Home Tags Posts tagged with "Camí dress"
Tag:

Camí dress

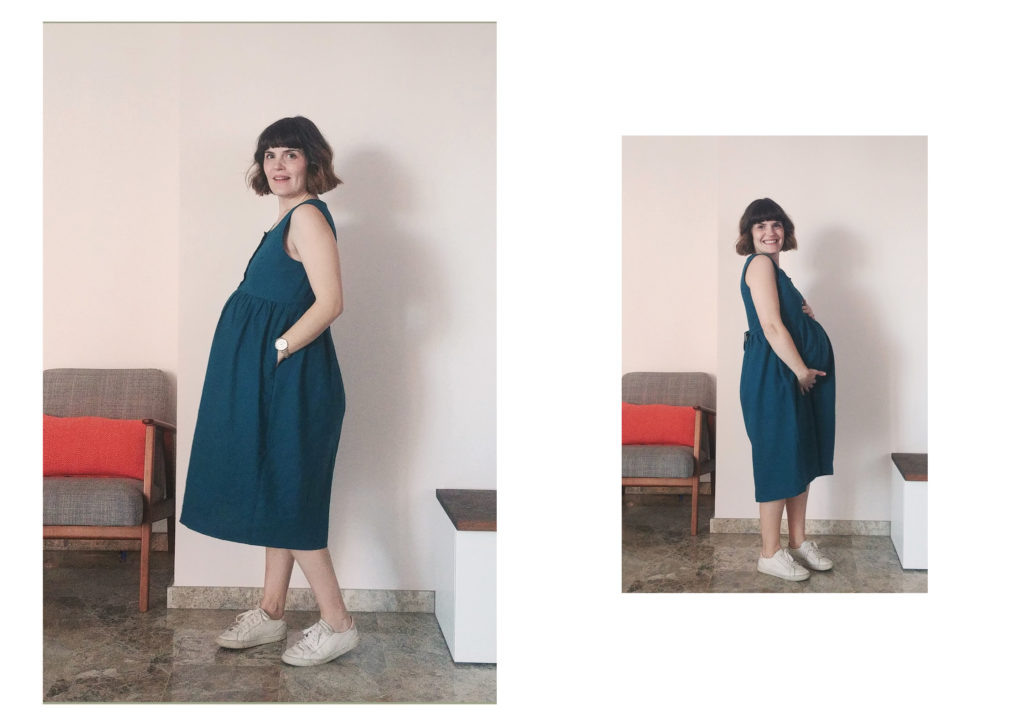
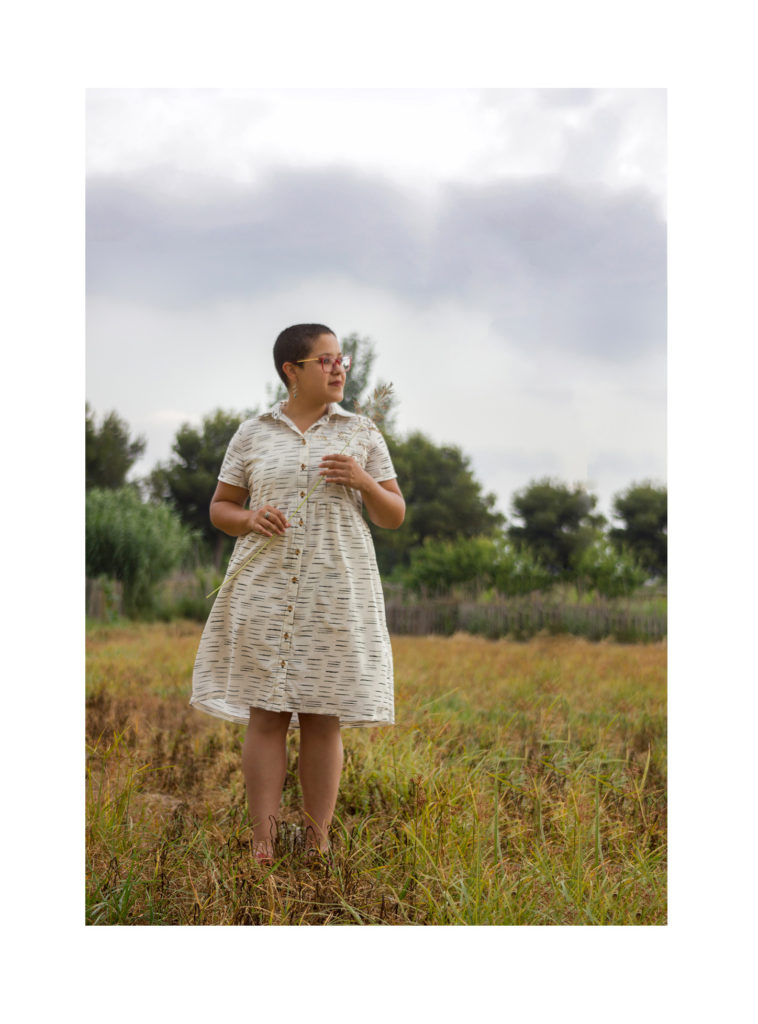
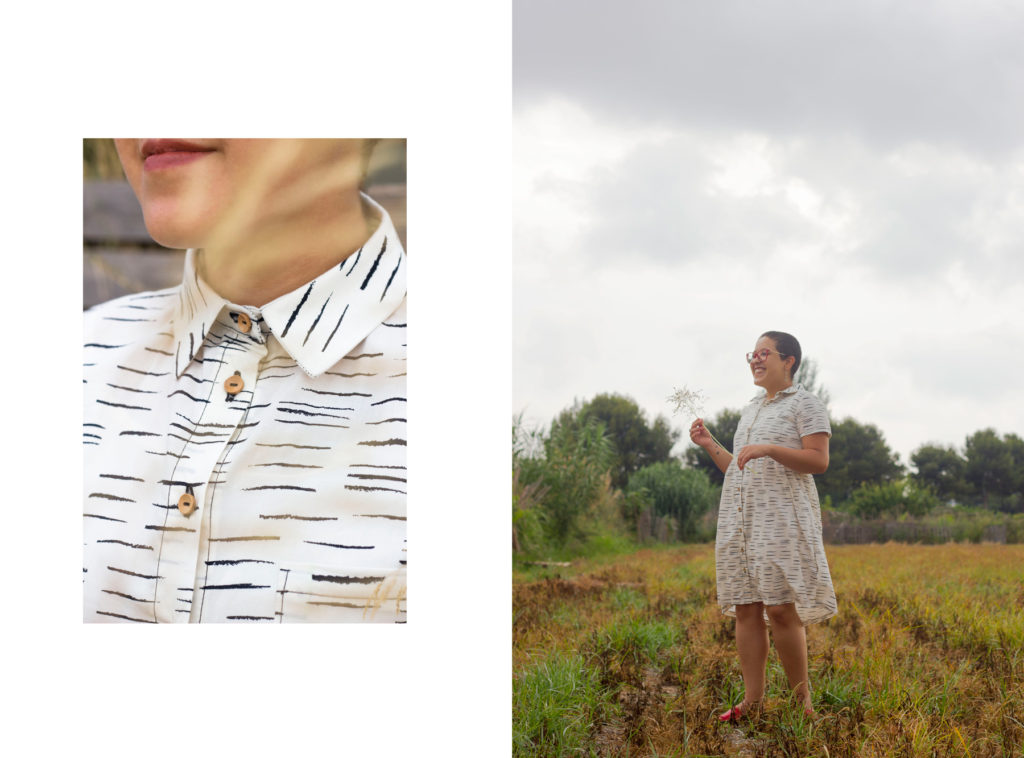
Last Saturday, I had 4 untinterrupted hours to myself (can’t remember when was the last time!) so I locked myself in my sewing room, decided to use that time well. I wanted to sew for myself, something easy and that I could wear now and later after pregnancy. I remembered seeing the Hinterland dress by Sew Liberated on instagram worn by a pregnant lady and loved it. It reminded me of the Cami dress pattern, View B, without collar. As it’s my oldest pattern, it’s one I know very well how to make and the modifications were easy and fast.

Here is what I did:

  • I used View B with the empire waistline and no darts. I scooped the front neckline about 10 cm (4″) but left the back as it was.
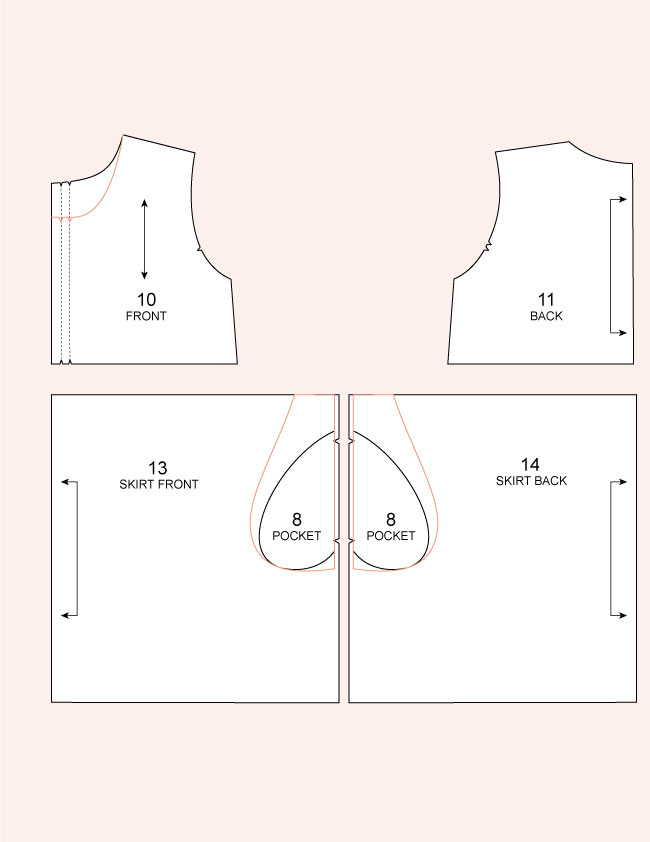
  • Instead of the Cami skirt pattern pieces, I used the entire width of my fabric (it was 150 cm (60″) wide) and cut 2 rectangles of 75 cm x 75 cm long seam allowances included. I didn’t add the buttonband on the front skirt pieces, just gathered the two skirts. As the waistline is not fitted, I can pull the dress up easily.
  • I had just enough fabric to add back ties and pockets (but not enough for sleeves for I went for a sleeveless version). I changed a bit the pocket shape as I wanted to have the top edge inserted inside the waist seam. I find that this way, they stay perfectly in place in the front of the skirt and if I put something inside, they don’t pull so much from the weight.
  • I omitted the sleeves as I didn’t enough fabric (I had 1,5 m (1 yd 2ft)). I took example from the Hinterland dress and finished the neckline and armholes with bias binding.

It was a very fast sew and I was able to finish the dress during that afternoon and wear the dress the very next day. Such a great feeling as during the last couple of months, I haven’t used my sewing machine much and only for making muslins.

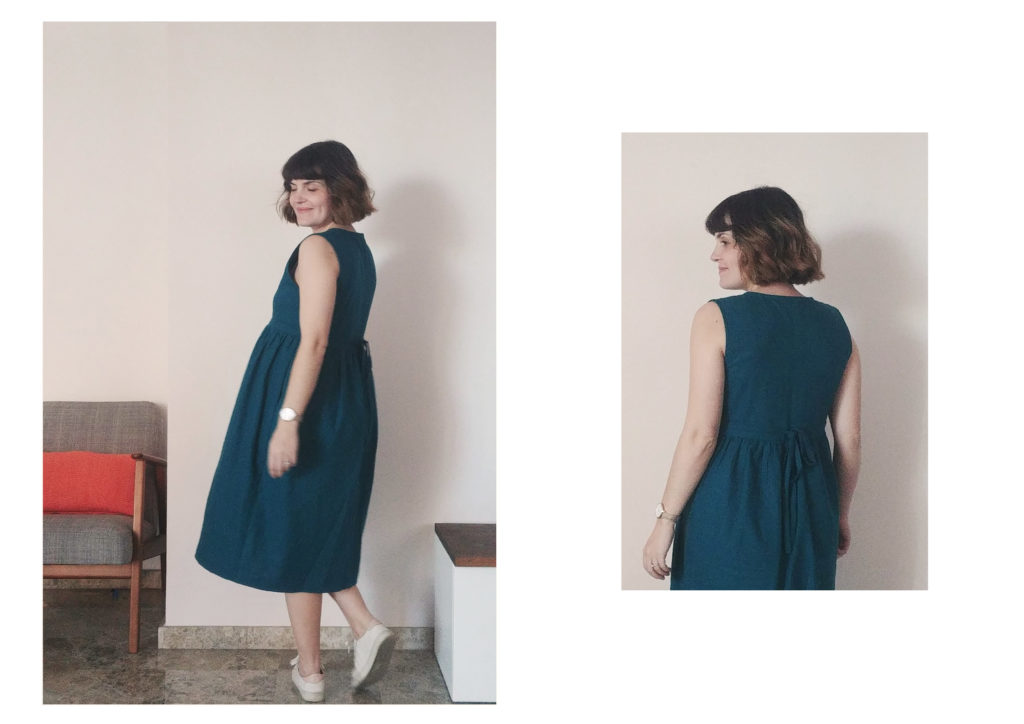
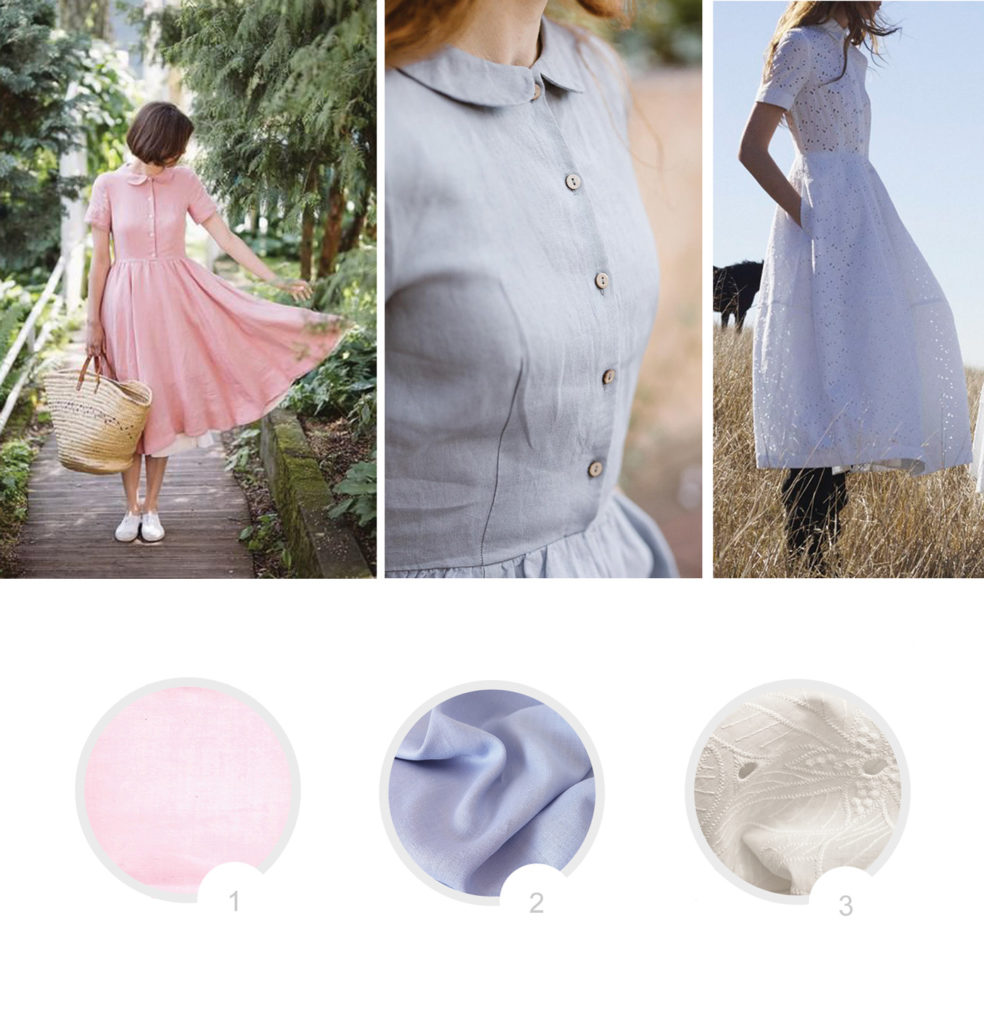
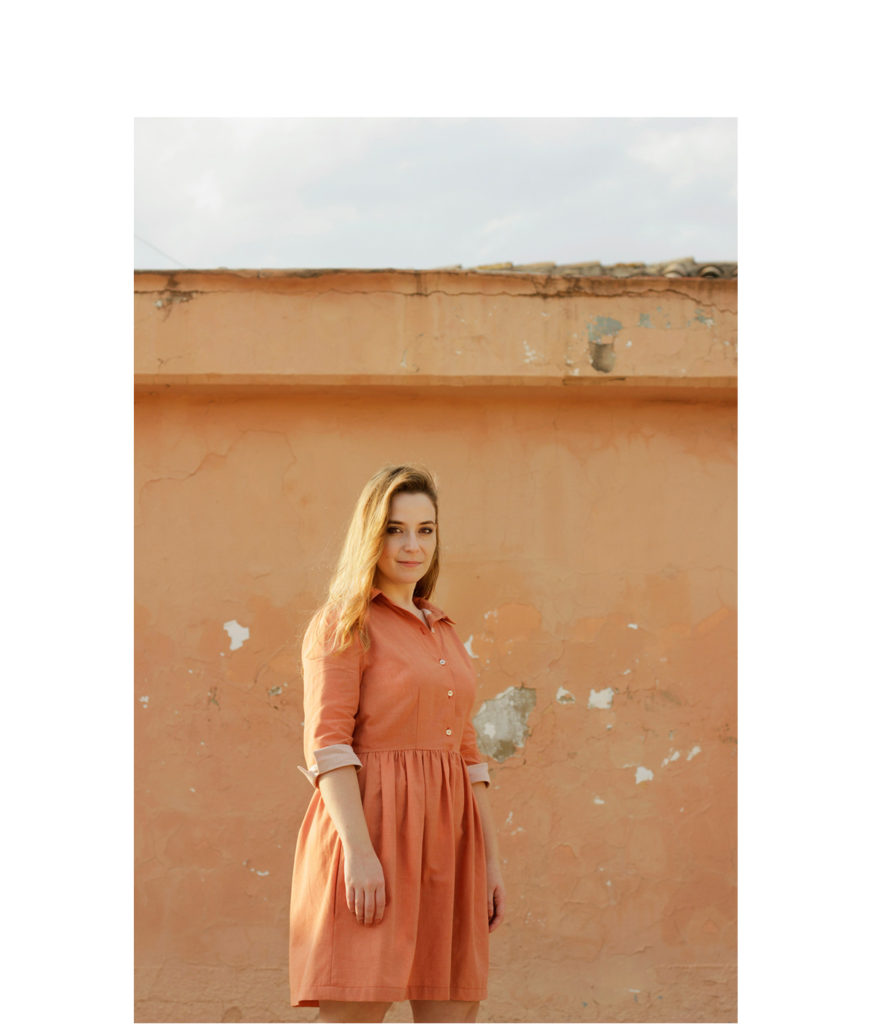
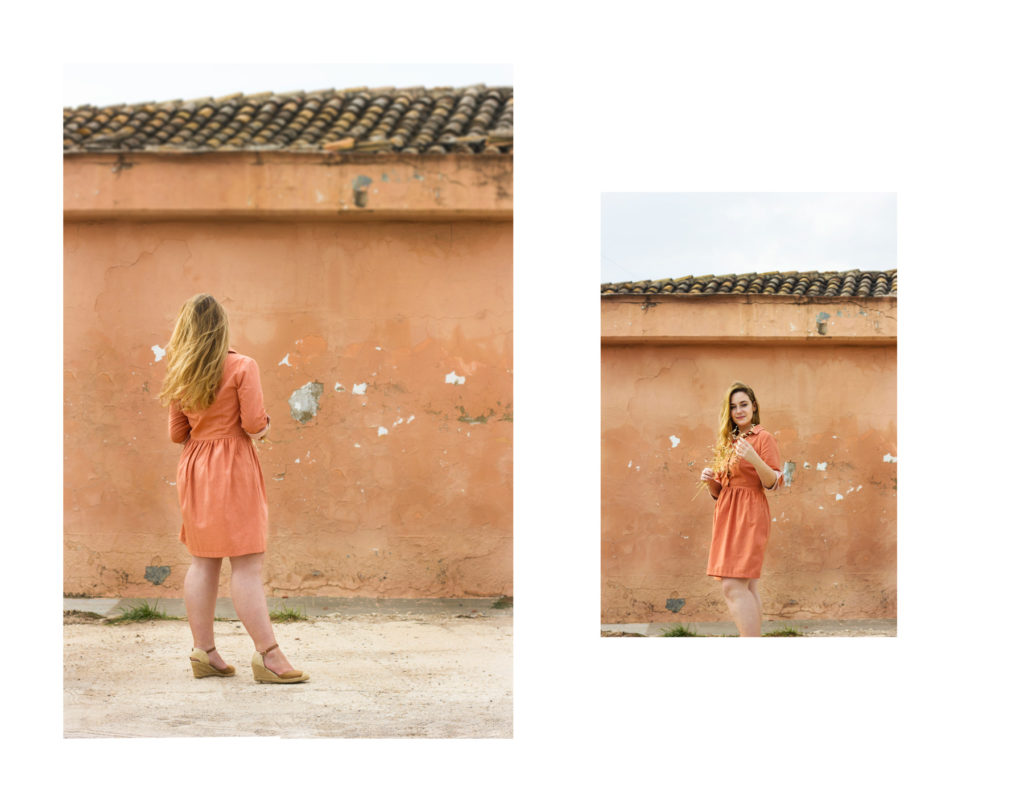
For the fabric, I used a lovely emerald green linen (looks more blue on the pictures but it’s a very difficult colour to photograph). I’ve had it for quite some time and I don’t remember when or where I bought it. I think I’ll wear it a lot for what’s left of my pregnancy (with a tee-shirt underneath or a cardigan) and later during spring and summer. I also used some amazing buttons handmade by Arrow Mountain: these are the moon phase buttons. So cute! I’ve been keeping them for a special project but why wait? They look great on this dress and they’ll make it special!

Now it’s time to go back to my muslins and next patterns instructions if I want them to be ready for Spring…

1 comment
1 FacebookTwitterPinterestEmail

The Camí dress  is the first pattern I designed 5 years ago. It’s a shirt dress with a retro vibe. We have now added a new version as well, more modern this time. For the mid-season, what about an elegant checked Cami? For summer, it would be perfect in a natural fabric such as linen or cotton. You can also choose an eye-popping and fun print for a modern take on the classic shirt dress. This is such a versatile pattern: romantic or playful, you choose how to style it!

CHECKS

1/ Fabric Kokka, Cousette

2/ Water check, estampado natural, Black Oveja

3/ Cotton popelin, Atelier de la Création

pictures sources:  Primark / Bittersweat coloursPrabal Gurung Resort 2018


NATURAL FABRICS

1/ Pink chambray, Amandine Cha

2/ Soft linen, Stragier

3/  Palmyre embroidered cotton, Anna Ka Bazaar

pictures sources:  dress Son de Flor / détail dress Son de Flor / Co


POP ART

1/ Dash cotton fabric, Guthrie and Ghani

2/ Chiffon pop art, le Chien Vert

3/ Clouds mint, Black Oveja

pictures sources: Gorman / Gorman / mischa dress, creature of comfort


– You can find the Cami dress pattern in print or in PDF in the shop. –

0 comment
2 FacebookTwitterPinterestEmail

The Camí dress is the first pattern I designed five years ago (pfff… time goes by so fast!). I think it was highly time to update it and add the two sizes that were missing compared to the other patterns. We even added a new version!

As you can see, view A is still the same. We kept the original as it was with buttoned bodice, shirt collar, gathered high waist skirt with inseam pockets, side zipper and ¾ length sleeves. It’s one of our most made patterns as it’s a classic design with just a hint of retro. It looks nice on everydoby and matches a great variety of fabrics.

We wanted to add a new version for the relaunch of the Cami dress pattern. With the same base, I made a variation last summer when I was pregnant and I really liked how the dress looked. Without darts and a empire waist, we get a more casual shirt dress. It’s completed by short sleeves, a small chest pocket and the whole front buttoned up, it’s so easy to wear. With the same pattern, you can make a retro fitted shirt dress or a more relaxed version. I hope you’ll like this Cami 2.0!


– You can find the Camí Dress pattern in our shop in printed copy of PDF downloadable. –


You already have the Cami dress pattern and would like to receive the updated version? That’s easy, here are the different options:

  • You bought Cami in PDF in our new shop: connect to your account and download the Cami file, it’s already updated.
  • You bought Cami in PDF in our old shop: send us an email at info@paulinealicepatterns.com with the order number or a copy of the confirmation email if you have it (if not, your name and surname will do). We will send you the PDF pattern by email.
  • You bought a printed copy of Cami in our shop (new or old): send us by email the order number (or your name and surname). We will send you the PDF pattern by email.
  • You bought a printed copy from one of our stockists or in a fair: send us by email a ticket or if you don’t have it, a picture of your pattern. We will send you the PDF pattern by email.
0 comment
4 FacebookTwitterPinterestEmail

Let’s continue with Fall/Winter sewing: after the inspiration, let me show you what I plan on sewing.

Hopefully the weather will behave and the temperatures will go down (but I really don’t know, I might just wear my bikini and go to the beach this afternoon. I’m not joking!).

The fabric is mine and the illustrations are to give you an idea of the shape, but I will draft my own patterns (you might even see some of them later if I am happy of how they turned out!)

fall-winter-sewing-plan-pattern-1
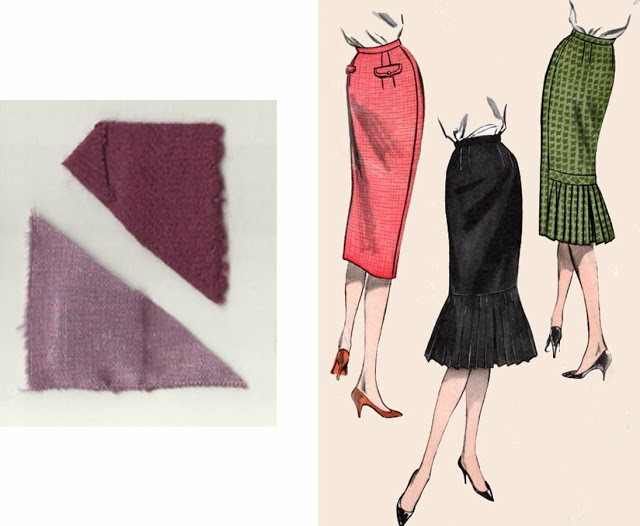
I have this beautiful burgundy wool that will be perfect for a jacket/skirt ensemble. I’m thinking of a short swing jacket and a pencil skirt with knife pleats at the back. And the light pink lining for a little bit of contrast.

fall-winter-sewing-plan-pattern-2
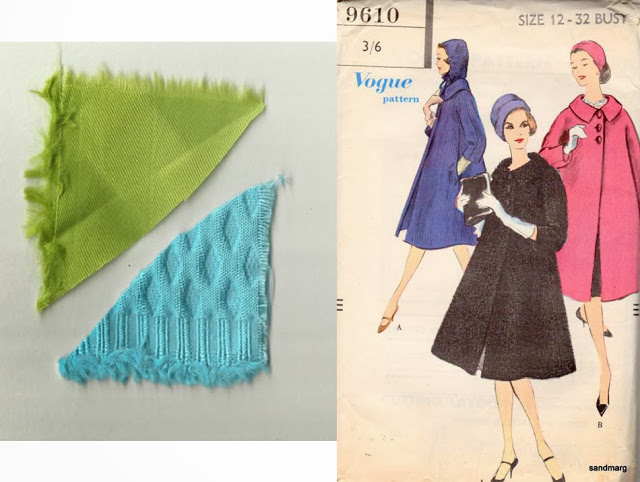
With the same pattern as the short swing jacket, I want to make a swing coat. I will just make it longer (or I hope it will work like that). I have a bright baby blue wool/cotton fabric with a diamond pattern in relief. With a bright green lining, it will be a very nice coat to brighten the winter.

fall-winter-sewing-plan-pattern-3
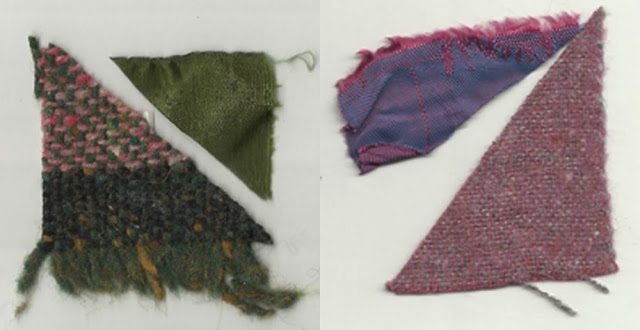
These two combinations are for skirts: A-line skirts with pleats. I need more skirts, I have lots of dresses but very few skirts. So I will add two for the winter: one in wool tweed in green, pink and brown with a bottle green lining and the other one in purple wool with blue/purple lining.

fall-winter-sewing-plan-pattern-4And a winter Camí dress of course! 3/4 sleeves or long, I still don’t know. I have a nice cotton/wool fabric but I might have to change the collar, it might be too heavy. It’s dark grey with purple leaves, very subtle.

Are you ready for next week? I’m so excited to show you the new pattern. I really hope you’ll like it!

It will be out on Thursday! Monday I’ll let you know more…

Have a great week end and see you then…

pauline-sewing-pattern

9 comments
0 FacebookTwitterPinterestEmail

Congratulation to all of you! You’ve made amazing dresses!
So let’s start and show your beautiful creations:


cami-sew-along-parade-pattern-1cami-sew-along-parade-pattern-2
French seamstress, Charlotte from Hector&Celestine, made a lovely red and white Camí. Look at the fabric, isn’t it pretty? (I have the very same!).
cami-sew-along-parade-pattern-3Wow! Jen’s dress is amazing! Read more about it at her blog Tea for Two (she shares it with her twin sister, how cool is that?).

cami-sew-along-parade-pattern-4
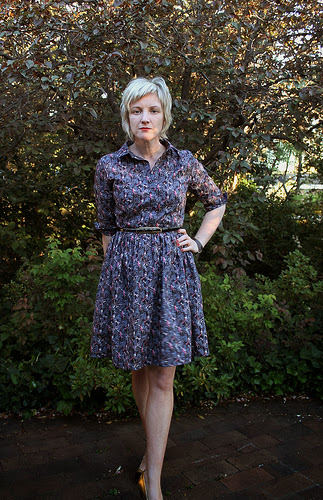
Kirsty’s gorgeous Liberty fabric looks so good. You can see more pictures of it here: Top notch.

cami-sew-along-parade-pattern-5 Alicia did a great job with her Camí, I love the colourful fabric. She blogs at Una Modista de Pacotilla.

cami-sew-along-parade-pattern-6
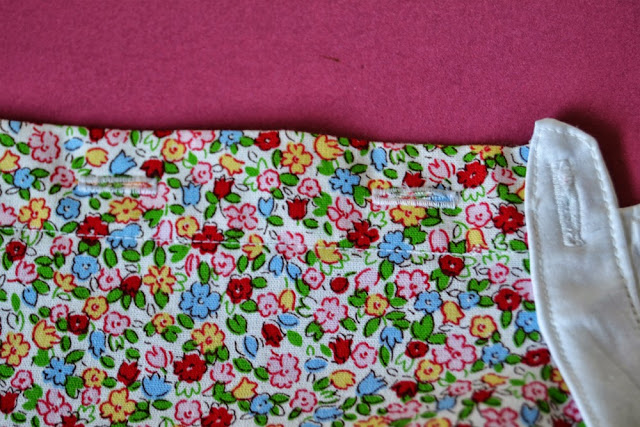
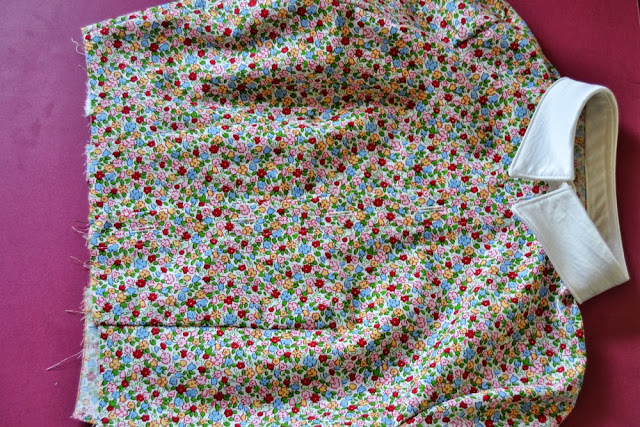
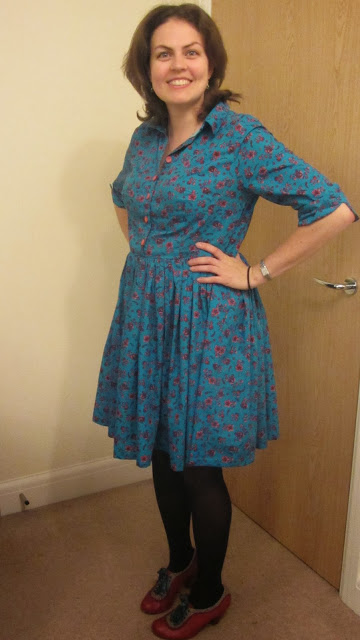
Another bold fabric: Claire from I want to be a turtle made a beautiful bright Camí. Perfect to brighten the coming winter…
cami-sew-along-parade-pattern-7
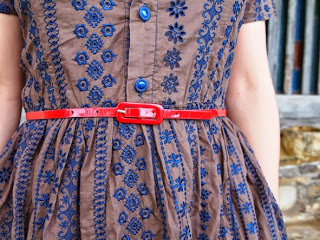
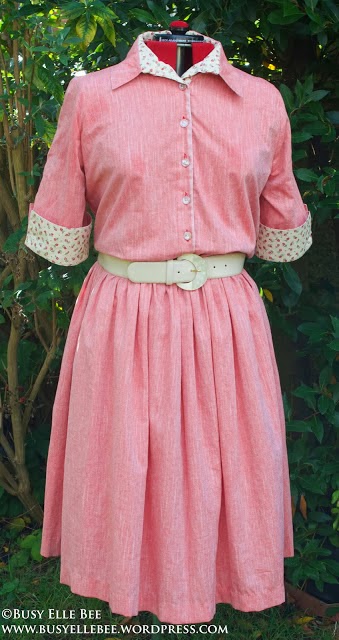
Elle went for a total vintage look and I love the contrast cuffs, collar and button placket. If you want to read more about her dress, go check her blog Busy Elle Bee: she’s made a very complete review of the Sew-Along.
cami-sew-along-parade-pattern-8cami-sew-along-parade-pattern-9Maider from Masustak eguzkitan made such a pretty dress, I had to include a detail picture of the fabric (I want the same).
cami-sew-along-parade-pattern-10Smaida’s winter version is very elegant. See more pictures of her dress on her blog
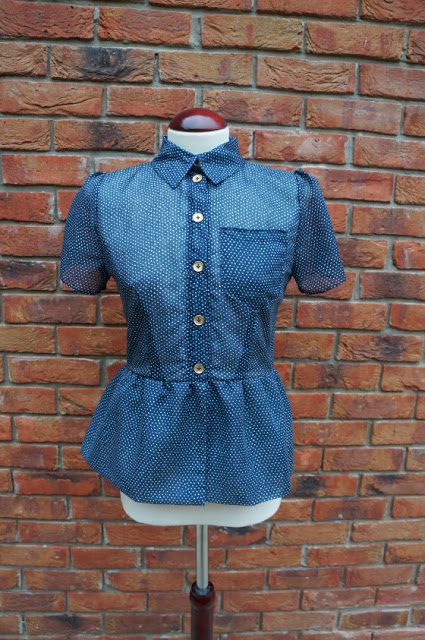
 SewMeow.
cami-sew-along-parade-pattern-11Lara from Dreaming of Avonlea made a shirt version from the Camí pattern. Isn’t it great?
 cami-sew-along-parade-pattern-12
Nathalie was a pattern tester but her beautiful dress never got shown on the blog. It deserves to be as it was the first ever dress she made! See more on her blog Made in Home.
Now, if your dress is not here, please send me an email with the picture (paulineyalice @ gmail.com) and I’ll add it!

And now the GIVEAWAY!

cami-sew-along-parade-pattern-13
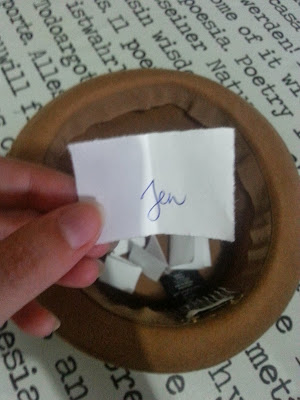
The lucky winner of the next pauline alice pattern is…………. JEN from Tea for Two!
As soon as the pattern is out, I’ll send it to you!

Thank to all of you for participating to the Sew-Along, I hope you had fun and that you enjoyed sewing the Camí dress pattern.

pauline-sewing-pattern

14 comments
0 FacebookTwitterPinterestEmail
I can now show you the Camí dress I made for the Sew-Along! I used a floral cotton fabric and a white cotton sateen for the contrasted collar and cuffs (that’s a look I saw on a Dolce & Gabanna dress and I thought I could try to make a modest replica).
Now I really looking forward to show all your pretty dresses on the 25th…
And I remind you that there will be one lucky winner of the next pattern during the giveaway!


my-camy-dress-sewing-pattern-1my-camy-dress-sewing-pattern-2my-camy-dress-sewing-pattern-3my-camy-dress-sewing-pattern-4

pauline-sewing-pattern

32 comments
0 FacebookTwitterPinterestEmail
Hello,
I am one day late for this post, sorry… I am working on the new pattern and got carried away.
But we still have to finish our Camí dress so let’s get to it.
You’ll need to hem your skirt.
Press and you’re ready to go!
HEMMING THE SKIRT

cami-sew-along-pattern-1

1.Because my fabric is busy and medium-weight, I’ll machine stitch the hem. You might prefer to use a blind hem stitch or hand-stitch the hem if you don’t want your hem to show.
First, baste a row of stitches 2 cm (6/8″) from the bottom edge.
cami-sew-along-pattern-2
2.Press the fabric with the basting line going inside.
cami-sew-along-pattern-3
3.Using the first fold as a guide, fold over again and press. Stitch at 2 cm (6/8″) from the border (if you have an edgestitching foot, now is the moment to use it to get a really straight sticthing line!). If you want to go back to previous step, all the Sew-Along post are here.
THE END!
I’ll show you my finished dress tomorrow.
Now it’s also time for you to take pictures of your Camí dress so we can all see your beautiful creations!
So get to your sewing machine and send me a picture with a link to your blog post (if you have one) by email (paulineyalice @ gmail . com) or post it on the flickr page.
And to get it even more exiting, I’ll be drawing one of you for a special prize. Submit your Camí dress and you’ll have a chance to win the new pauline alice pattern (coming out in November). You have until Thursday 24th of October to send your picture.
Have a great week!
 pauline-sewing-pattern
5 comments
0 FacebookTwitterPinterestEmail
It’s the final countdown! Tadadada Tadadada Tadadada Tadadadadada!
Sure that you have the song stuck in your head for the rest of the day now (at least I got it),  so it’s the perfect time to insert the zipper in our dress and start the final countdown of the Sew-Along: penultimate step!
I am going to show you how to insert a regular zipper. But if you prefer to have an invisible zipper, there are a lot of great tutorial on Youtube. The only difference would be to stitch the side seam after inserting the invisible zipper.
INSERT A REGULAR ZIPPER
cami-sew-along-zipper-pattern-1
1.Take the left side of the dress, pin the zipper opening right sides together and baste it (by hand or by machine). You might want to finish your seam allowances before depending of the finishing technic you are using (here, turned-and-stitched seams).

cami-sew-along-zipper-pattern-2

2.Press the zipper opening seams open.

cami-sew-along-zipper-pattern-3
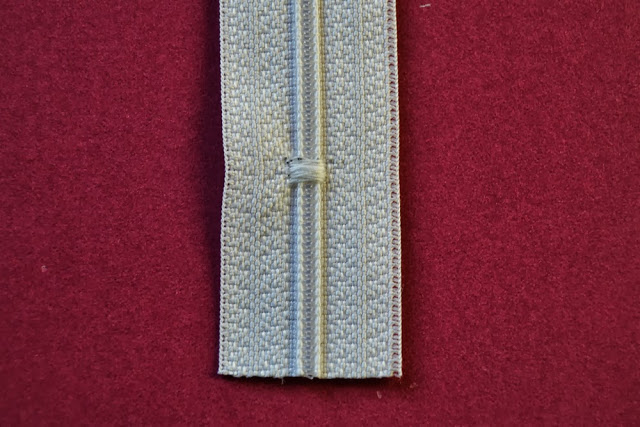
3.If your zipper is too long, secure the teeth closed by stitching over them at the desired length and cut the zipper at least 3 cm longer (1,2″).

cami-sew-along-zipper-pattern-4
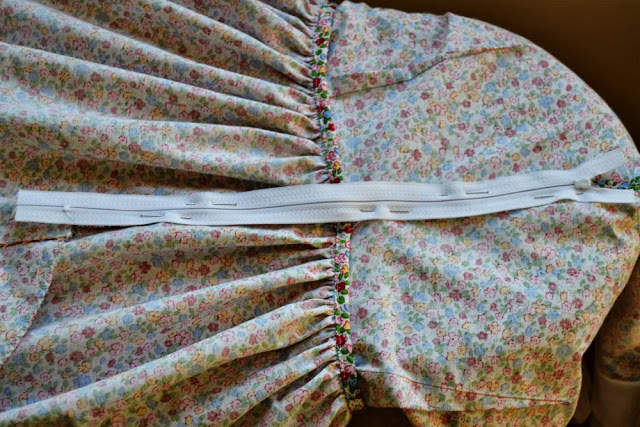
4.Place the zipper face down with the teeth on top of the seam allowances. Match the zipper top to the beginning of the zipper opening. Pin or baste in place. Make sure the zipper is well centered.

cami-sew-along-zipper-pattern-55.With the dress on the right side, stitch all around the zipper, using a regular zipper foot, following the basting line or the pins. When you are done, remove the bastings.
The last step will be to hem the dress so let’s see each other on Monday! When your dress is ready, don’t forget to send me a picture with a link to your blog or/and post for the virtual Catwalk we’ll be having the following week!
Get all the Sew-Along posts here.

pauline-sewing-pattern

8 comments
0 FacebookTwitterPinterestEmail
I love a full gathered skirt. It’s dramatic and so vintage looking as its emphasize the small of the waist and hides the hips, but sometimes, if your fabric is a little bit on the heavy side, you don’t feel like adding too much volume to your waist seam line.
So let’s see how your can draw a circle skirt for an amazing vintage look as well as a sleeker figure.
This pattern is to be cut twice on fold.
DRAW A CIRCLE SKIRT (PATTERN TO CUT TWICE ON FOLD)


cami-sew-along-skirt-variation-add-lining-pattern-11.Get the finished measurement of the dress waist on the instruction page 2. For example, if you are making size 36, the waist finished measurement is 69 cm (27″). Divide it by 3,14 to obtain the diameter of your circle skirt pattern.
69 / 3,14 = 22 cm (approx.)
Then you need to divide it by 2 to have the radius.
22 / 2 = 11 cm
2.Start your pattern drawing a line the desired length of your skirt (for me 50 cm/20″ is a great length) and of your radius. For me, that would be a total of 61 cm (24″).
3.Draw a perpendicular line with the same length. Draw the waistline connecting the radius points in a nice and even curve. Do the same for the hem line.
4.Add the following seam allowances: 1,5 cm (5/8″) at 1 side seam and the waistline (not on the drawing, sorry) and the desired length at the hem. Draw a “cut on fold” bracket on the other side seam and you’re done.
ADD A LINING
1.This one is very easy! If your fabric is see-through or too light, you might want to line it. Take your skirt pattern and cut the 2 pieces in your lining fabric. Stitch the side seams together leaving the zipper opening unstitched and gather the waistline.
2.Attach the lining to your finished skirt before sewing it to the bodice. Treat the skirt and lining as one when attaching it to the bodice and setting the zipper in.
3.Hem the lining slightly higher than the skirt.


pauline-sewing-pattern
8 comments
0 FacebookTwitterPinterestEmail
I guess you’re looking forward to finish your Camí dress, no? Well, with today’s step, it’s going to be almost done and you’ll be able to try it and see the overall look and fit.
We are going to sew the pockets, gather the skirt and attach it to the bodice. I don’t know about you, but for me, the perfect garment (whether it is a dress, a skirt or a jacket for example) has to have pockets. They are to practical and it’s always a cute detail to add.
DRAW THE SKIRT PIECES
1.Following the instructions, draw the 2 skirts pieces and mark the zipper opening and the pocket start and end.
If you wish to make a circle skirt, there will be a tutorial on how to draw your own circle skirt pattern on Wednesday 9th.
STITCH THE POCKETS
 cami-sew-along-sewing-pockets-attaching-skirt-pattern-1
cami-sew-along-sewing-pockets-attaching-skirt-pattern-2
1.Match the pocket marks to the skirt marks and pin right sides together. Stitch with a 1 cm (3/8″) seam allowance.
cami-sew-along-sewing-pockets-attaching-skirt-pattern-32.Fold the pocket over and press the seam allowances toward the pocket.
Repeat with the other pocket on the opposite side and the two other pockets on the other skirt piece.
STITCH THE SKIRT PIECES TOGETHER


cami-sew-along-sewing-pockets-attaching-skirt-pattern-41.On the right side, match the seams of the two skirt pieces together all around the pockets, with right sides together and pin.

cami-sew-along-sewing-pockets-attaching-skirt-pattern-52.Stitch, pivoting at the pocket angle.

cami-sew-along-sewing-pockets-attaching-skirt-pattern-63. If you insert a regular zipper on the left side (that’s what I will do), match the seams, pin and start stitching from the zipper mark to the hem.
If you are inserting an invisible zipper, it will be easier first to gather the skirt, attach it to the bodice, set the zipper and then close the side seam.
cami-sew-along-sewing-pockets-attaching-skirt-pattern-7
4.Finissez les marges et repassez les poches vers le devant de la jupe.

GATHERING THE SKIRT

cami-sew-along-sewing-pockets-attaching-skirt-pattern-8
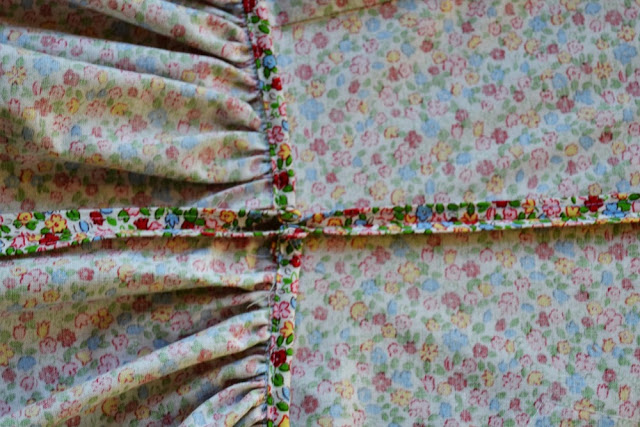
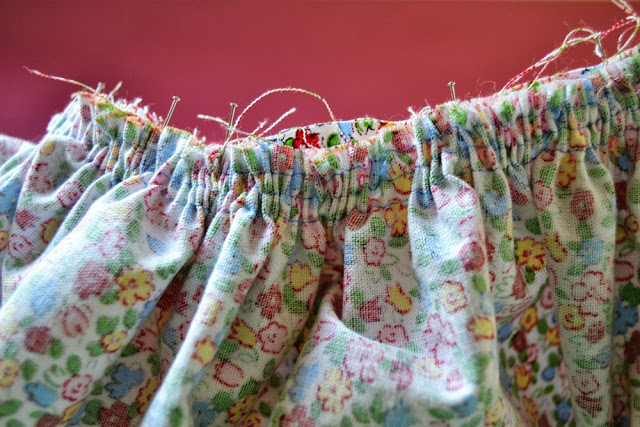
1.On the skirt waist seam, baste 3 lines of stitches at 1,5 cm, 1 cm and 0,5 cm from the egde (5/8″, 3/8″ and 1/4″).

cami-sew-along-sewing-pockets-attaching-skirt-pattern-9

2.Tie the bobbin threads (the ones at the bottom) together at both end. You will pull them to gather the skirt volume.
cami-sew-along-sewing-pockets-attaching-skirt-pattern-10cami-sew-along-sewing-pockets-attaching-skirt-pattern-11
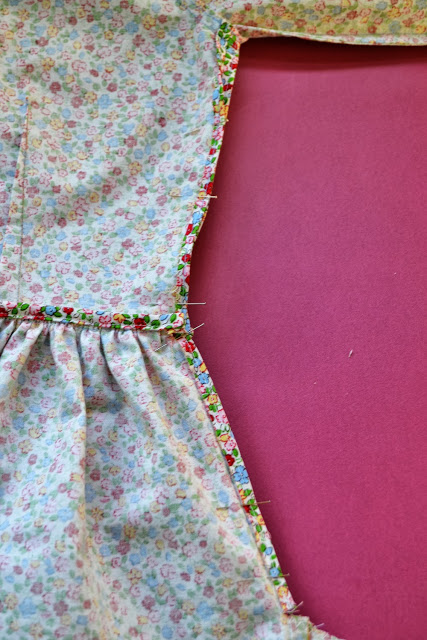
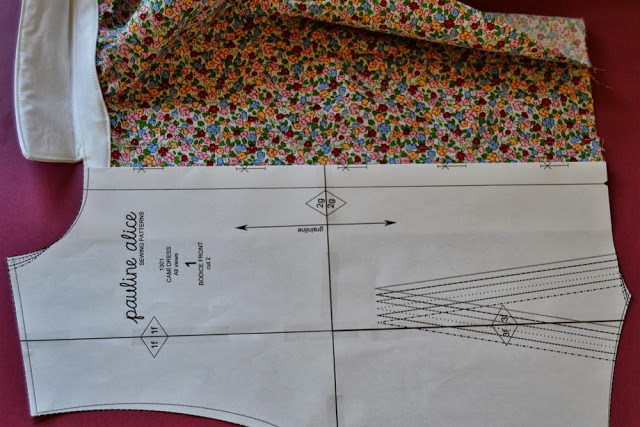
3.Match the skirt side openings, front and back center, side seam to the corresponding bodice marks, with right sides together and pin. Gather the skirt between the marks until it fits the bodice.
When it does, stitch and finish the seam allowances (I like to bind the seam with bias).
There you go! On Wednesday we’ll see how to draw a circle skirt and how to add a lining in case your fabric needs it. Now go try your almost finished dress! And the whole Sew-Along posts are here.
pauline-sewing-pattern


4 comments
0 FacebookTwitterPinterestEmail
When I went sewing machine shopping, I knew that one of the main feature I wanted was automatic buttonholes. I love that feature!
So let’s make the buttonholes and sew the buttons on our dress today!
The buttonholes/buttons on the pictures are inversed: buttonholes should be on the right side and buttons on the left. I had to make the change because of the way the collar way standing. Please follow the instructions and sorry for the confusion.
BUTTONHOLES
cami-sew-along-buttonholes-pattern-11.Mark the buttonholes on the right side and the buttons on the left side. Mark the buttonhole and button on the under collar as well.

cami-sew-along-buttonholes-pattern-2
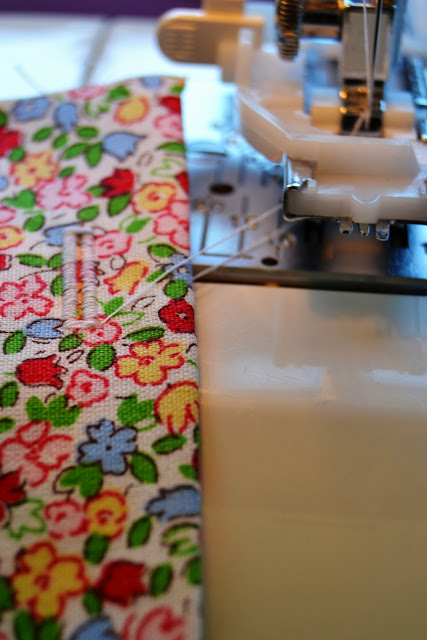
2.Stitch the buttonholes on the right side. Sew the buttons on the left side.
cami-sew-along-buttonholes-pattern-3cami-sew-along-buttonholes-pattern-4

3.Open the buttonholes with your seam ripper. Be careful not the cut the threads!

cami-sew-along-buttonholes-pattern-5cami-sew-along-buttonholes-pattern-6

4.Overlap the buttonhole placket over the button placket and baste the edge. The bodice is now opened only on the left side (where we are going to insert the zipper).
Have a great week end (I’ll be having a great one at a wedding!) and see you on Monday for sewing the skirt up and attaching it to the bodice!
pauline-sewing-pattern
6 comments
0 FacebookTwitterPinterestEmail

When I first designed the Camí dress pattern, I spent a long time deciding whether I should make a classic shirt collar or a cute peter pan one. Well, you which one won but I kept the peter pan collar as a backup idea. I am going to show you how to draw your own peter pan collar for the Camí dress (or any other dress or blouse). If you don’t feel confident enough for the shirt collar or want to go for a super cute look, that’s a great alternative!

Pendant la conception du patron de la robe Camí, j’ai longtemps hésité entre faire un col chemisier classique et un col claudine. Bon, vous savez lequel l’a remporté mais j’ai quand même gardé l’idée du col claudine dans un coin de ma tête, juste au cas où. Je vais donc vous montrer comment dessiner votre propre co claudine pour la robe Camí (ou toute autre robe ou blouse). Si vous ne vous sentez pas prête à attaquer le col chemisier ou que vous voulez une robe au style encore plus féminin, voilà la parfaite alternative!

cami-sew-along-collar-variation-peter-pan-collar-1cami-sew-along-collar-variation-peter-pan-collar-2

1. Take your front and back bodice pattern pieces. On the bodice front, decide where you want your collar to arrive: cross over the button placket (first picture – fold the first part of the placket), join at the middle of the button placket (no picture – fold the placket on the button line), before the button placket (second picture – fold the whole placket). Mark the seam allowances at the shoulder (1,5 cm or 5/8″).

cami-sew-along-collar-variation-peter-pan-collar-3
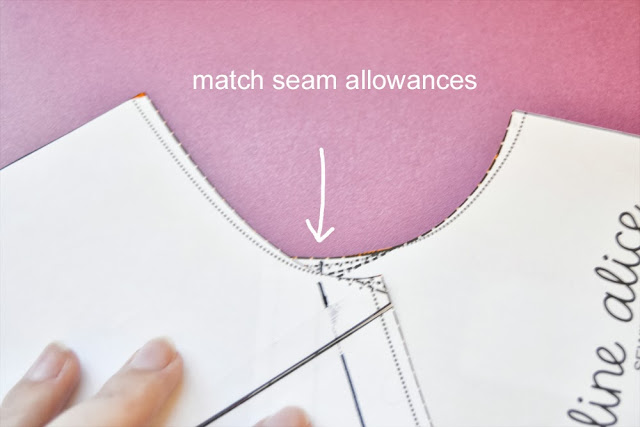
2. Match the seam allowances at the neckline.
cami-sew-along-collar-variation-peter-pan-collar-43. On the other side (armhole), overlap the shoulder seam. The more you overlap, the more the collar is going to stand up. A good measure would be about 2 or 3 cm (6/8″ or 9/8″).

cami-sew-along-collar-variation-peter-pan-collar-5

4. Now you’ll need to paste the pattern pieces together so they don’t move and get some pattern paper. Trace the neckline.

cami-sew-along-collar-variation-peter-pan-collar-6
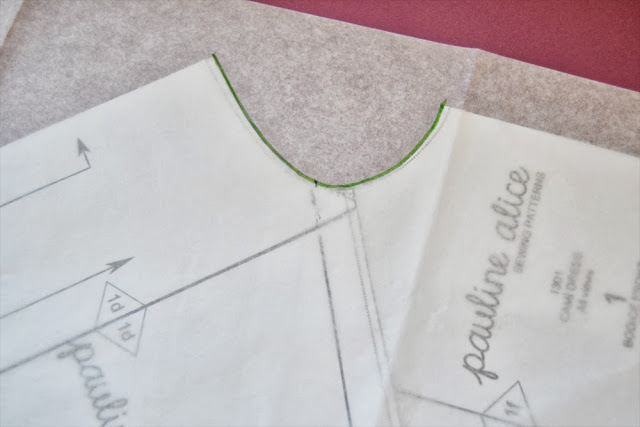
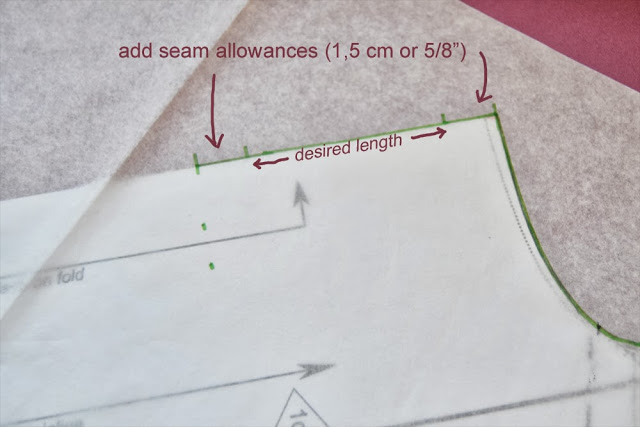
5. As my back bodice pattern is cut on the fold, I am going to draw a full collar on the back. The peter pan collar pattern will be cut on the fold as well. Decide how long you want it to be and add 3 cm or 4/5″ (1,5 cm or 5/8″ seams at the top and bottom). Start tracing the total length all around the neckline.

cami-sew-along-collar-variation-peter-pan-collar-7
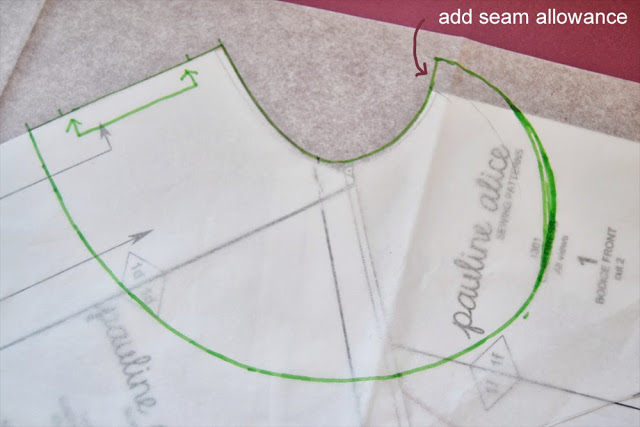
6. Once you arrive at the front seam, add a 1,5 cm or 5/8″ seam allowance. Finish the collar with a nice curve.

7. Cut two pieces of this pattern on the fold in the fabric and interfacing. Interface and stitch the exterior seam with right sides together. Clip the seam allowances or cut close to the edge, turn inside out and press flat. Ready to attach to your neckline!

pauline-sewing-pattern

2 comments
0 FacebookTwitterPinterestEmail
  • 1
  • 2