Home Tags Posts tagged with "Coat"
Tag:

Coat

This coat has been on the making for at least 3 years, so it’s about time I release the pattern! Come meet the ALMIRALL coat pattern!

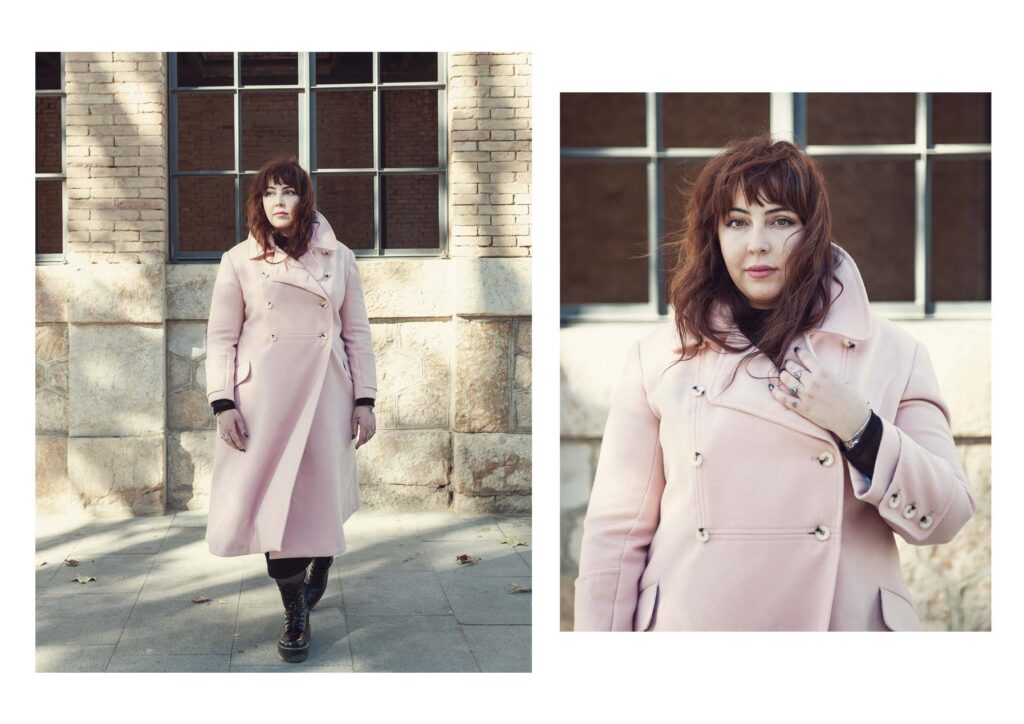
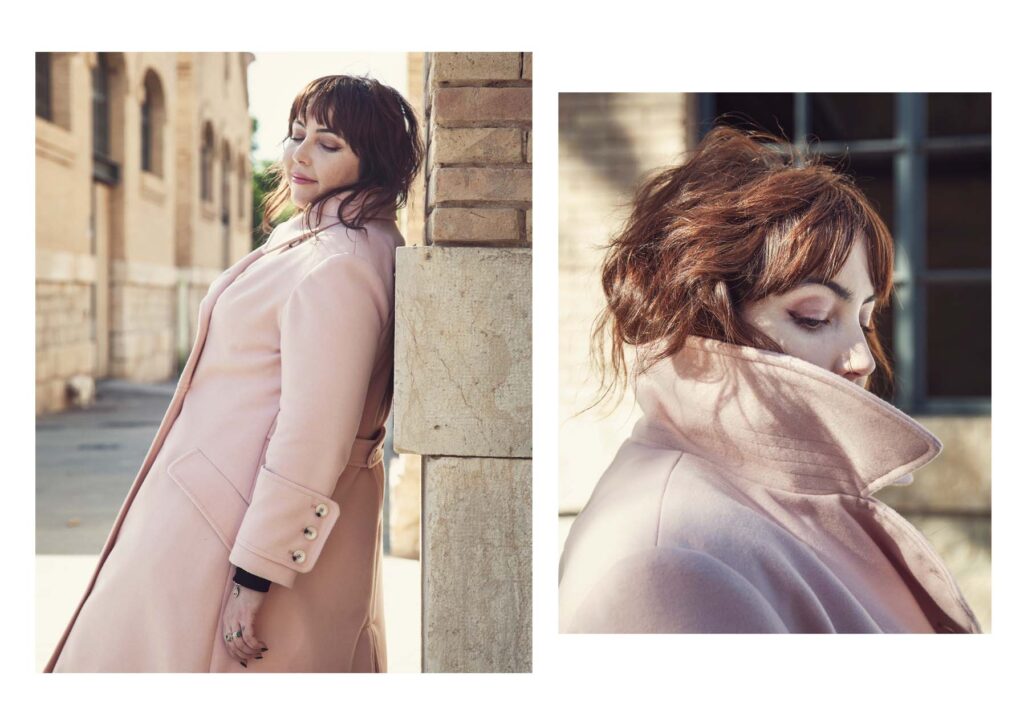
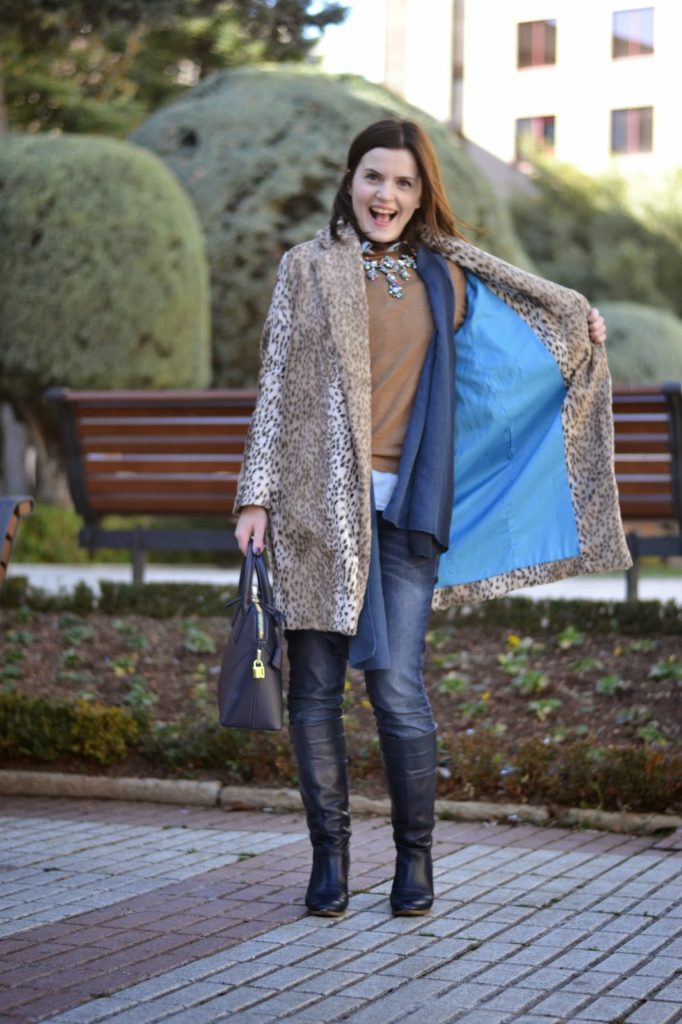
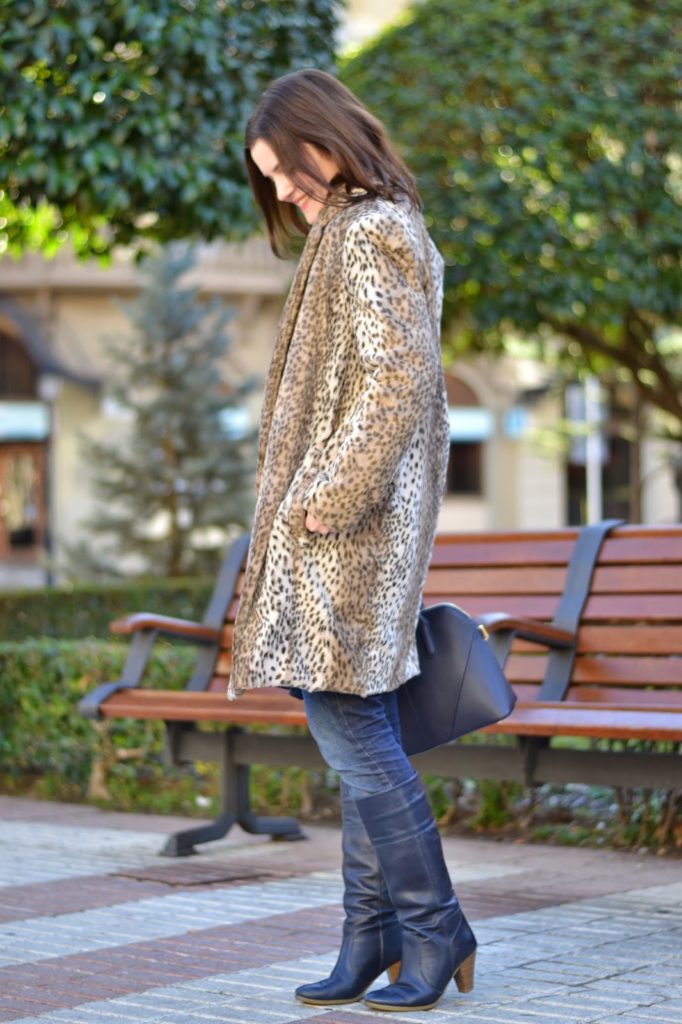
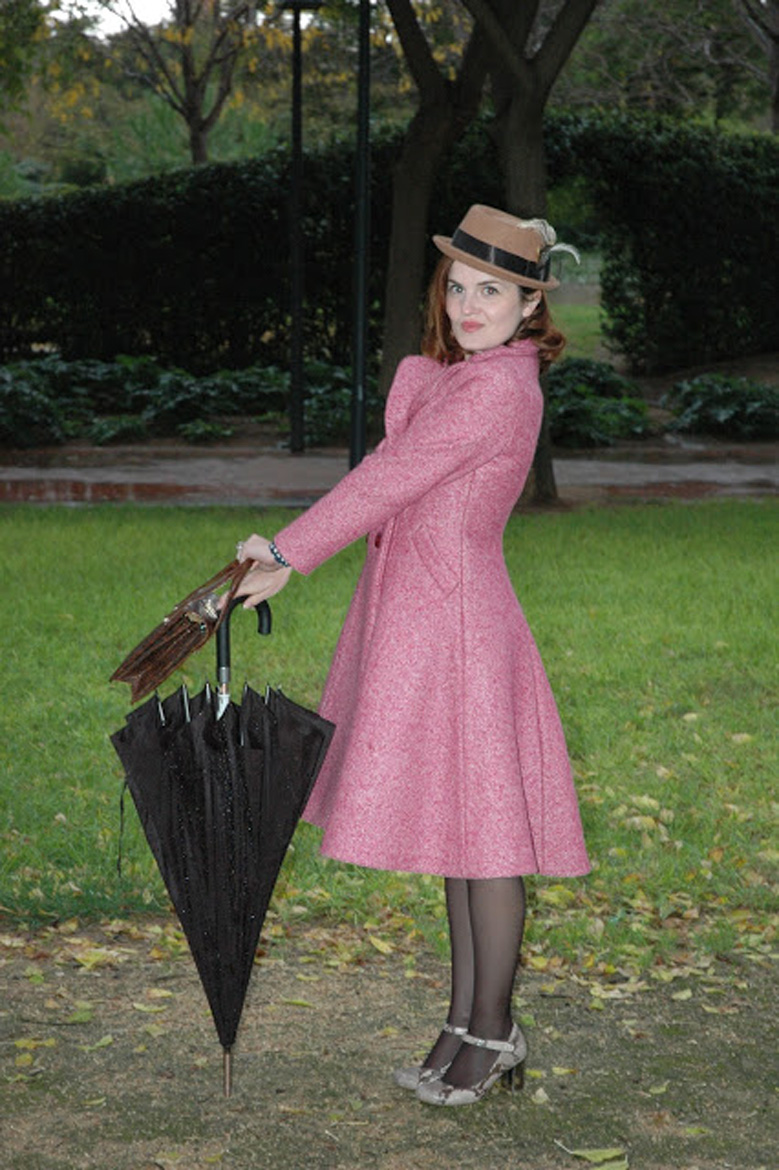
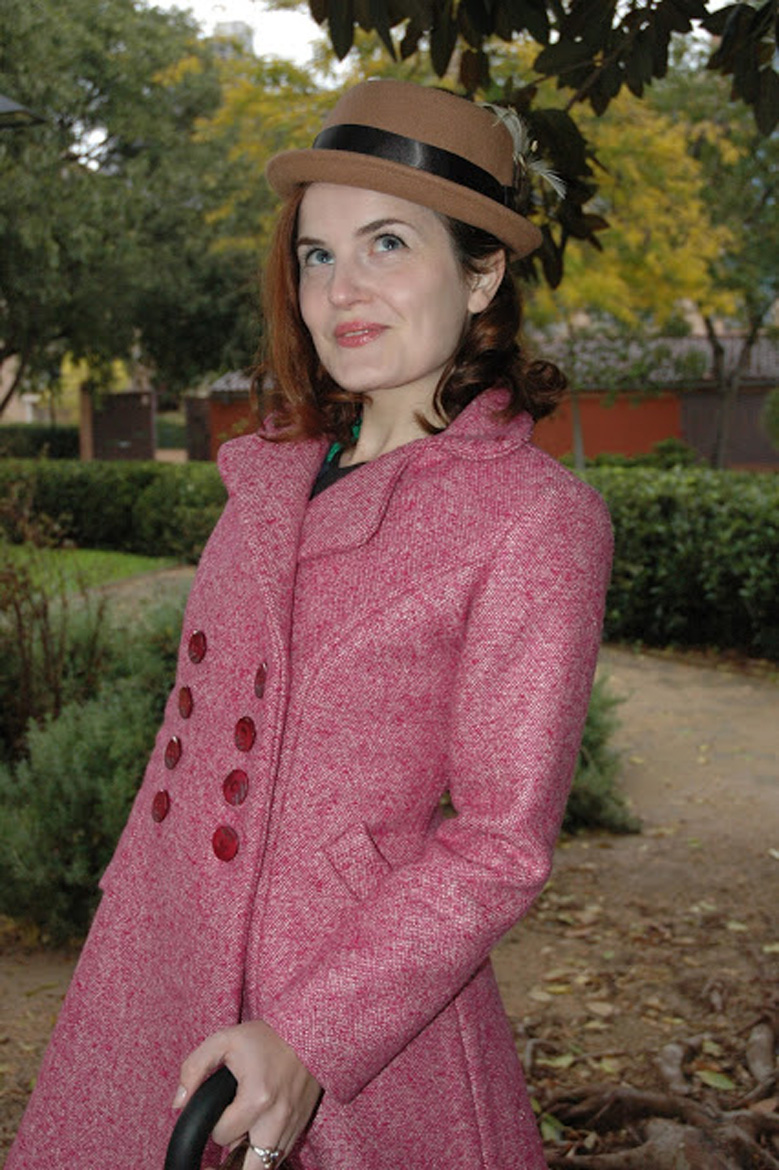
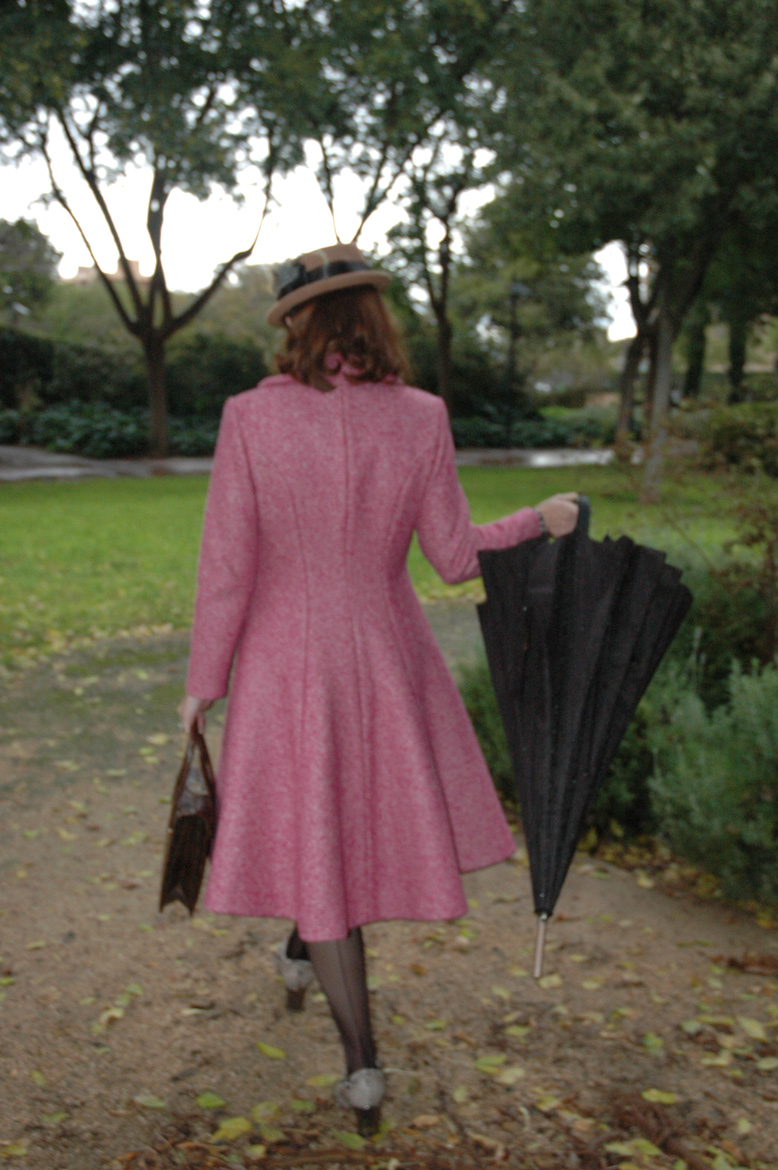
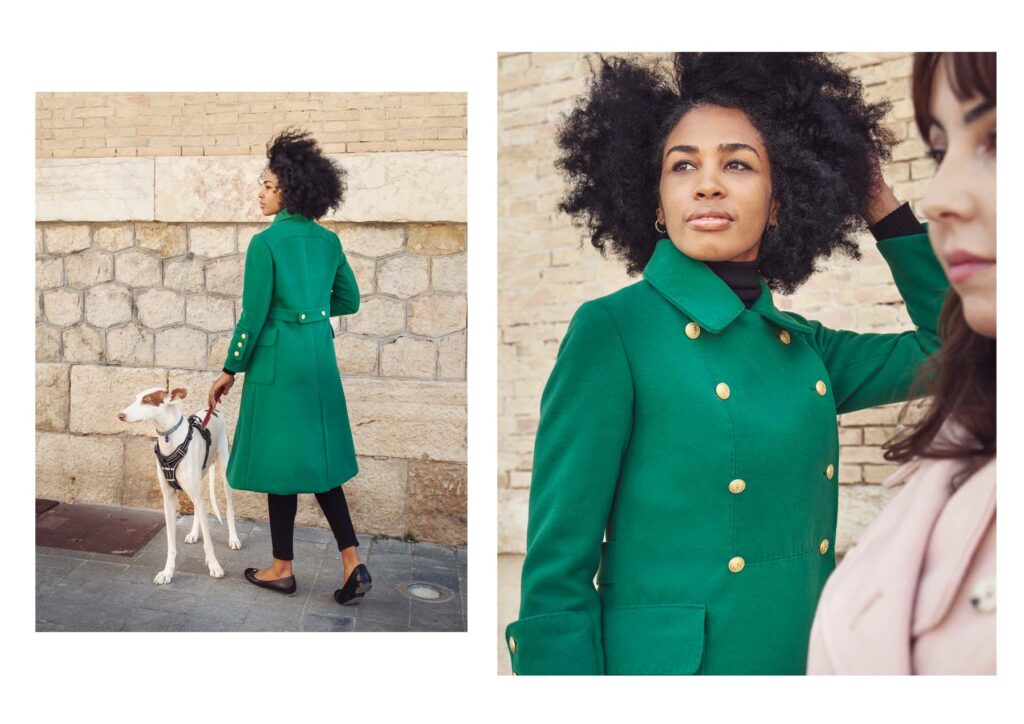
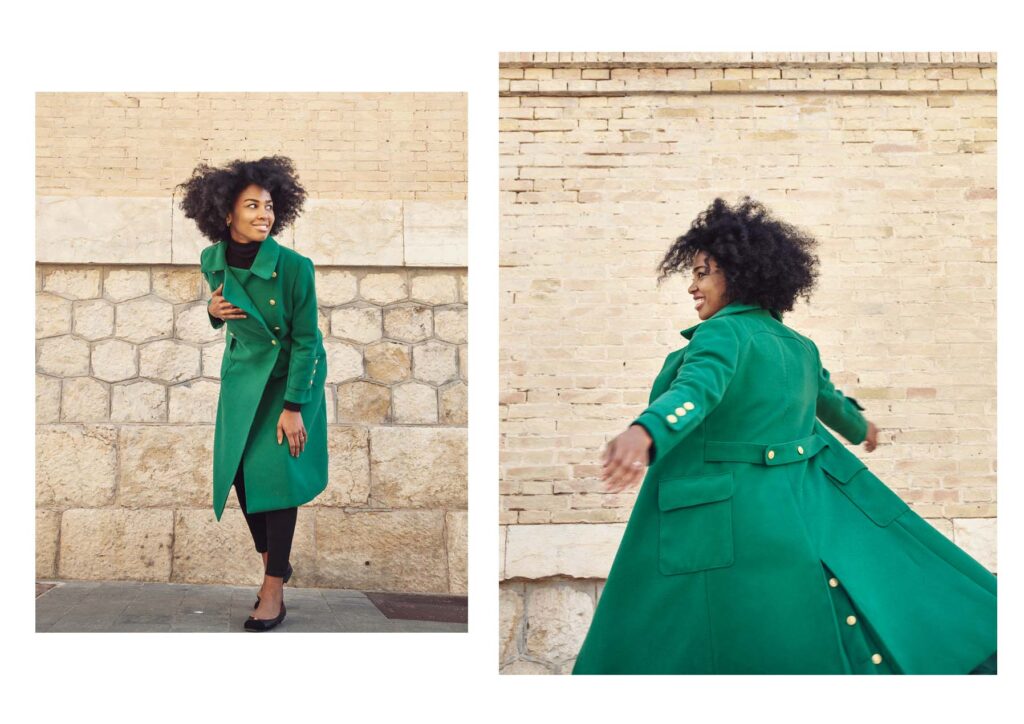
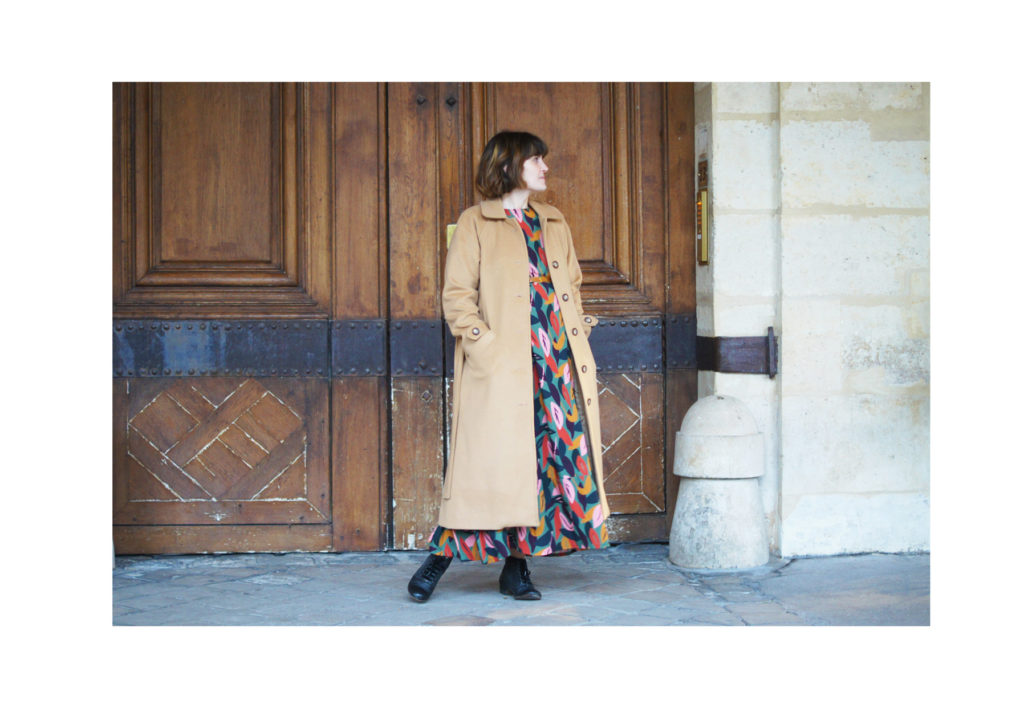
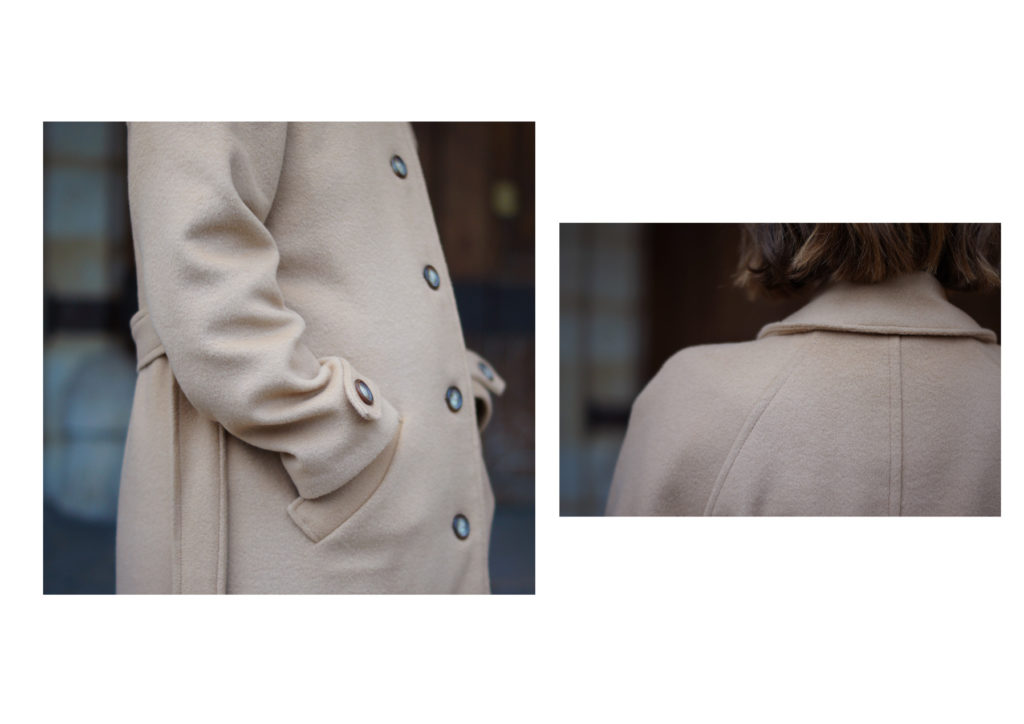
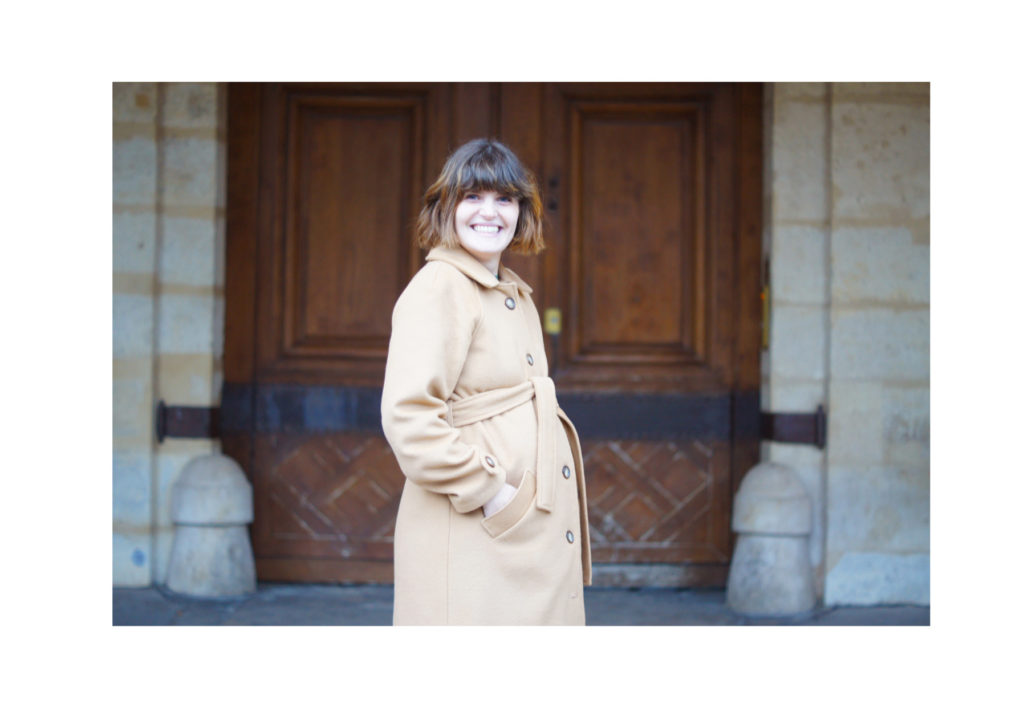
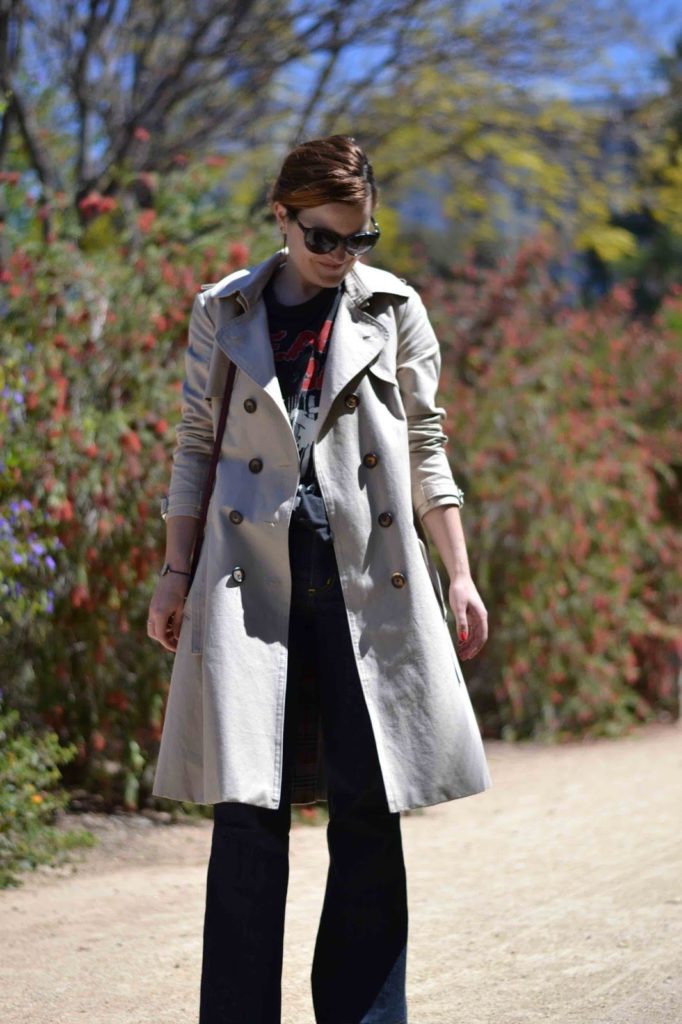
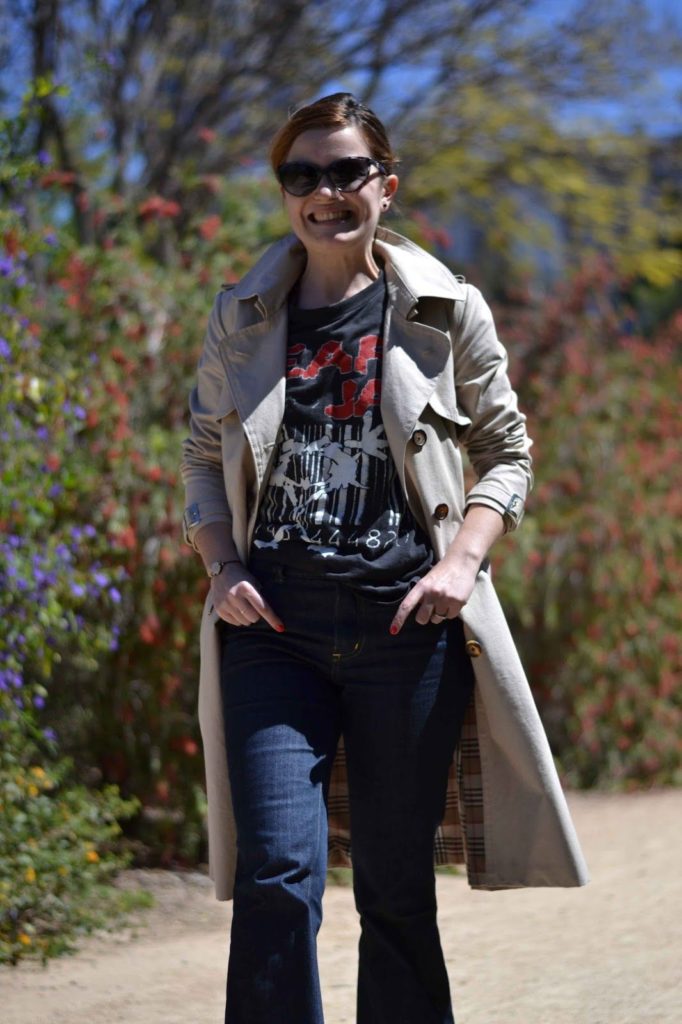
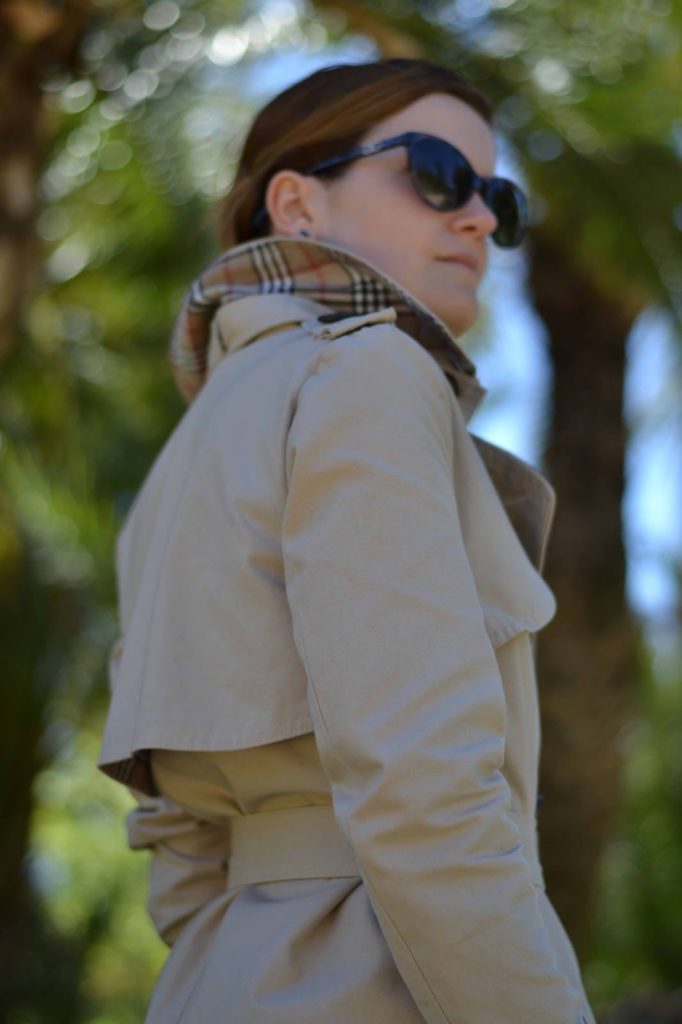
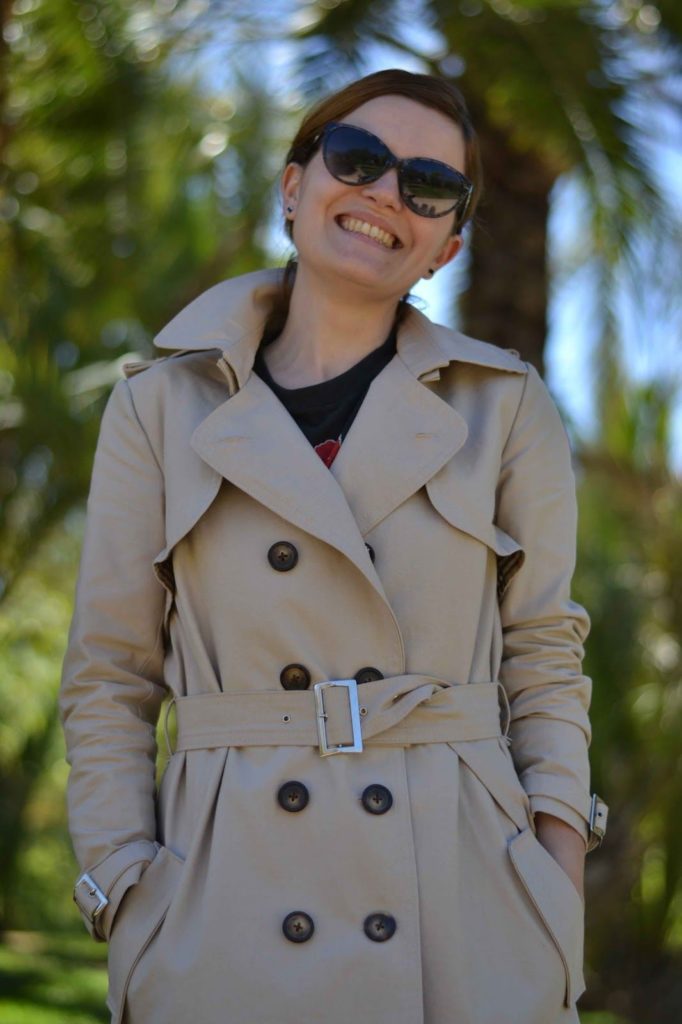
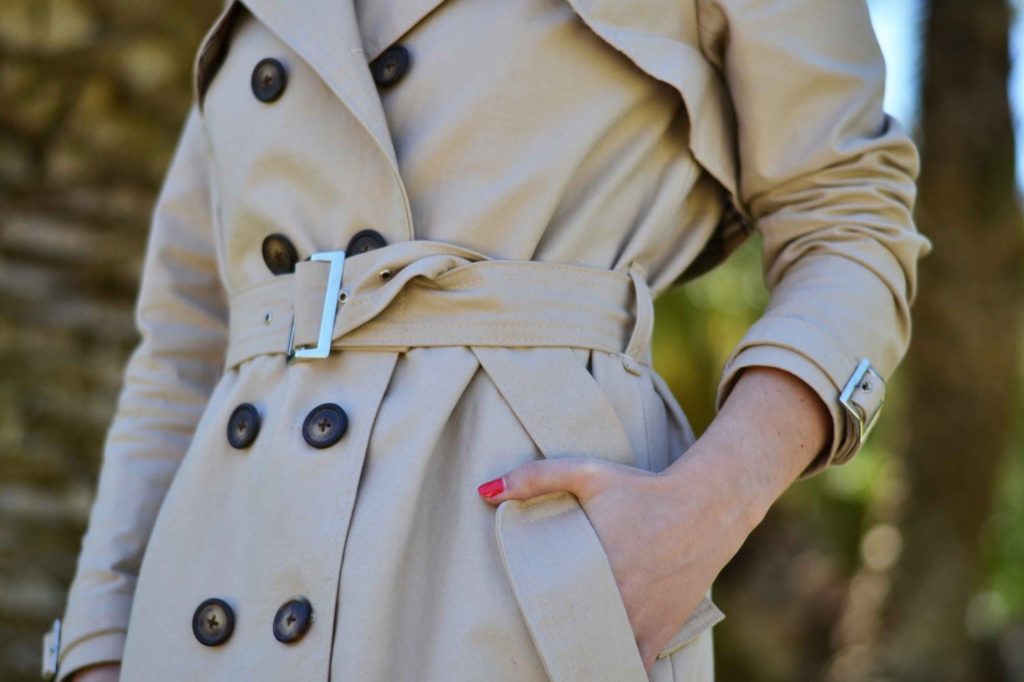
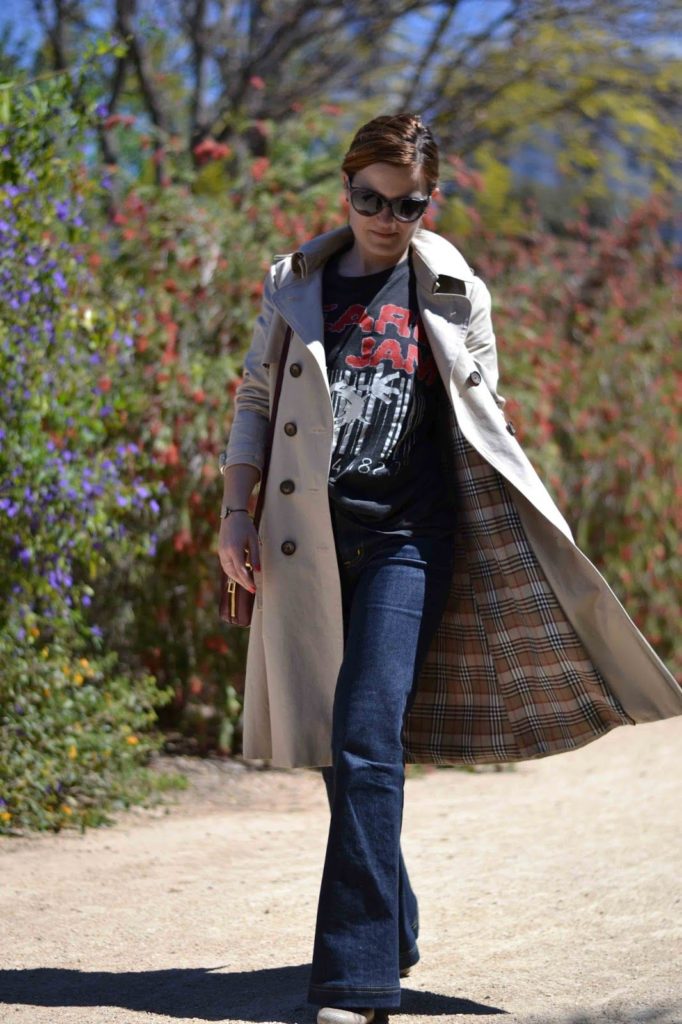
Almirall is a long coat, semi-fitted, with a very classic and elegant look. It features a double breasted front that can be worn with the lapel folded down or fully buttoned up to fight the cold weather. The military influence is quite obvious: double rows of buttons, sharp tailoring, lots of topstitching, strong details, this a coat that stands out. However, it’s also very wearable on a daily basis made in a neutral colour. The long two piece sleeves end with a buttoned cuff and the back shows two nice details, a buttoned half belt and a buttoned vent.

When I first designed the Almirall coat, the pockets were supposed to be patch pockets with flaps and that’s it. But after speaking with a tester/friend, she insisted on a welt pocket option and I obliged.

For fabric, you can guess: wool coating is the best! From medium to heavy weight woolen, the importance is that it has enough body to keep the sharp shape of the Almirall pattern. It could also be tweed, boiled wool or even a nice weight wool gabardine (some testers made it in denim and gabardine in a trenchcoat style and it looks great as well). You also need some lining (acetate or flannel for extra warmth) and interfacing.

The Almirall coat is an advanced level pattern (there are 27 different pieces – some of them in double) and it will be a long project, not something you can whip in an afternoon. But in my opinion, it’s so rewarding later to wear a coat you took extra time and patience to make, as you might wear it everyday during winter. But if you are an adventurous intermediate, you won’t have any problem sewing this coat. You can use the patch pockets instead of the welt ones, remove some details (topstitching, cuffs, the back vent…) and still have a great coat at the end.

The PDF file includes the instructions in English, French and Spanish as well as a A4/print-at-home file, a A0/copyshop file and a projector file, all with size layers (and stitching line/no seam allowances layers). Sizes available from 34 to 52.

Get the ALMIRALL coat pattern here!

Credits:

Photos: Rosa Campos

Models: María wears a size 48 and is 1,65 m. Laura is wearing size 38 and is 1,78 m.

0 comment
0 FacebookTwitterPinterestEmail

I love sewing coats, that’s not a secret. Not that I need an excuse to make one but I don’t wear coats that much in Spain. But this time, I had a very good excuse to make one indeed. See, I have my dark blue Quart coat, light blue Hemisféric coat and pink self-drafted coat in pretty good conditions but I can’t close them anymore. They are all rather fitted at the waist and for this winter, I needed a coat… not so fitted.

SERRA JACKET AS A LONG COAT


One of my inspiration for the Serra jacket pattern was a Balmaccan coat by the british brand S.E.H. Kelly. I love the classic shape, raglan sleeves, beautiful collar and topstitching. Looking through coat patterns, I remembered this one and decided on using the Serra jacket with a few changes to make it.

I chose View C as a starting point as it has so much similarities: the collar, the cuff button tabs, the length. The first change I made was lengthening it about 40 cm as I wanted a long coat that goes to mid-calf, almost ankle length. But because of the length, I knew a back vent would be easier to walk. So I added a back seam and drafted a vent for both the main fabric and the lining. I left off the wind shields and changed the shaped welt pockets for classic rectangular ones. Other than that, it’s the same pattern and I used the same instructions (only adding the back vent).

For the main fabric, I chose a heavy wool from Pretty Mercerie in camel (out of stock but similar here). I interfaced the facings, collars, armhole edges, pocket placements and hem. I just received my new sewing machine (juki DX-2000) and I was so happy with how well she sewed through multiple layers of heavy wool. Even the buttonholes were great! I used topstitching to give a little detail to an otherwise very plain coat.


I’ve been wearing it these past few weeks and I love it. Most of all, I love that it buttons close! I’m looking forward to wear it all winter and the next ones.

I’d also like to wish you all a Merry Christmas and Happy New Year! May 2020 be good with you!

PS: yes, 2020 will bring another baby into our family! Another boy!

5 comments
5 FacebookTwitterPinterestEmail

The Fall/Winter collection of Named Patterns came out … well last fall as it’s name indicate. And I remember liking every single pattern. But as I knew ordering more than one was stupid as I would never have time to make them, I just ordered my favourite: the Isla Trench coat. And I’m just about to show it now, 6 months later 😉

Isla-trench-coat-named-patterns-1

I wanted to make a very traditionnal trench coat (traditionnal in the sense of copying a Burberry one!) so I studied every Burberry trench coat pictures I could find on Pinterest (i even created a special board, check it for details). I went fabric shopping for some beige gabardine and tartan checked lining, which was more difficult than I thought first. In the end, my gabardine is slightly lighter in colour than desired but it’s ok. I found all the fabrics and material (buttons and belt loops) at my local fabric shop. I will admit that it was quite an expensive coat to make: the printed pattern was 22 € (+ 8€ shipping fees so 30 € in total), 3 meters of gabardine at 20€/m, 2 meters of 15€/m lining and about 15€ for the buttons/belt loops, I mean it’s almost a 100€ trench coat. But knowing a real Burberry one retails at least at 1500€, I feel better.

Isla-trench-coat-named-patterns-2

Isla-trench-coat-named-patterns-3

Isla-trench-coat-named-patterns-4

The gabardine is very nice, a bit on the heavy side so some areas were quite difficult to sew due to the various layers. I didn’t add any interfacing because of the gabardine’s weight. And the lining is a Burberry-like tartan in flannel, which makes it a perfect winter coat for the mild mediterranean weather of Valencia (sleeves are lined in rayon).

As for the supplies, I chose to change some of the features to get a more Burberry-lookalike coat. I’ve used some metal belt loops and eyelets for the sleeve straps and the belt. I wanted to do the same for the collar stand but instead just shortened it. I also added some epaulettes and made the under collar out of checked lining.

Isla-trench-coat-named-patterns-5For the pattern itself, I made some changes mostly due to my petite size: I had to shorten the body about 30 cm and the sleeves by about 10 cm (fyi I’m 1m55 tall , 5ft1). The instructions were very complete but I wouldn’t recommand this pattern for a beginner (which Named patterns doesn’t either, the pattern is marked 5/5 and challenging). There are a lot of pieces and the construction has to be very detailed and meticulous. But the results are very professional looking. The only complaint I have is just some personal preference: I like to cut my pattern directly in the paper but I could n’t do it as the numerous pieces are layered on top of each other so I had to trace them first.

I’m still not sure I attached the lining at the back vent correctly but it looks ok. It was the fist time I had to line a back vent, I even left the trench unfinished for about 4 months before going back to finish the lining. I finally figured it out and that’s why I’m showing it only now (started in november and finished in march, that’s my longest project!)

For the rest, everything fits together nicely, the construction order is great and the fit is good.

Isla-trench-coat-named-patterns-6

I’ve been wearing the Isla trench coat for about a month now and I really like it. My favourite thing about it? When the wind blows and the pretty tartan lining peeps out!

Isla-trench-coat-named-patterns-7

25 comments
6 FacebookTwitterPinterestEmail
I’ve never been an animal print fan, but sometimes the heart wants what the heart wants! And my heart was wanting a leopard print coat so that my inner Cruella Devil could be satisfied.
Cruella-Devil-sewing-pattern-1

Cruella-Devil-sewing-pattern-2I found the fabric in my usual fabric store, Julián López. It was on sales but still a little bit pricey, but I really liked the light
background and the furry touch. It was easy to work with as the wrong side is very similar to linen but the whole house was full of hairs for the next few days… (and I have a sewingroom so imagine!).

I chose a bright blue lining to contrast with the leopard.

Cruella-Devil-sewing-pattern-3Cruella-Devil-sewing-pattern-4

As the fabric was bold enough on its own for me, I decided to use a very classic coat pattern: Burdastyle #101 from 08/2012.
It’s a good pattern: I just enlarged the collar and shortened the coat. I didn’t make any buttonholes for the moment as I wasn’t sure which one to use, but I might keep it buttonless as I like better open.
I’ve already worn it quite a lot as the weather is perfect for a light coat.
It adds interest to an otherwise simple and casual look like this one.
Cruella-Devil-sewing-pattern-5
pauline-sewing-pattern
50 comments
0 FacebookTwitterPinterestEmail
pink Dior coat

I am glad to present The Dior coat in all its spendour:

pink Dior coat side view Dior coat full view

I designed the pattern myself from a princess seam slopper I did for the scallop coat I made in october.
The idea was to accentuate the waist and have a full skirt like the type of coats popular in the late 40’s, early 50’s. I also had some contempory inspiration but even those were based on retro models.

Earlier this year, I purchased an e-course on Craftsy called the Starlet Suit Jacket (sorry, I can’t link it, it appears to have disappeared from the classes availables). The course focuses on sewing a fitted jacket with hand-tailoring (or fusible-tailoring), using bound-buttonholes. welt pockets, and other vintage/tailoring technics.

I mostly bought this class because the instructor was Gretchen Hirsch, whose blog I religiously follow and whose book I bought and devoured. The woman is so passionate about vintage technics, her style is very close to mine and I love the fact that she is self taught (by that I mean that she has not been to fashion school, because she obviously has been to a lot of sewing classes with the crème de la crème of US sewing teachers).

Anyway, the craftsy class was great and I learnt so much from Gertie while sewing my coat. I even took the welt pocket pattern from her jacket and added it to my coat as I found it very elegant and I wanted to included as much technics as I could. I fear those technics are disappearing and that’s a shame as no machine will ever be able to make such beautiful and delicate buttonholes for example. Go to any store and try to find a jacket or a coat with bound-buttonholes, that might be mission impossible (or they will be very expensive).

pink Dior coat front details

I interfaced the front, the side front and the facing with weft fusible interfacing. I wasn’t feeling confident enough to do the whole hand tailoring method for the moment and I was also afraid it would take me months instead of weeks. And as my wool was very thick, the interfacing was just for shaping, not for supporting the fabric. So I am very happy with the fusible method. But next time, I definitely want to try the hand-tailoring method.

I wanted the shoulders to be structured without giving me crazy swimmer back. In the craftsy class, Gertie explains how to use biais cut mohair strips to consolidate the sleeve cap and give structure in the sleeve head, that technic is often used on tailored jackets and coats and it works wonderfully. I also added small shoulder pads.

As I might have repeated thousands of times, the fabric is pure double face wool from Dior in fuschia. It is very heavy, the coat has to weigh about 3 kg! But it feels so luxurious, even more when you get a peek of the bright fuschia silk lining (sorry, I realise we didn’t take any pictures of the lining). There were some moments I thought my sewing machine was going to die from the thickness of the fabric. Imagine sewing the seam allowances where you have 4 layers… a nightmare! But Elna survived! Good girl!

pink dior coat back
I am very happy and proud of the work I have done with this coat. I love a fast sewing project like a little dress or skirt that you can wear the following day but spending hours and hours on a project like this one is rewarding in a different way. I have learnt a lot in terms of sewing technics and for me that’s so much as I am self taught.

73 comments
3 FacebookTwitterPinterestEmail