Home Tags Posts tagged with "off-the-shoulder"
Tag:

off-the-shoulder

Holiday season has started and it means Party!!! Have you thought about your party dress for the holidays? Mine is going to be a velvet and polka dot tulle Seda Dress. And while sewing it, I took pictures of the minor changes I made in order to show you some variations you might want to try on your own version of the Seda dress.
So today, we’ll see how to add boning to the Off-the-shoulder version, View A.

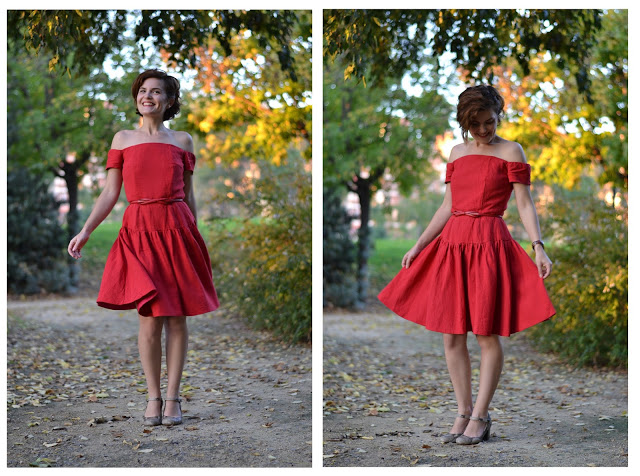
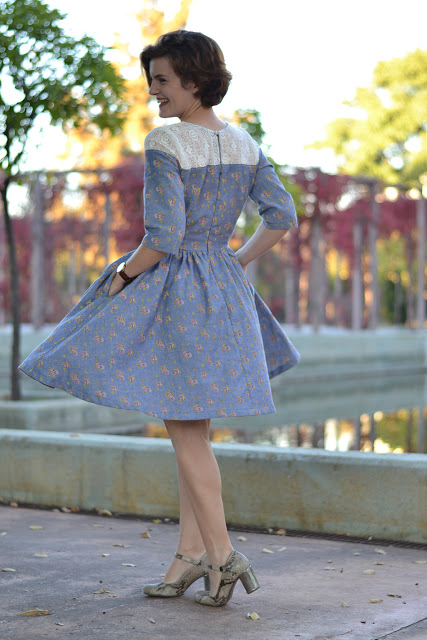
View A of the Seda dress emphasizes the shoulders and neckline, I think it’s very sensual and quite sexy if you ask me. The dress is designed to work without added structure but depending on your fabric and your bust size, you may feel more comfortable adding boning to the bodice of the Seda dress View A.If your fabric is light and doesn’t have enough body, I would recommend adding an underlining. To underline the bodice, you can use muslin fabric, cotton batiste or silk organza (choosing the right underlining will depend on your fashion fabric, underlining should always be lighter in weight). Cut the bodice pieces out the underlining and transfer all the markings (you don’t need to mark the main fabric). Baste the fashion fabric and the underlining together, you can then use them as one piece.

Underlining will help structure the bodice of the dress, it will also prevent darts to be seen from the right side if your fabric is very light and will minimize wrinkles. And for our purpose, it will prevent to boning to show throught this double layers of fabric.So now on to the boning!

There are different types of boning, here the ones you’re most likely to find at your notion store:

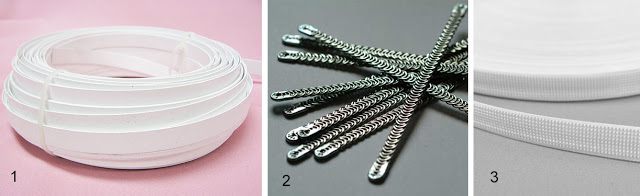
  1. Plastic boning. Sold by the meter/yard.
  2. Steel boning. Either flat or spiral like in the above picture. Usually sold in precut length.
  3. Rigilene boning. Can be stitch directly on fabric. Sold by the meter/yard.You’ll need approximatively two 28 cm (11″) boning for the front bodice and two 26 (10 1/2″) for the back, both about 1 cm wide (3/8″).
If you’re using plastic or steel boning, you’ll also need 1,10 meter (1 yd 1 ft) of bias binding, wider than your boning. So if you’re using a 1 cm boning, a 1,5 cm wide bias binding will leave enough room for the boning to move a little bit (attention, you don’t want it to move too much either).Plastic and steel boning insertionOn this illustration, you’ll see how to apply boning to the Seda dress bodice.
-Cut your bodice pieces from your lining fabric and stitch the darts on the front and back pieces. Press them as indicated in the instructions.
-Place the bias binding on the wrong side of the lining and pin it over the waist darts, going up to the neckline. Fold the top end of the binding to the wrong side. Make sure the top edge of the binding is below the neckline seam allowance (make it stop about 2 cm (3/4″) below the edge so it won’t get caught when you sew the lining to the main fabric).
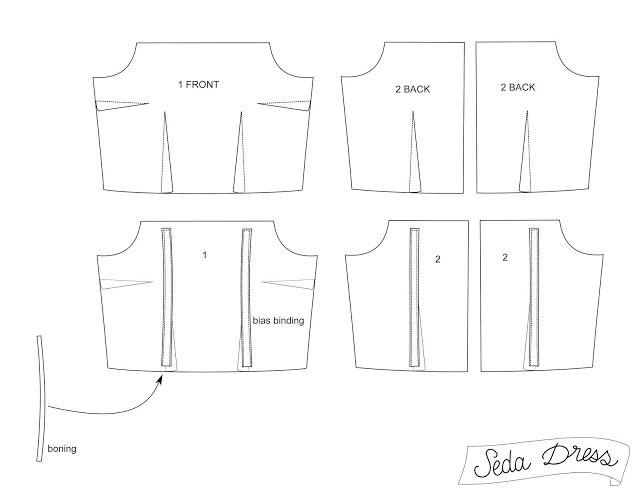
-Stitch along the edge of the bias binding, going up and down, stitching very very close to the edges.
-Insert boning into the channel you created with the bias binding. Make sure your boning stops about 2 cm (3/4″) above the waistline edge. Stitch the bottom edge of the bias binding to prevent boning from moving.Rigilene boning insertionWith Rigilene boning, you’re going to pin the boning directly on the wrong side of the lining over the darts, as explained for the bias binding previously. You can melt both ends of the Rigilene so it won’t punch through the fabric (or stitch a piece of fabric over the ends). Make sure the boning stop about 2 cm (3/4″) from the neckline and waistline edges.
Stitch over the boning, on each side.Now you are ready to follow the Seda dress instructions just as they come.
Let me know if you have a question.
Next week I’ll show you how to add lining to View B of the Seda dress + some tips on sewing with velvet..

signature1_editado-1

1 comment
0 FacebookTwitterPinterestEmail
Between the holidays coming very soon now and the end of wedding season (which will come back soon enough), I wanted to make a new dress. A dress I could wear everyday and for parties. And this dress, you’ve guessed, is the new pattern: the SEDA dress !!!
seda-dress-pattern-sewing-1
View A: linen from Cousette


During the summer, I told Anne, my intern, about such a dress: off-the-shoulder neckline with a silhouette very much inspired by the 50’s. The first thing she told me was “Ok, that nice, but how can I wear a bra with such a dress?” Good point Anne! Being a very small B cup myself, I hadn’t thought about more “gifted” women 😉
And that how the Seda dress pattern was born, view A… and B!
seda-dress-pattern-sewing-2
View B: chambray from Henry&Henriette, lace from Cousette


View A has that deep off-the-shoulder neckline, to show off the shoulders with just a hint of sexy… The short sleeves stay put thanks to an elastic and the bodice and hip yoke are lined for comfort. The front and back darts on the bodice and yoke accentuate the waistline and the skirt, fully gathered at the hip, create a silhouette worthy of an Hitchcock heroine.

seda-dress-pattern-sewing-3

Easier to wear everyday, view B starts with the ame bodice but with the addition of a shoulder yoke. You can play with contrasting fabric or color, transparency with lace… The 3/4 sleeves can easily be replaced by the short ones of view A and vice-versa. And no party dress is complete without a full skirt… with pockets of course!

seda-dress-pattern-sewing-4

Both views are closed with an invisible zipper in the back, and for view B, a small button or an hook and eye set close the shoulder yoke.
The Seda dress can be made in lots of different fabrics: here in linen and chambray, in cotton, light wool or flannel for winter, velvet, raw silk, lace…I hope you’ll like the Seda dress pattern, I’ll be back soon with some tutorials. If you have any questions, feel free to ask.
Buy the Seda dress pattern here: SEDA DRESS.
Check out the first testers’ versions: Anne, Céline.

pauline-sewing-pattern


8 comments
0 FacebookTwitterPinterestEmail