Home Tags Posts tagged with "pattern drafting"
Tag:

pattern drafting

You’ve been quite a lot to ask me if it was possible to turn the Turia dungarees into a pinafore dress. And my answer is YES! And more importantly, it’s very easy to do!

Turia-dungarees-pinafore-dress-variation-1

Adeline and Sonia have already made this variation and they have tempted me so much. I think it would look so cute with a sweater and tights during the fall/winter. How about corduroy, velvet or brut denim?

TURIA PINAFORE DRESS VARIATION

Turia-dungarees-pinafore-dress-variation-2

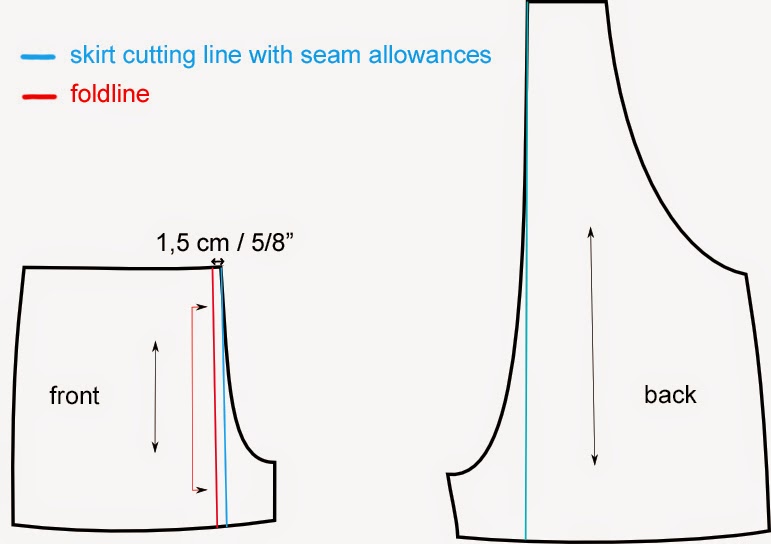
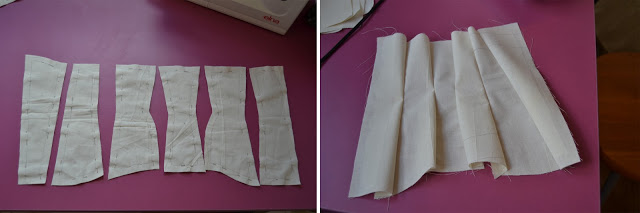
1. Take the shorts front (10) and back (11) pieces.

2. You need to decide if you’re going to place the front piece on the fold or if you want to keep the center flat-fell seam. For the centered seam, trace a horizontal line (the blue one) starting from the top of the center front seam and parallel to the granline.

If you prefer to eliminate the center seam, trace a foldline (in red) starting 1,5 cm away from the center front seam and parallel to the grainline. You’ll place the new piece on the fold of the fabric.

3. For the back piece, you need the center seam. Trace a new seam line (in blue) from the top of the center back seam parallel to the grainline.

4. You might want to add some length as well to the hem as the shorts are… well, shorts! I would recommend adding at least 10-15 cm (4″ to 6″) for a mini to mid-thighs length dress. Just follow the side seams and add the desired length.

5. Stitch the seams the exact same way! See, that’s a very easy variation!

signature1_editado-1

9 comments
0 FacebookTwitterPinterestEmail
I’m very excited to show you the first videos of the Carme blouse Sew-Along!
Let’s start with some general information: all videos will be available here on the blog as well as on my Youtube channel with the tutorials in 3 languages. You can subscribe to the channel to see all the videos and the updates (and click “Like it” please!).
If you have any question, please ask them in the comment section of the blog below, that way we can all answer each other and profit from the answers.
Remember that here you can buy the Carme blouse pattern.And now, let start the show! I’m going to show you 3 style variations you can make easily to your blouse. Last week I received some comments and mails asking me to show how to make them and I thought it would be a good idea to make a small video for each.And before the variations, you might want to look at the inspiration file I gathered on Pinterest: gathered front for maternity wear, square yoke, plain front piece…
Let’s see if one of these variations  is appealing to you…
VARIATION 1: HOW TO MAKE A MATERNITY BLOUSE
Diana sent me a mail asking me how to change the pattern so she would be able to wear the blouse while pregnant. I answered that adding some ease to the front would do the trick but then thought it’s a style design that I’ve seen on a lot of “non-maternity” blouses as well. So adding some gathers to the front piece under the yoke is going to give space for your growing belly or just more ease and flow if you use a supper light fabric for example.
Let’s see how to draw the new pattern piece (I’m using a miniature drawing).

VARIATION 2: HOW TO DRAFT A PLAIN FRONT (NO YOKE)
As much as I like the pin tucks and the yoke, the Carme blouse would look great with a plain front. I’ve been asked to show how to draft a single front piece and it’s very easy: tape the front and the yoke together overlapping the seam allowances by 3 cm (1 and 1/4″) and matching the shoulder and front lines.

VARIATION 3: HOW TO DRAFT A SQUARE YOKE
You might want to change the round yoke (or bib) for a square one. Easy! Just draw the new lines on the yoke (pattern piece 4) and the front (pattern piece 1) with the same angle and measurements. And follow the same instructions: baste the yoke and the front around the edge, clip the seam allowances (in the angles), press them toward the inside and stitch both layers together (see the instructions for more details and illustrations).

I hope you’ll like the videos! If you have any questions, ask below!
Have a great day.


18 comments
0 FacebookTwitterPinterestEmail
Hello, as promised, here is the Piping Dress:
 

piping-dress-sewing-pattern-1

I drafted the pattern myself and I still have to improve the shape and the fit, but I am quite happy. The bodice is one piece with front darts and it is sewn to the yoke/straps at the collar and at the back. The bodice and the gathered skirt are joined with the waistband. I also added in-seams pockets (so useful!).
Fitting the yoke/straps was a nightmare: I had to make 2 more muslins before getting it ok and I am still not completely satisfied (as you can see, the back rides up a little bit).


piping-dress-sewing-pattern-2

Even with these little problems, I love the dress. The shape is very nice and flattering, the fabric is amazing and the piping details set it apart. And the open-back, what can I say about it? I just love it! I am fulfilling my summer to-do list one item at a time: this one checks the retro dress inspiration moodboard.


piping-dress-sewing-pattern-3

Would you like to be a pattern tester? Wait for wednesday post for all the details…
Have a nice week!

pauline-sewing-pattern

34 comments
0 FacebookTwitterPinterestEmail
If you’re like me, when you see a garment you like on the internet, you want to know how it’s made. There is nothing more frustating than finding the perfect dress or skirt and having no idea of what pattern was used or good enough pictures to figure it out. What I love are blogs with construction pictures, that way, even if I don’t have the pattern, I can try to make something similar. If only I did that! But everytime I try to take pictures of the construction, I forget and keep on sewing until it’s almost finished… Do what I say, not what I do 🙂
Ok, I made an effort and took pictures of the construction of the Scarlett dress, good girl!
Let’s start with the corset:

scarlett-dress-construction-sewing-pattern-1scarlett-dress-construction-sewing-pattern-2scarlett-dress-construction-sewing-pattern-3scarlett-dress-construction-sewing-pattern-10

It’s made of heavy muslin (or coutil in the corset world). I am pretty happy with it being my first corset but I would make some changes for the next one. I wasn’t able to find spiral metal boning in any notion stores in Valencia so I had to use plastic boning. Not bad for a night but I don’t think it would be confortable for a longer time. Nor was I able to find a busk to close and open the front. So I have to lace it open everytime I want to wear it.
The pattern is made from my measurements and is amazing. I found it here, the fit is perfect and it’s very easy to follow and make, you just need a piece of paper, a ruler and a calculator. The same girl also has a tutorial on how to sew the corset here. I didn’t make the same flat-felt seams, just regular seams with slip-in-the-ditch to create boning channels.
I didn’t have metal grommets so I sewed them by hand like small buttonholes. Took me a whole movie, not so bad…

scarlett-dress-construction-sewing-pattern-4scarlett-dress-construction-sewing-pattern-5

Here is the hoop-skirt: the most important part of the costume as it support the whole dress. The volume depends of how many hoops you add and the width. Here is how I made mine:

scarlett-dress-construction-sewing-pattern-6 scarlett-dress-construction-sewing-pattern-7scarlett-dress-construction-sewing-pattern-8

Now the underskirt: you need it to cover the hoop skirt and smooth the boning lines. It’s very simple to make: gather a big rectangle of fabric! For example, mine is 4 meters wide (it has to be wider than the hoop skirt, important). I made a small gathered flounce at the bottom (6 meters x 20 cm) and sew it to the big piece. I also made a separate waistband so it would be easier to gather the ribbon around my waist to close the skirt.


scarlett-dress-construction-sewing-pattern-9
I also found this pattern on the internet but I think it’s out of print. Maybe you can find it on ebay or etsy.
And for the umbrella, I found the recover tutorial here. I had a vintage umbrella from the 20’s with a broken fabric so I decided to recover it. It’s not difficult to do and it’s a great way to customize an old umbrella.
I hope it was useful and that you enjoyed it. If you’re still reading, sorry, this has to be the longest post ever 🙂 If you have any questions, just ask in the comment section, I’d be happy to help.
Have a nice week end!

pauline-sewing-pattern


32 comments
0 FacebookTwitterPinterestEmail
scarlett-ohara-barbacue-dress-sewing-pattern-1

That’s the last dress I made: the famous barbecue dress worn by Scarlett O’Hara in Gone with the wind.
I made it for a special occasion (I don’t wear that kind of dresses on a daily basis, sorry to disappoint you): a costume birthday party! How cool is that? I love costume parties…
And as the theme was the cinema, I couldn’t think of a better heroine than Scarlett.

scarlett-ohara-barbacue-dress-sewing-pattern-2scarlett-ohara-barbacue-dress-sewing-pattern-3
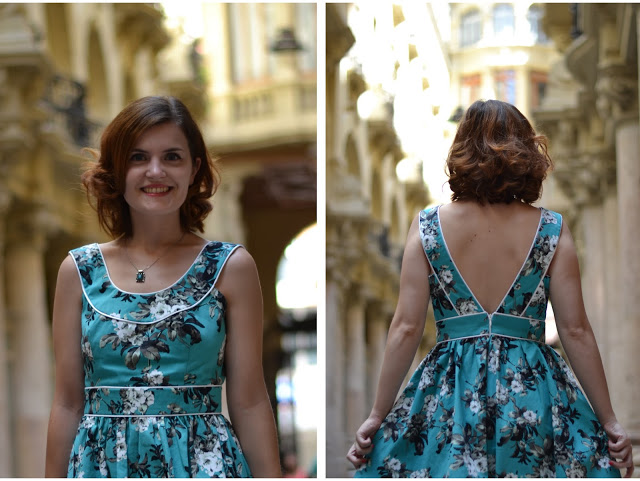
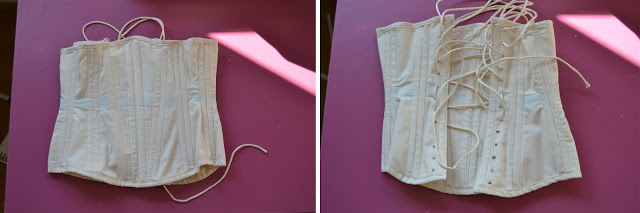
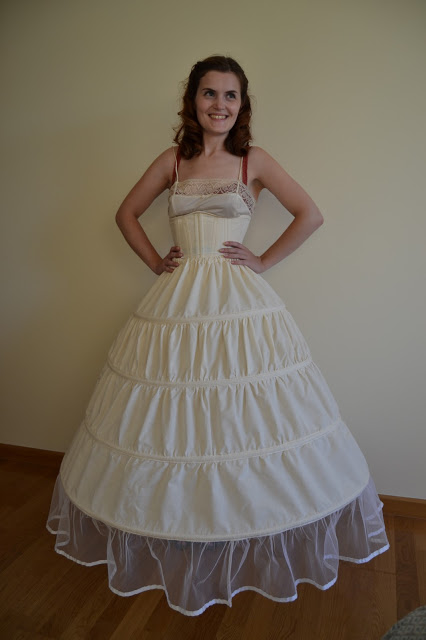
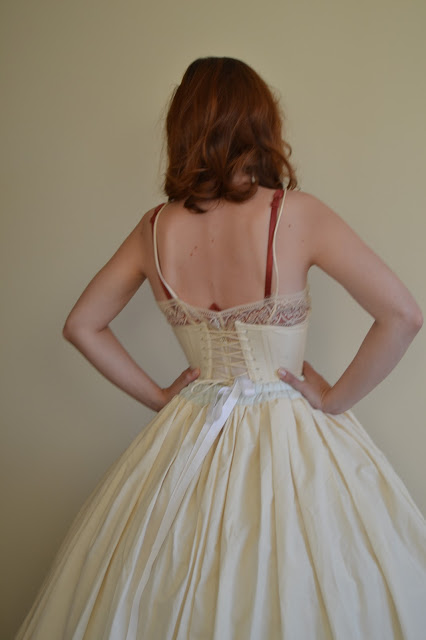
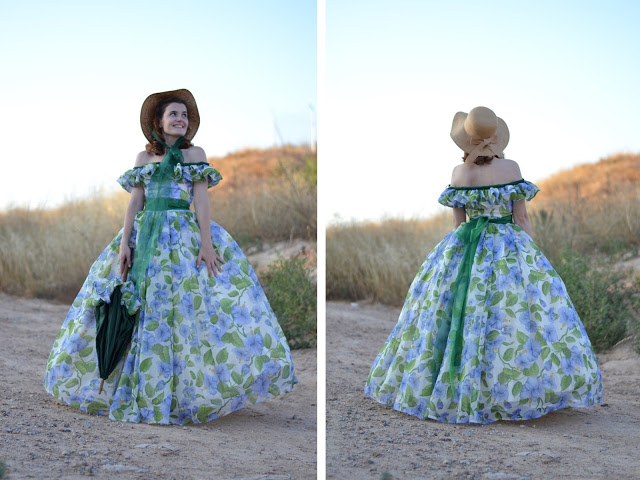
I drafted the pattern myself: the skirt is gathered (5 meters of fabric) and the bodice has front and back darts. It was not a dificult dress to make even if it looks like it, but quite time consumming (one week-end non-stop).
The most important part of the costume is the foundation: a corset, a hoop-skirt and an underskirt. I will explain all those parts in the following post.


scarlett-ohara-barbacue-dress-sewing-pattern-4
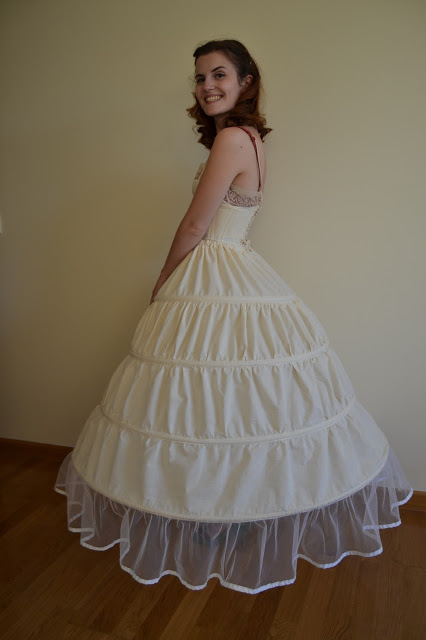
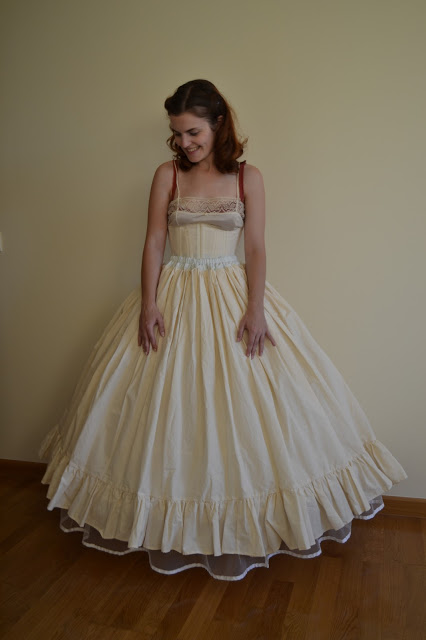
The dress was surprisingly very confortable and so dramatic. I didn’t want to take it off at the end of the night…
I leave you with a short excerpt from the movie where you can see the dress and the foundation worn by Scarlett I used as inspiration.
See you on Friday for the details post.


pauline-sewing-pattern


49 comments
0 FacebookTwitterPinterestEmail