Home Tags Posts tagged with "pauline alice patterns"
Tag:

pauline alice patterns

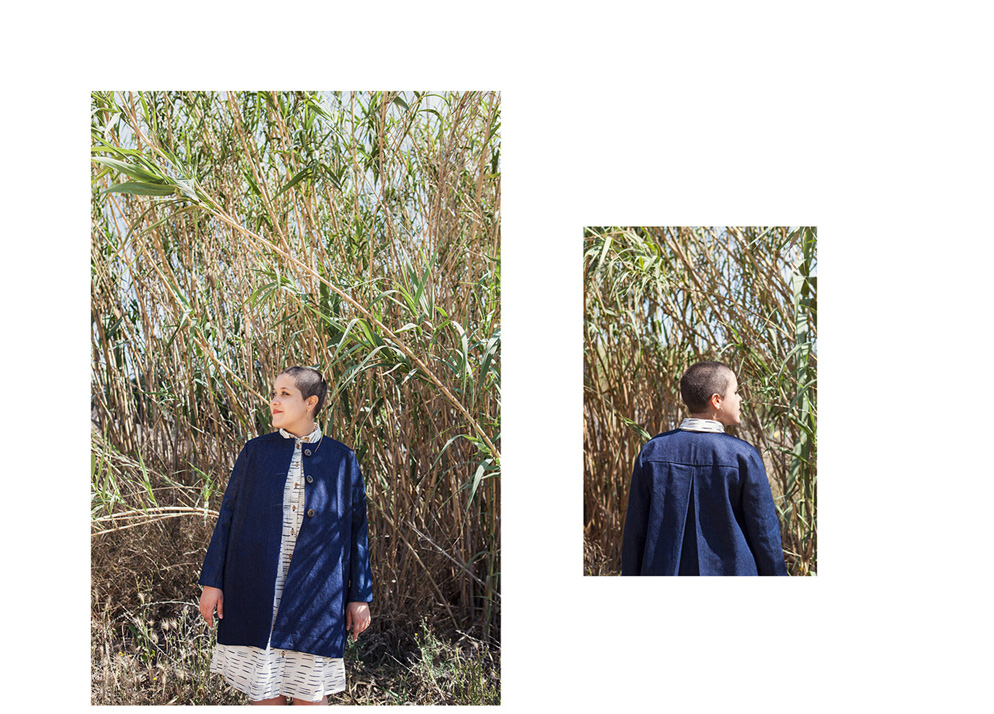
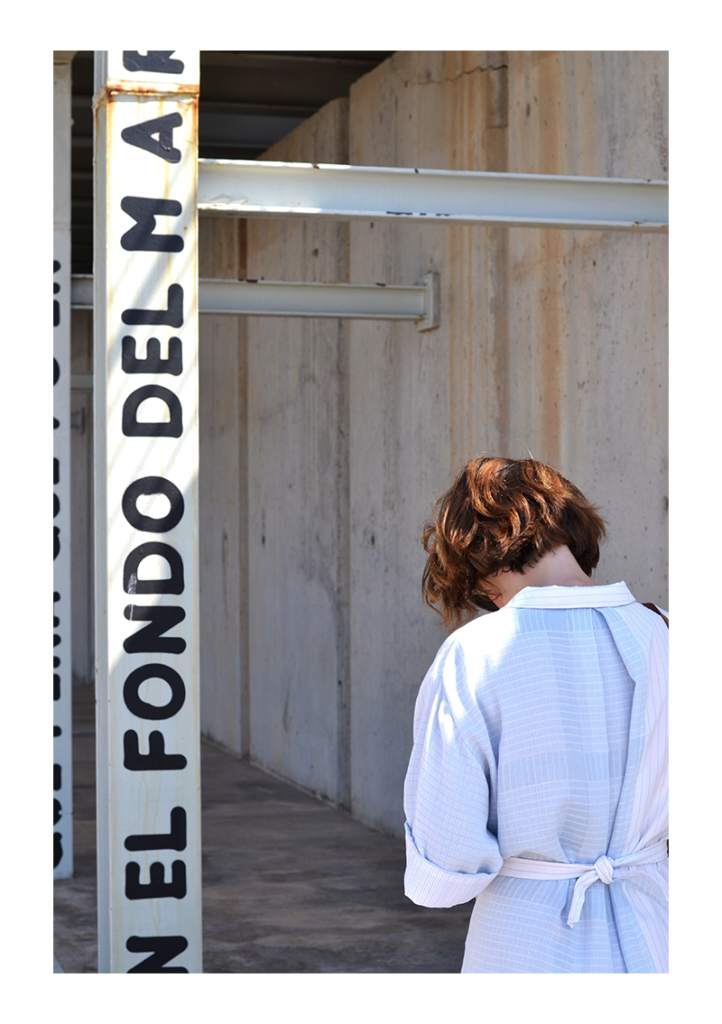
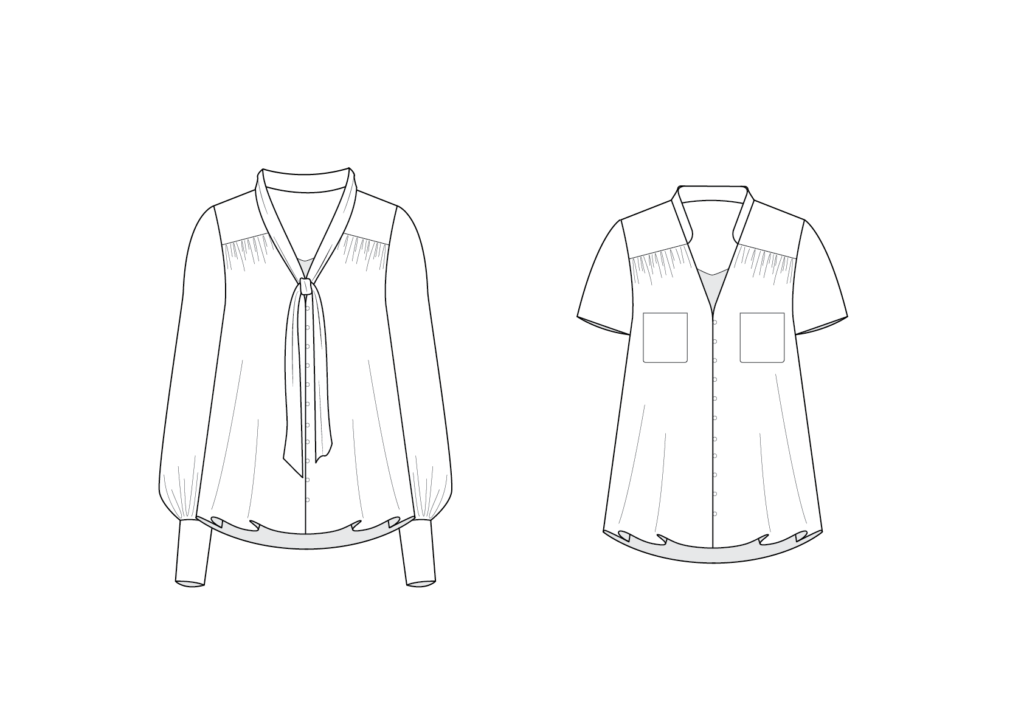
The Carme blouse pattern 2.0 is here! As it’s one of my first pattern, the sizing was not up to date, but I’m happy to tell you that you can now sew this blouse from size 34 to 52.
The pattern includes a print-at-home file as well as copyshop version. Get your copy here: Carme blouse pattern.

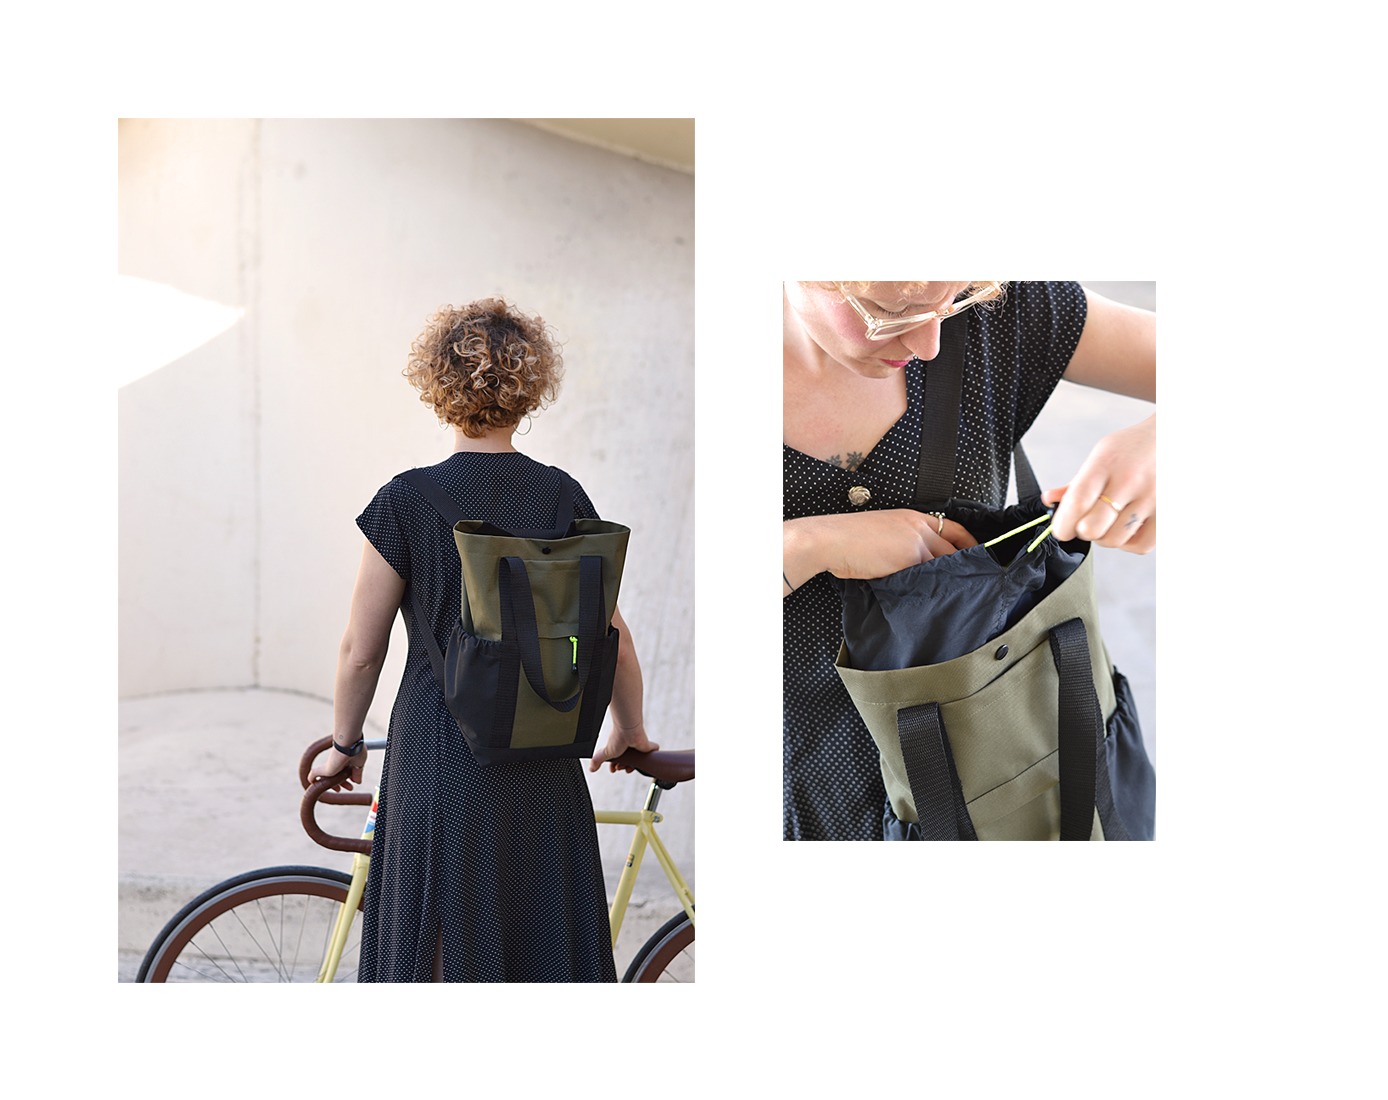
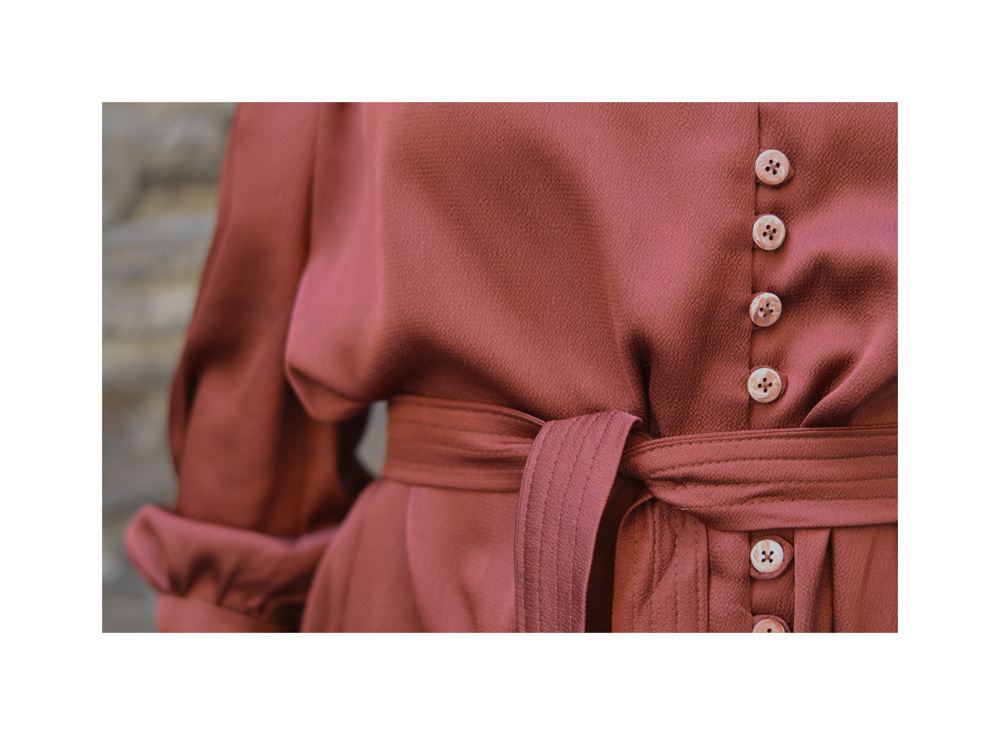
If you’re like me and don’t have a serger, you might want to use a cleaner finish than zig-zag stitches on your seam allowances. That’s why we’re going to see how to make french seams for the side and shoulder seams (and later on the sleeve seams) to get that nice and clean finishing touch.


I’ll see you on Wednesday for the sleeve part!

6 comments
1 FacebookTwitterPinterestEmail
I hope sewing the pin tucks was not too difficult. Remember that you can check the previous Sew-Along videos here.
Today, we’re going to see 2 tutorials:  first we’ll stitch the darts on the front bodice and join it to the yoke and then we’ll make the button placket. A little bit more work as the week-end is here!
FRONT BODICE

BUTTON PLACKET


I wish a very nice week-end! I’m going to enjoy the visit of my parents from France for the traditional festivities of Valencia, the Fallas.
8 comments
0 FacebookTwitterPinterestEmail

The Calvari dress is such a versatile pattern that can be made with most shirting fabrics: from cotton poplin to linen, flannel or needlecord for winter, viscose or tencel for a version with more drape… Here are some example for you:

STRIPES & PLAID

1/ Chambray – Les Trouvailles d’Amandine

2/ Navy cotton gingham– Backstitch

3/ Lurex stripes – Henry & Henriette

Source images (from the left to the right and from the top to the bottom): Shein  /  Vogue Girl Japan  / New Chic / https://www.maisonchateigner.com/ / Fantasy Linen


CLASSIC SHIRT

1/ Linen off-white – Atelier Brunette

2/ Blue chambray– Backstitch

3/ White cotton poplin – Rascol

Source images (from the left to the right and from the top to the bottom): So linen  /  Vogue  / Margaret Howell / Pinterest / Pinterest


WINTER VERSION

1/ Dark forest flannel – Harts Fabrics

2/ Sundance plaid flannel– Stonemoutain Fabrics

3/ Chesnut needlecord – Henry & Henriette

Source images (from the left to the right and from the top to the bottom): Margaret Howell  /  Pinterest  / Toast / Burberry / Toast


The Calvari dress pattern is available in sizes 34 to 52, in both print and PDF.
0 comment
0 FacebookTwitterPinterestEmail

ZOOM IN: MARITIMS

by Pauline Alice

Finally, it’s time to show you the Maritims pullover in details!

I don’t know if you know it but I’m from Britanny (France). So the fisherman smock or « vareuse » as we call it in french was an evidence for me, I knew I would design one, one day (it’s a basic there, just like the rain coat and rubber boots).

After the Serra jacket, I thought it would be great to make another unisex pattern. A pullover you put on like a sweater but that protects you like a jacket. Maritims is fully lined to shield you from the weather and have nice finishing on the inside.

It has a loose shape with dropped shoulders, a big front pocket, deep enough so you don’t lose anything, an interior pocket and a high collar to protect from the wind.

To put it on, easy : just pull it over your head. Maritims has a wide zipped opening offset on the side and the colla ris closed by snaps. You can also choose to adjust the hem thanks to the drawstrings. Its extra long sleeves are meant to be rolled up.

You should choose a medium weight fabric for the outer layer : cotton canvas, gabardine, denim, corduroy or even nylon for an athleisure version. As for the lining, poplin or flannel are perfect.

Maria is wearing the size S, made in off-white cotton canvas with contrasting toptsitching and lined with poplin (coming soon). Aquilino is wearing a size L, lengthen 8 cm (patterns are designed for a height of 1,65 m and he is 1,83 m – front, back and front pocket pieces were lenthened), made in blue denim from Les Trouvailles d’Amandine and lined with striped cotton.

The Maritims pullover is available in sizes XS-XXL in the shop in print and PDF.
2 comments
0 FacebookTwitterPinterestEmail

ZOOM IN: CALVARI

by Pauline Alice

It’s time to shine the light on the Calvari dress. It has all the characteristics of a shirt dress : a notched collar, a buttonband, shoulder yoke, breast pockets. Its simple, loose shape makes it perfect for every season. The buttonband finishes with a pleat on the front, which adds some ease as well as the back pleats below the yoke.

Like a modern uniform with the bracelet length sleeves and the notch collar, you can wear it alone as a dress or over some trousers as an oversize tunic. I imagine it perfectly worn by the seaside, at the market or gardening.

For this collection, I was inspired by workwear and Calvari reminds me of the painters’ smocks they would were not to get paint on their clothes. And because you almost always need pockets, I’ve added multiples ones on this pattern : breast pockets with flap, big patch pockets on the front and back, you’ll have enough.

I would suggest light to medium weight fabrics to make Calvari : poplin for a classic shirt look, linen, chambray or even flannel for a winter version. And like the patterns from this collection, feel free to use contrasting topstitching to highlight the collar or pockets.

Maria is wearing a size 38, made in a linen/cotton fabric (coming soon) with matching topstitching.

You can find the Calvari dress pattern in sizes 34-52 in the shop in print and PDF.
0 comment
1 FacebookTwitterPinterestEmail

The Serra jacket pattern was released last February. It’s a unisex and casual jacket with raglan sleeves, fully lined. The pattern includes 3 different versions: a parka with lots of pockets, a short athletic style jacket and a trench coat, all of them with hoods.

For the presentation pictures of View C, the trench coat, I wanted to use some checked or tartan fabric. I found the right one at The Sweet Mercerie and started to get overwhelmed by the matching it would require. But in the end, it wasn’t too bad!

I’ll show you how I did it. The most important steps are the preparation ones. Hopefully this will help you if you’re planning sewing a tartan Serra (or any jacket) for fall.

PATTERN PIECES THAT NEED TO MATCH 


HOOD

  • Back hood (11) 
  • Side hood (10) 
  • Front hood facing (14)
  • Back hood facing (15)

FRONT

  • Front (1)
  • Welt (36)
  • Welt facing (37)
  • Front facing (4)
  • Interior welt (39)
  • Gun flap (32)

BACK AND COLLAR

  • Back (2)
  • Storm shield (18) 
  • Collar stand (35)
  • Under collar (34)
  • Collar (33)

SLEEVE

  • Sleeve (3)


TRACE THE PATTERN PIECES

To trace the pattern, you’ll need : 

  • Pattern paper (or any transparent paper)
  • A ruler
  • A pencil, a thin black marker
  • An eraser
  • tape

Trace on pattern paper the pieces noted above, adding the following details: 

  • Seam allowances (1,5 cm or 5/8”) 
  • Center of the pieces that need to be doubled
  • Grainline
  • Notches and marking

You’ll need to double the pattern pieces that are placed on the fold of the fabric. It’s easier to match the pattern if you cut your pieces flat (on the fold, the fabric might move more easily).

TRACE THE PATTERN PIECES ON THE FABRIC

For that step, you’ll need : 

  • Your fabric
  • Traced pattern pieces
  • A ruler
  • Some colour marker

Before tracing the pattern on fabric, you’ll need to determine the dominant line of your fabric. This is the line that shows the more when you look at your fabric from far away. It miht be obvious but sometimes, you’ll need to choose one and stick with it. For example, my fabric has a beige background and some brown, green and yellow checks. For me, the dominant line was the yellow one.

Now let’s start the funny part…

If you have a huge table, use it. If not, the floor will be perfect. Spread the fabric on a large surface, as one open layer.

FRONT

GUN FLAP

FRONT FACING

BACK

STORM SHIELD

The storm shield is supposed to place on the fold. You’ll need to double it and trace the entire piece. 

COLLAR STAND

SLEEVE

Raglan sleeves are not easy to match. You’ll need to determine where you want the lines to match and where it’s ok if it doesn’t. For me, the most important place is the front, from shoulder to above the chest. 

POCKET


HOOD

The main pieces to match for the hood are the back hood and the front facing. Place the center of the back hood (11) on the grainline of the fabric, placing the center line between two dominant lines. 

Once these pieces have been traced and prepped with the dominant lines marked, you just need to place them on the fabric. Sometimes, you won’t be able to make all the lines match, make sure the most visible areas are matching, that’s the most important. For example, I want the front of the sleeve to match the front piece, even if the back will not match entirely (and the under sleeve will not match either but that’s ok as it’s not going to show).

If you want more help, you can watch Marie-Gabrielle’s lesson on pattern matching at Artesane (sorry, only in french – but for a similar class in English, you can try Bluprint’s Perfect pattern matching).


0 comment
0 FacebookTwitterPinterestEmail

Last summer, we released the Vera shirt pattern: a loose shirt with an asymmetrical hem. We’ve seen amazing versions on social media, and some of them modified as a dress. We loved the idea and decided to make a casual shirt dress for the summer. We have added a large pleat in the back, two big pleated pockets on the hips, longer sleeves and ties at the waist so it can be ajusted.

Fabrics: Blue and red stripes cotton poplin Lanterne & Céleste. / Cahier d’Écolier gauze. / images: Coralie marabelle. / Le Mont Saint Michel.

We wanted to work with various fabrics to give it a patchwork vibe and play with the grafic look of the shirt. We selected Amandine Cha’s organic fabrics (mainly cotton poplin and gauze) as they look and feel great.

HACK

1/ Lengthen the front and back pieces. Trace an horizontal line about 20 cm below the armscye on the front and back pieces. Cut along the line. On a piece of paper, place the top and bottom pieces 30 to 35 cm apart (make sure the centers match). Tape the pieces to the paper and draw a line to meet the top and bottom at the sides and centers.

2/ Lengthen the front facing to same way.


3/ Once the front, back and front facing pieces are lengthened, we will widen the back piece with an inverted pleat. Place the back piece on paper and trace a line parallel to the center back 2 to 4 cm away. Trace around the new back piece.

4/ Lengthen the sleeve. Trace a cutting line 10 cm above the hem. Cut and place on paper 10 cm apart. Tape and draw the new sides from the armscye to the hem.

5/ Draw the pleated pocket.

  • Pocket : on a piece of paper, trace a rectangle 22 cm wide and 16 cm high. Trace a vertical line at the center, this will be the center of the inverted pleat. On each side of the line, trace a fold line 2 cm away. Add 1,5 cm seam allowances around the pocket piece. You’ll need to cut 2.
  • Pocket facing : Trace a rectangle 18 cm wide and 8 cm high. Add 1,5 cm seam allowances around the facing. Cut 2.

6/ Make the waist ties. Trace a rectanle 8 cm high 1 m wide (if you want longer or shorter ties, feel free to change the length). Add 1,5 cm seam allowances around the ties. Cut 2.

7/ Place the pockets and ties placements on the front pieces as indicated.

CONSTRUCTION

BACK

  • Form the inverted pleat on the back neckline. Here’s a great post (in french) about that:

> Coudre des plis: plis plats, plits creux, plis ronds

POCKETS

  • Form the inverted pleat of the pocket.
  • With right sides together, stitch the pocket facing to the top edge of the pocket with 1,5 cm seam allowances. Press the seam allowances towards the facing and understitch.
  • Fold the top edge of the facing 1,5 cm wrong sides together. Press. With right sides together, fold the facing in two, stitch around the pocket, over the top fold. Trim the corners.
  • Turn the pocket right sides out. Fold the pockets seam allowances towards the wrong side, using the stitching as a guide. Edgestitch the facing.
  • Pin the pockets on the front pieces. Topstitch around the pockets.

TIES

  • With right sides together, fold the tie in two lengthwise. Stitch 1,5 cm from the edge, leaving one end open. Turn right side out and press. Baste the ties to the front pieces.

HEM

  • Finish the hem with bias binding (or you could use the original facing if you prefer, just remember to add the extra width from the back pleat).


0 comment
0 FacebookTwitterPinterestEmail

Today, I’m not releasing a new garment pattern but an accessory. Welcome to the Arenas bag!

I’m not a purse kind of girl but I love a good backpack! I find them so practical to carry all your essentials and still have free hands. But it’s not always easy to find the perfect backpack for me: I might like the shape but not the colour, or the contrary, it might lack some inside compartments, the opening might not be easily accessible… Well, I can just draft one myself!

The Arenas bag checks all my requirements: not too small nor too big, it has the right dimensions for a day bag (or even for a week-end trip if you’re a light packer like me). On the front, you’ll find a long pocket (for your newspaper or your baguette) and a zippered pocket for your bus card, your headphones or your keys. There are also two water bottles pockets on the sides, perfect for a water bottle (hence the name!) or a book.

And the best feature for me is the tote bag shape that can be worn over the shoulders or as a backpack. The back strap is adjustable in length so it can transform from tote to backpack. With its top loader with drawcord closure, you’ll have easy access the bag’s inside compartments. The back panel is padded for more comfort. The Arenas bag is fully lined. Inside, you’ll find a big patch pocket on the front, a big pocket on the back that can fit most 15” laptops and a small zippered pocket for your valuable belongings.

When planning our photoshoot, we have thought of showing two different bags so that you can see the multiple possibilities of styling the Arenas bag. The one I’m wearing is made with a heavy duty coton canvas from Stragier and lined with a medium weigh cotton – that the fabric I use for my toiles. Vanessa is wearing a more athlectic version, made from Acier Cordura® , a technical fabric made from nylon, in olive and black colours and lined with black Tactel® Santorin , a waterproof fabric. All these fabrics come from activa textil.

In a few days, we’ll share a post we have written on fabric and material inspiration to give you more ideas. If you don’t want to wait to sew your Arenas bag, medium weight and heavy duty are the keys.

The Arenas bag pattern is available as a PDF download with detailed instructions, an A4 print-at-home pattern and A0 copy shop version as well. You can find it now on the shop!

0 comment
0 FacebookTwitterPinterestEmail

You might have seen my stories before Christmas and how I was sewing a special dress for the holidays. I didn’t have time to show it to you yet. I’ve wanted to make a dress from the Reina shirt pattern for ever (there’s a dress in that style in my inspirations photos). And what a better time to try and make it than the holidays?

If you don’t know Reina, it’s a blouse pattern inspired by victorian style. It has a long collar that ties, wide sleeves gathered into a high buttoned cuff and it buttons on the front with nice little fabric loops. You can also make a more casual version with short sleeves and a standing collar.

I found a beautiful textured crepe satin, in a sienna colour I’ve been obsessed with lately, in my local fabric shop. I started with View A, the long sleeves and tie collar version of the Reina pattern, and lengthened the front and back pieces to the desired length. I added about 35 cm so it would hit just above the knee. I also finished the bottom hem differently: instead of a simple hem, I made a facing to add some weight to the dress. For a simpler look, I omitted the collar and made a self-fabric belt with topstitching to adjust the dress at the waist. Overall, I’m pretty happy with the results! It was a nice dress to wear on New Year’s Eve!

Here are the instructions if you want to make a Reina dress :

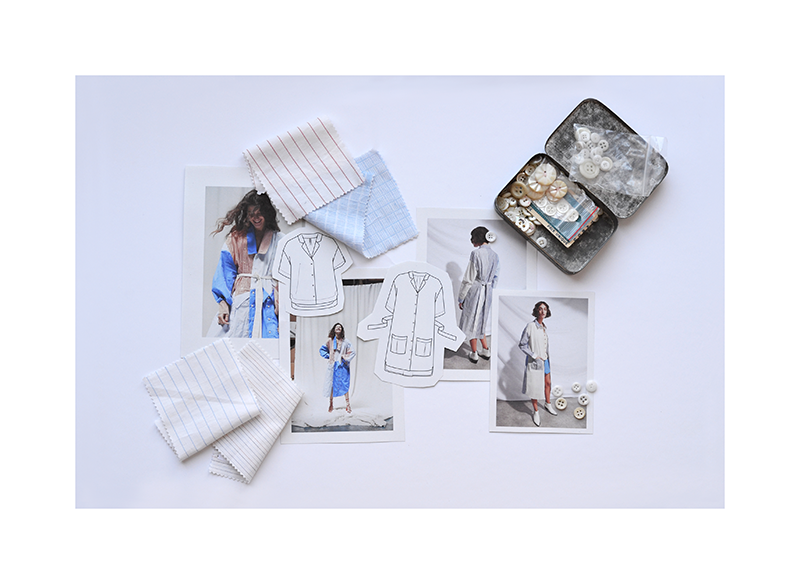
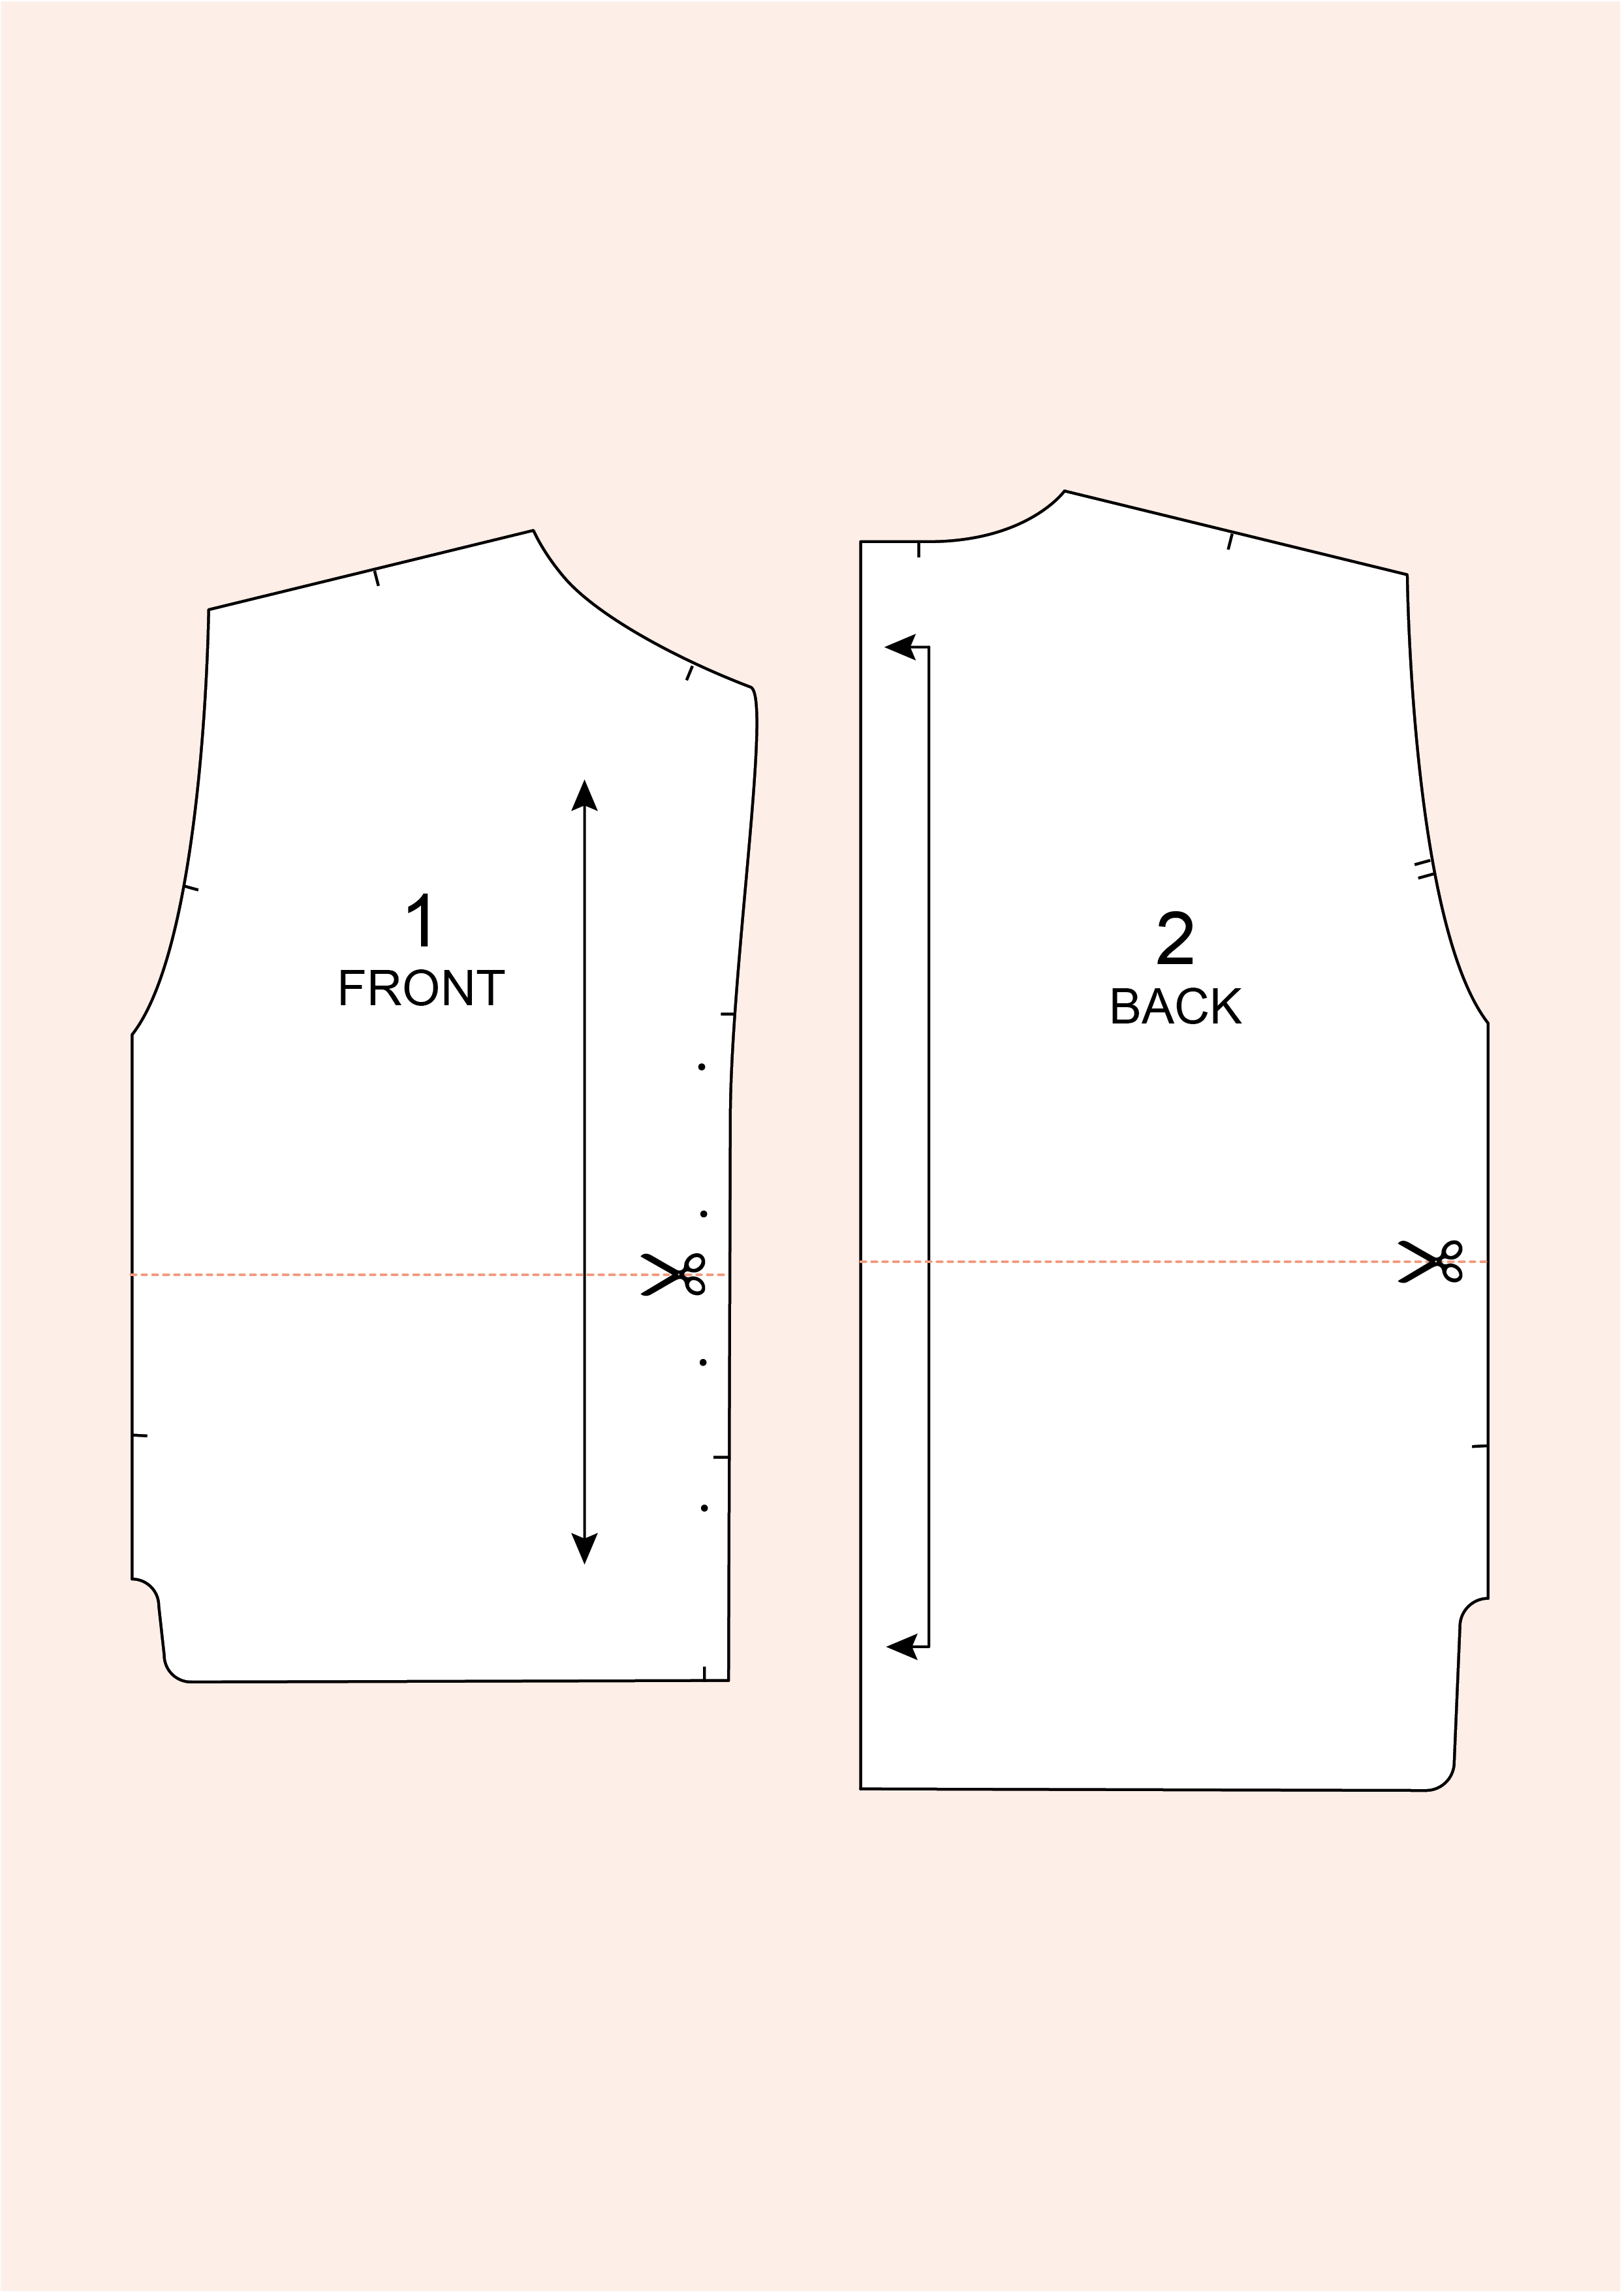
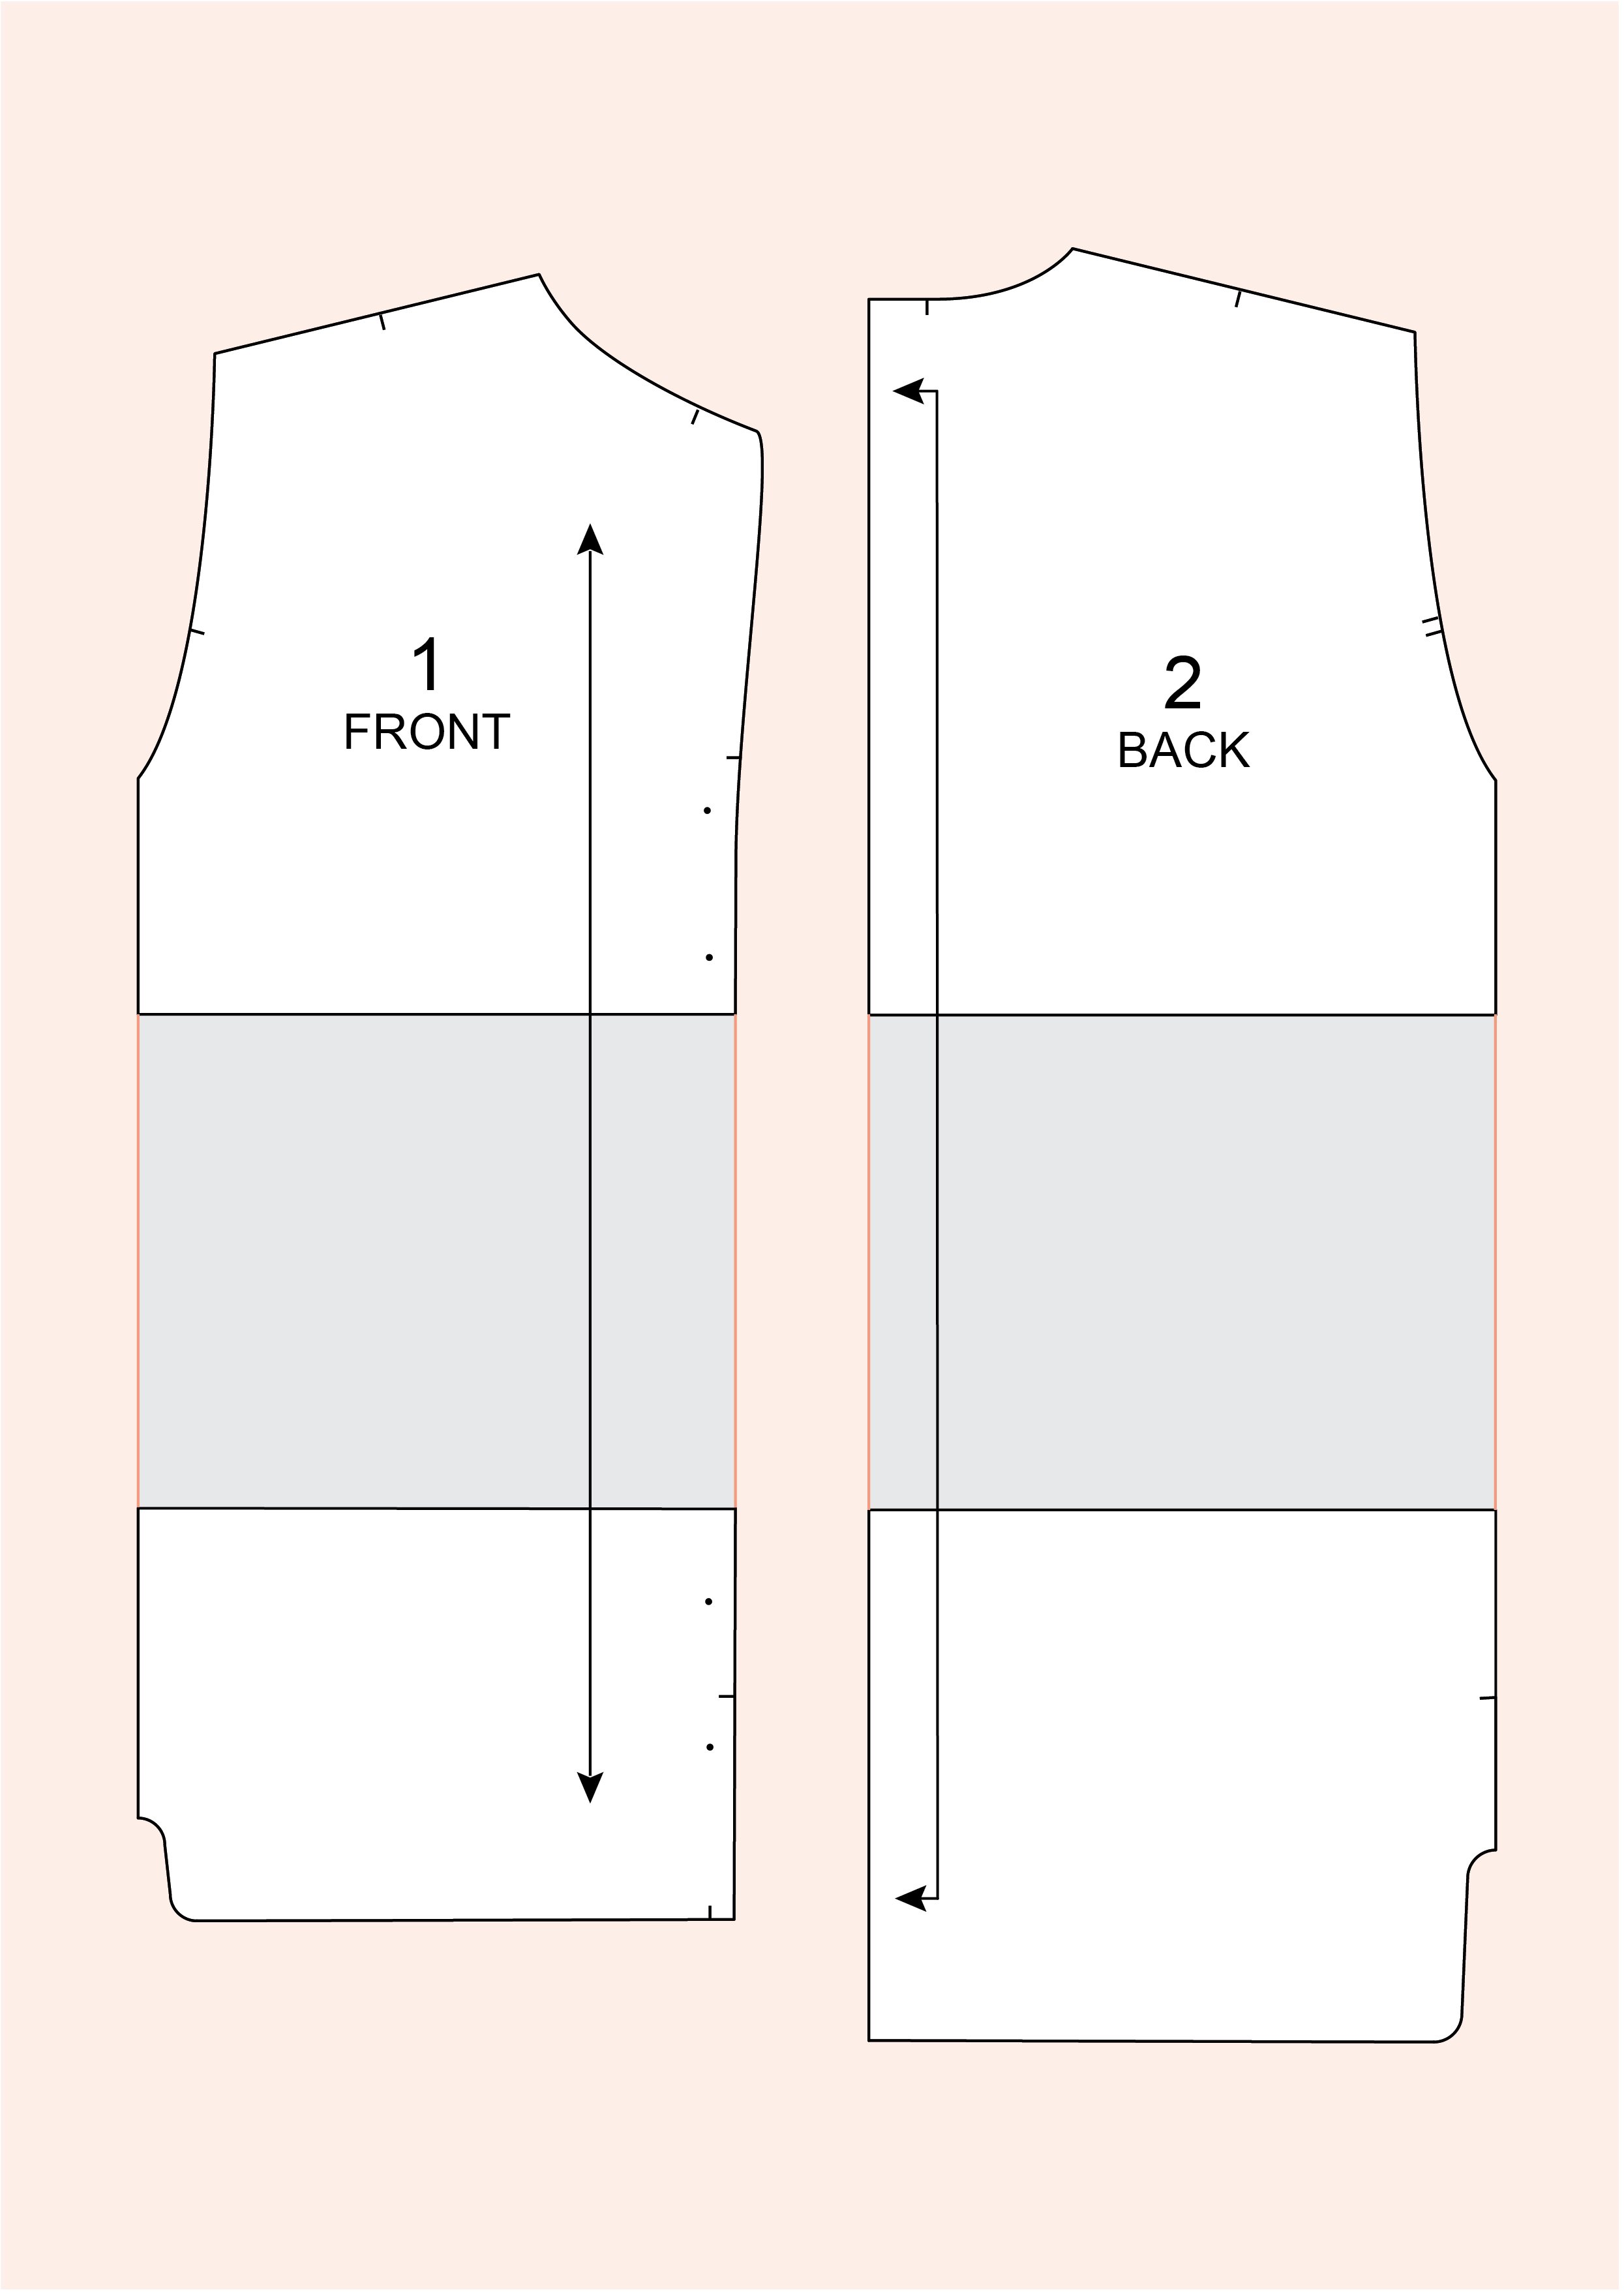
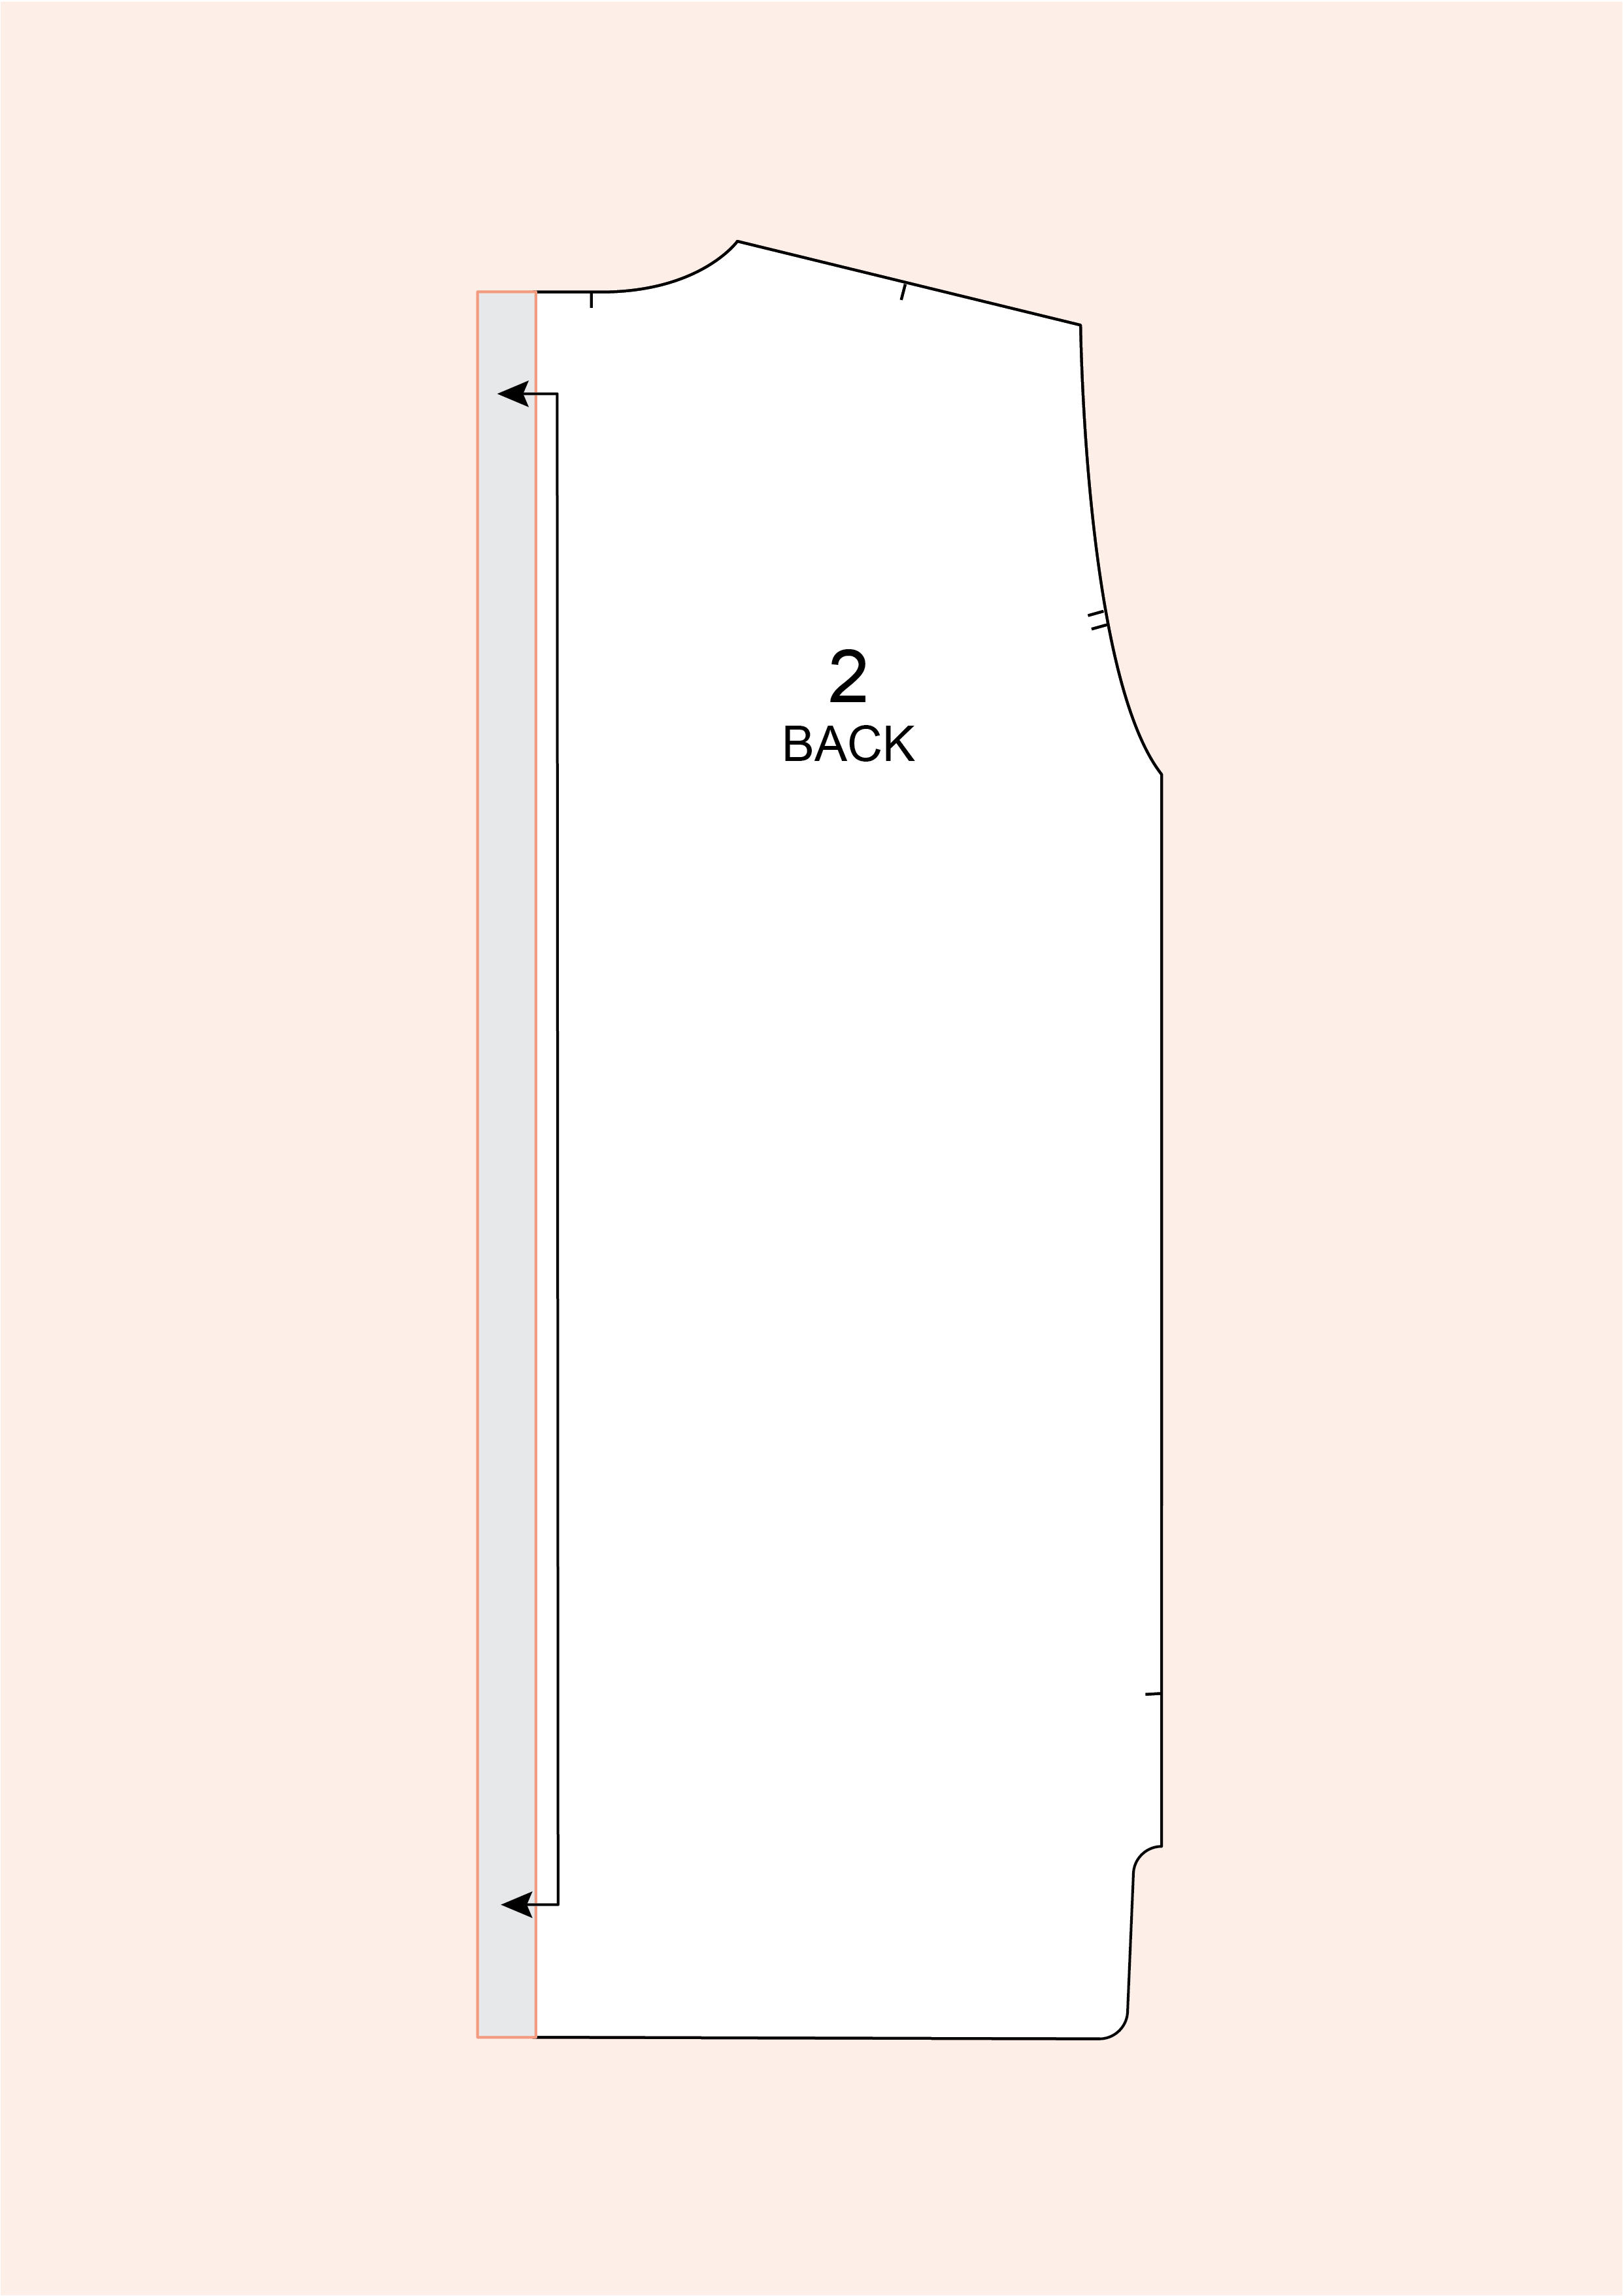
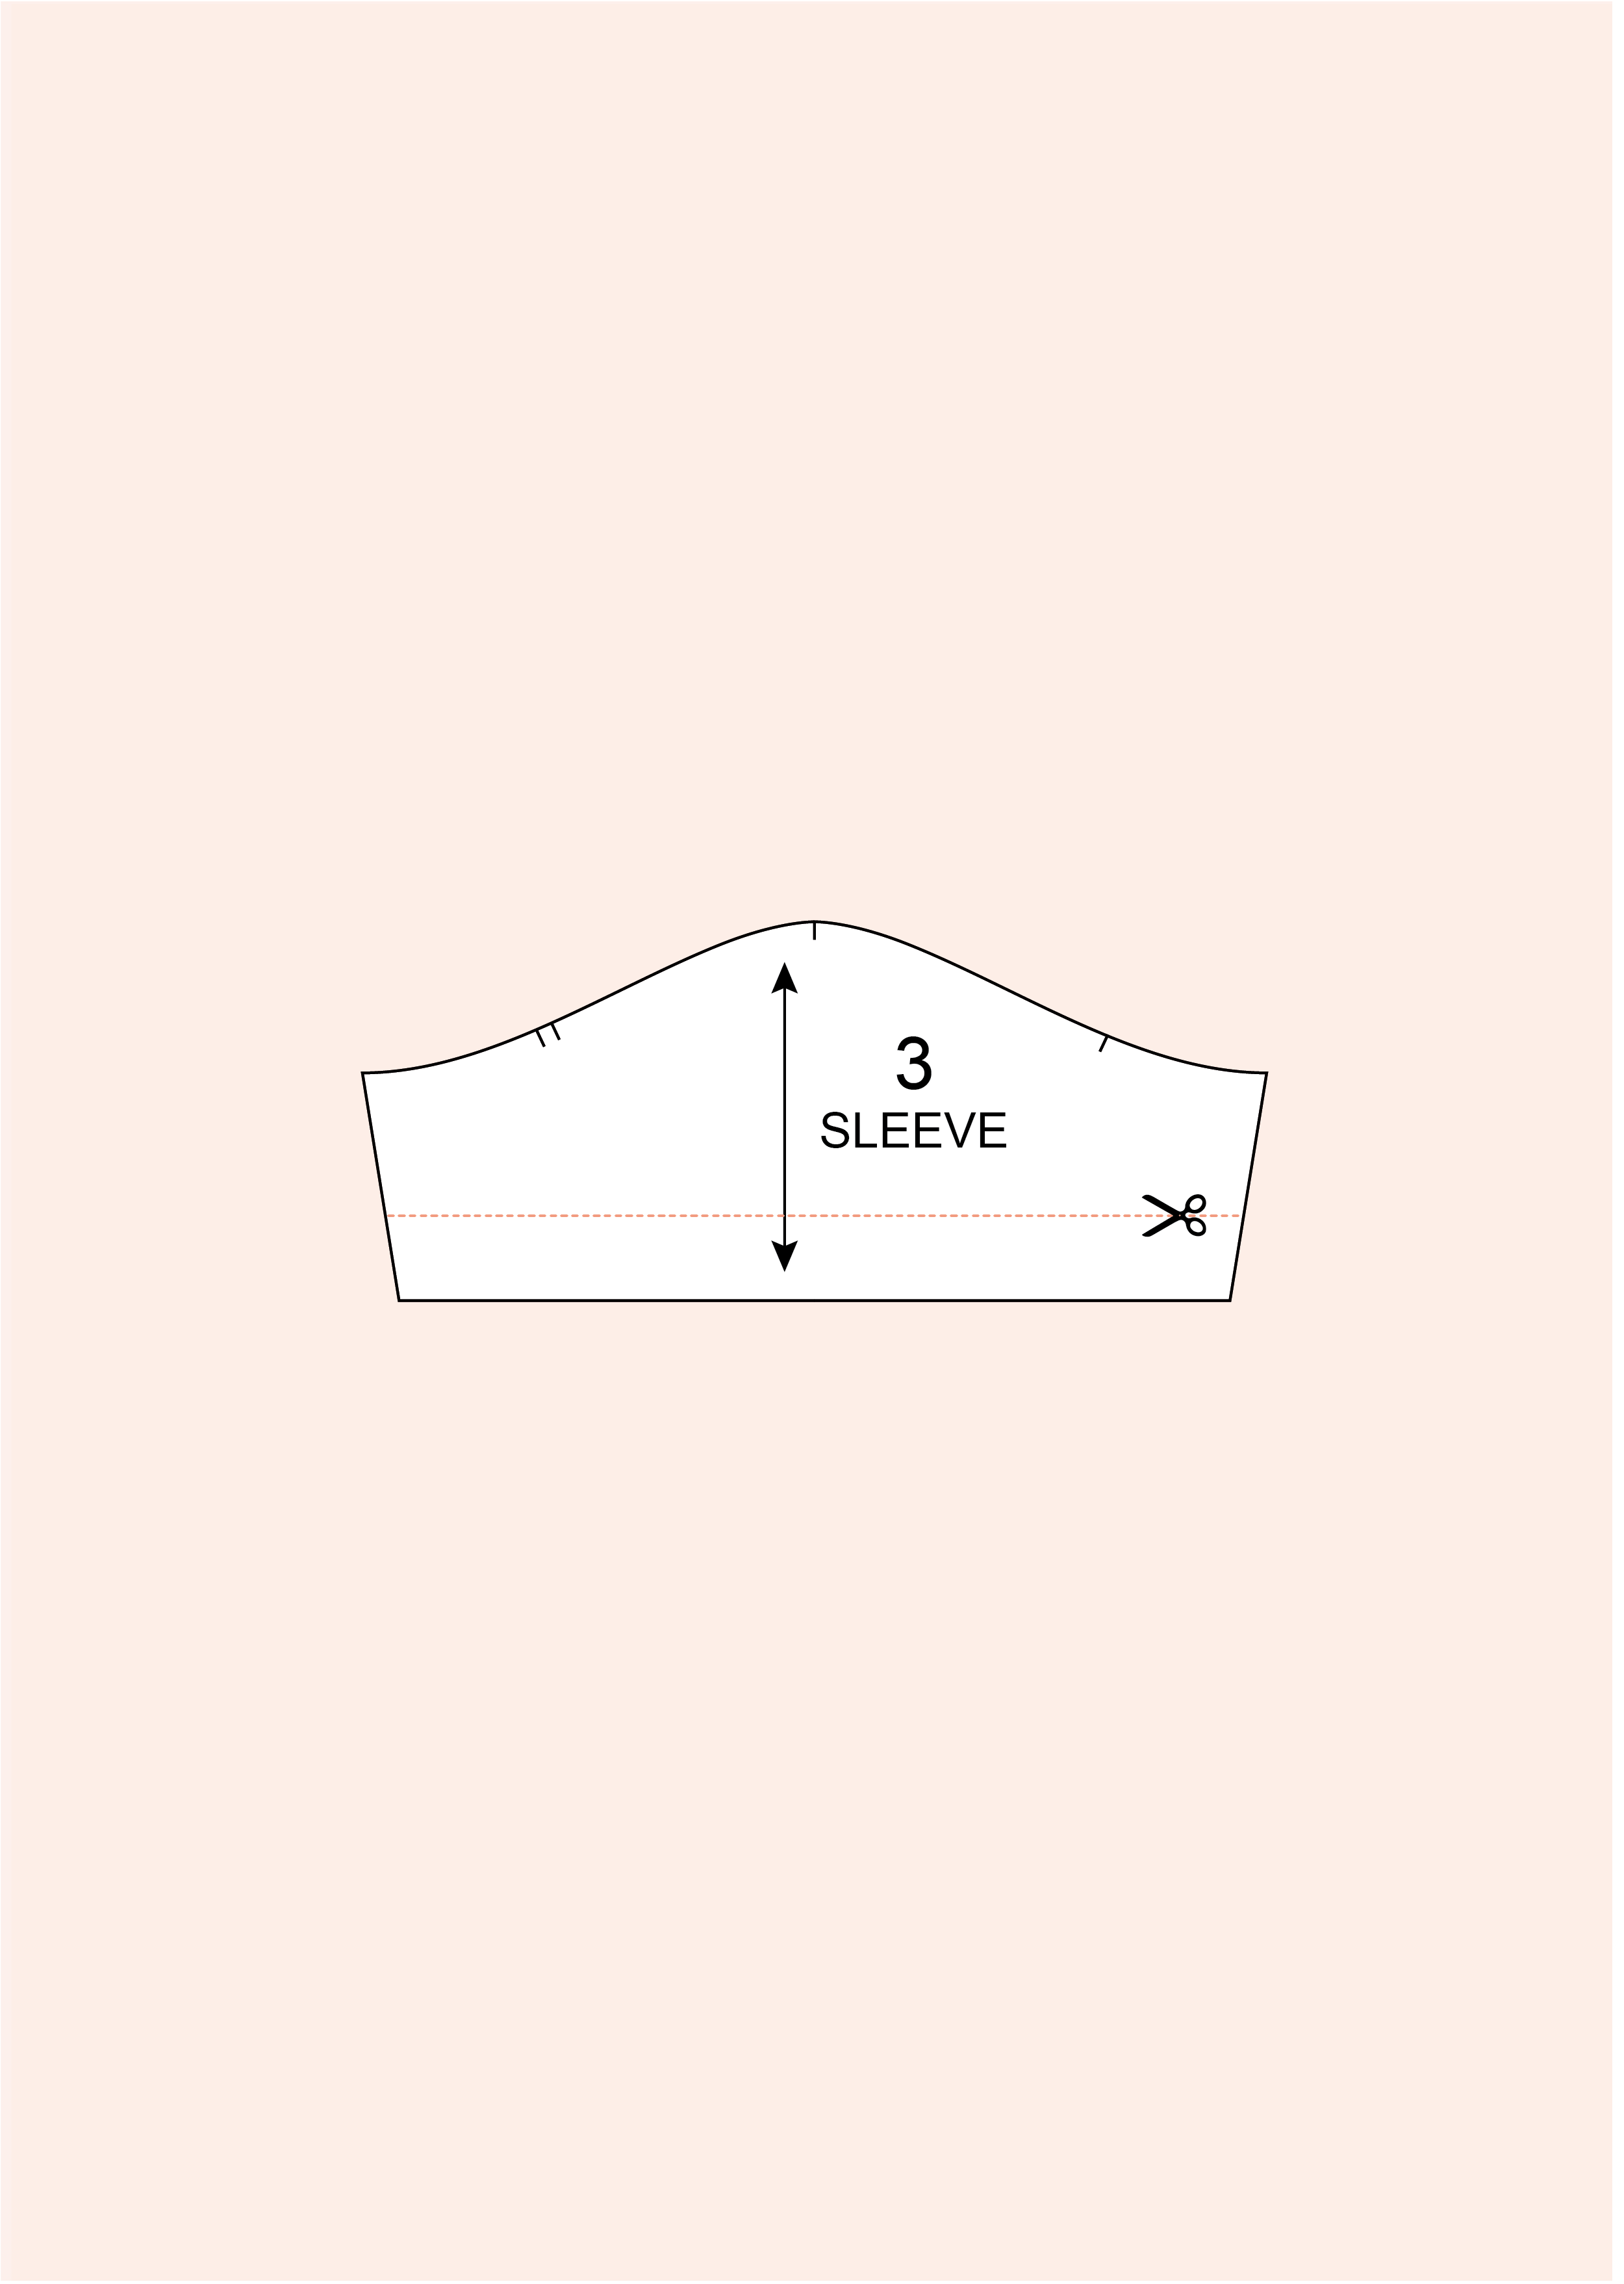
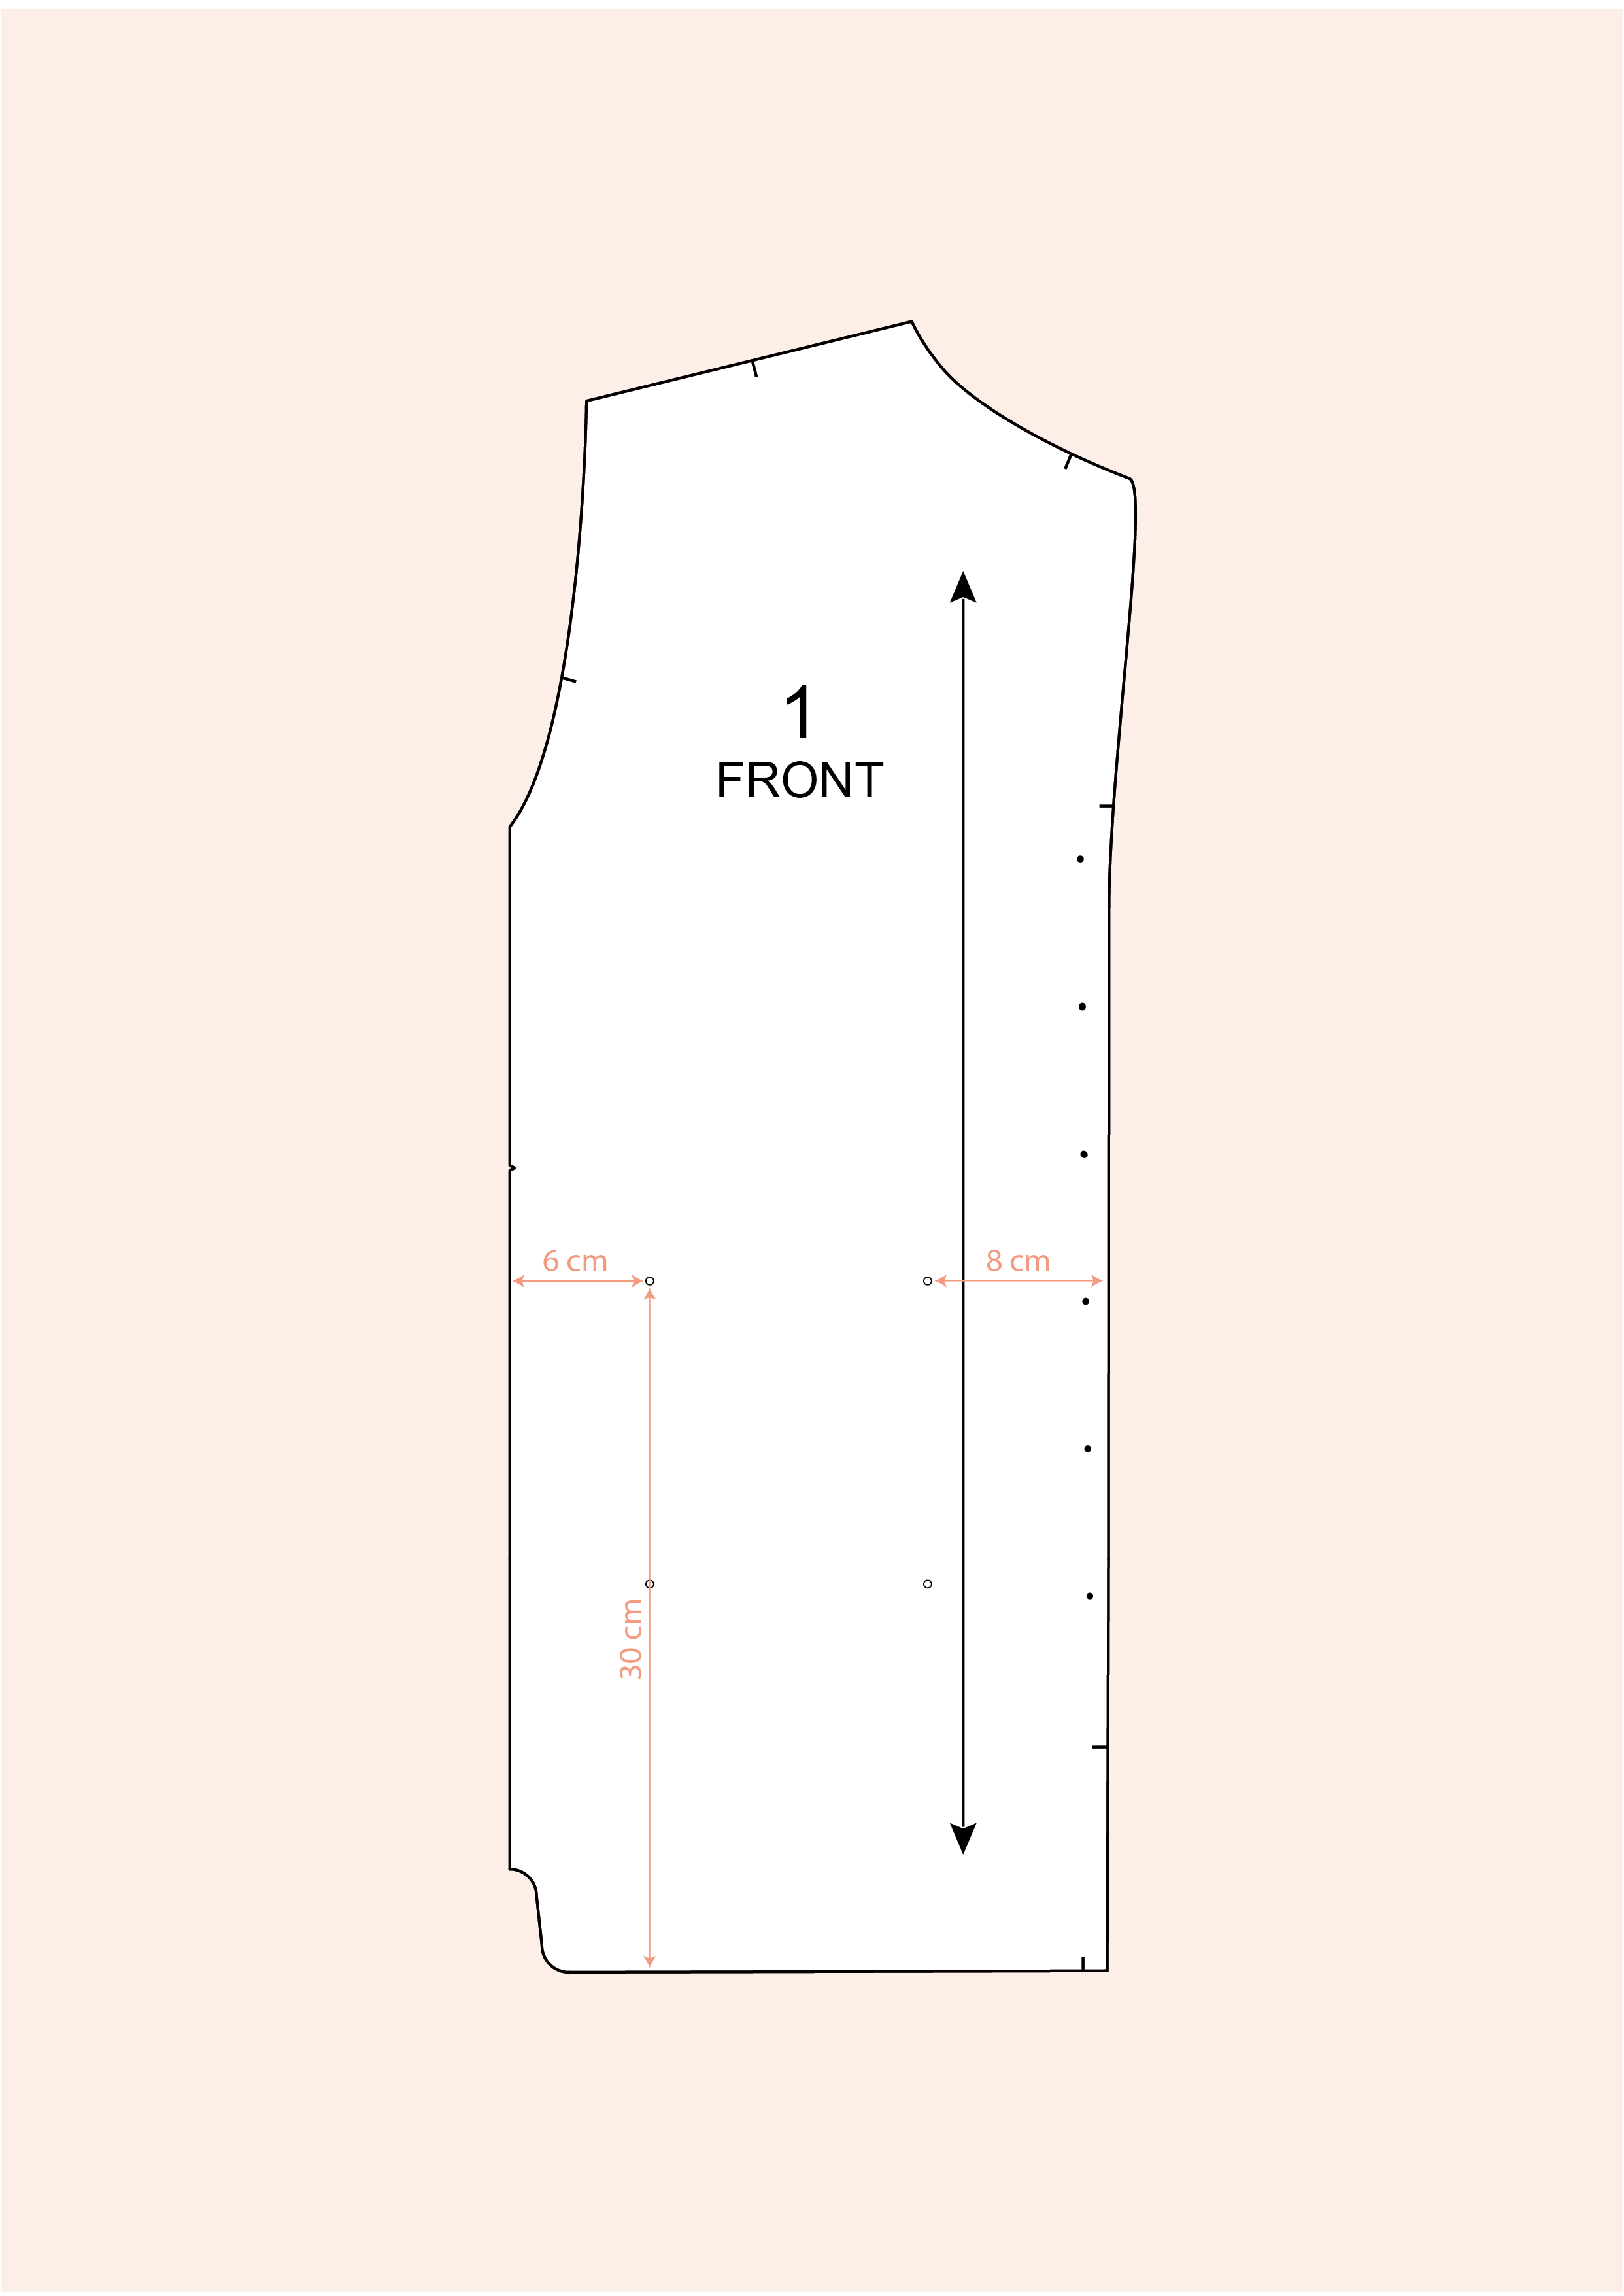
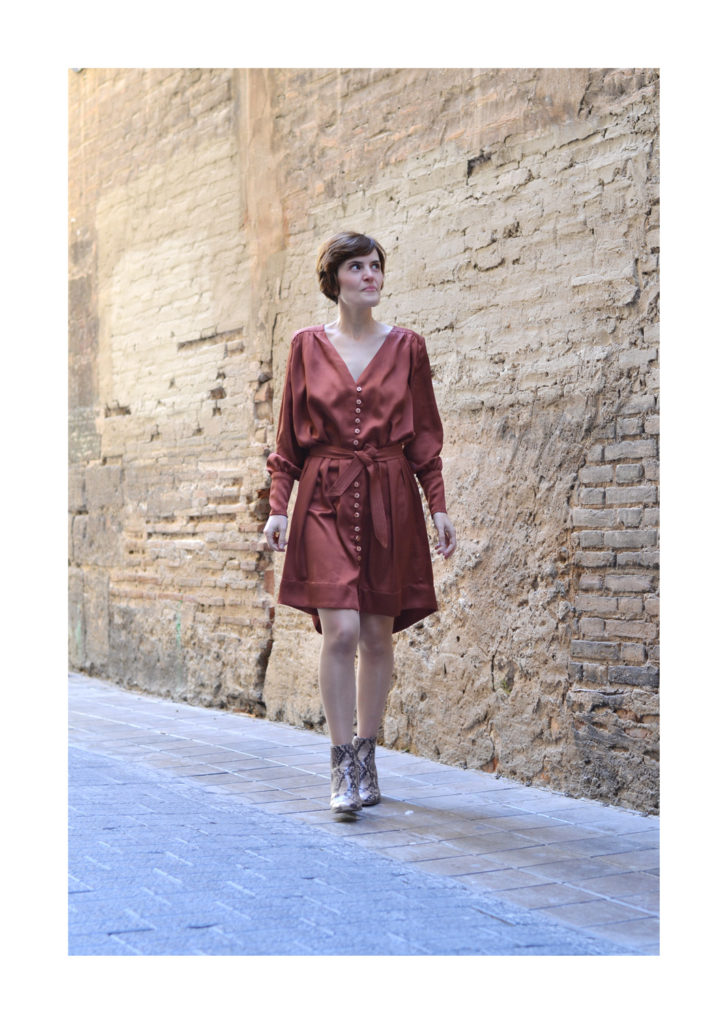
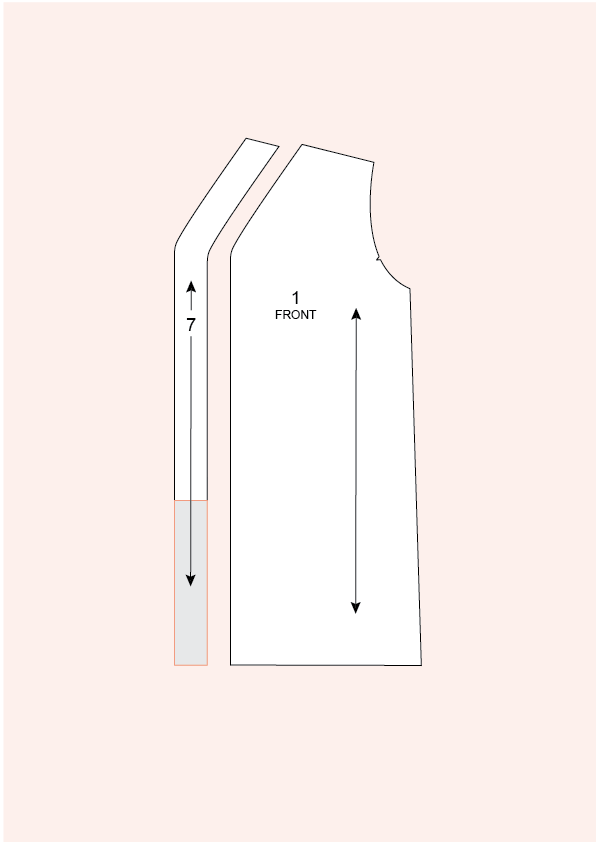
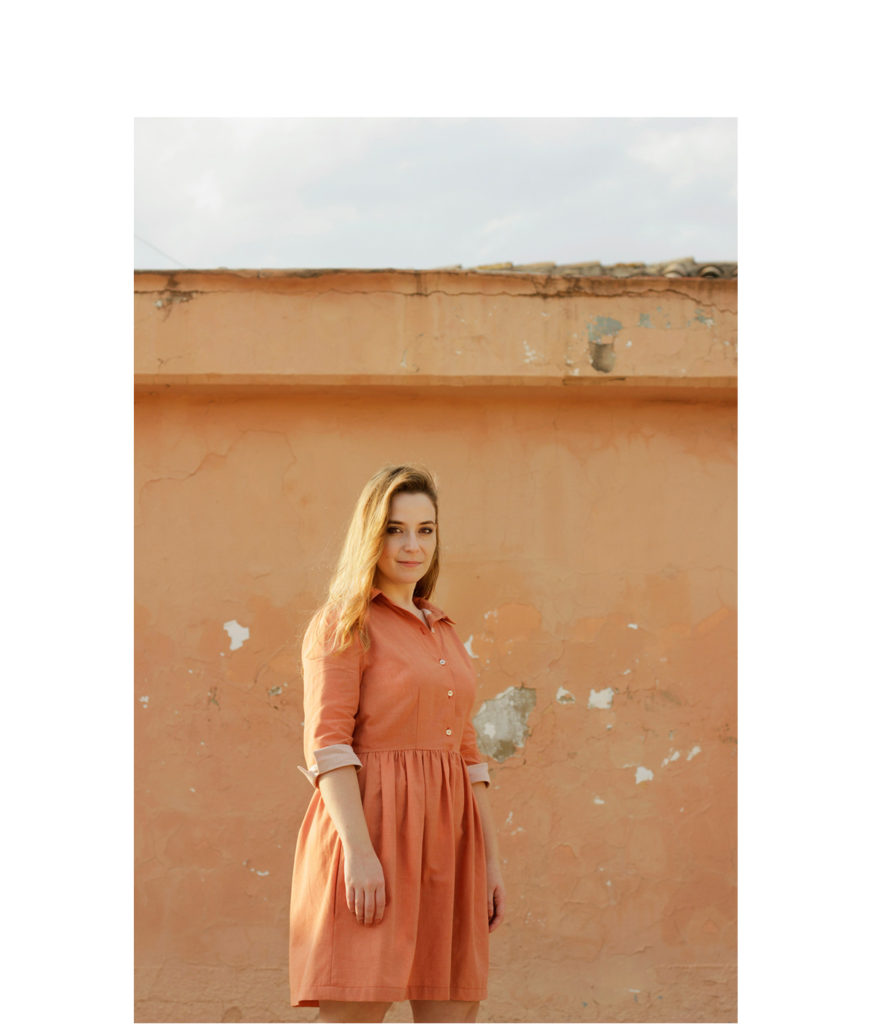
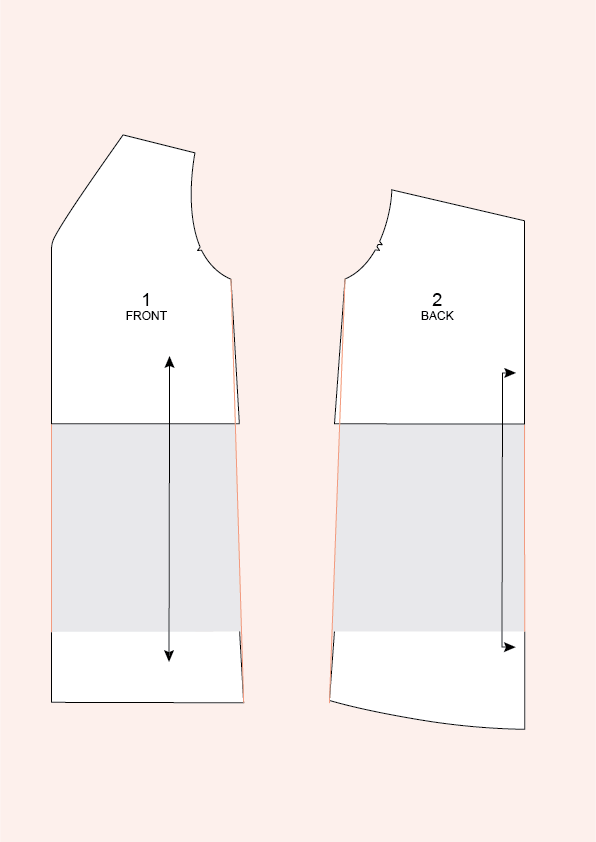
1/ Cut the front and back pieces along the cutting line. On a big piece of paper, place the pieces about 25 to 35 cm apart (or more if you want a longer dress). Draw the dress shape: trace a line from the neckline base to the bottom edge on the front and back, then from the armscye to the bottom edge.

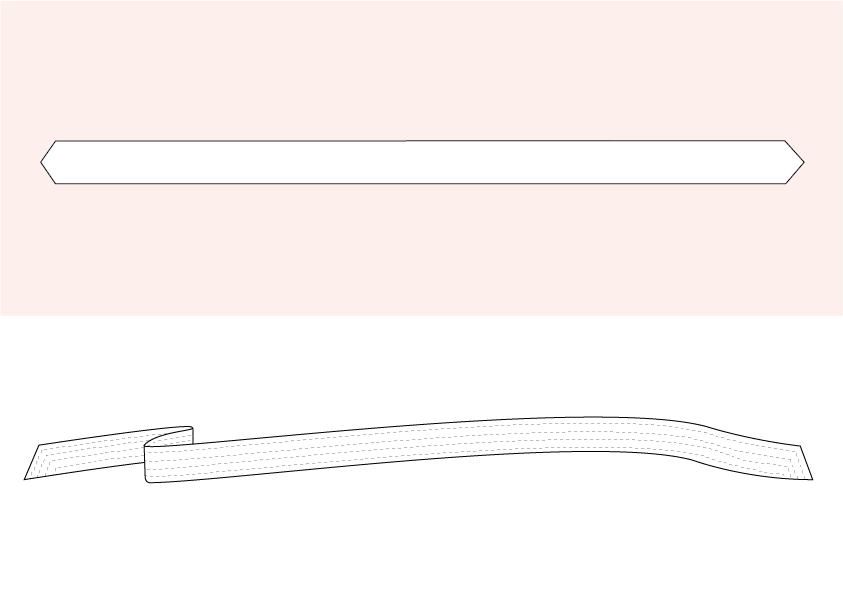
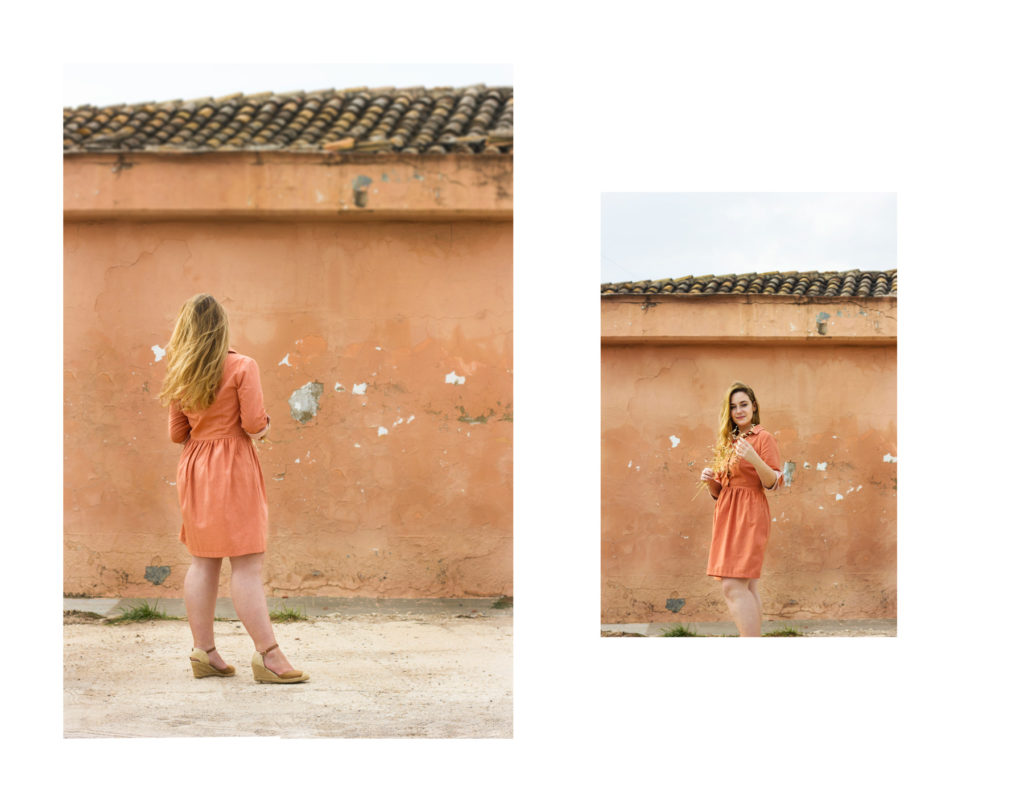
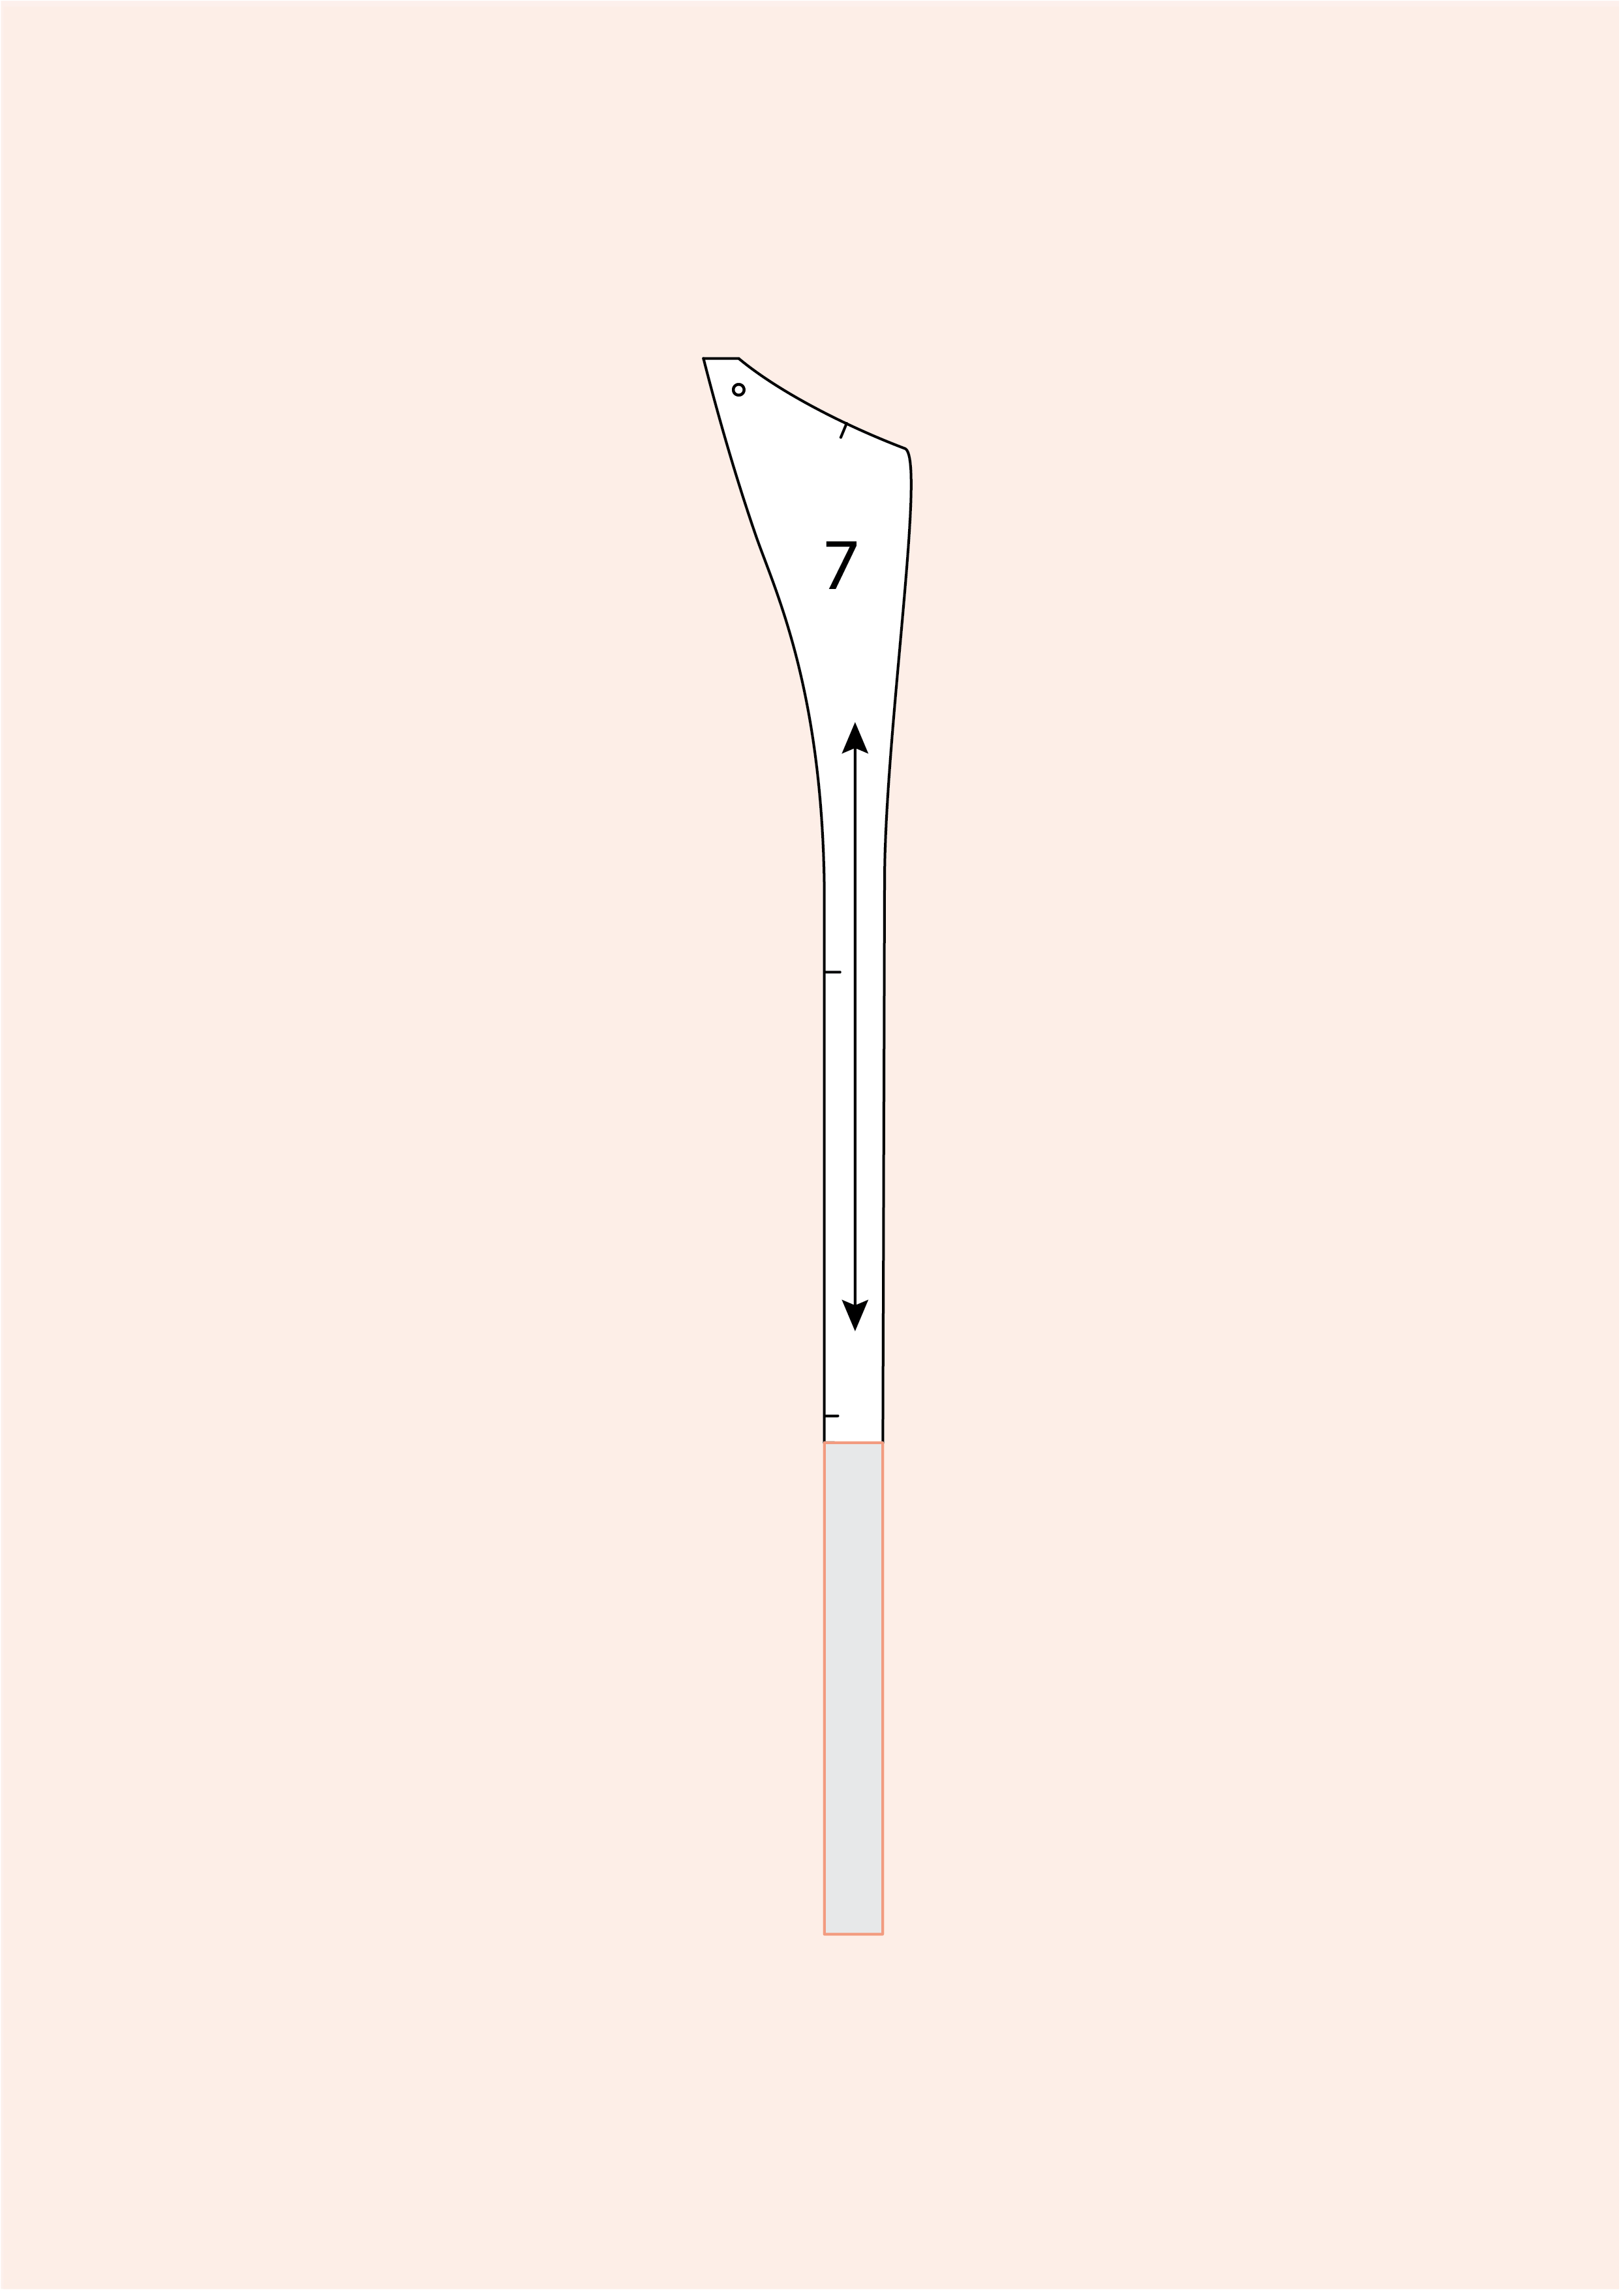
2/ Once the front and back pieces are modified, trace the hem facing at the bottom of the pieces at 5 to 10 cm above the hemline. Cut on the line and add the 5/8” seam allowances to the front and back pieces as well as the facings. Cut the front facing 4 times and the back facing twice on the fold.

3/ Lengthen the front facing (7) like the front piece (1).

4/ Make a 4 cm (1 ½”) wide belt – the length will depend on your fabric width. Once it’s sewn, you can topstitch it several times.

That’s how you change easily a Reina shirt into a Reina dress. I think I’ll do something similar with the Vera shirt pattern (Céline from @aiguille.coupon.ciseaux made it and it’s great!). When I design a new pattern, I like to think of all the modifications that can be done, whether I include them in the pattern or add them later as tutorials like this one. Playing on length (blouse into dress or dress into blouse), adding or removing some elements (collar, sleeves, belt), it allows you to really take advantage of a single pattern. I don’t like to make twice the same clothes, so instead of make various time the same pattern, I like to make a variation of the same. I think the next pattern I will transform is the Vera shirt and I can also see a skirt based on the Romero trousers. What about you ? Do you like to modify your favourite patterns ? Which ones ?

Here’s a little anecdote: as I wanted to wear this dress for New Year’s Eve, I had a very short time to sew and I decided to “forget” the washing step before cutting my fabric. “Bad Pauline!” I know that’s what you all want to say. And normally, I would say you’re right. But in this particular case, it was “good Pauline”. On New Year’s Eve, the crepe fabric was behaving perfectly, with a beautiful drape. But while taking the pictures afew days later, and after washing the dress, imagine my surprise when it clinged to me everywhere. I think that the special products they put on new fabric prevented the static electricity to make this crepe fabric being glued to me ?.

So for once, not washing the fabric prior to sewing was a good thing!

1 comment
2 FacebookTwitterPinterestEmail

Ninot is one of the very first Pauline Alice patterns. With the details like the Peter Pan collar and button bands, it’s such a sweet and pretty/preppy Little jacket. With the update, we wanted to offer a new version, this time with a more modern and casual flair. Here are some fabric and style inspiration to celebrate the launch of the updated Ninot jacket pattern! 

BACK TO SCHOOL !

1/  Flannel, Cousette

2/ Prince of Wales check, Pretty Mercerie

3/ Houndstooth, Les Tissus du Chien Vert

image sources:  Fashionista / Des petits hautsThe sartorialist


WOOL 60’S

1/ Tweed, Stragier

2/ Boiled wool, Stragier

3/ Wool, Cousette

image sources: nytimes /  The sartorialist High Low Vintage


SOFT FABRICS


1/ Textured fleece dress fabric, Atelier de la Création

2/  Faux Fur, Atelier de la Création

3/ Plain sherpa textured fleece,  Minerva Crafts

image sources: Soeur Fashionista Fashionista


– You can find the Ninot jacket pattern in printed copy or in PDF (with A4 print-at-home and A0 copyshop versions) in the shop! –

0 comment
0 FacebookTwitterPinterestEmail

Just as the Cami dress, we thought the Ninot jacket pattern could use a little « sprucing up ». We have added the missing sizes (sizes available now go from 34 to 48) and a new version as well. For those who don’t know the pattern, Ninot is a swing jacket with a large pleat in the back. It has a shoulder yoke, welt pockets and long tailored sleeves.

View A is short and entirely lined. The sweet Peter pan collar and the back and sleeves button tabs give it a classic look.

Whereas view B is more modern with its mid-thigh length and round neckline. Perfect for mid-season, it’s not lined but finished with bias binding.

We chose to simplify a little bit this pattern : we replaced the bound buttonholes by machine-made buttonholes (but if you feel like it, you can always add bound buttonholes following the tutorial we wrote a few years ago) and we joined some pieces together (front and back shoulder yokes are now one, as for the front and the facing). As for the instructions, we rewrote them according to these modifications but the jacket basis is still the same so no surprises.

– You can find the Ninot jacket pattern in printed copy or in PDF (with A4 print-at-home and A0 copyshop versions) in the shop! –


You already have the Ninot Jacket pattern and would like to receive the updated version? That’s easy, here are the different options:

  • You bought Ninot in PDF in our new shop: connect to your account and download the Ninot file, it’s already updated.
  • You bought Ninot in PDF in our old shop: send us an email at info@paulinealicepatterns.com with the order number or a copy of the confirmation email if you have it (if not, your name and surname will do). We will send you the PDF pattern by email.
  • You bought a printed copy of Ninot in our shop (new or old): send us by email the order number (or your name and surname). We will send you the PDF pattern by email.
  • You bought a printed copy from one of our stockists or in a fair: send us by email a ticket or if you don’t have it, a picture of your pattern. We will send you the PDF pattern by email.
1 comment
0 FacebookTwitterPinterestEmail

The Camí dress is the first pattern I designed five years ago (pfff… time goes by so fast!). I think it was highly time to update it and add the two sizes that were missing compared to the other patterns. We even added a new version!

As you can see, view A is still the same. We kept the original as it was with buttoned bodice, shirt collar, gathered high waist skirt with inseam pockets, side zipper and ¾ length sleeves. It’s one of our most made patterns as it’s a classic design with just a hint of retro. It looks nice on everydoby and matches a great variety of fabrics.

We wanted to add a new version for the relaunch of the Cami dress pattern. With the same base, I made a variation last summer when I was pregnant and I really liked how the dress looked. Without darts and a empire waist, we get a more casual shirt dress. It’s completed by short sleeves, a small chest pocket and the whole front buttoned up, it’s so easy to wear. With the same pattern, you can make a retro fitted shirt dress or a more relaxed version. I hope you’ll like this Cami 2.0!


– You can find the Camí Dress pattern in our shop in printed copy of PDF downloadable. –


You already have the Cami dress pattern and would like to receive the updated version? That’s easy, here are the different options:

  • You bought Cami in PDF in our new shop: connect to your account and download the Cami file, it’s already updated.
  • You bought Cami in PDF in our old shop: send us an email at info@paulinealicepatterns.com with the order number or a copy of the confirmation email if you have it (if not, your name and surname will do). We will send you the PDF pattern by email.
  • You bought a printed copy of Cami in our shop (new or old): send us by email the order number (or your name and surname). We will send you the PDF pattern by email.
  • You bought a printed copy from one of our stockists or in a fair: send us by email a ticket or if you don’t have it, a picture of your pattern. We will send you the PDF pattern by email.
0 comment
4 FacebookTwitterPinterestEmail