Home Search
Search results for

"eliana"

Maxi Eliana

by Pauline Alice
maxi-eliana-sewing-pattern-1
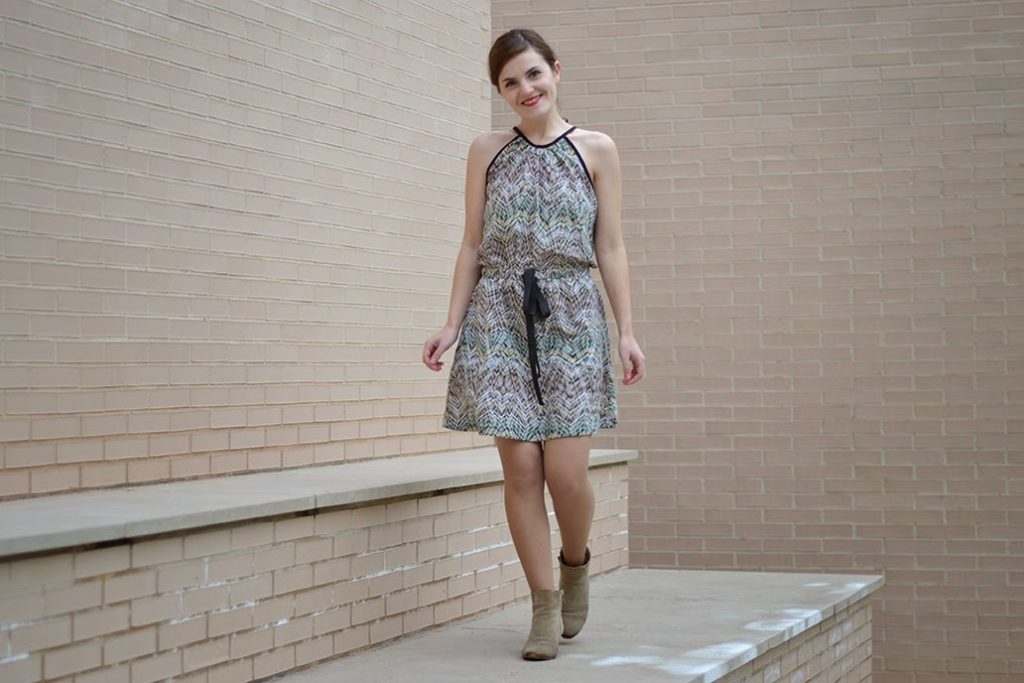
I wanted to show you this dress since I made it for the CSF fair in Paris last month. I teamed up with Henry Henriette, a pretty fabric and notions store in Nantes (they also sell online: here) as we shared our booth and we were all wearing Pauline Alice x Henry Henriette outfits.
maxi-eliana-sewing-pattern-2maxi-eliana-sewing-pattern-3
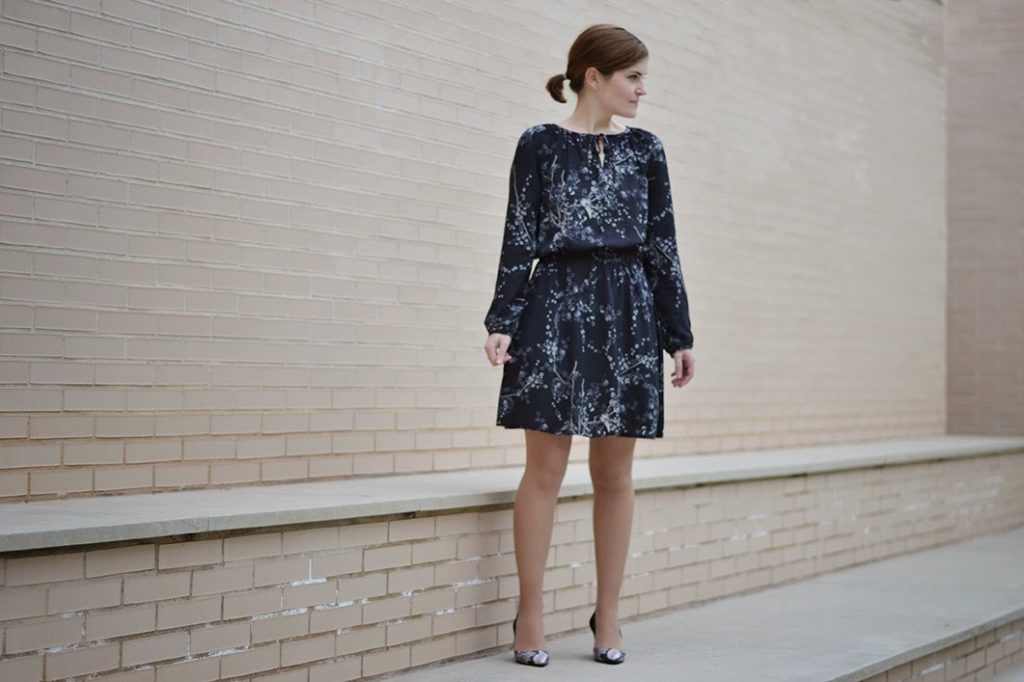
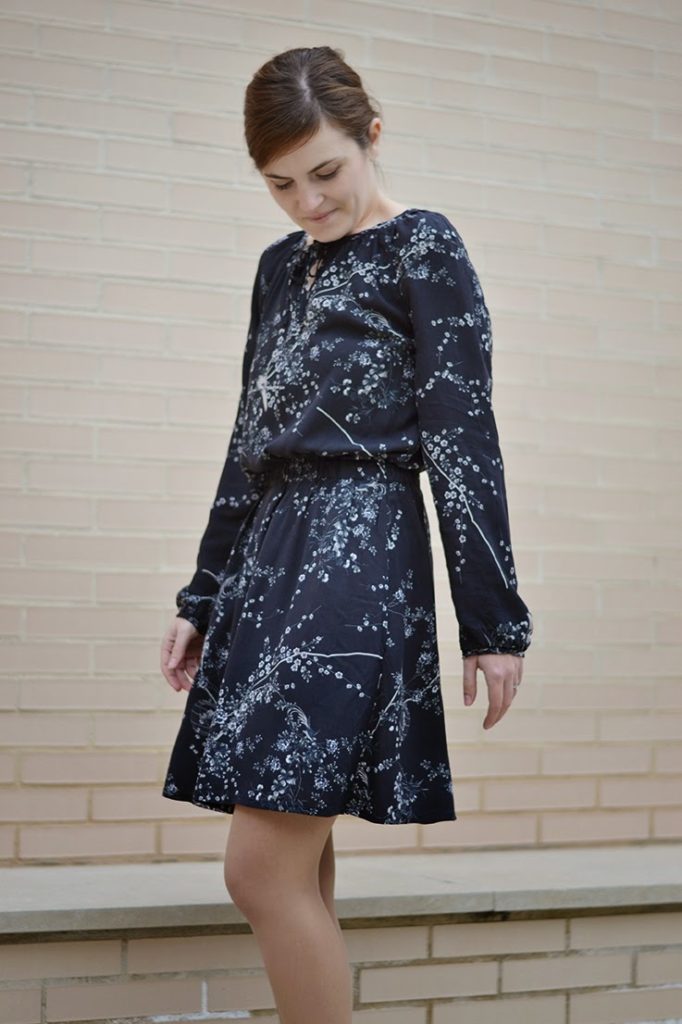
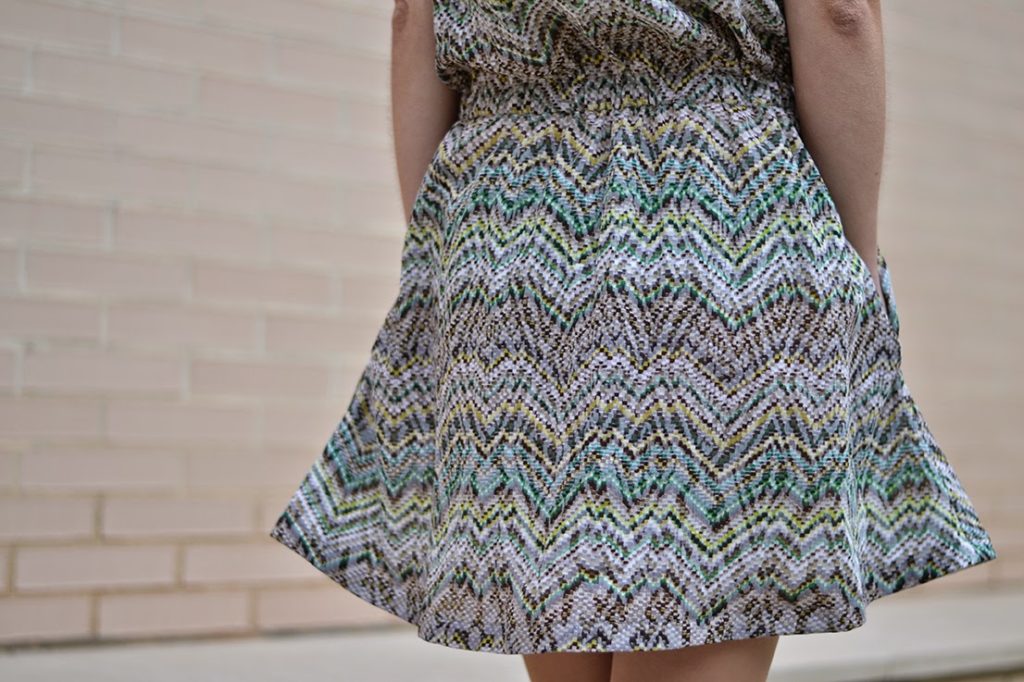
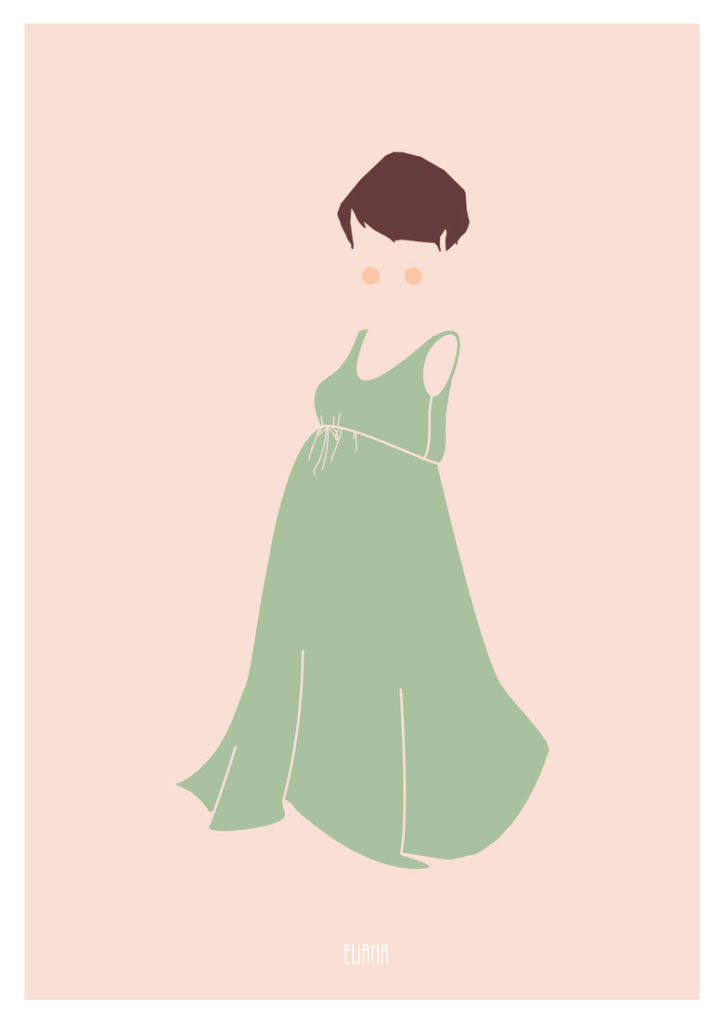
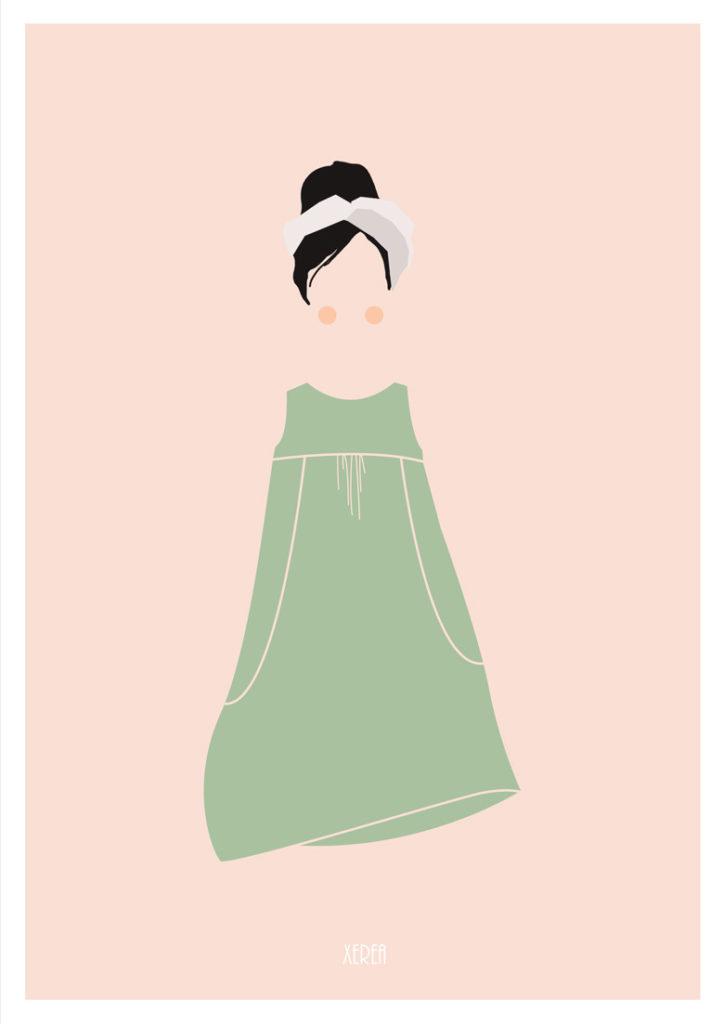
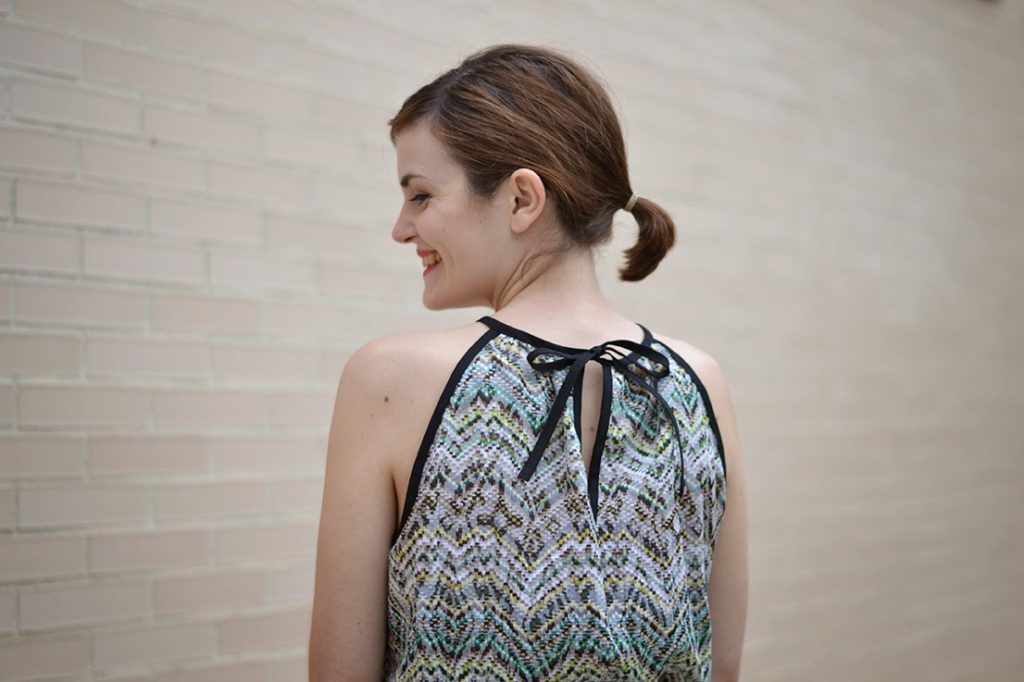
I made this Eliana dress in a soft rayon fabric, perfect for fall. The fabric drapes so nicely, I love walking in this dress as the skirt moves so beautifully.
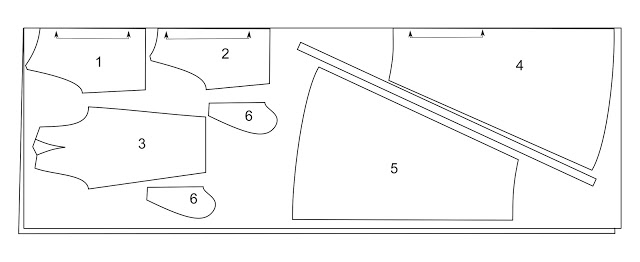
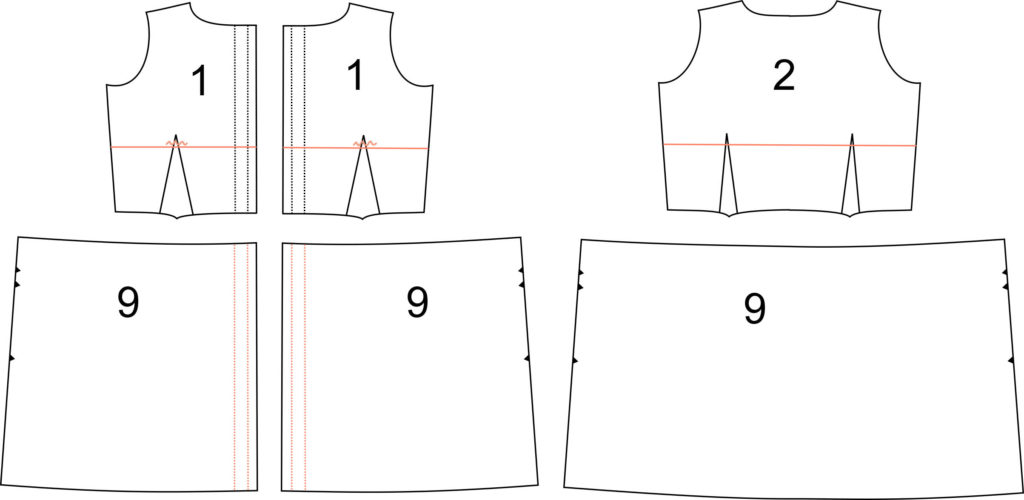
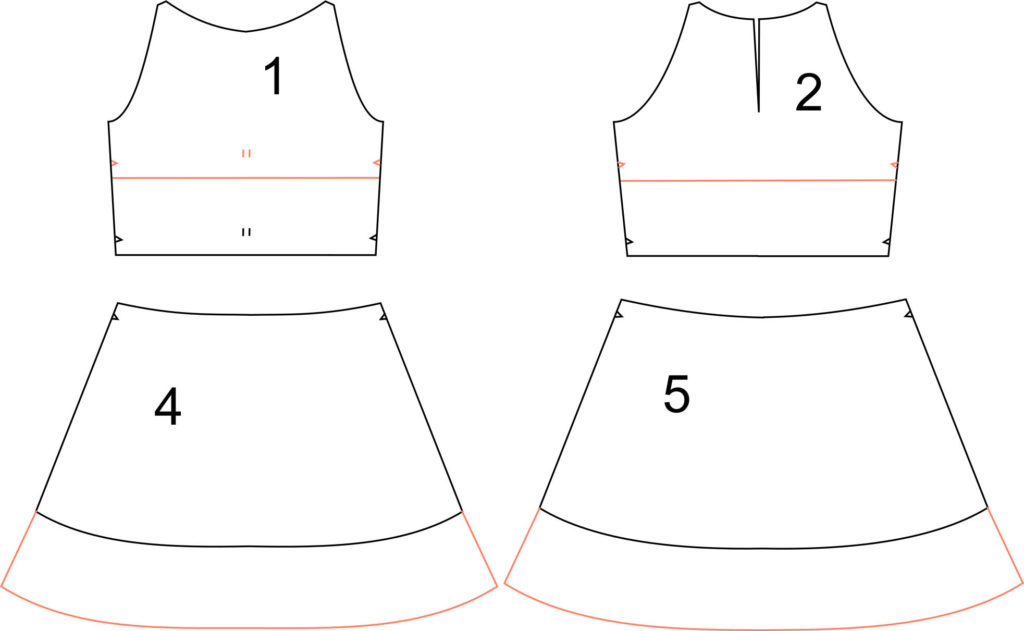
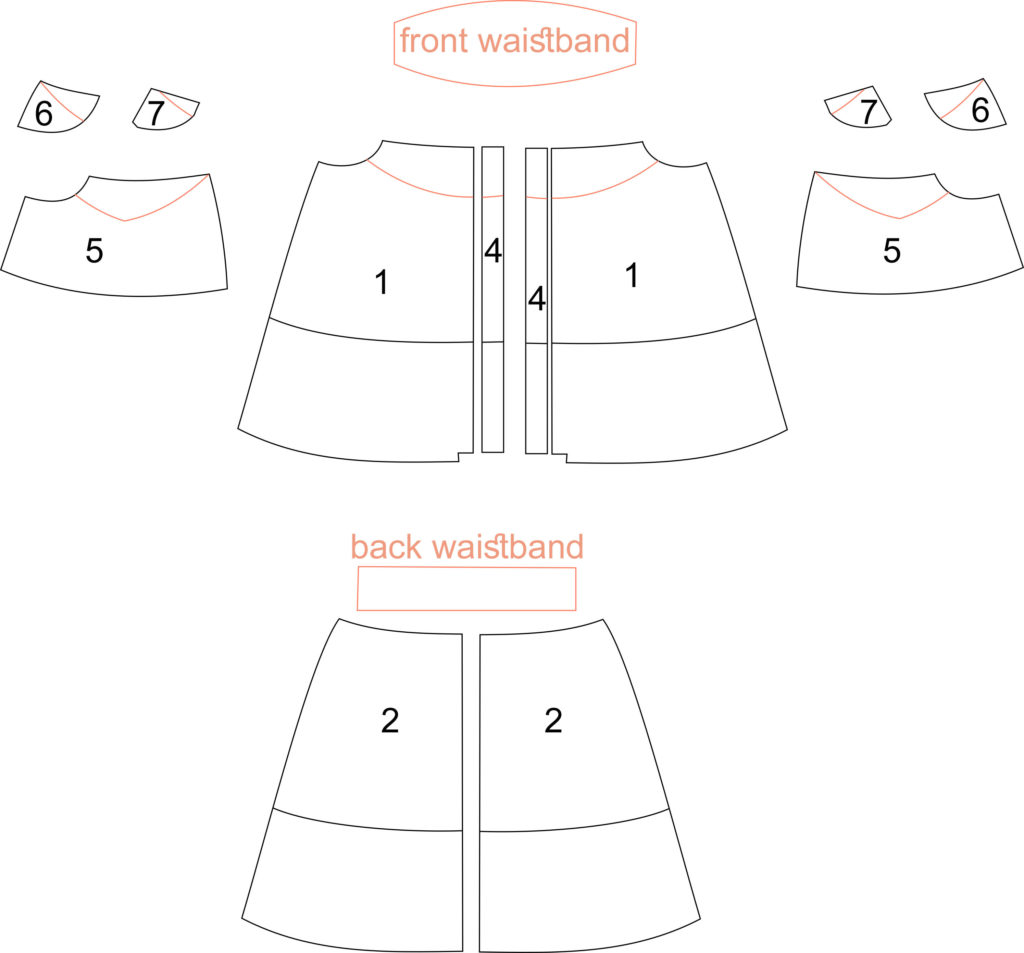
To make this variation of the Eliana dress pattern, you just need to lengthen the skirt pieces. For mine, I added 50 cm to the skirt hem and widened the skirt to use the whole fabric width. In order to keep the fabric length recommended, I cut the skirt back piece in two instead of on the fold and planned quite ingeniously the layout. But I’m happy to report that I was able to make the maxi length version in the original yardage (ok, I’m quite short so it might have helped). Here is the layout I used:

maxi-eliana-sewing-pattern-4
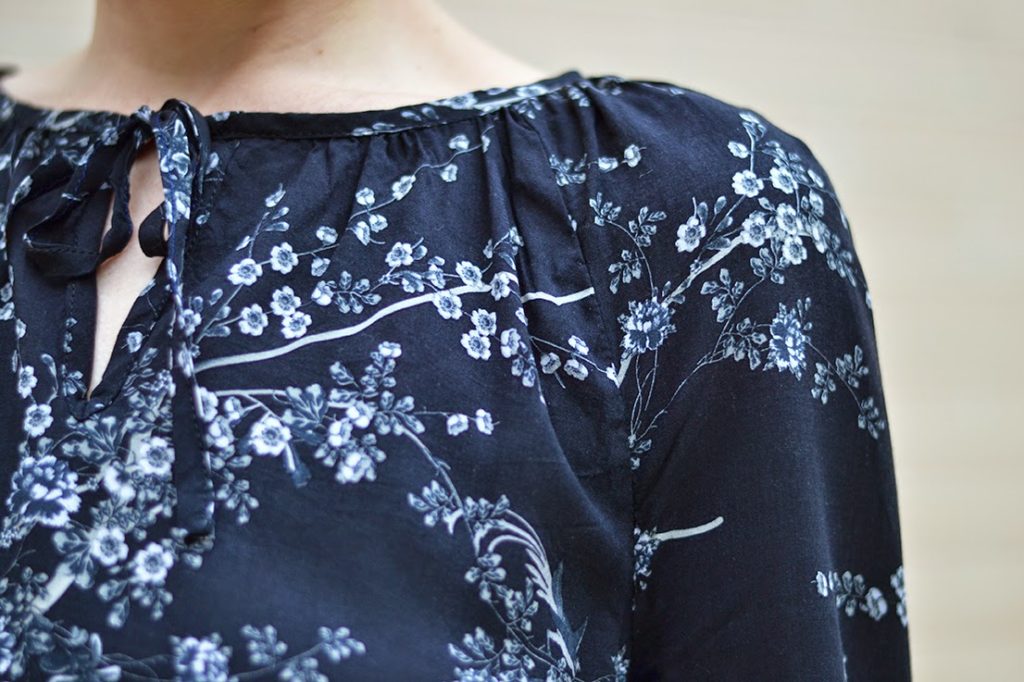
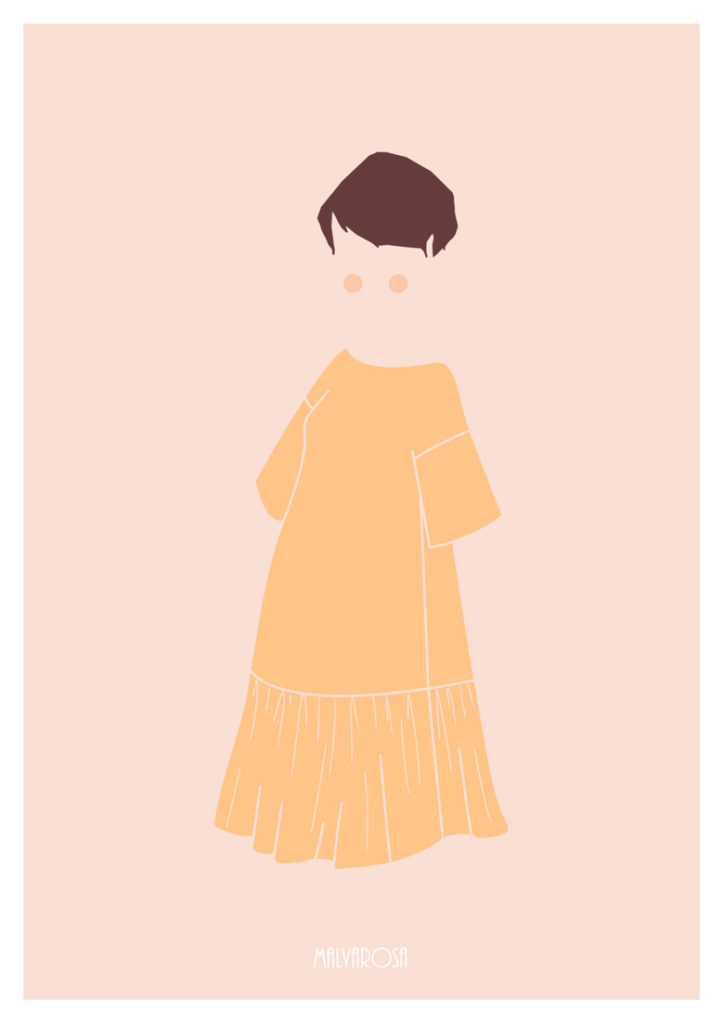
For the rest, I followed the instructions: bias binding for the neckline, elastic for the waist, pockets. I love the bohemian vibe of this maxi Eliana.

maxi-eliana-sewing-pattern-5Have a great week end,

pauline-sewing-pattern

19 comments
2 FacebookTwitterPinterestEmail

It feels like yesterday I was releasing the Quart coat and here I am, with a new pattern for you! Well, truth be told, I don’t work super fast, but this new pattern was designed and printed at the same time as the coat, that’s why I’m able to offer it to you so soon.Please welcome the Eliana dress:

Eliana is the kind of dress you can make so many times and it will not look the same: depending on the fabric you choose and the variations, you’ll go from chic to casual, winter to summer, one color to contrasting hues…
new-pattern-eliana-dress-sewing-1new-pattern-eliana-dress-sewing-2I’ve been making samples with elastic waistband and I loved it so much I knew I needed to design a pattern with that detail. On the
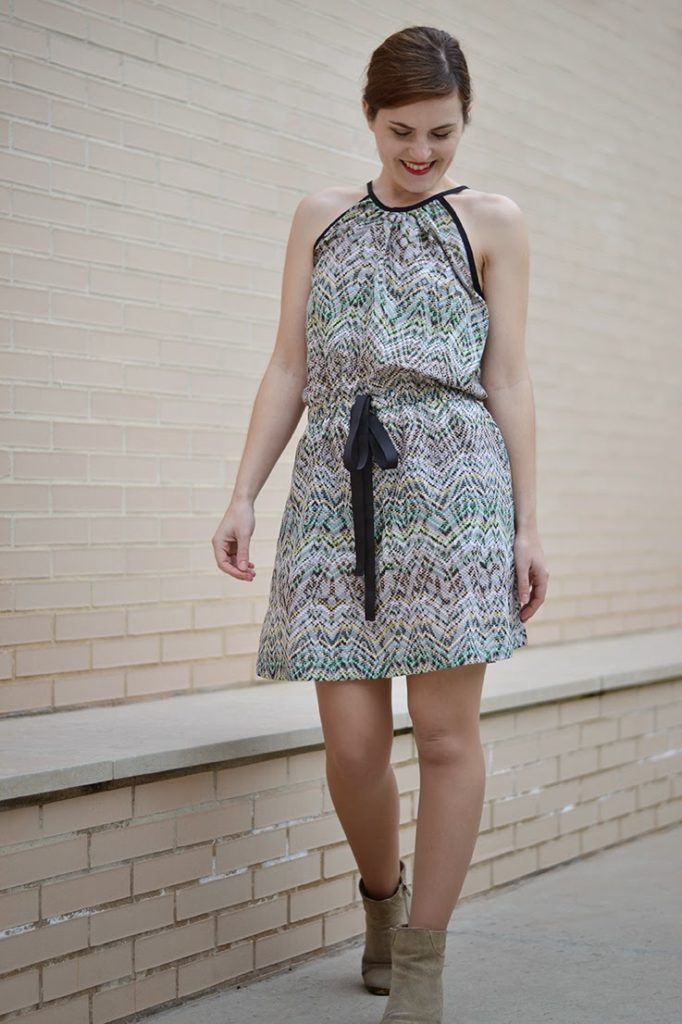
 Eliana dress, you can choose to have a comfortable elastic encased waistband or add a ribbon to tie the dress around your waist.
new-pattern-eliana-dress-sewing-4
 new-pattern-eliana-dress-sewing-3
On the very first sketches of the Eliana dress, the model was supposed to be for summer with only the sleeveless version. But soon it seems like raglan sleeve options were perfect to get a versatile pattern. And because comfort and practicality are essential, the dress has inseam pockets.
new-pattern-eliana-dress-sewing-5
Easy to make with no zipper or button, you can choose to make the front or back opening and just tie it or let it loose. Use contrast binding or self fabric as an original detail to frame the softly gathered neckline.

new-pattern-eliana-dress-sewing-6new-pattern-eliana-dress-sewing-7

The flirty skirt hits just above the knee, perfect to wear either with heels or flats.
The sleeve version (View A) is made in black rayon voile with a grey japanese print (trees and birds).
The sleeveless version (View B) is made in cotton voile with an ethnic print, black bias binding and black grosgrain ribbon.
Both fabrics were purchased at The Sweet Mercerie.
new-pattern-eliana-dress-sewing-8I hope you like the Eliana dress. Which version is your favourite?
Buy the Eliana dress pattern, in print or PDF, at the shop!

signature1_editado-1


69 comments
2 FacebookTwitterPinterestEmail

Today I’m writing a special post: how to adapt your Pauline Alice patterns when you’re expecting!

You may have noticed (or not) that I’m expecting a baby for Fall (thanks to everyone who congratulated me!). My closet is quite limited right now as most of my clothes are fitted and high waisted, so I need new outfits more adapted to my growing belly. I thought it would be nice to show you how to adapt non-maternity patterns quite easily with pretty illustrations and diagrams:


CAMI DRESS

This is a very easy modification: you just have to shorten the front and back bodice pieces of the Cami dress pattern.

I would then remove the back darts and replace the front ones by gathers. To make the dress easier to put on, I would remove the side zipper and cut the front skirt piece in half and continue the bodice buttonband on the skirt. As the waistline is now under the bust, I would remove the pockets but they can also be lowered if you wish to keep them.


CARME BLOUSE & PORT SHORT

In the Carme blouse Sew-along (see it here on youtube), I had already shown how to make a maternity version.

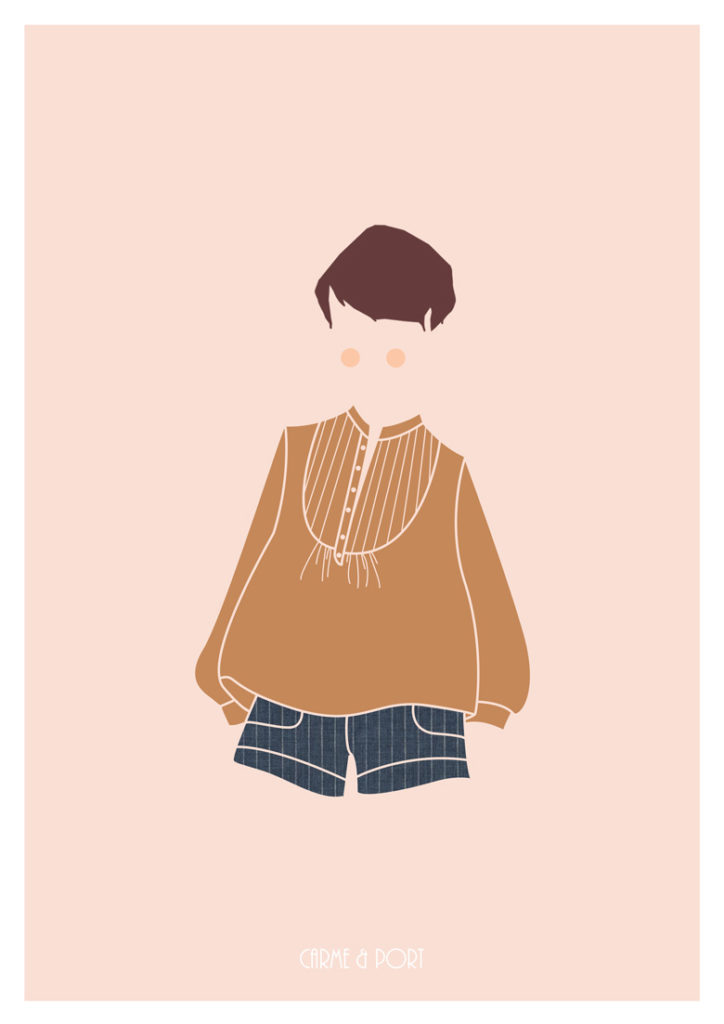
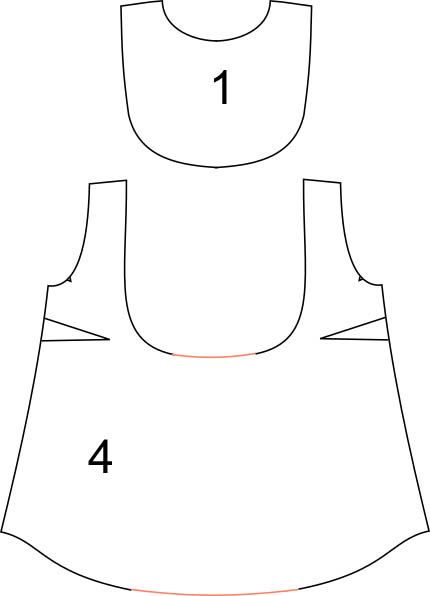
You just need to add fabric on the bodice centre front that will later be gathered and stitched to the front yoke as the original version.


The Port short is a model that will ask for a more complex modification.

You’ll need to add a jersey waistband to the short. You need to redraw the front pieces (front and pockets). Draw a curve from the side to the center front (the seat is shortened by about 15 cm – this measure will vary depending on your belly, make sure to make a toile before). You won’t need the zipper fly pieces as the shorts will be pulled on, fly will only be decorative. Place the pockets (view A or B) over the new front piece and draw the curve on the pockets as well.

For the jersey waistband, we’ll cut two front and two back waistbands (size is to be adapted to your belly). The bottom edge should measure the same as the short’s new waistline with the cruve. Stitch the front and back waistbands at the sides and then both waistbands together at the top edge. Turn with the right sides out and stitch a line about 2 cm below the top edge to created a channel and insert an elastic. Stitch the waistband to the short. You can now pull the short on and the jersey waistband will be very confortable all the way through pregnancy.


MALVAROSA DRESS

No need to change anything on the Malvarosa dress as it’s loose shape makes it perfect for maternity.


ELIANA DRESS

That’s the first dress I thought of hacking : if you move the elastic waistband up, you’ll have the perfect maternity dress, from the first to the third trimester.

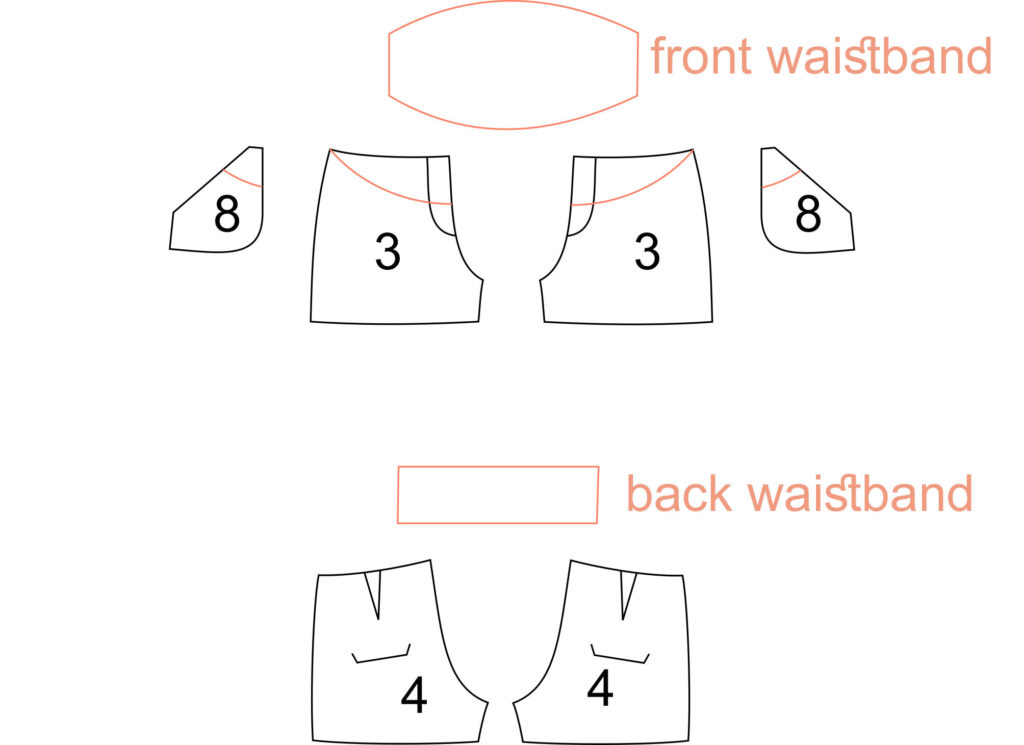
You need to shorten the Eliana dress bodice front and back pieces, without removing the 3 cm seam allowances at the waist. For the skirt, no need to change the waist but you might want to lengthen it a little bit. As the waistline is now under the bust, I would remove the pockets but they can also be lowered if you wish to keep them.


REINA SHIRT / DRESS

No modification needed for the Reina shirt thanks to the loose shape and gathers around the bust. But I want to lengthen it and try to make a dress out of it.


XEREA DRESS

By replacing the fold on view B of the Xerea dress by soft gathers, you’ll get a pretty maternity dress that you’ll also be able to wear after baby’s arrival.


DENIA BLOUSE & ROSARI SKIRT

The Denia blouse pattern doesn’t need any change. It will be perfect for summer temperatures.

Just as the Port short, the Rosari skirt will need a jersey waistband to be worn as a maternity skirt.

Check out the Port modifications above. You don’t need to make the buttonholes, as the skirt won’t be opened, you can stitch the buttons directly over the buttonbands. Pockets will nedd to be lowered slightly.


ALDAIA DRESS

The Aldaia dress is designed for jersey fabrics, perfect when your belly is getting rounder every day.

I would shorten the bodice pieces (all three views are compatibles) under the bust and remove the back darts. For the skirt, I recommand using view B, without seams, and lengthen the skirt at the waist. Make sure you choose a fabric with enough stretch ad why not add some soft gathers on the front around the waist?


This is my Pauline Alice maternity wardrobe! I don’t know if I’ll have the time to test all the variations but this is definitely my summer sewing plan. I’m about to start the Cami dress in white cotton, I’ll let you know how that works out.

What about you? What’s your favourite maternity pattern? Which of these do you like the most?

8 comments
6 FacebookTwitterPinterestEmail
I know a few of you have requested a tutorial on how to sew the sleeve vent for the Carme blouse pattern. I wrote one a couple of months ago for Craftsy so I thought it would be nice to share it here as well (with translation).
This tutorial might come in handy if you’re making the new Eliana dress pattern as this is the technique used to make the front/back opening on the bodice.
It’s quite easy and produces such great results. If you are making a blouse or shirt, using sheer or lightweight fabric and want to add a vent to a one-piece sleeve or an opening on the bodice, this tutorial definitely is for you!

tutorial-easy-binding-vent-sewing-pattern-1
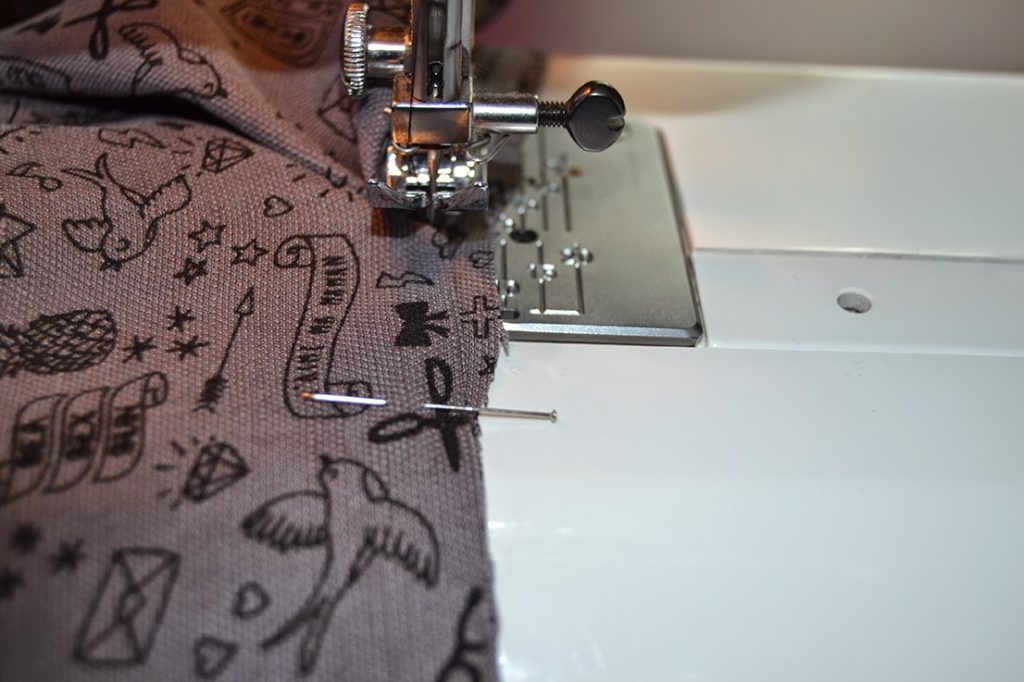
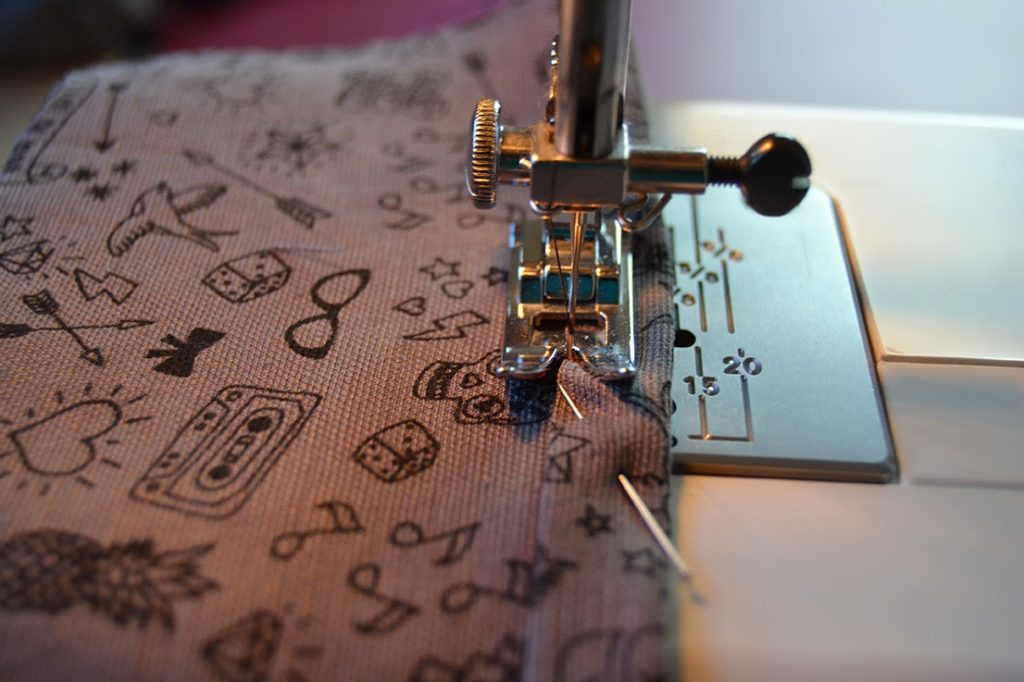
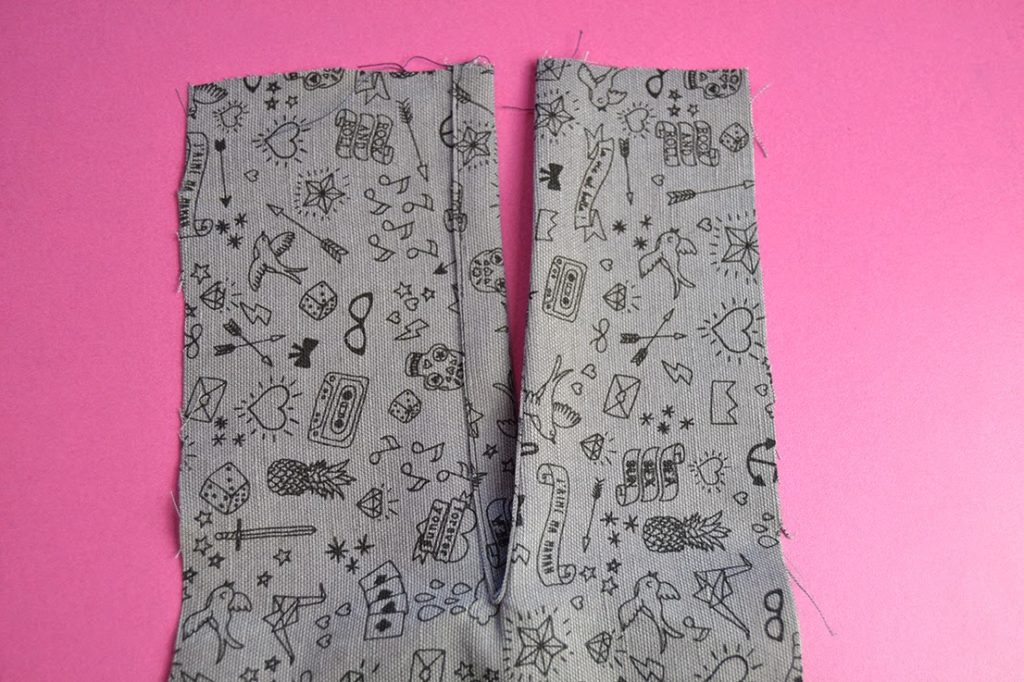
Here’s how to sew an easy vent with binding!

Supplies:

tutorial-easy-binding-vent-sewing-pattern-2
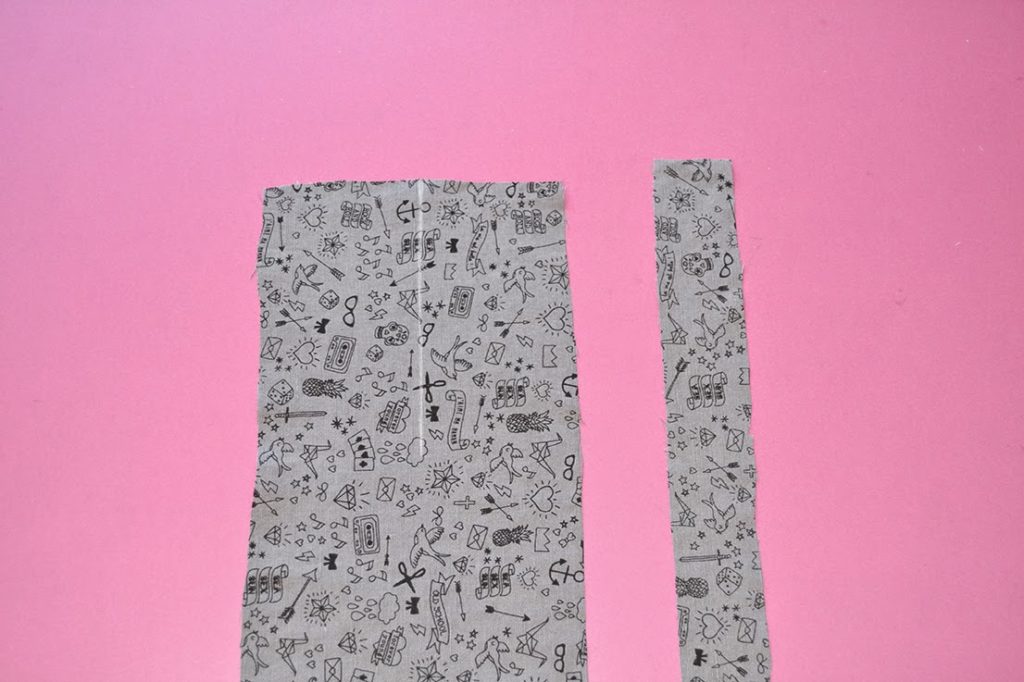
You’ll need your fabric piece (sleeve or bodice) and a strip of fabric cut on grain twice as long as your opening and about 1″ large (you can also use bias binding, just know that it may not sit as flat as on grain fabric).
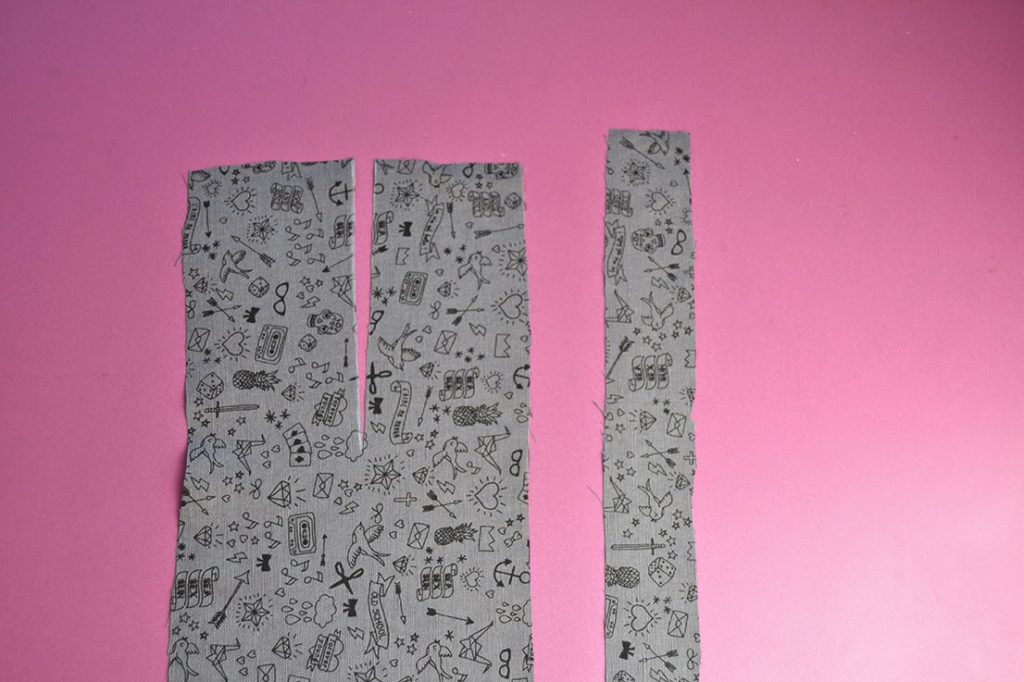
Step 1:
Cut the opening.

tutorial-easy-binding-vent-sewing-pattern-3Step 2:
With right sides facing you, pin the sleeve/bodice opening and the vent together. The center of the sleeve/bodice opening will sit about 1/4″ from the vent edge, this will account for the pivot/shit of fabric.

tutorial-easy-binding-vent-sewing-pattern-4
Step 3:Stitch 1/4″ from the edge. When you reach the center, put the needle down, lift the foot and pivot the fabric to the back. Make sure there is no fold at the corner: the stitching line is just barely on the sleeve/bodice.
Then continue until the end.

tutorial-easy-binding-vent-sewing-pattern-5tutorial-easy-binding-vent-sewing-pattern-6

Step 4:
Press the seam allowance toward the vent. Then fold the other edge of the vent by 1/4″ and press.
Fold the vent over the seam allowances. The folded edge of the vent should sit just over the stitching line. Pin in place.

tutorial-easy-binding-vent-sewing-pattern-7tutorial-easy-binding-vent-sewing-pattern-8
Step 5:
Edgestitch. Remember to pivot when you reach the center.

tutorial-easy-binding-vent-sewing-pattern-9
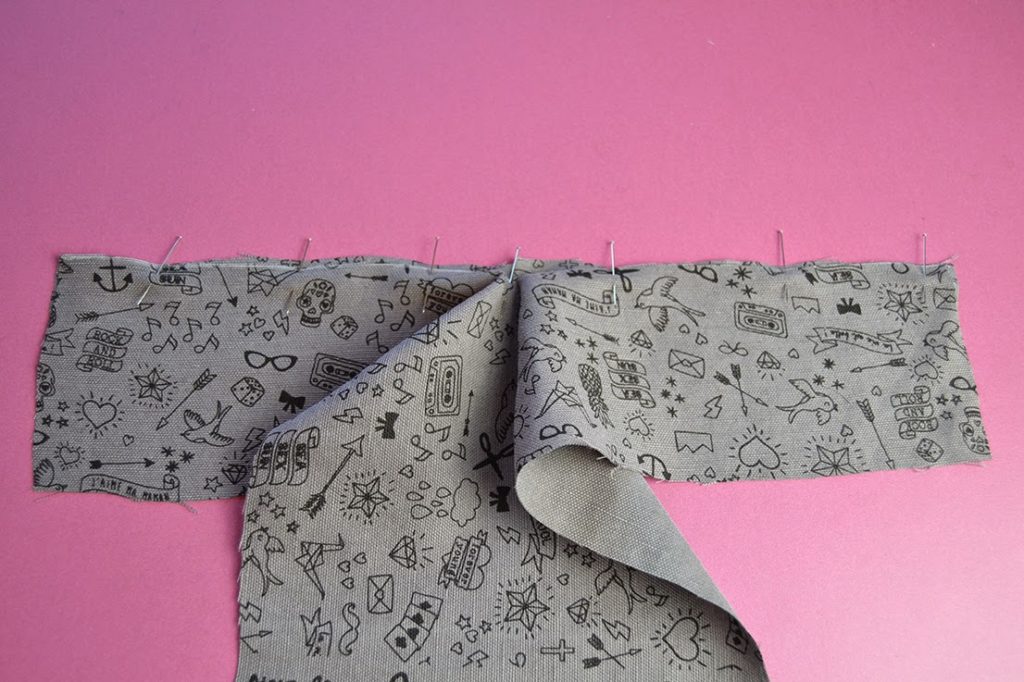
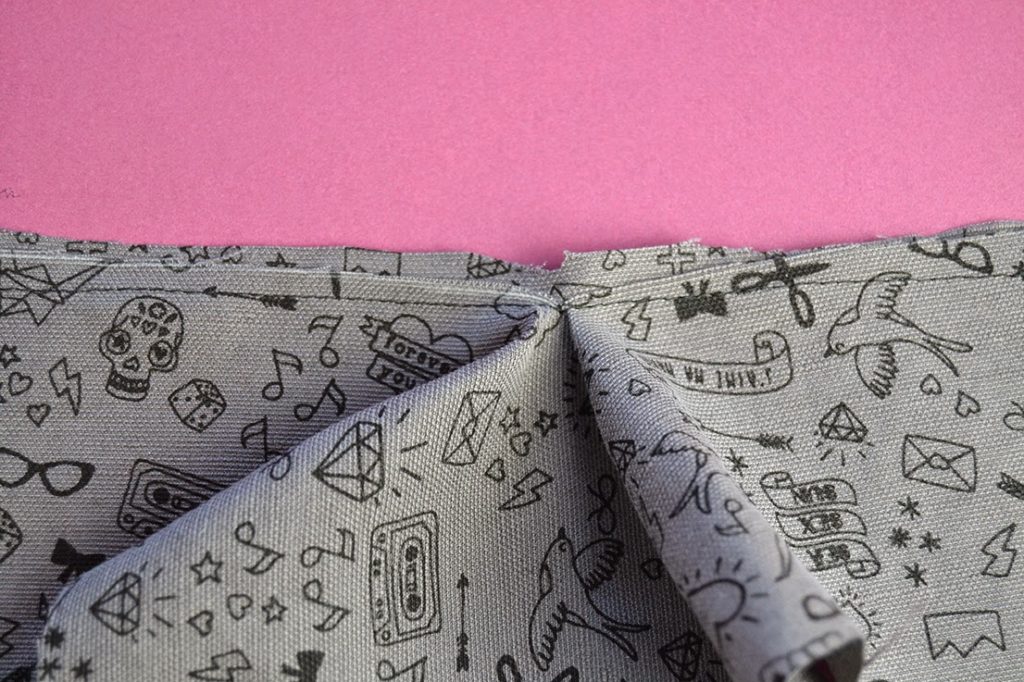
Here is how it looks from the right side:
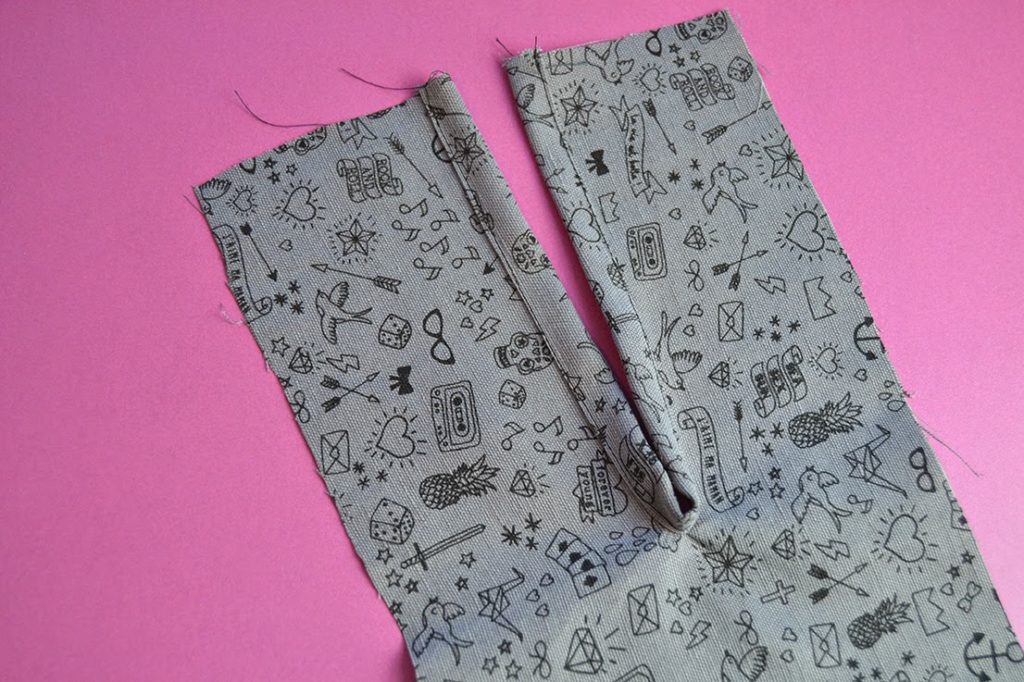
tutorial-easy-binding-vent-sewing-pattern-10Step 6:
Fold the vent with right sides together. Stitch diagonally across the end, it will keep the vent inside and flat.

tutorial-easy-binding-vent-sewing-pattern-11tutorial-easy-binding-vent-sewing-pattern-12
Press the vent to one side.

tutorial-easy-binding-vent-sewing-pattern-13
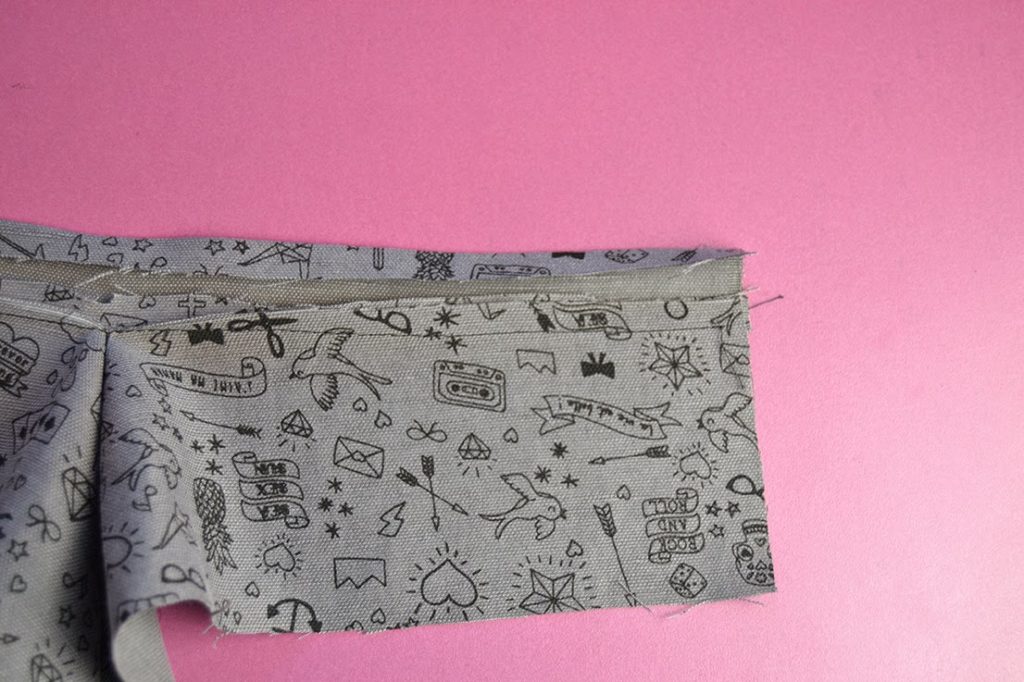
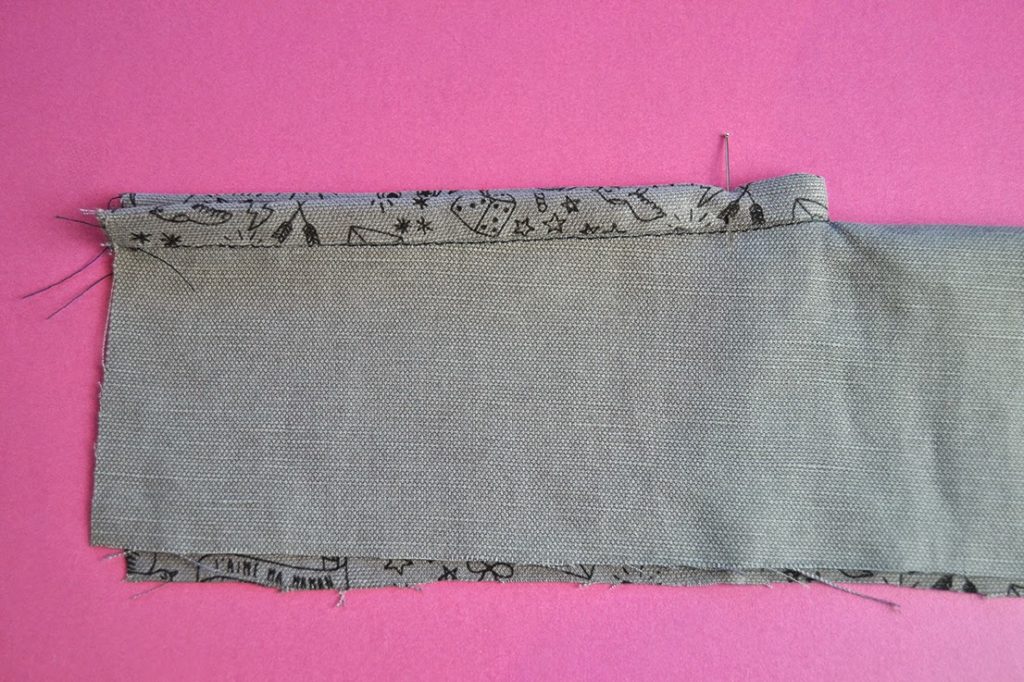
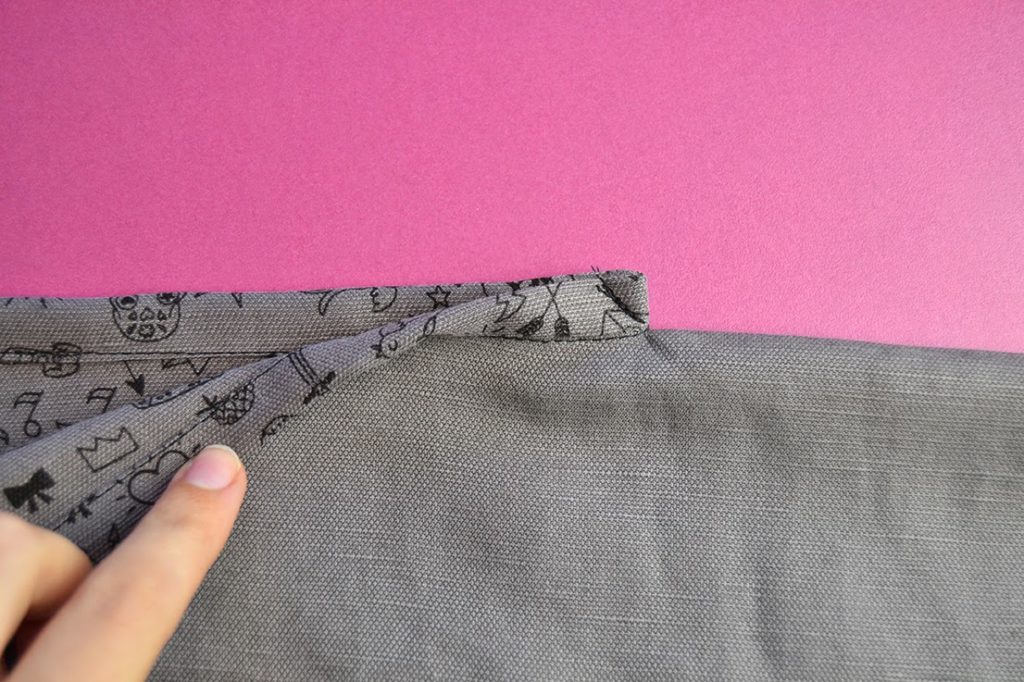
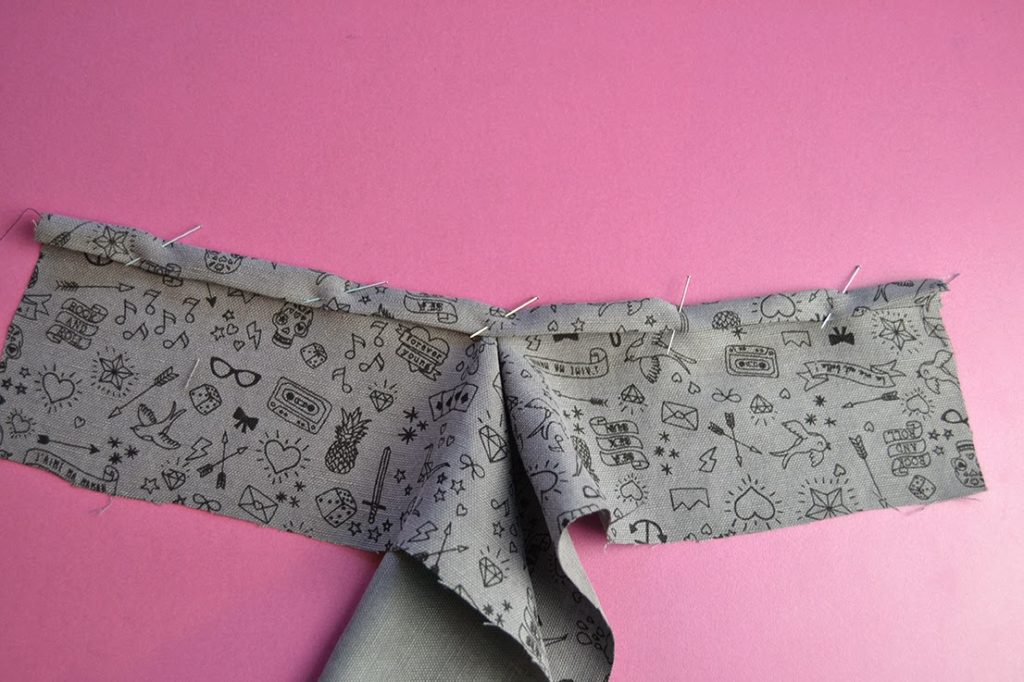
There you go! Now you can add cuffs or hem your sleeves for the Carme and stitch the bias binding neckline on the Eliana.

signature1_editado-1


12 comments
1 FacebookTwitterPinterestEmail