Home Pauline alice patterns Serra

Serra

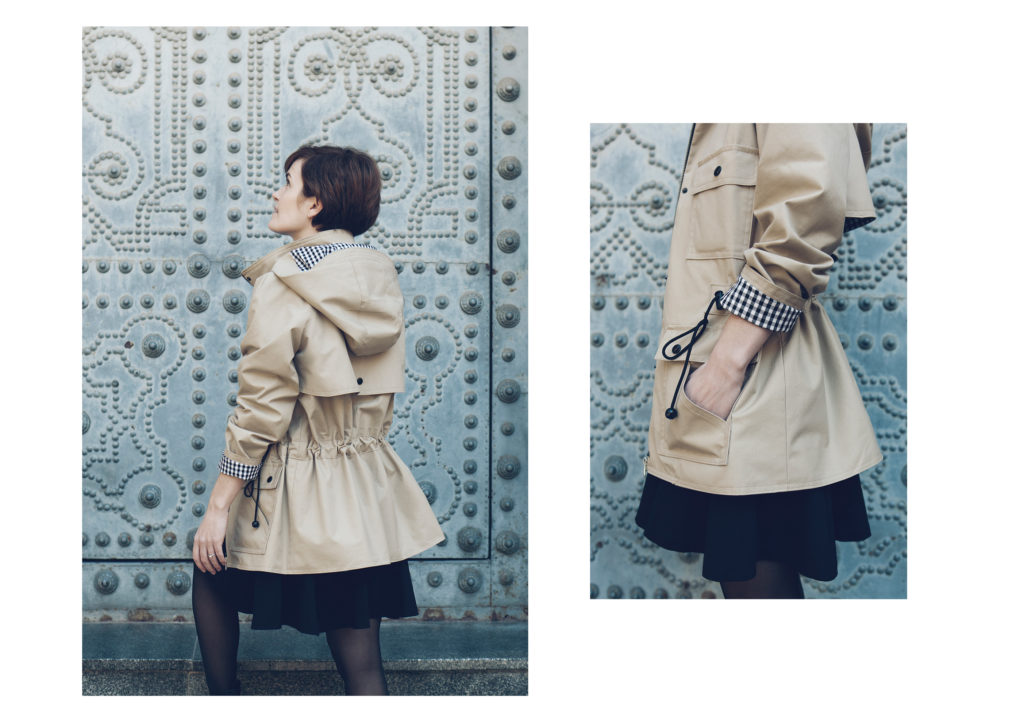
I love sewing coats, that’s not a secret. Not that I need an excuse to make one but I don’t wear coats that much in Spain. But this time, I had a very good excuse to make one indeed. See, I have my dark blue Quart coat, light blue Hemisféric coat and pink self-drafted coat in pretty good conditions but I can’t close them anymore. They are all rather fitted at the waist and for this winter, I needed a coat… not so fitted.

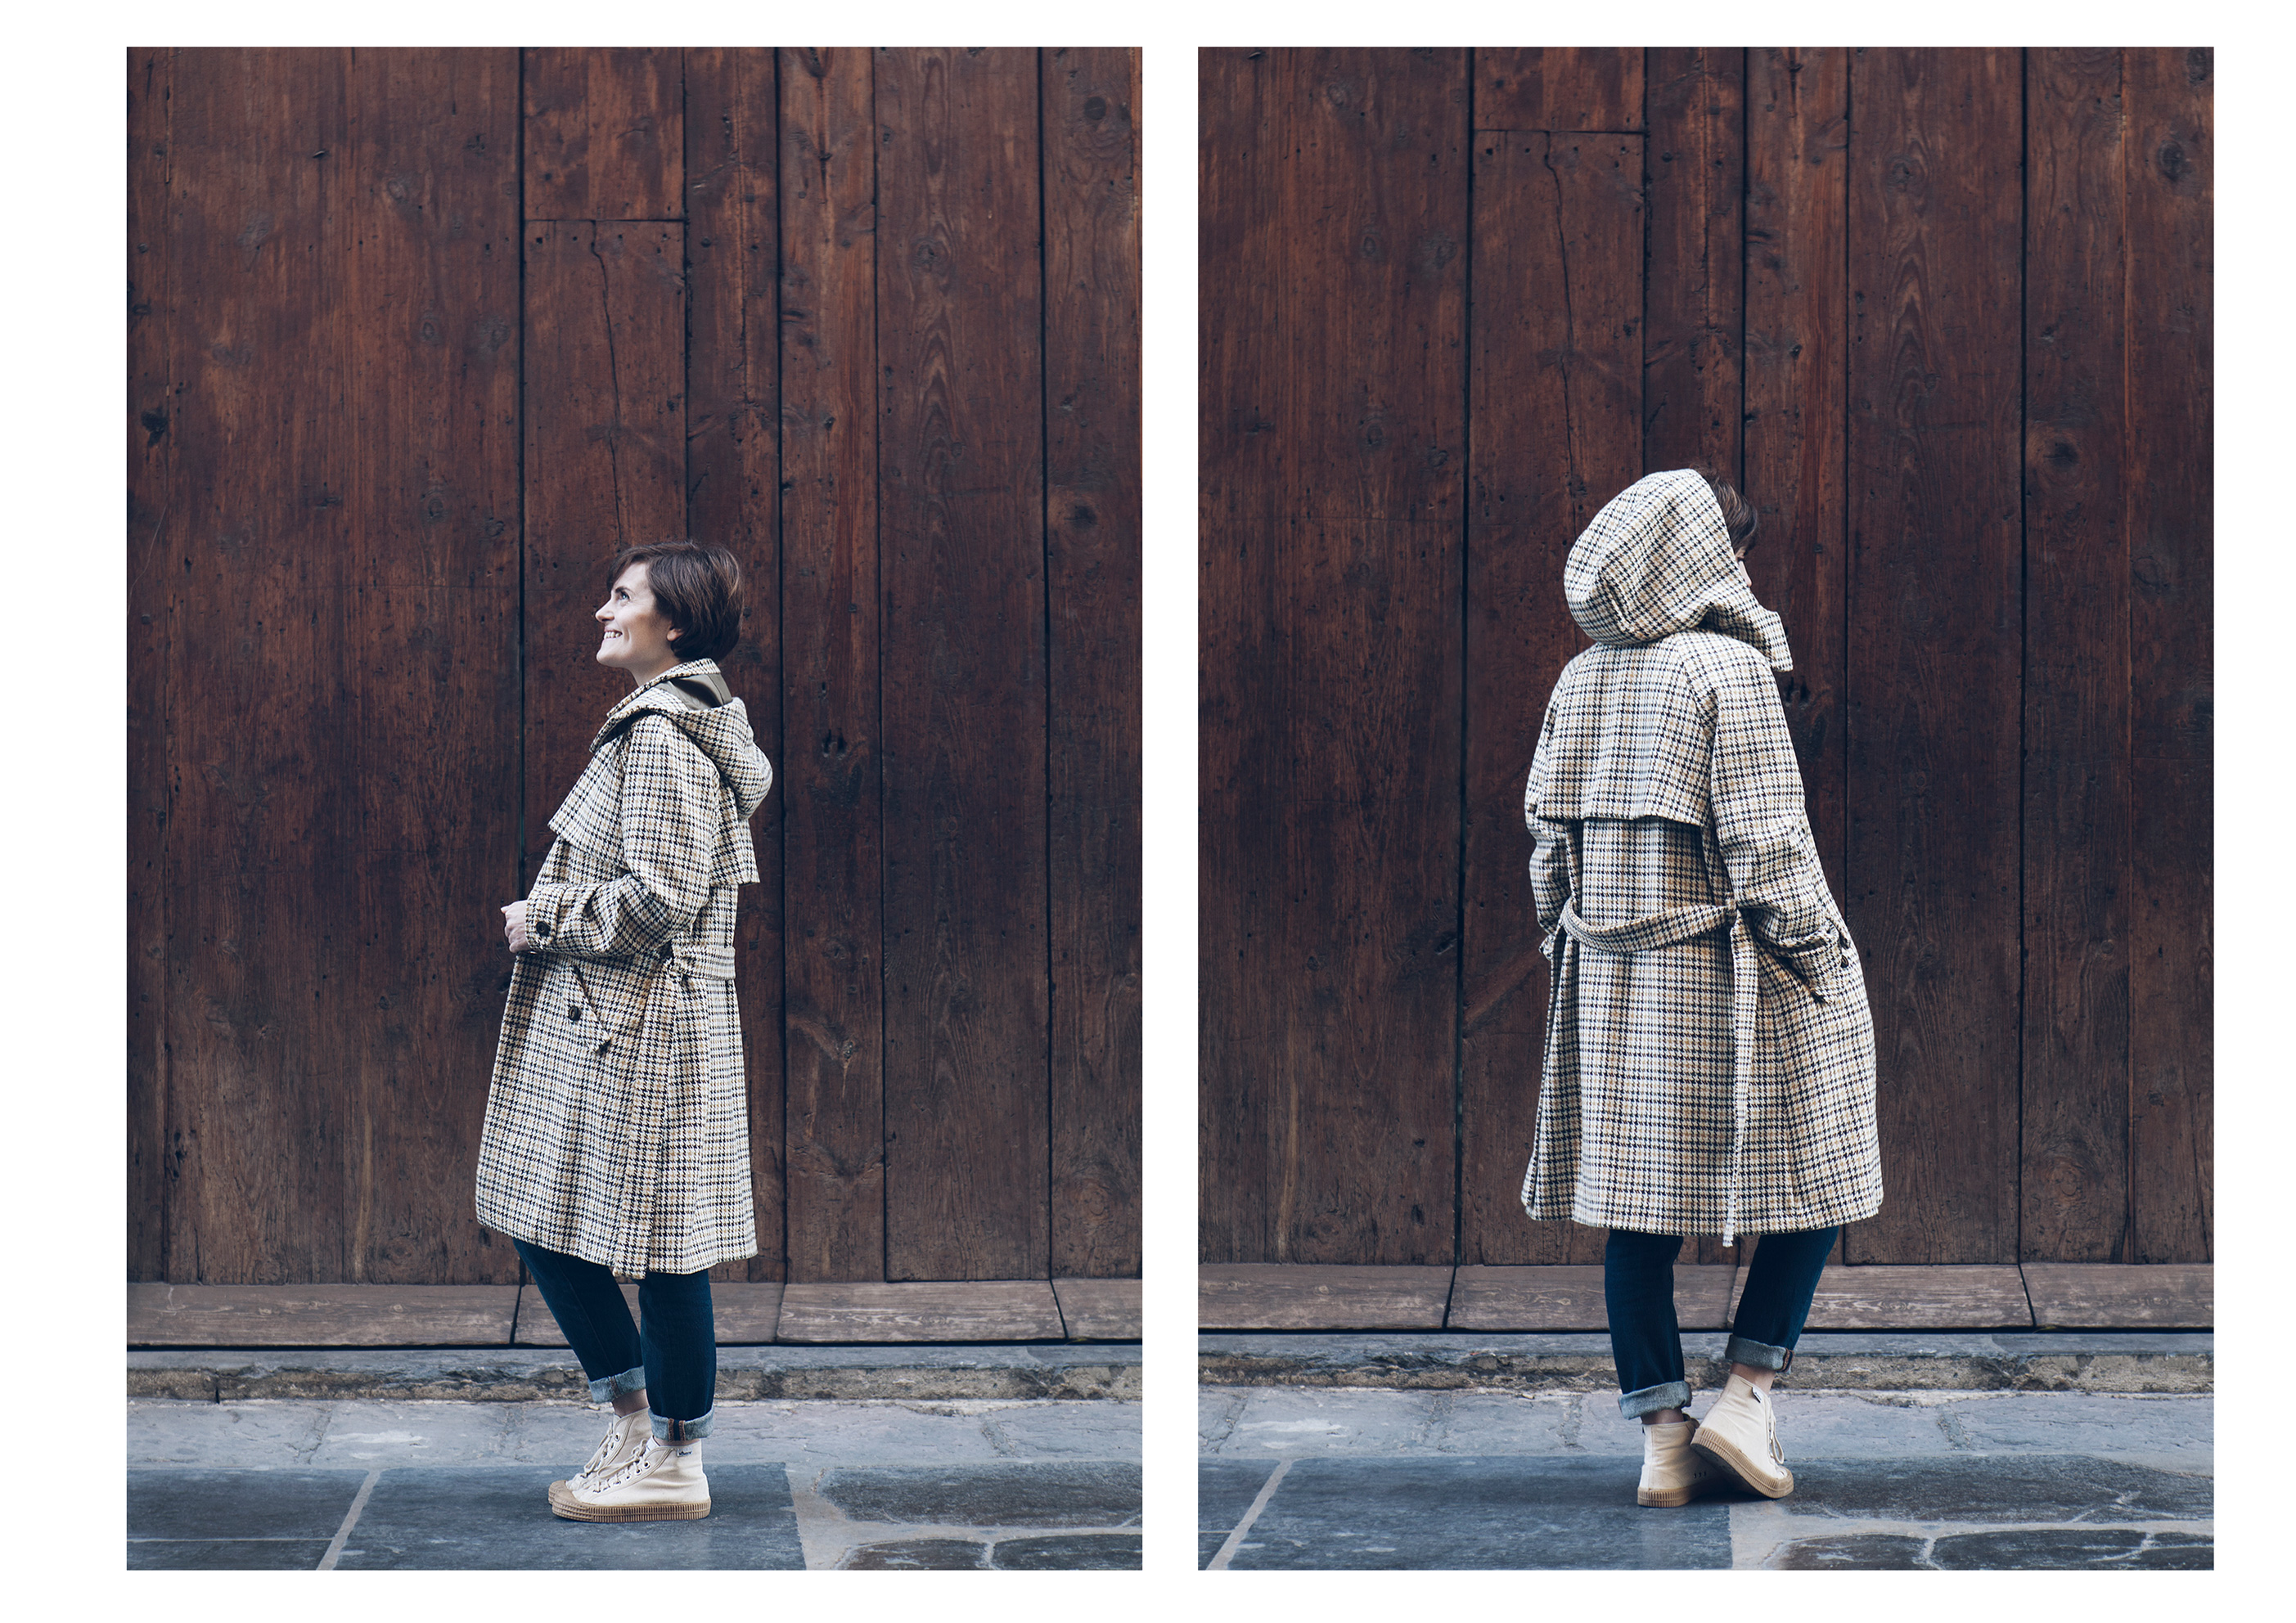
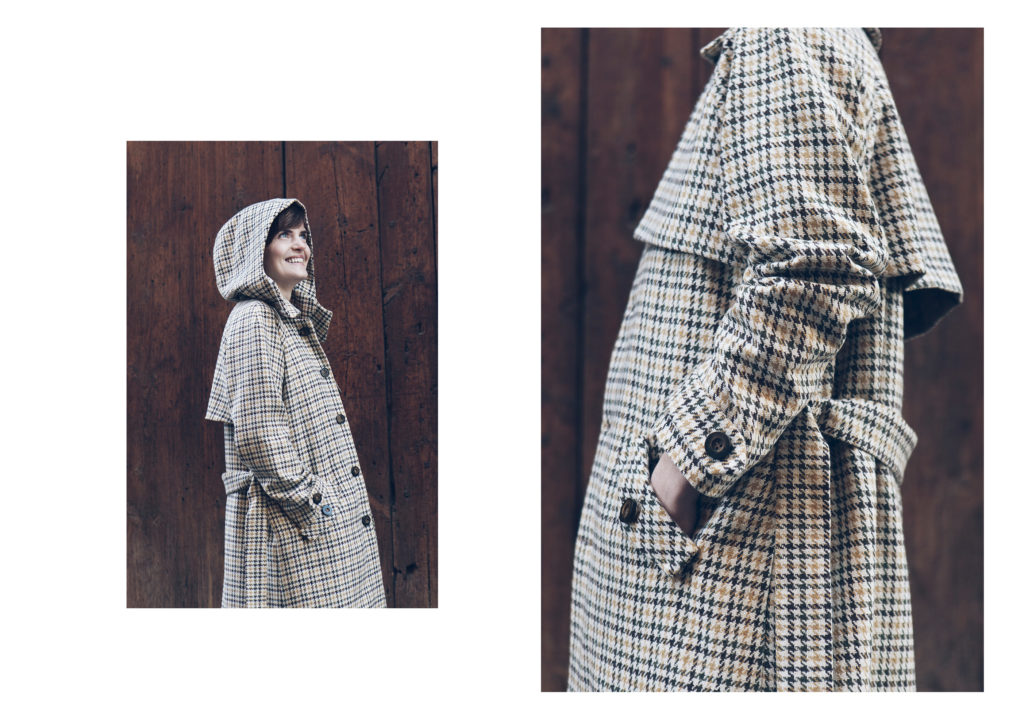
SERRA JACKET AS A LONG COAT


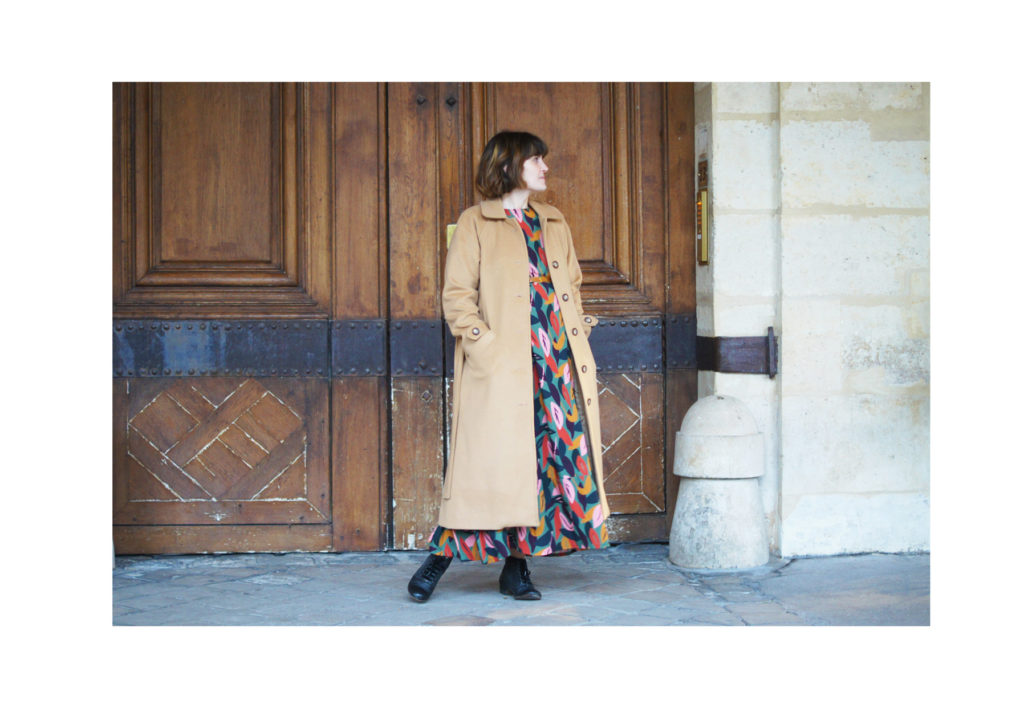
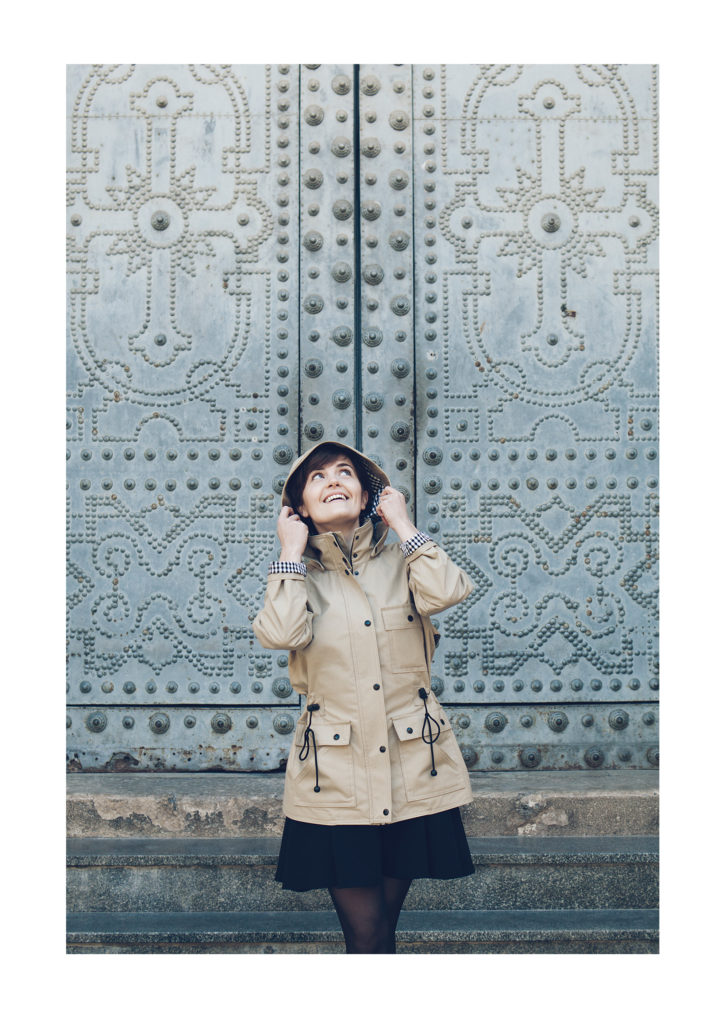
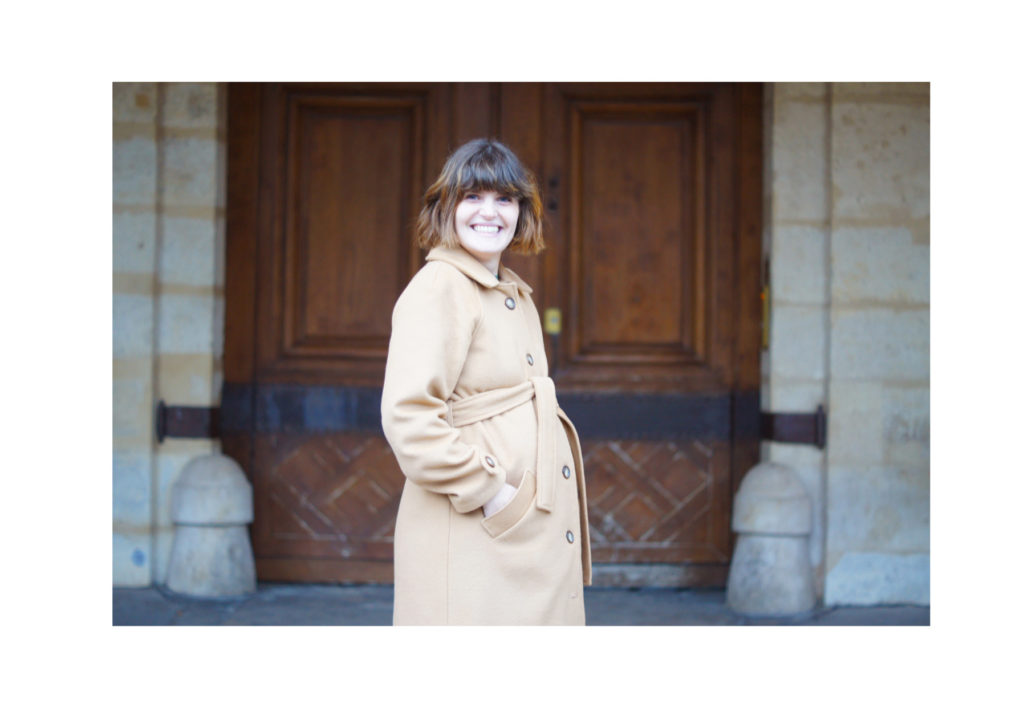
One of my inspiration for the Serra jacket pattern was a Balmaccan coat by the british brand S.E.H. Kelly. I love the classic shape, raglan sleeves, beautiful collar and topstitching. Looking through coat patterns, I remembered this one and decided on using the Serra jacket with a few changes to make it.

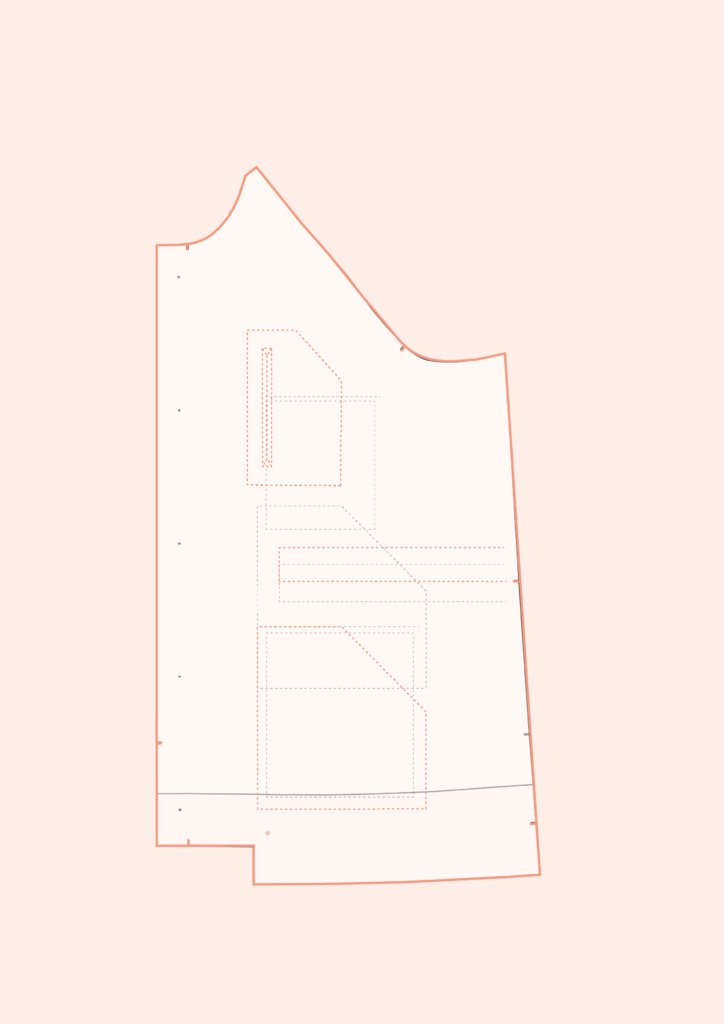
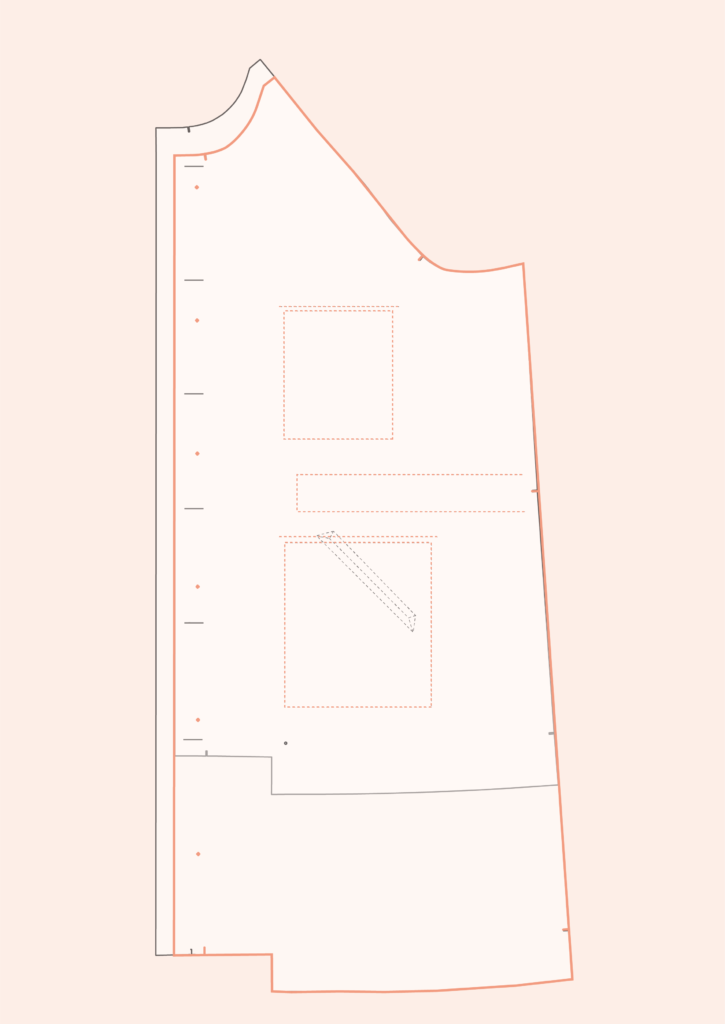
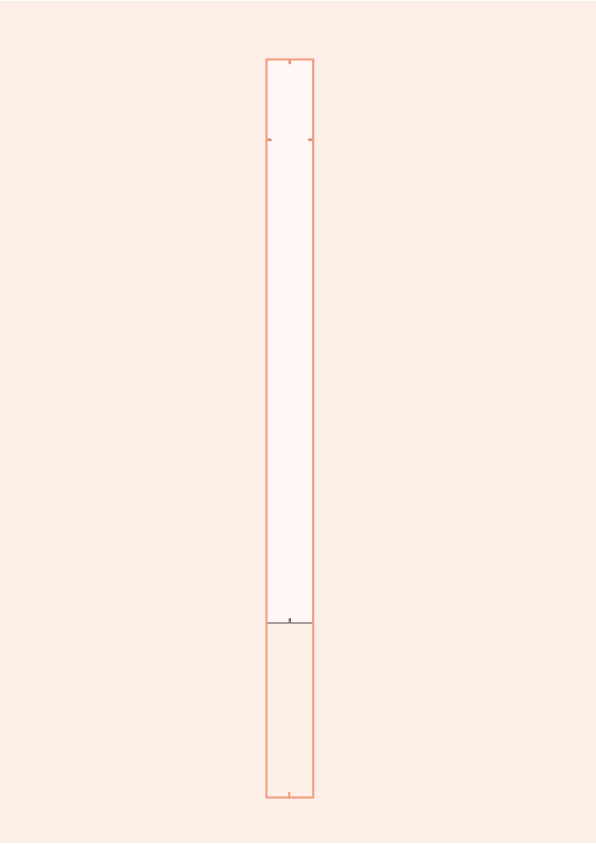
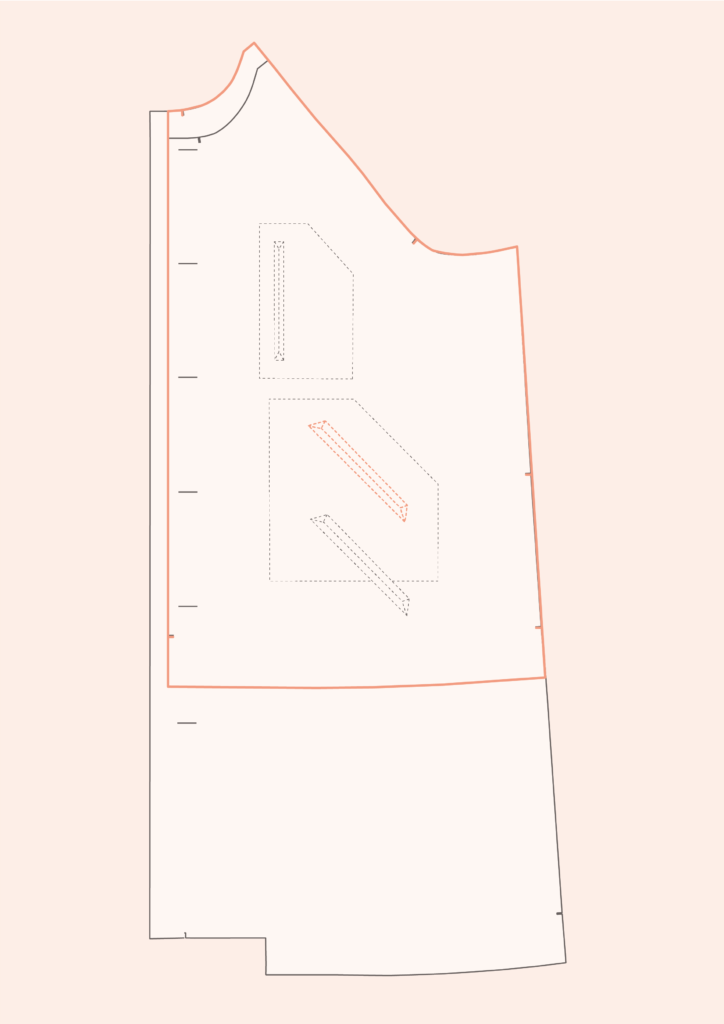
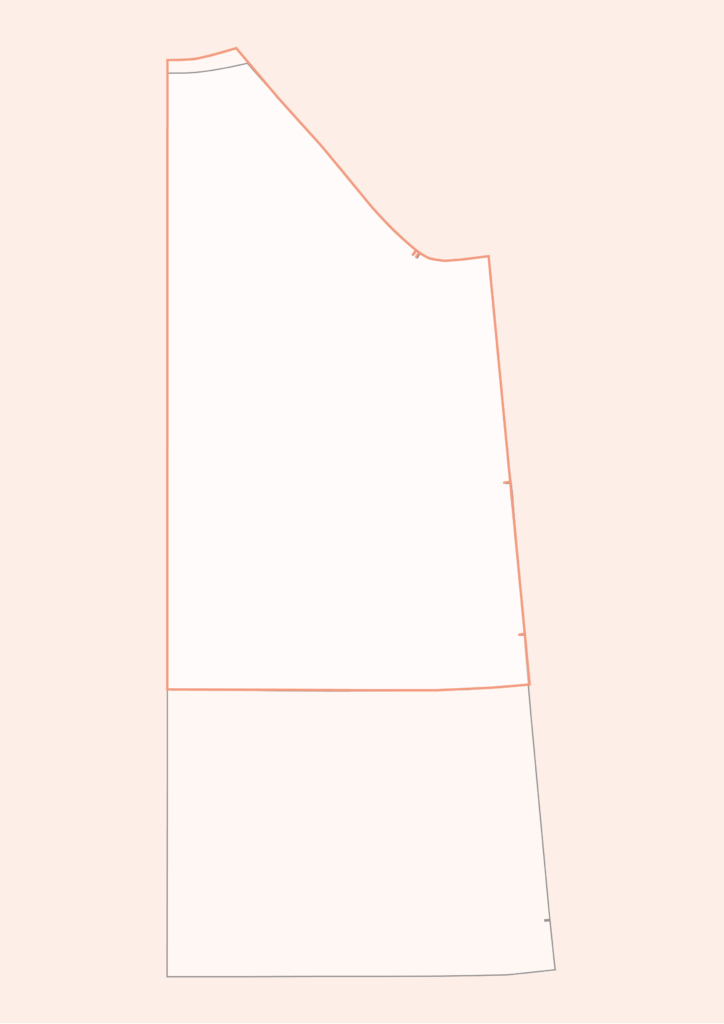
I chose View C as a starting point as it has so much similarities: the collar, the cuff button tabs, the length. The first change I made was lengthening it about 40 cm as I wanted a long coat that goes to mid-calf, almost ankle length. But because of the length, I knew a back vent would be easier to walk. So I added a back seam and drafted a vent for both the main fabric and the lining. I left off the wind shields and changed the shaped welt pockets for classic rectangular ones. Other than that, it’s the same pattern and I used the same instructions (only adding the back vent).

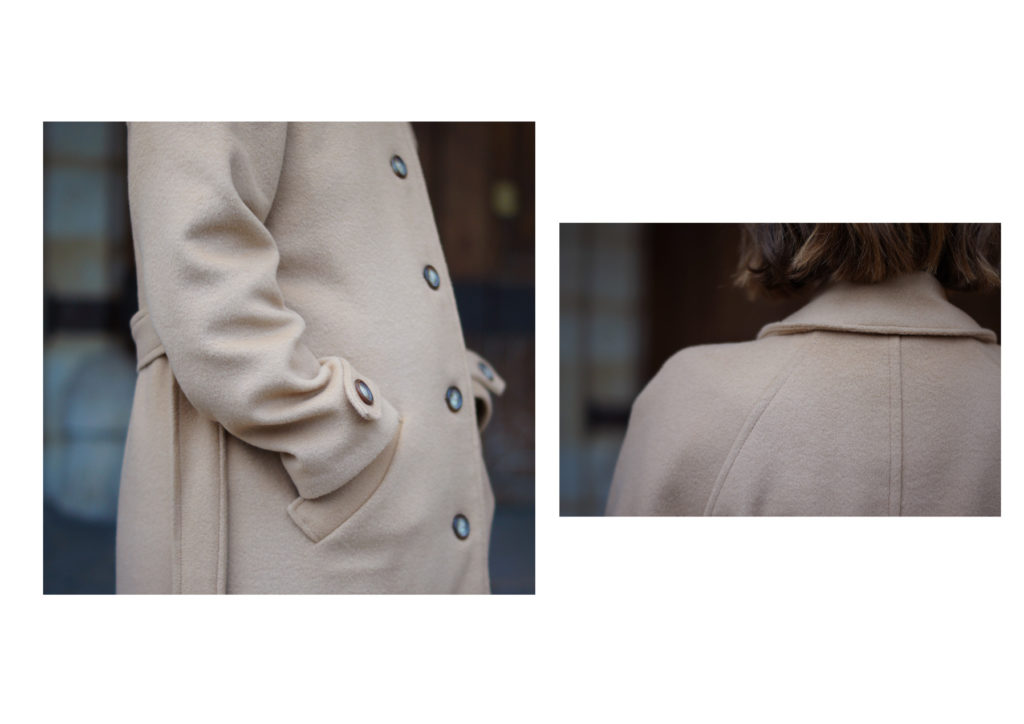
For the main fabric, I chose a heavy wool from Pretty Mercerie in camel (out of stock but similar here). I interfaced the facings, collars, armhole edges, pocket placements and hem. I just received my new sewing machine (juki DX-2000) and I was so happy with how well she sewed through multiple layers of heavy wool. Even the buttonholes were great! I used topstitching to give a little detail to an otherwise very plain coat.


I’ve been wearing it these past few weeks and I love it. Most of all, I love that it buttons close! I’m looking forward to wear it all winter and the next ones.

I’d also like to wish you all a Merry Christmas and Happy New Year! May 2020 be good with you!

PS: yes, 2020 will bring another baby into our family! Another boy!

5 comments
5 FacebookTwitterPinterestEmail

The Serra jacket pattern was released last February. It’s a unisex and casual jacket with raglan sleeves, fully lined. The pattern includes 3 different versions: a parka with lots of pockets, a short athletic style jacket and a trench coat, all of them with hoods.

For the presentation pictures of View C, the trench coat, I wanted to use some checked or tartan fabric. I found the right one at The Sweet Mercerie and started to get overwhelmed by the matching it would require. But in the end, it wasn’t too bad!

I’ll show you how I did it. The most important steps are the preparation ones. Hopefully this will help you if you’re planning sewing a tartan Serra (or any jacket) for fall.

PATTERN PIECES THAT NEED TO MATCH 


HOOD

  • Back hood (11) 
  • Side hood (10) 
  • Front hood facing (14)
  • Back hood facing (15)

FRONT

  • Front (1)
  • Welt (36)
  • Welt facing (37)
  • Front facing (4)
  • Interior welt (39)
  • Gun flap (32)

BACK AND COLLAR

  • Back (2)
  • Storm shield (18) 
  • Collar stand (35)
  • Under collar (34)
  • Collar (33)

SLEEVE

  • Sleeve (3)


TRACE THE PATTERN PIECES

To trace the pattern, you’ll need : 

  • Pattern paper (or any transparent paper)
  • A ruler
  • A pencil, a thin black marker
  • An eraser
  • tape

Trace on pattern paper the pieces noted above, adding the following details: 

  • Seam allowances (1,5 cm or 5/8”) 
  • Center of the pieces that need to be doubled
  • Grainline
  • Notches and marking

You’ll need to double the pattern pieces that are placed on the fold of the fabric. It’s easier to match the pattern if you cut your pieces flat (on the fold, the fabric might move more easily).

TRACE THE PATTERN PIECES ON THE FABRIC

For that step, you’ll need : 

  • Your fabric
  • Traced pattern pieces
  • A ruler
  • Some colour marker

Before tracing the pattern on fabric, you’ll need to determine the dominant line of your fabric. This is the line that shows the more when you look at your fabric from far away. It miht be obvious but sometimes, you’ll need to choose one and stick with it. For example, my fabric has a beige background and some brown, green and yellow checks. For me, the dominant line was the yellow one.

Now let’s start the funny part…

If you have a huge table, use it. If not, the floor will be perfect. Spread the fabric on a large surface, as one open layer.

FRONT

GUN FLAP

FRONT FACING

BACK

STORM SHIELD

The storm shield is supposed to place on the fold. You’ll need to double it and trace the entire piece. 

COLLAR STAND

SLEEVE

Raglan sleeves are not easy to match. You’ll need to determine where you want the lines to match and where it’s ok if it doesn’t. For me, the most important place is the front, from shoulder to above the chest. 

POCKET


HOOD

The main pieces to match for the hood are the back hood and the front facing. Place the center of the back hood (11) on the grainline of the fabric, placing the center line between two dominant lines. 

Once these pieces have been traced and prepped with the dominant lines marked, you just need to place them on the fabric. Sometimes, you won’t be able to make all the lines match, make sure the most visible areas are matching, that’s the most important. For example, I want the front of the sleeve to match the front piece, even if the back will not match entirely (and the under sleeve will not match either but that’s ok as it’s not going to show).

If you want more help, you can watch Marie-Gabrielle’s lesson on pattern matching at Artesane (sorry, only in french – but for a similar class in English, you can try Bluprint’s Perfect pattern matching).


0 comment
0 FacebookTwitterPinterestEmail

If you grew up in the nineties like me, you must know the game “fashion designer”. I loved it! I was thinking about this game when developping the Serra jacket pattern: with one base, we worked on different lengths, pockets, necklines, details to offer 3 versions for 3 different looks:

  • A parka for view A, A mid-thigh jacket inspired by the Pauline Alice Mini coat and the traditionnal breton raincoat.
  • An athletic jacket for view B, A short jacket with hood, athletic style.
  • A trench coat for view C, A knee-length jacket with trench coat details.

All the details can be mixed with the different versions to create infinite combinations! In this post, we’ll show you how to create 3 variations. You’ll see how to mix the pockets, lengths and other details. You can apply these modifications to all 3 versions, you just need your imagination run free and create your dream jacket!

To help you design your jacket, we’ve made a template available for free download. You can draw the details you want to incorporate to your jacket and see which version you prefer. You’ll find the download link at the end of the post.

HACK #1

Sportwear parka


You’ll need the following pieces to make this jacket:

      • 1   FRONT A*+B*
      • 2   BACK A
      • 3   SLEEVE B
      • 4    FRONT FACING A
      • 5    BACK FACING A
      • 6    SLEEVE FACING A
      • 7    FRONT LINING A
      • 8    BACK LINING A
      • 9    SLEEVE LINING B
      • 10  SIDE HOOD B / 10 bis SIDE HOOD B
      • 11  BACK HOOD B
      • 12  SIDE HOOD LINING B
      • 13  BACK HOOD LINING B
      • 14  FRONT HOOD FACING B / 14 bis FRONT HOOD FACING B
      • 29  BREAST POCKET B
      • 30  POCKET B
      • 31  POCKET FACING B
      • 17  ZIPPER PLACKET A
      • 27  FRONT CASING A
      • 29  BACK CASING A

*Pieces we will modify

FRONT POCKETS

On the front piece of view A (1) add the placements of pockets (29) & (30) from view B.

HACK #2

Long parka jacket


You’ll need the following pieces to make this version :

      • 1  FRONT A*+ C*
      • 2   BACK A*+ C*
      • 3  SLEEVE A
      • 4  FRONT FACING A*+ C*
      • 5  BACK FACING A
      • 6  SLEEVE FACING A
      • 7  FRONT LINING C
      • 8  BACK LINING C
      • 9  SLEEVE LINING A
      • 10  SIDE HOOD A
      • 11  BACK HOOD A
      • 12  SIDE HOOD LINING A
      • 13  BACK HOOD LINING A
      • 14  FRONT HOOD FACING A
      • 15  BACK HOOD FACING A
      • 16  VISOR A
      • 17  ZIPPER PLACKET A
      • 19  COLLAR A
      • 20  COLLAR BUTTON BAND A
      • 21  FRONT BUTTON BAND A
      • 22  BREAST POCKET FLAP A
      • 23  BREAST POCKET A
      • 24  POCKET FLAP A
      • 25  POCKET A
      • 26  OVER-POCKET A
      • 27  FRONT CASING A
      • 28 BACK CASING A

*Pieces we will modify

       FRONT LENGTH, CENTER FRONT, NECKLINE, POCKETS AND CASING

On the front piece (1) of view C : draw the neckline and the center front of view A. On the front piece (1) of view C, draw the placements of the pockets flaps (22) (24), the pockets (23) & (25) and the front casing (27) of view A.

BACK LENGTH, NECKLINE AND CASING

On the back piece (2) of view C, draw the neckline and the casing of view A.

FRONT FACING LENGTH, NECKLINE AND CENTER FRONT

On the front facing piece (4) of view C : draw the neckline and center front of view A.

FRONT BUTTON PLACKET

Lengthen the front button placket piece (21) of view A to match the length of the new front piece.

ZIPPER PLACKET LENGTH

Lengthen the zipper placket piece (18) of view A to match the length of the new front piece.

HACK #3

Aviator style jacket


You’ll need the following pieces to make this version :

  • 1  FRONT B*+ C*
  • 2  BACK B*+ C*
  • 3  SLEEVE C
  • 4  FRONT FACING B*+ C*
  • 5  BACK FACING C
  • 6  SLEEVE FACING C
  • 7  FRONT LINING B
  • 8  BACK LINING B
  • 9  SLEEVE LINING B
  • 10  SIDE HOOD C
  • 11  BACK HOOD C
  • 12  SIDE HOOD LINING C
  • 13  BACK HOOD LINING C
  • 14  FRONT HOOD FACING C
  • 15 BACK HOOD FACING C
  • 18  STORM SHIELD C
  • 32 GUN FLAP C
  • 33 COLLAR C
  • 34 UNDER COLLAR C
  • 35 COLLAR STAND C
  • 36 WELT C
  • 37 POCKET FACING C
  • 38 POCKET LINING C

*Pieces we will modify

    FRONT LENGTH, NECKLINE AND POCKETS

On the front piece of view B : draw the neckline of view C.

On the front piece of view B : draw the welt pocket placement at waist level.

BACK LENGTH AND NECKLINE

On the back piece of view B : draw the neckline of view C.

FRONT FACING LENGTH AND NECKLINE

On the front facing piece of view B : draw the neckline of view C.

ZIPPER GUARD

Shorten the zipper guard of view B to match the center front of the new front piece.

Have fun and create your dream jacket thanks to the free downloadable template here!
0 comment
4 FacebookTwitterPinterestEmail

Like we usually do, we made a selection of fabrics that would be perfect for our Serra jacket pattern.

We chose fabrics specific for each view’s style but feel free to mix and match. Overall, we recommand using a medium weigh fabric (between 100 and 250 gr/m2 is great). For the lining, classic anti-static lining is perfect, but if you prefer a printed cotton or quilted lining, it would be great for a winter version.

VIEW A

1/ Cotton wax Millerain – col. Aubergine – Guthrie & Ghani

2/ Coated fabric – col. Ocre – Atelier de la création

3/ Wax pur cotton – col. Dark kaki – Stragier

Sources images A: Hunterboots / Petit Bateau / Parka London / Cos / Vogue 


VIEW B

1/ Cordura Light – col. Black – Telas activas

2/ Coated cotton – col. Blue – Stragier

3/ Softshell – col. Navy blue – Rascol

Sources images B: Massimo DuttiRomwe / Vogue


VIEW C

1/ Prince of Wales wool – col. Beige/black/red – The Sweet Mercerie

2/ Coated canvas – leaves print – Tissustory

3/ Gabardine – col. Sand – Cousette

Sources images C:  Death by Elocution / Zara / Man Repeller / Soeur / Burberry


– We hope that will inspire you to make a Serra Jacket! You want to make the pattern? Shop it here: Serra Jacket. –


0 comment
1 FacebookTwitterPinterestEmail

Serra is an unstructured, unisex jacket with raglan sleeves, fully lined. There are 3 views for 3 different styles and uses: a parka jacket for View A, an athletic blouson for View B and a trench coat for View C.  


VIEW A 

View A of the Serra jacket is a mid-thigh length jacket inspired by the Pauline Alice Mini coat and the traditionnal breton raincoat. It has been designed for the rainy and stormy days along the breton coast (my homeland). You’ll find all the details of the original Mini coat: a parka/raincoat shape with storm shield and double pockets with flaps and snap buttons. We’ve also added a stand-up collar, a drawstring casing for those of you who want some waist definition and a detachable hood. The jacket hits below your bottom and is closed by a zipper and two button plackets with snap buttons. 

You can choose a lot of different fabrics for your Serra jacket. To keep the raincoat vibe, choose a coated or wax coton gabardine, perfect to protect you from the wind, in light to medium weight (between 150 and 300 gr/m2).  

Fabric : Trench dry oilskin – beige – Merchant & Mills.


VIEW B 

View B is a short blouson jacket with hood. With athletic aesthetic, it’s great for outdoor adventures like a walk in the mountains. It has a front zipper from the hood to the elasticized hem. We have added zipped pockets: one on the bust and two on the front, large enough to hold all your everyday belongings (keys, money and phone).  

View B would look great with a technical fabric such as cordura® light or cordura® ripstop, or any light to medium weight fabric (between 135 et 200 g/m2). Here, we have used a lightweigh coton canvas.  

Fabric : Imper coton toilé – uni, forêt (this color is out of stock)- Stragier.


VIEW C 

For View C, we’ve been thinking about the iconic trench coat. Designed to be worn everyday in the city (or on the countryside if you prefer!), it’s a knee-length jacket with storm shield and gun flap, two big buttoned welt pockets and an interior pocket. Its classic collar has buttons on the collar stand to attach the removable hood. You’ll also find button bands on the sleeves. The jacket is closed by five front buttons and can be belted. 

Fabric wise, there’s so much to choose from! How about a classic gabardine, coated canvas or woolen?  

Fabric : houndstooth wool (out of stock – similar) – écru, brun, kaki – The Sweet Mercerie. 

We have designed the three Serra versions to offer a versatile jacket pattern, that you can adapt to your daily life and your personal style easily. All the details can be removed and added to all three versions so you can create an unique jacket. We have prepared a post on the subject to explain how to adapt the pattern.  

– You can find the SERRA jacket pattern in printed copy or PDF (A4 print-at-home and A0 copyshop included) in the shop. –
5 comments
0 FacebookTwitterPinterestEmail

Here is our new pattern, the Serra jacket. Does it ring a bell with its double pockets? It’s an adult version of our kid’s coat, designed for our first Mini collection last February. Many of you asked for an adult version of the jacket, so we made it! We have taken the shape and details of the Mini coat to develop the first “version” of Serra (view A): an unstructured, unisex jacket – we wanted it to be perfect for you and your man as well! – raglan sleeves, fully lined, with all the Mini coat details… But we didn’t stop there! We’ve been talking about making new patterns with multiple possibilities for a while, like the Aldaia dress you love so much (all the variations have make it our best-seller!).

The Serra jacket was the perfect example to try the multi-purpose versions: with its simple shape, we have worked on different lengths and details to propose a 3-in-1 pattern. Three views for three different styles and uses. We are delighted to show you the result of long months of work!


Serra jacket, view A

A mid-thigh jacket inspired by the Pauline Alice Mini coat and the traditionnal breton raincoat.

Serra jacket, view B

A short jacket with hood, athletic style.

Serra jacket, view C

A knee-length jacket with trench coat details.

More than three versions of the same pattern, these are three unique jackets designed from the same base with lots of possibilities. In the next post, we’ll talk more about the details of each view. In the meanwhile, I hope you’ll like the Serra jacket pattern (or at least one of the view!). My favourite is the athletic View B whereas Lucile is in love with the city version of View C. What about you? We are curious, let us know which one is your favourite!

– You can find the Serra Jacket pattern in printed copy or PDF (A4 print-at-home and A0 copyshop included) on the shop. –

Technical details

  • Difficulty: The Serra jacket pattern is designed for an advanced seamstress. Some details like the welt pockets or collar Pauline Alice Sewing Pattercan be a difficult for a beginner. But if you want to tackle this project, we’ve made some photo and video tutorials to guide you through the construction of the most complex steps.
  • Size chart: For Serra, we’ve worked with a different size chart than usual. The pattern was graded using a half-size scale from XS (34-36) to XXL (50-52) to get the ease and fit we wanted for a unisex jacket. Even if you are accustomed to our patterns, we recommand you to make a muslin, even a partial one, to choose the best fit. I’m wearing the jacket in XS in the pictures (for my usual 36).
  • Pattern and instructions: The Serra jacket pattern includes an instructions booklet in french and spanish. Each view has its own step-by-step illustrated instructions. Besides, there are seven pattern sheets (yes, seven!). Because of the number and size of the pattern pieces, you’ll find that some of the smaller pieces are included inside a bigger one, so you won’t be able to cut diretly into your pattern.
6 comments
0 FacebookTwitterPinterestEmail