Home Tags Posts tagged with "Sew-Along"
Tag:

Sew-Along

The Carme blouse pattern 2.0 is here! As it’s one of my first pattern, the sizing was not up to date, but I’m happy to tell you that you can now sew this blouse from size 34 to 52.
The pattern includes a print-at-home file as well as copyshop version. Get your copy here: Carme blouse pattern.
And now, buttons! In this tutorial, I’ll show you where to place the buttons and buttonholes. You’ll not see me actually stitch them because, 1st I didn’t have my buttons at the time, and 2nd my machine makes an automatic buttonhole in 1 step so… not really interesting.
I have seen versions of the Carme blouse with only 2 or 3 buttons on the button placket and that’s a great idea! You’ll probably never wear it buttoned-up so it’s a good way to spare buttons and go for a more relaxed look. I think I’ll do that for my next version…

Thank you so much for following this Sew-Along and I really hope you enjoyed the video tutorials. I know I had fun making them. I’m looking forward to see photos of your Carme!!!


4 comments
2 FacebookTwitterPinterestEmail
The Carme blouse pattern 2.0 is here! As it’s one of my first pattern, the sizing was not up to date, but I’m happy to tell you that you can now sew this blouse from size 34 to 52.
The pattern includes a print-at-home file as well as copyshop version. Get your copy here: Carme blouse pattern.


We’re almost done with the Carme blouse! Today we’ll hem it. We’ll use a narrow hem (0,5 cm or 3/16″) but you don’t need a special foot. Let’s see how to do it:

On Wednesday, we’ll see the last part of this Sew-Along, the buttons and buttonholes placement. Have a great week!


3 comments
0 FacebookTwitterPinterestEmail
The Carme blouse pattern 2.0 is here! As it’s one of my first pattern, the sizing was not up to date, but I’m happy to tell you that you can now sew this blouse from size 34 to 52.
The pattern includes a print-at-home file as well as copyshop version. Get your copy here: Carme blouse pattern.

Have you tried your Carme blouse yet? There are just a few steps to finish now and you’ll be ready to wear your lovely creation out on the street…

I don’t know about you, but sewing the collar has always been kind of stressful for me. What if it doesn’t fit into the neckline? And if the fabric doesn’t lay flat?
With this method of attaching the collar (thanks so much to Anna from the blog Paunnet for suggesting it while she was testing the pattern!), collars are going to be so easy now…

Have a great weekend and see you on Monday!


8 comments
1 FacebookTwitterPinterestEmail
The Carme blouse pattern 2.0 is here! As it’s one of my first pattern, the sizing was not up to date, but I’m happy to tell you that you can now sew this blouse from size 34 to 52.
The pattern includes a print-at-home file as well as copyshop version. Get your copy here: Carme blouse pattern.
Now, let’s talk about the Sew-Along! Today is a big day as we’re going to make the entire sleeve piece. But don’t worry, there are 4 steps but each one is quite easy on its own.
Let’s begin!
SLEEVE VENT

SLEEVE TAB

SLEEVE CUFF

SET THE SLEEVE

I hope the videos are being useful and that you’re not already fed up with the jingle and my broken English (I know I am after editing the videos and watching them so much). I wish a great day and I’ll see you on Friday for the collar part of the Sew-Along.


4 comments
2 FacebookTwitterPinterestEmail
The Carme blouse pattern 2.0 is here! As it’s one of my first pattern, the sizing was not up to date, but I’m happy to tell you that you can now sew this blouse from size 34 to 52.
The pattern includes a print-at-home file as well as copyshop version. Get your copy here: Carme blouse pattern.

If you’re like me and don’t have a serger, you might want to use a cleaner finish than zig-zag stitches on your seam allowances. That’s why we’re going to see how to make french seams for the side and shoulder seams (and later on the sleeve seams) to get that nice and clean finishing touch.


I’ll see you on Wednesday for the sleeve part!

6 comments
1 FacebookTwitterPinterestEmail
The Carme blouse pattern 2.0 is here! As it’s one of my first pattern, the sizing was not up to date, but I’m happy to tell you that you can now sew this blouse from size 34 to 52.
The pattern includes a print-at-home file as well as copyshop version. Get your copy here: Carme blouse pattern.
The pin tucks… they might seem difficult to make and get those nice and parallel little folds might seem tricky but it’s not!
When I was designing the Carme blouse, I wanted to incorporate pin tucks because I find they add a romantic detail without beeing to “frilly”. So I tried different approach to pleat the yoke and the one we’re using is by far the easiest I could find (if you have any other method, please let us know).
We’ll make the pin tucks on a big enough piece of fabric and then cut the yoke out of it. So if you’re not happy with your pin tucks, you can make more before cutting the final yoke.
And don’t worry, folding the pin tucks is not as time consuming as you think… just need a little bit of patience.


15 comments
0 FacebookTwitterPinterestEmail
I would like to start this post with an giant THANK YOU!
Thank you to all of you who bought the new patterns, the Sorell trousers and the Xerea dress! I’m so happy (and relieved) that you like them!And Thank you to my testers! I’m so grateful for your help, your advices on the design and instructions… Without you all, I wouldn’t have been able to release these new patterns!And now, let’s talk about the Sorell trousers! Again!
I know sewing trousers can be intimidating: what with the fly, the pockets, the waistband… so many details that can go wrong.
I knew a step-by-step photo tutorial would be the perfect support for this pattern and that many beginners would feel better with extra pictures and instructions.You can download the Sorell trousers Tutorial here (in English).If you have questions, feel free to ask them in the comment section below.
Want some ideas for your Sorell trousers? Check out my inspiration board on Pinterest.

signature1_editado-1.

2 comments
1 FacebookTwitterPinterestEmail
Here it is, the last viedo of the #AlamedaSewAlong!
In this video, you’ll see how to insert the invisible zipper, attach the lining with a fellstitch and stitch the hem with bias binding.

Watch directly on Youtube.
I hope you enjoyed the videos and the Sew-Along. Let me know if you have any questions and send me pictures of your Alameda dresses when you have finish!!!
Have a great week-end…
And see you next week with some big news (new pattern release!)…


3 comments
1 FacebookTwitterPinterestEmail

Today, we’ll start with the first video tutorial of the #AlamedaSewAlong! Yeah!

I had a lot of fun last spring making the videos for the Carme blouse Sew-Along and you were a lot to tell me that it was a huge help to have these visual tutorials, so here come the Alameda videos!

You’ll recognize the music 😉

Piping is a great decorative option and such an easy way to add a pop of colour to your Alameda dress. I invite you to see the inspiration boards to get ideas on what colour you want to choose: contrast, patterned piping, the same colour, leather…

And remember that you can buy it already-made or you can make it yourself! See for yourself on this tutorial I made back in April.

To watch the video in Youtube, click here.

I hope you liked it. See you on Monday with the bodice video…


0 comment
0 FacebookTwitterPinterestEmail

Today we’ll see how to make simple changes to the Alameda pattern: how to lengthen or shorten the bodice and how to connect two sizes together on the skirt part.

Note: If you have made a Full Bust Adjustment according to the previous tutorial, you have noticed that the front bodice is slightly longer than before. If you want to lengthen/shorten it as well, do it after the FBA so that you modify all the bodice pieces the same way.

First, let’s lengthen the bodice:

1. Draw a line parallel to the waistline on all the bodice pattern pieces (nº 1, 2, 3 and 4). I made mine about 5 cm (2″) from the bottom.
2. Cut along the line and place the pieces over a piece of paper. Add the length you need between each piece and tape in place. Make sure you add the same amount between all the pieces.
And now, let’s shorten the bodice, you’ll see it’s even easier:

1. Overlap the pieces by the length you need to remove. Make sure you remove the same length on all the bodice pieces. Tape together.

If you need to connect 2 different sizes on the skirt pieces, here’s how to do it:

1. With a ruler, connect two lines together (in red 40-42 and in blue 42-46 for exemple, but not more than  an 2 size difference) by drawing a new line from the top to the bottom. Repeat this step on all the skirt pieces and don’t forget to change the marks placement.

There you go! These changes were quite easy and will help you get the best possible fit for your Alameda dress.

Ask any questions you have in the comments section…

0 comment
0 FacebookTwitterPinterestEmail


Today we’ll see how to make a Full Bust Adjustment on the princess seam of the Alameda dress pattern. But first, you might be wondering: How do I know if I need a FBA?
Well, it’s not that difficult. The first clue is that you have more than a B bra cup (sorry to all the ladies with bosom, as the patterns are drafted by a small chested girl – me! – this fitted design will need a FBA to get fit on you). You also want to make a FBA if:
  • compared to all your measurements, your bust measurements is one (or more) size bigger.
  • when you made your muslin, you went for a bigger size for the bust but have now some extra fabric at the armscye.
  • the waistline is pulling up at the front.
Let’s take an example: Maria’s measurements are bust 92 cm (36″), waist 70 cm (27 1/2″) and hips 95 cm (37 1/4″). For the waist and hips, she should cut a size 38 but her bust belongs to size 40. The problem if she cuts size 40 for the bust and 38 for the waist and hips is that the armscye and shoulder lines will also belong to size 40, which will be too big for her and most likely there will be some extra fabric where the princess seam starts and at the shoulder seams. The solution is to cut the pattern pieces in 38 and add extra volume only in the bust area.
And of course make a muslin before to check the fit and correct the adjustments!
Let’s see how to make the Full Bust Adjustment:
1
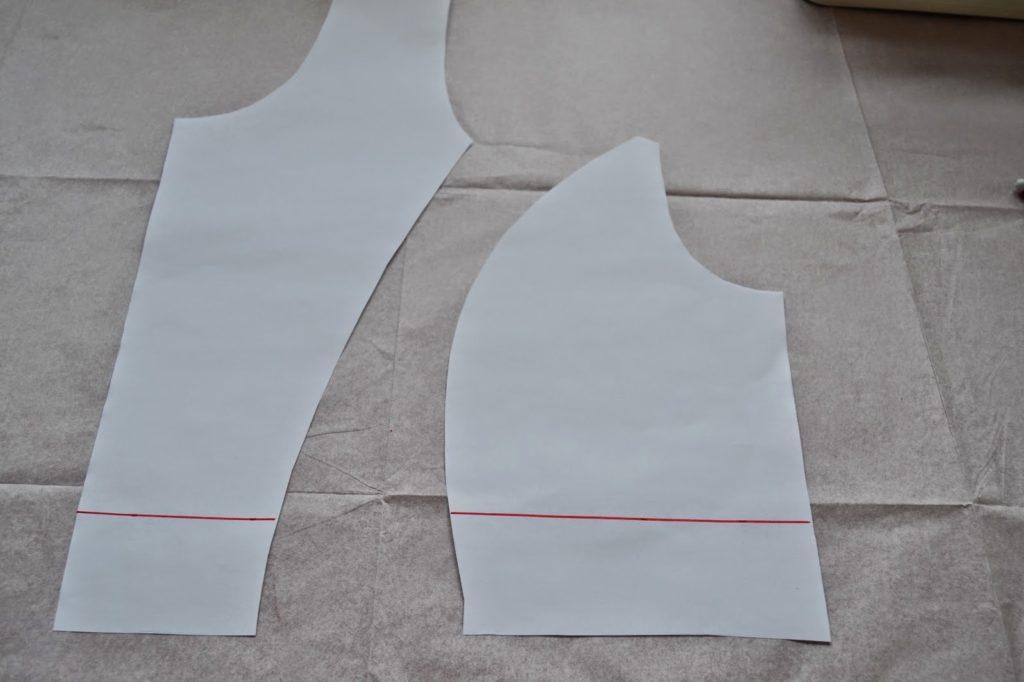
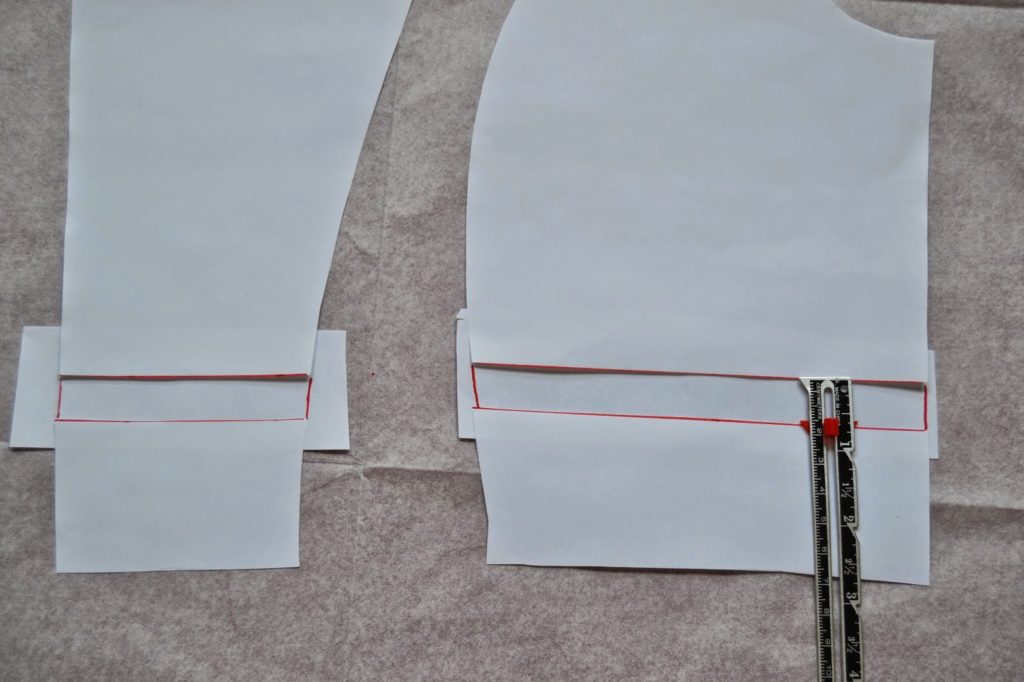
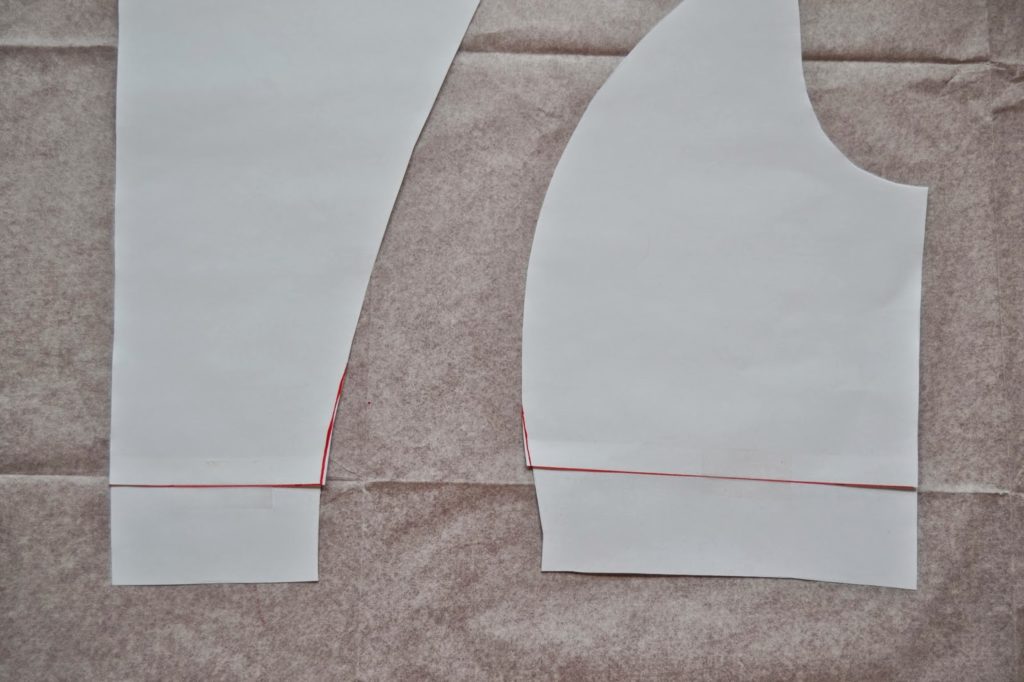
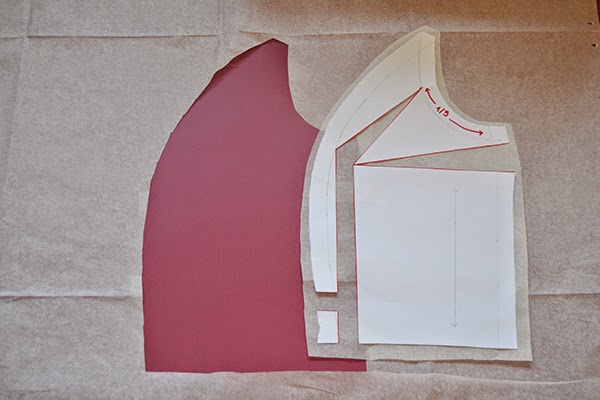
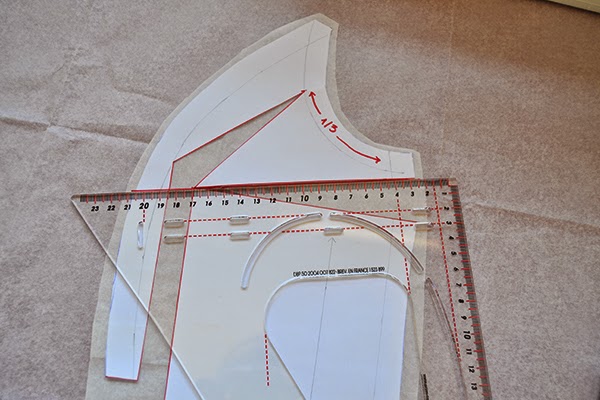
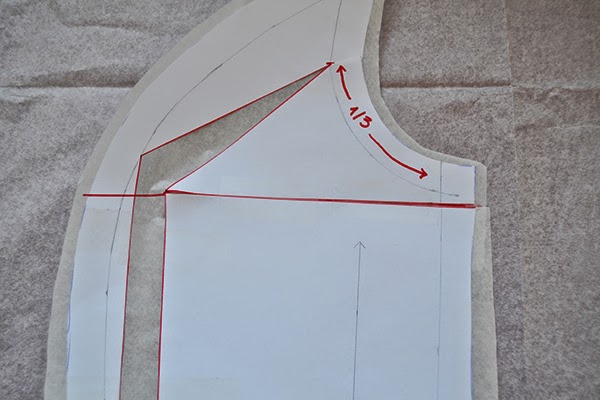
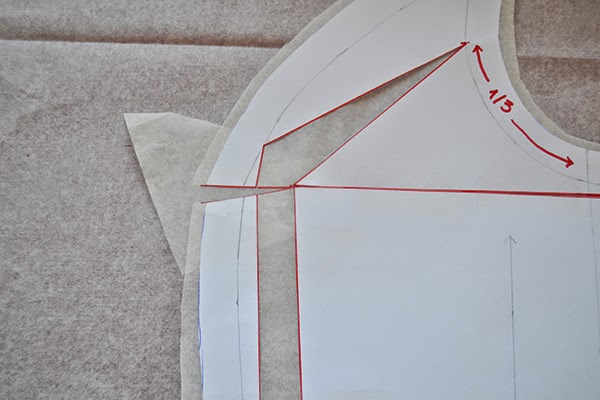
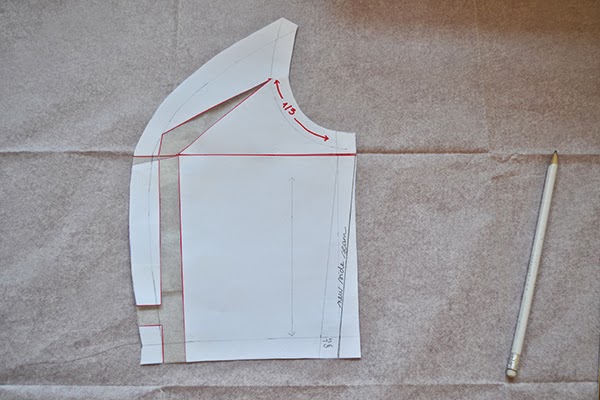
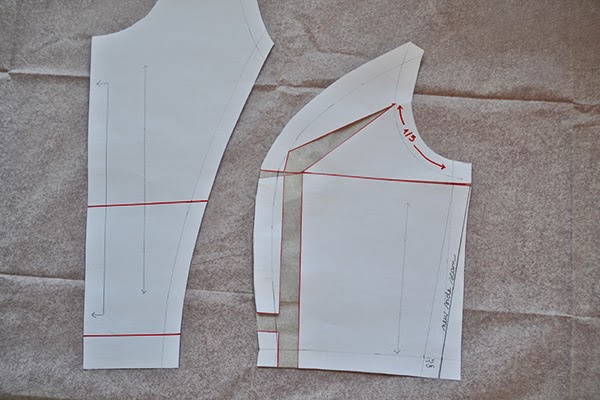
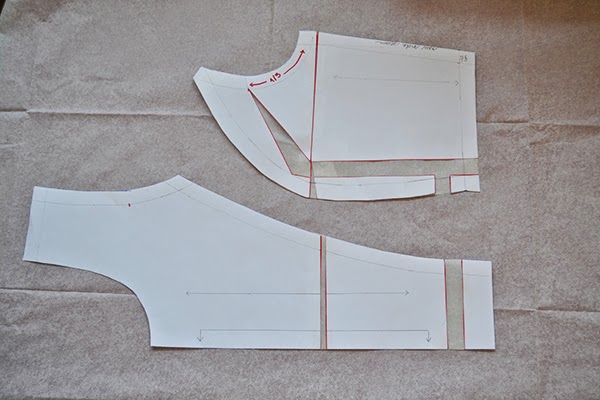
Let’s take Maria’s measurements again: her bust measurement is 92 cm (36″) when the one corresponding to her size 38 is 88 cm (34 1/2″), there is a 4 cm (1 1/2″) difference. She’ll cut the pattern in size 38 and add 2 cm (3/4″) at each bust seam to make the full bust adjustment, without increasing the waistline or the neckline.

1. Take your pattern bodice front and bodice side front pieces. Draw the seam allowances and all the marks (notches, grainline…).On the bodice side front, we’re going to draw 3 lines:

  •    1: from the waistline to the fullest part of the bust.
  •    2: from 1/3 of the armhole (remember that the armhole is made of the the front and side front bodice pieces) to the fullest part of the bust.
  •   3: from the fullest part of the bust, draw a diagonal line toward the side seam allowance, like a dart.
3
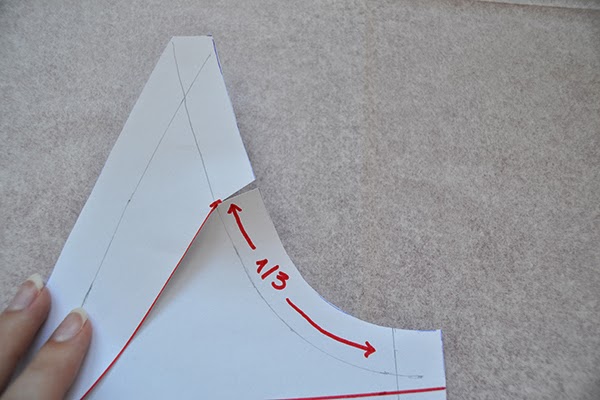
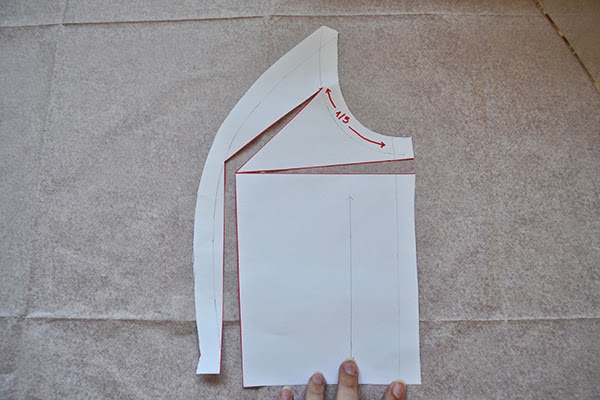
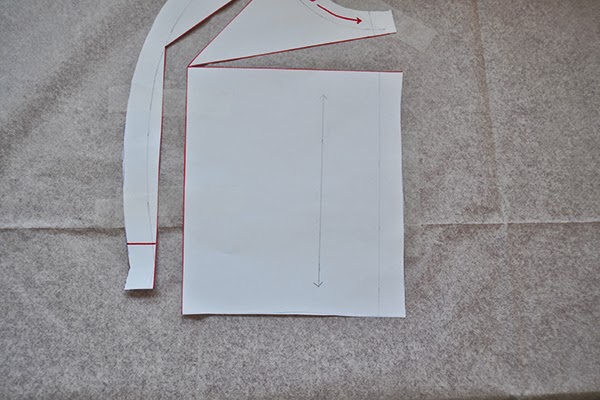
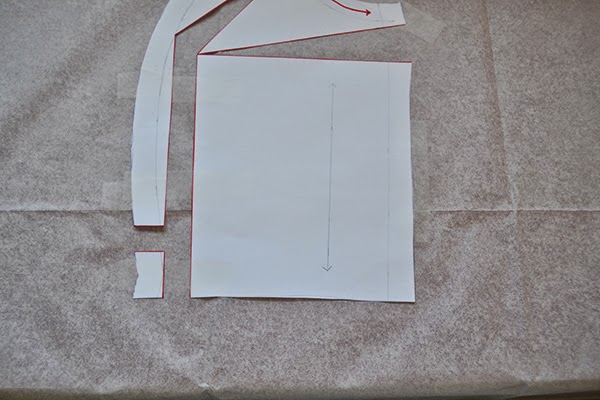
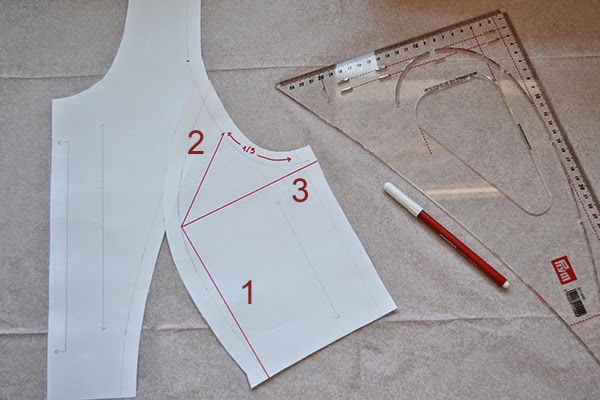
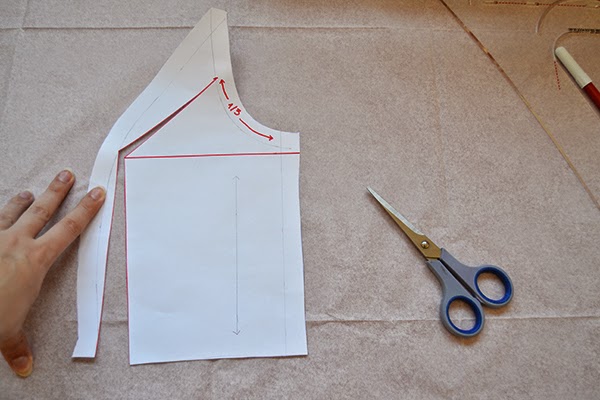
2. Cut lines 1 and 2 and stop when you reach the seam allowance.
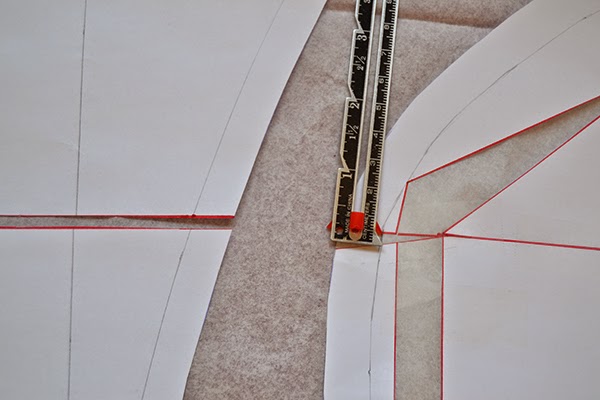
4
3. Cut the seam allowance but make sure it’s still attached.
5
4. Cut line 3 and stop just before you reach the fullest part of the bust.
6
5. Tape the princess seam to a piece of paper and pivot the pattern along lines 1, 2 and 3 so that the opening at line 1 measures the  2 cm (3/4″) increase we need. Make sure the 2 cm (3/4″) increase is even all the way down line 1. Tape the pattern in place on the paper.
7
6. As you can see, the waistline is not even. Draw a line parallel to the waistline on the princess seam part.
7. Cut along the line and place the small piece on the continuity of the waistline, 2 cm (3/4″) from line 1. Tape.
9
8. Cut roughly around the new pattern piece.
10
9. Draw a line extending line 3 to the princess seam.
11
10. Cut along line 3 until you reach the first pivot. Close the “dart” and tape.
12
11. Cut the line 3 from the princess seam to the pivot. Place a piece of paper under the spread “dart” and tape.
13
12. We need to take 2 cm (3/4″) in at the side seam to keep the waistline the original width (this is the measurement we added at the bust). Draw a new side seam starting from line 3 and ending 2 cm (3/4″) from the waistline edge.
14
13. Now we need to add the increases we made to the side front piece to the front. Trace 2 lines at the same level you made the increases.
14. Measure how much you added to the side front piece and report that on the front piece. For the bust, measure the seam allowance line, not the cutting line.
15. Here you go: your new pattern pieces!  We have increased the bust area without touching to the waistline, armhole or neckline.
If you have any questions, let me know in the comments.
Are you going to make a FBA?


12 comments
1 FacebookTwitterPinterestEmail