Home Search
Search results for

"carme"

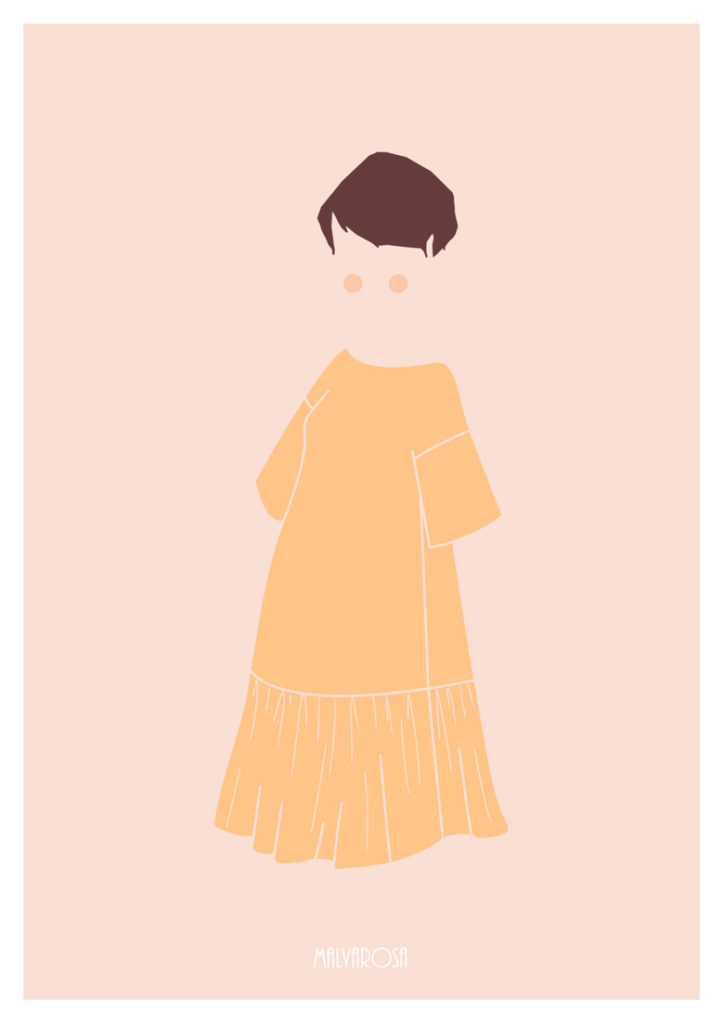
I’m very happy to make a Sew-Along for the Carme blouse, and with videos! How great is that? I think it’s going to be really cool and easy for you to follow (and you won’t have to read a 10 km long post everyday other day, hehe). The other good thing is that all the videos will be available indefinitely, so even if you can’t join right now, you’ll be able to access them here on the blog or through Youtube.Let’s talk about the schedule. As you might want to buy fabric (and maybe make a muslin), I’ll give you more than a full week to gather the tools and material for the Carme blouse. Here is the schedule:

Monday, March 3rd: inspiration and variation
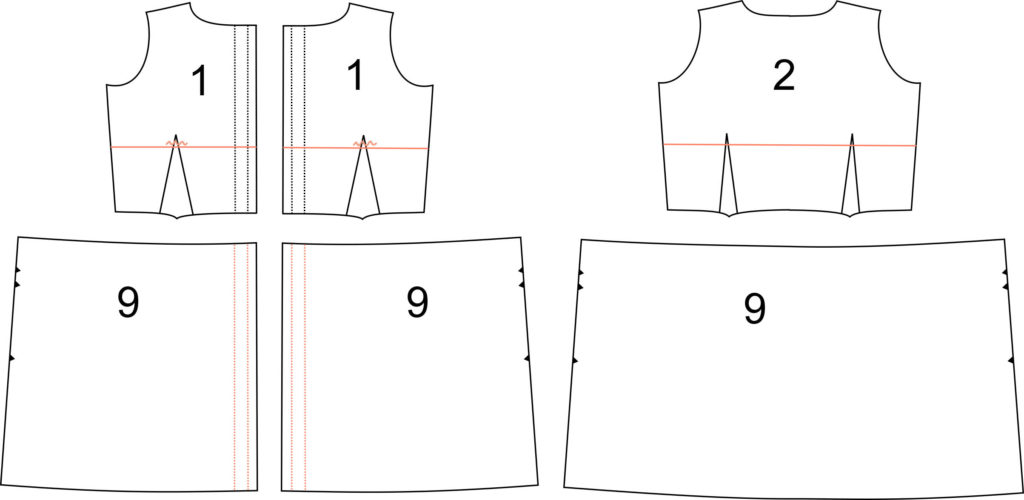
Monday, March 10th: Cut the fabric
Wednesday, March 12th: Pin tucks
Friday, March 14th: Yoke and placket
Monday, March 17th: French seams
Wednesday, March 19th: Sleeves
Friday, March 21st: Collar
Monday, March 24th: Hem
Wendesday, March 26th: Buttonholes
Monday, April 7th: Your Carme Party!!!

You can start collecting your material right now, here’s what you’ll need:

  • Lightweight woven fabric such as cotton voile, lawn, batiste,dotted swiss, chiffon, linen, chambray…
  • Fabric (150 cm wide): 1,7 m  (60″ wide: 1,9 yard)
  • Fabric (115 cm wide): 2 m   (45″ wide: 2 1/4 yards)
  • 10 small buttons
  • matching thread
  • optional: fusible interfacing for the collar if your fabric is too light on its own (20 x 50 cm or 19,7″ x 7,9″)

And here is the Sew-Along button (Click right on the image to save it):

So let me know if you’re going to join and don’t hesitate to ask me anything in the comment section so that everybody can share. I also created a flickr group so you can post pictures of your Carme blouse.
I’m really looking forward to start sewing with you!
Have a wonderful weekend!


25 comments
0 FacebookTwitterPinterestEmail
Here is round 2 of the testers versions of the Carme blouse pattern!
Read about the first part here.
Fiona from Diary of a Chain Stitcher chose a white cotton lawn, breezy and with a nice drape, to make her Carme. That will be such a great blouse to wear in spring and summer. It also shows beautifully the pin tucks details.
Like the busy seamstress she is, Sonia from La Pequeña Aprendiz found the time to make 2 Carme: one blouse and one dress variation. This is so lovely! And see how she incorporated the piping around the yoke: genious idea!
I hope these lovely ladies have inspired you!
On Friday, we’ll discuss the Sew-Along schedule.
9 comments
1 FacebookTwitterPinterestEmail
Thank you all for the amazing reception to the Carme blouse over the first weekend! Your comments (and your orders of course!) were so nice, I’m really touched!
So for those who have ordered the pattern or need some inspiration to get it, let’s see the beautiful versions of the pattern testers (second part is coming on wednesday).
Go read all the details about their Carme blouse on their blogs:

Carme Shirt 071PicMonkey Collage

Merche from Aventuras de costuras, made this beautiful cashmere print blouse with a white contrasting yoke. I don’t know about you but I want to make one lie that as soon as possible.

IMG_5698IMG_5727

The master of Liberty fabric, Kirsty from Top Notch, used this beautiful blue and green Liberty. It feels really romantic and easy going.

Carme-Blouse-Tucked-in-1-568x1024Sleeve-tabs

What a delicate and feminine fabric! Andrea from Stitch Parade chose this pretty cotton voile to sew her Carme blouse. A detail I love: the buttons and topstitching in red!
See you Wednesday for part 2…


13 comments
0 FacebookTwitterPinterestEmail
carme blouse pattern, blouse pattern, pauline alice, pin tuck, yoke, button placket, sleeve tab
I’m really happy to present the brand new pattern: the Carme blouse!
This is a casual, and yet feminine, blouse with a button placket, a pin-tucked yoke, a small mao collar and long gathered sleeves that can be rolled up with the sleeve tab.
carme blouse pattern, blouse pattern, pauline alice, pin tuck, yoke, button placket, sleeve tab
I wanted to design a blouse that you could wear everyday and still look elegant. With your favourite pair of trousers or your favourite skirt, it will be perfect to wear from the morning to work until the night for a drink, or on the weekend walking in the city.
2copiacarme blouse pattern, blouse pattern, pauline alice, pin tuck, yoke, button placket, sleeve tab
I really hope you’ll love the pattern as much as I do! I’m preparing a series of video tutorials so you don’t have to feel intimidated by the yoke detail and the button placket. The pattern is for an intermediate level, but with the tutorials, an advanced beginner can easily make it.
Buy the pattern here: Carme blouse pattern.
Have a great weekend!


54 comments
0 FacebookTwitterPinterestEmail

It was time, we haven’t released any printed pattern since February ! We worked non-stop to show you our new pattern collection ! Here they are : Ayora, Mila, Diago and Morella.

I don’t usually give names to our collections, only to the patterns, but if I had to, this one would be called “cocooning”. I thought about it as mix between loungewear and streetwear. When temperatures start to fall, the only thing I want to do is roll myself in a blanket and drink a cup of tea. Well, this collection feels just like that to me : simple, comfortable and enveloping shapes, natural and soft fabrics, peaceful colours.

AYORA

quilted jacket ayora

The Ayora jacket is quilted, boxy and reversible. Perfect to be worn inside as a cardigan or outside when it’s starting to get cold.

MILA

mila jumpsuit dress

Mila is a double pattern : jumpsuit or dress. My favourite feature : the ties that are crossed and knotted in the front or back. The back waistband is elasticized. View A is sleeveless and with tapered cropped trousers. View B has ¾ sleeve length and a knee-length pencil skirt with front vent.

These two patterns are available as printed patterns as well as PDF (print-at-home and copyshop).

And to complete them, we have developped two PDF patterns.

DIAGO

diago blouse

Diago is our first beginner pattern. A simple blouse with nice finishing (French seams and facings). The boxy and cropped silhouette can be easily paired with high waisted garments (Morella, Romero or Botanic for example).

MORELLA

morella trousers skirt

And finally Morella : I couldn’t decide between the trousers and the skirt so I added both the pattern ! Cropped tapered trousers or midi A line skirt, the details are the same : elasticized waistband so it can be pulled on easily, flat front, deep pockets and the side seam moved to the back of the leg.

I really hope you’ll enjoy these new patterns !

– You can find the new patterns as a printed copy and/or PDF file on the shop.  –
– Now available from size 34 to 52! –


Pictures: Rosa Campos

Location: Cuit

Hair and makeup: La Peluquería de Mari Carmen

0 comment
2 FacebookTwitterPinterestEmail

Vera is such a versatile shirt pattern: any lightweigh fabric is going to look great paired with it! You can choose if you prefer an understated shirt in a plain white cotton popelin or a more exuberant look with some colorful viscose for example. And how about adding some contrast using piping around the collar for a pyjama shirt style or topstitching around the edges and pocket to make them pop?

Here are some of our inspiration for the Vera shirt pattern:

PLAIN COLOUR

  1. Marsala plumetis – Cousette
  2. White cotton lawn – Guthrie & Ghani
  3. Yellow batiste – Cousette

TROPICAL

  1. Botanical cotton lawn – Guthrie & Ghani
  2. Toucan cotton – Henry & Henriette
  3. Jungle cotton – Tissustory

ABSTRACT PRINT

  1. Abstract batiste – Fil’Etik
  2. Graphite double gauze – Anna Ka Bazaar
  3. Nani Iro double gauze – Guthrie & Ghani


– You can find the Vera shirt pattern in the shop in printed copy or PDF download. –


inspiration pictures:

1 / 2 / 3 / 4 / 5

1 / 2 / 3 / 4

1 / 2 / 3

0 comment
1 FacebookTwitterPinterestEmail

Today I’m writing a special post: how to adapt your Pauline Alice patterns when you’re expecting!

You may have noticed (or not) that I’m expecting a baby for Fall (thanks to everyone who congratulated me!). My closet is quite limited right now as most of my clothes are fitted and high waisted, so I need new outfits more adapted to my growing belly. I thought it would be nice to show you how to adapt non-maternity patterns quite easily with pretty illustrations and diagrams:


CAMI DRESS

This is a very easy modification: you just have to shorten the front and back bodice pieces of the Cami dress pattern.

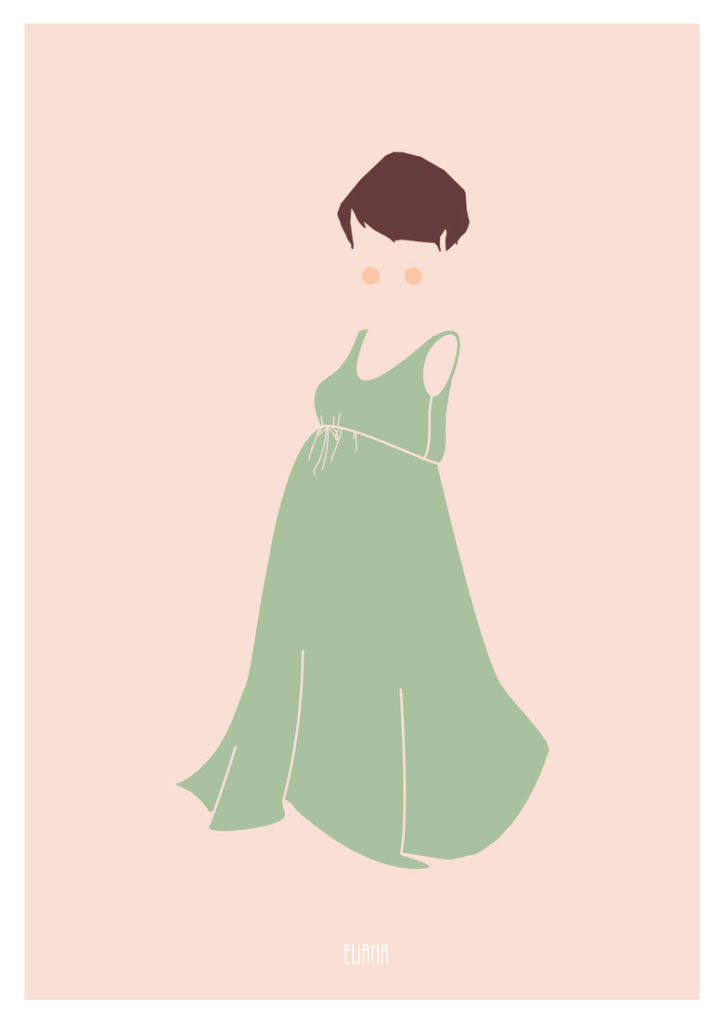
I would then remove the back darts and replace the front ones by gathers. To make the dress easier to put on, I would remove the side zipper and cut the front skirt piece in half and continue the bodice buttonband on the skirt. As the waistline is now under the bust, I would remove the pockets but they can also be lowered if you wish to keep them.


CARME BLOUSE & PORT SHORT

In the Carme blouse Sew-along (see it here on youtube), I had already shown how to make a maternity version.

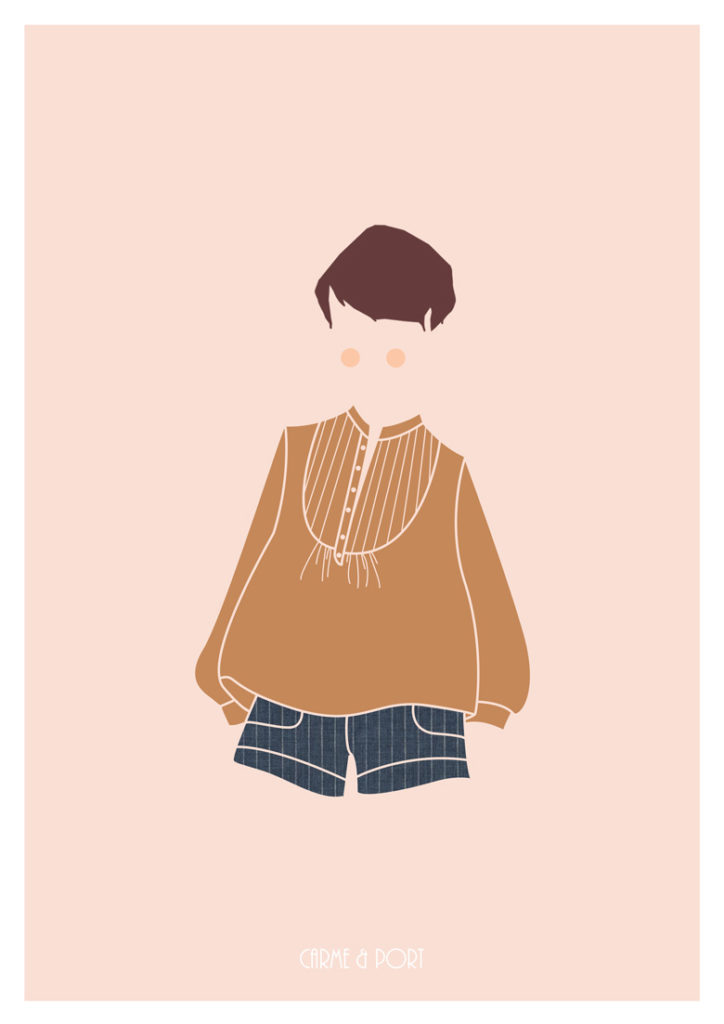
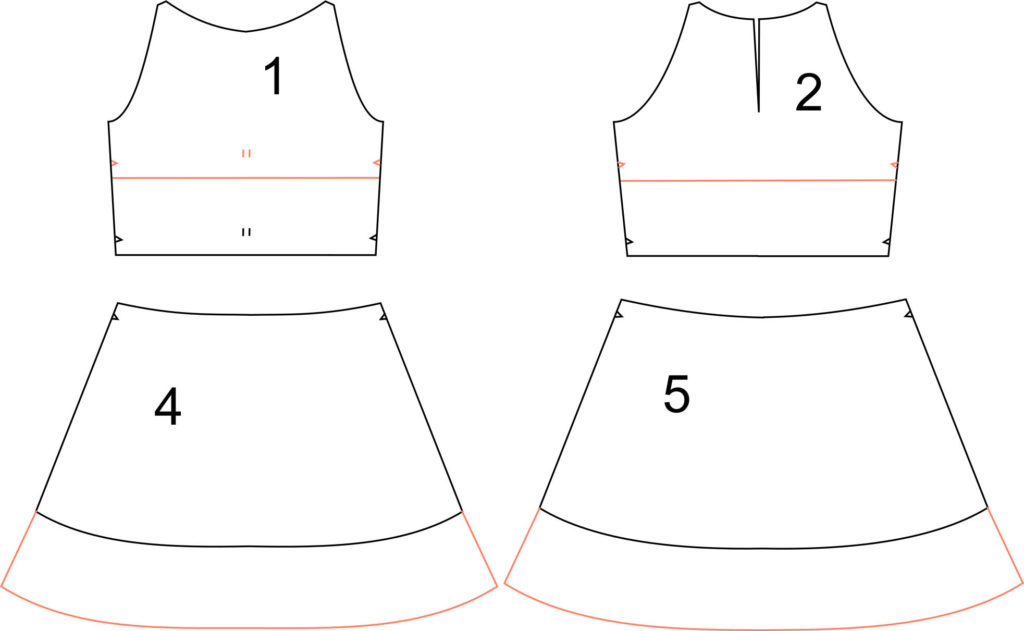
You just need to add fabric on the bodice centre front that will later be gathered and stitched to the front yoke as the original version.


The Port short is a model that will ask for a more complex modification.

You’ll need to add a jersey waistband to the short. You need to redraw the front pieces (front and pockets). Draw a curve from the side to the center front (the seat is shortened by about 15 cm – this measure will vary depending on your belly, make sure to make a toile before). You won’t need the zipper fly pieces as the shorts will be pulled on, fly will only be decorative. Place the pockets (view A or B) over the new front piece and draw the curve on the pockets as well.

For the jersey waistband, we’ll cut two front and two back waistbands (size is to be adapted to your belly). The bottom edge should measure the same as the short’s new waistline with the cruve. Stitch the front and back waistbands at the sides and then both waistbands together at the top edge. Turn with the right sides out and stitch a line about 2 cm below the top edge to created a channel and insert an elastic. Stitch the waistband to the short. You can now pull the short on and the jersey waistband will be very confortable all the way through pregnancy.


MALVAROSA DRESS

No need to change anything on the Malvarosa dress as it’s loose shape makes it perfect for maternity.


ELIANA DRESS

That’s the first dress I thought of hacking : if you move the elastic waistband up, you’ll have the perfect maternity dress, from the first to the third trimester.

You need to shorten the Eliana dress bodice front and back pieces, without removing the 3 cm seam allowances at the waist. For the skirt, no need to change the waist but you might want to lengthen it a little bit. As the waistline is now under the bust, I would remove the pockets but they can also be lowered if you wish to keep them.


REINA SHIRT / DRESS

No modification needed for the Reina shirt thanks to the loose shape and gathers around the bust. But I want to lengthen it and try to make a dress out of it.


XEREA DRESS

By replacing the fold on view B of the Xerea dress by soft gathers, you’ll get a pretty maternity dress that you’ll also be able to wear after baby’s arrival.


DENIA BLOUSE & ROSARI SKIRT

The Denia blouse pattern doesn’t need any change. It will be perfect for summer temperatures.

Just as the Port short, the Rosari skirt will need a jersey waistband to be worn as a maternity skirt.

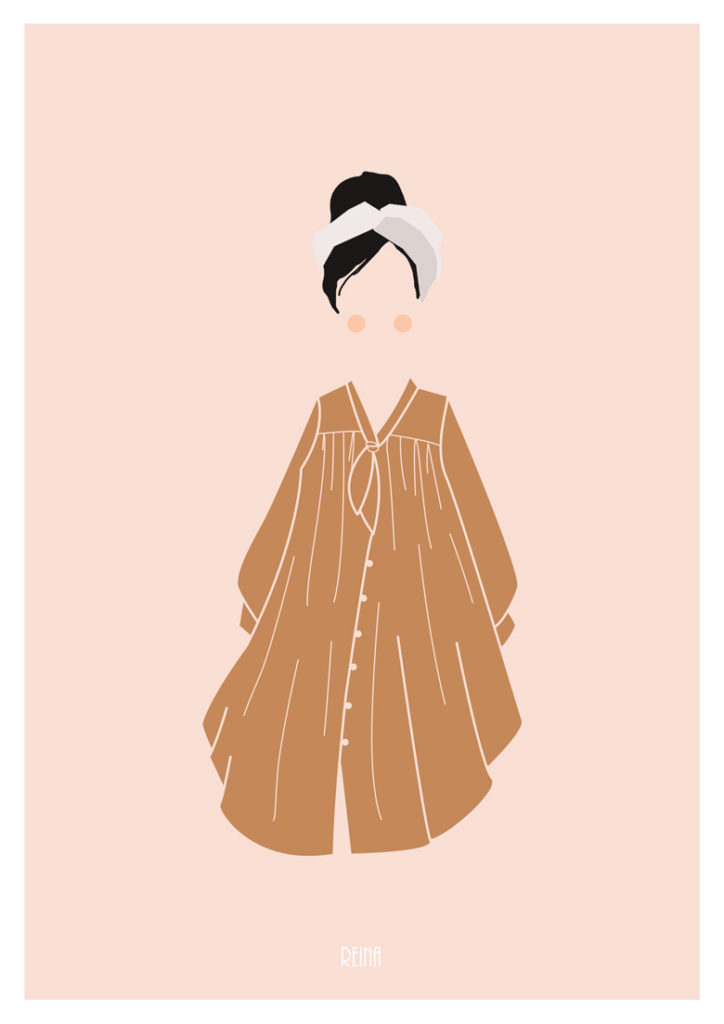
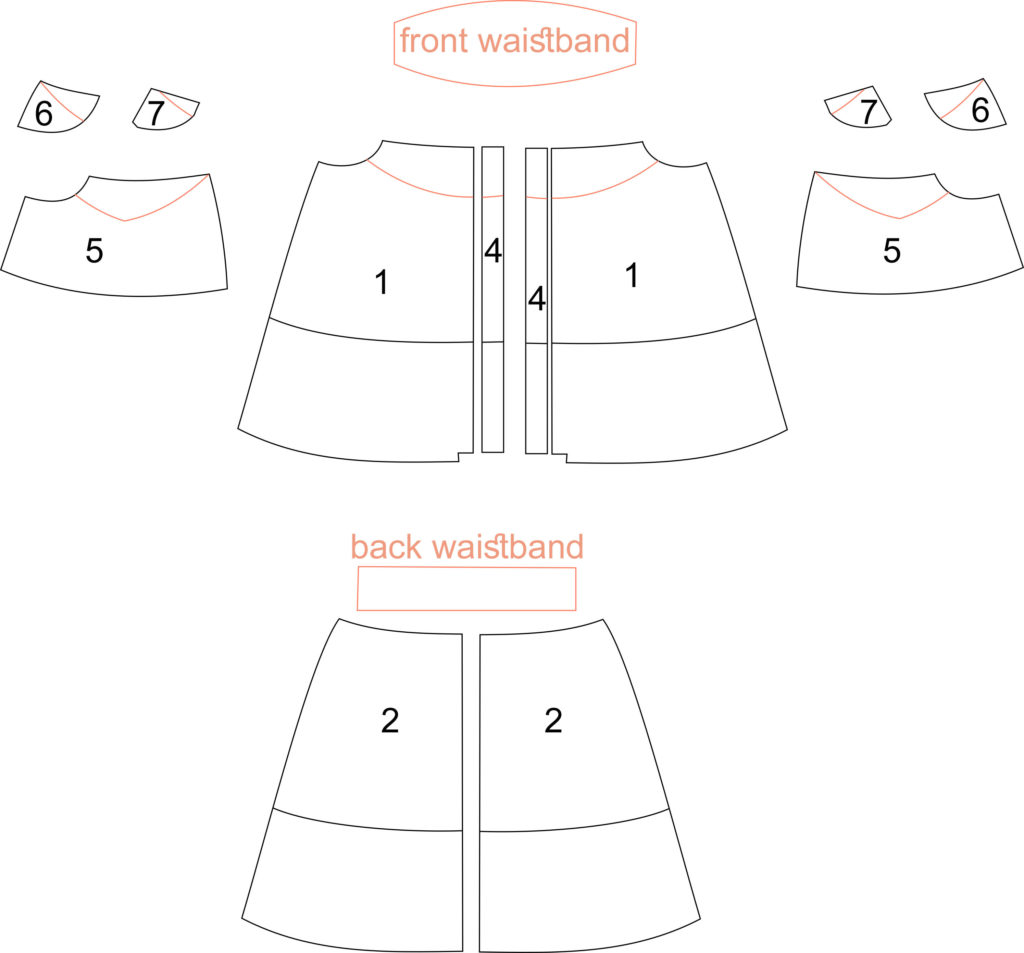
Check out the Port modifications above. You don’t need to make the buttonholes, as the skirt won’t be opened, you can stitch the buttons directly over the buttonbands. Pockets will nedd to be lowered slightly.


ALDAIA DRESS

The Aldaia dress is designed for jersey fabrics, perfect when your belly is getting rounder every day.

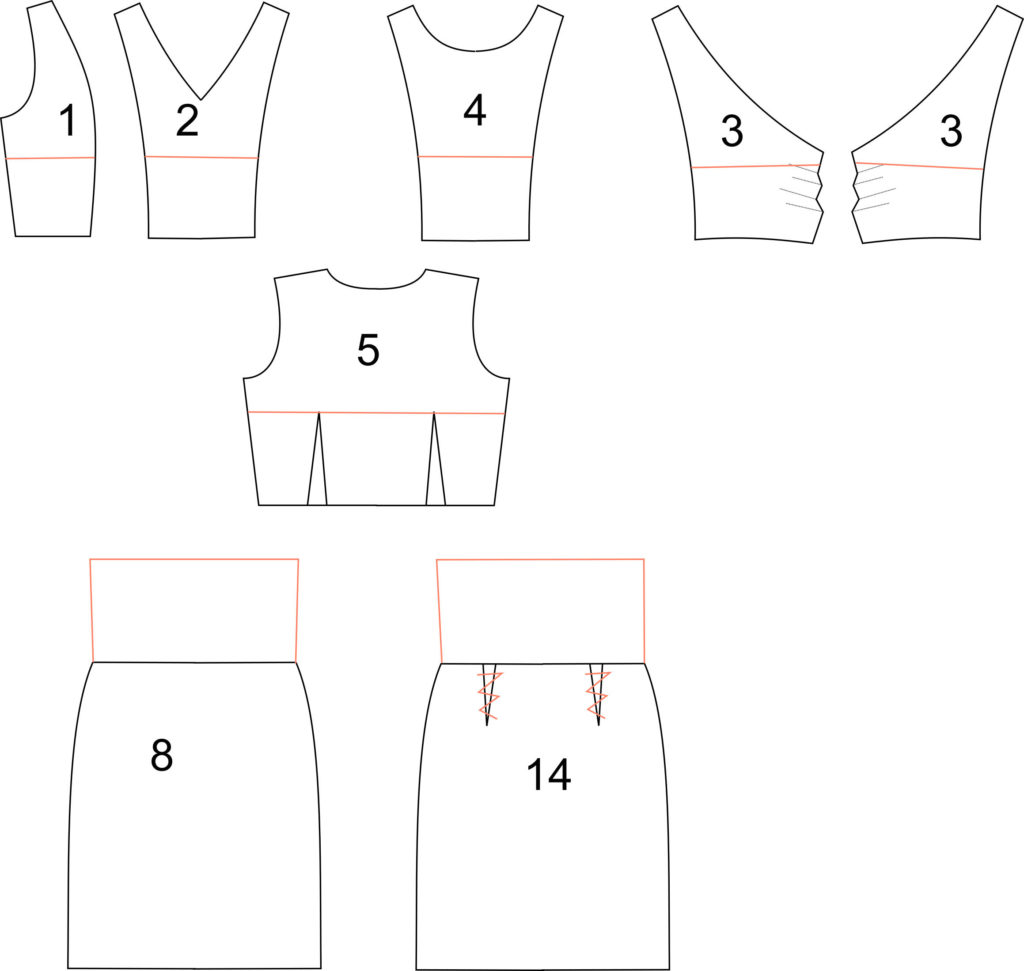
I would shorten the bodice pieces (all three views are compatibles) under the bust and remove the back darts. For the skirt, I recommand using view B, without seams, and lengthen the skirt at the waist. Make sure you choose a fabric with enough stretch ad why not add some soft gathers on the front around the waist?


This is my Pauline Alice maternity wardrobe! I don’t know if I’ll have the time to test all the variations but this is definitely my summer sewing plan. I’m about to start the Cami dress in white cotton, I’ll let you know how that works out.

What about you? What’s your favourite maternity pattern? Which of these do you like the most?

8 comments
6 FacebookTwitterPinterestEmail
port trousers 6

PortA6

Here it is, the new pattern: the Port trousers and its short version. Its casual look will be perfect for the back at school/work season or the ones who don’t want to say good-bye to summer.
The chino cut, military inspired, makes it perfect all year-round. How about wearing view A with cuffed hems and heels for work or view B to make the most of the last summer days?
PortA4
PortA5
PortB4
The Port trousers have a relaxed fit at the waist and hips with a slightly tapered leg and ankle length, as well as a mid-rise waistband with belt loops. There are many pockets options (you all know my love for pockets by now, no?): view A with front slant pockets and back patch pockets, view B with front patch pockets and back zipped pockets.
I recommend using medium-weight fabrics such as gabardine, twill cotton, linen, denim… or even lightweight woolen fabrics for a more dressed-up version.
PortB2
PortB3
The Port trousers pattern is available at the shop only as a PDF download.
I wanted to propose an easy trousers pattern, with interesting details, that could be made quite quickly (print it, stitch it on the very same day! Great as the week end is coming!). And printed pattern are coming back very soon…
I’m preparing a series of posts on trousers common adjustments, inspiration and a few tutorials in the up-coming weeks.
PortB5
PortA2
Fabrics:
View A: gabardine from Cousette (worn with a Bailén top in rayon from Cousette)
View B: denim from Julían López (worn with a Carme blouse)
I hope you’ll like the Port trousers and that it will join your fall wardrobe!
signature1_editado-1
0 comment
1 FacebookTwitterPinterestEmail
I know a few of you have requested a tutorial on how to sew the sleeve vent for the Carme blouse pattern. I wrote one a couple of months ago for Craftsy so I thought it would be nice to share it here as well (with translation).
This tutorial might come in handy if you’re making the new Eliana dress pattern as this is the technique used to make the front/back opening on the bodice.
It’s quite easy and produces such great results. If you are making a blouse or shirt, using sheer or lightweight fabric and want to add a vent to a one-piece sleeve or an opening on the bodice, this tutorial definitely is for you!

tutorial-easy-binding-vent-sewing-pattern-1
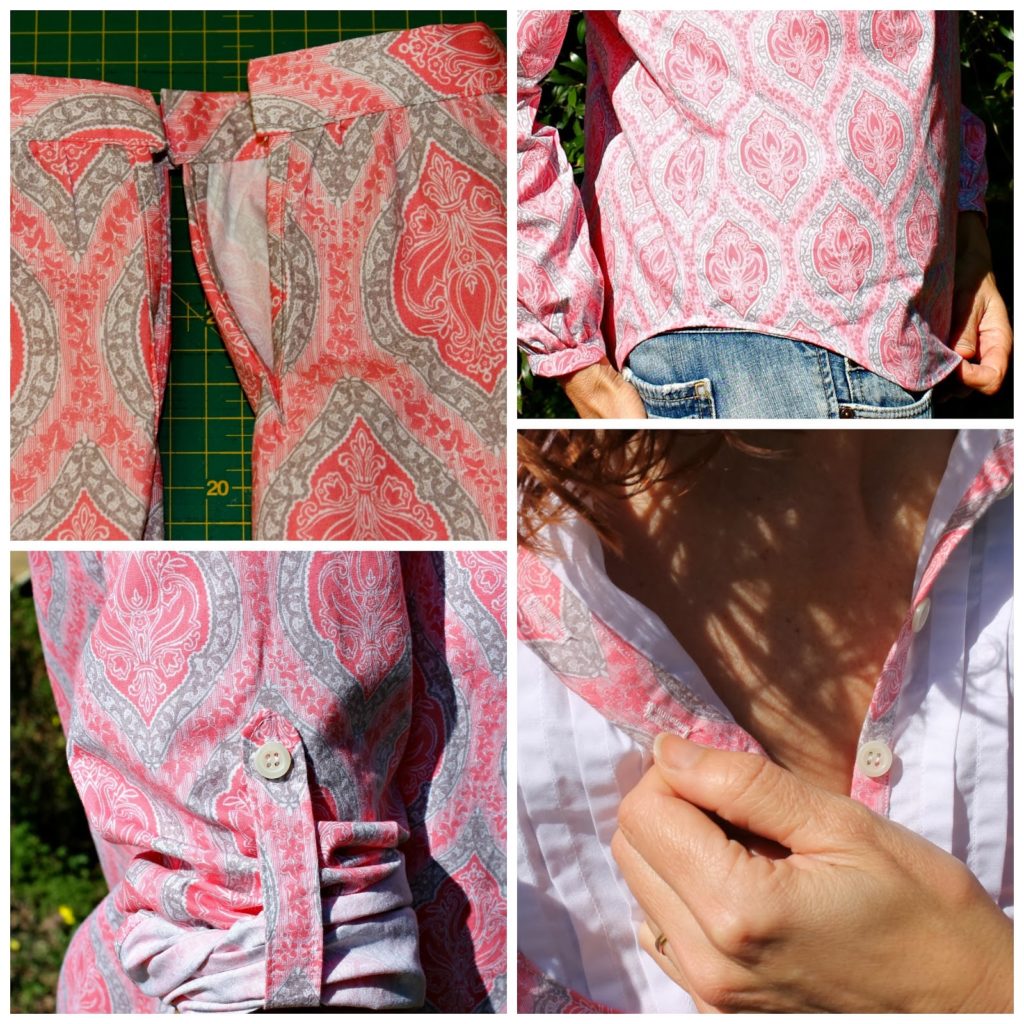
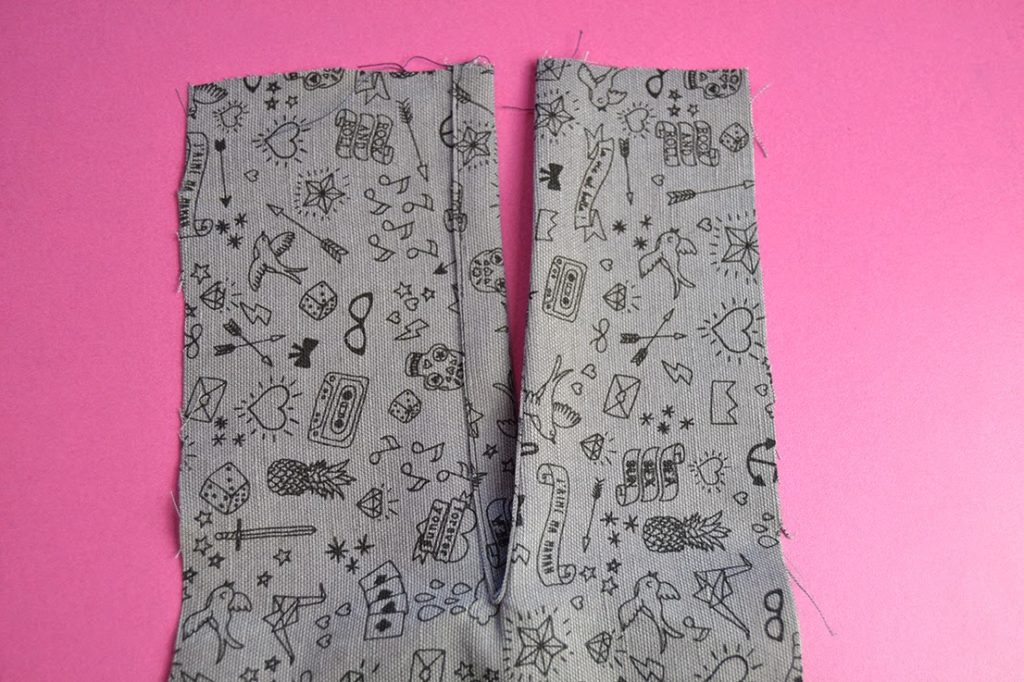
Here’s how to sew an easy vent with binding!

Supplies:

tutorial-easy-binding-vent-sewing-pattern-2
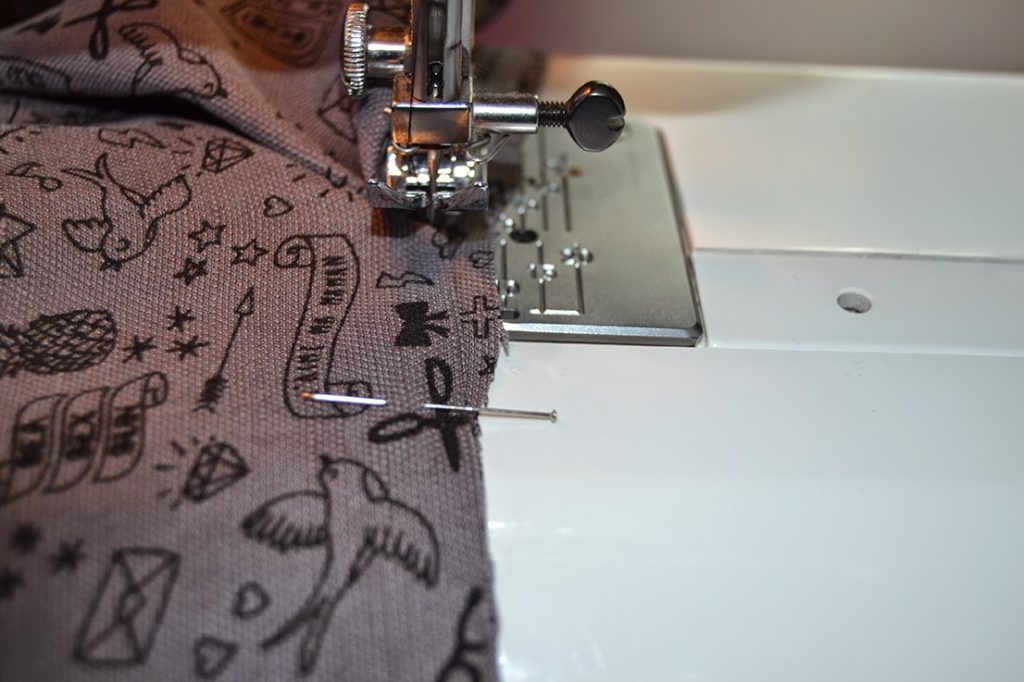
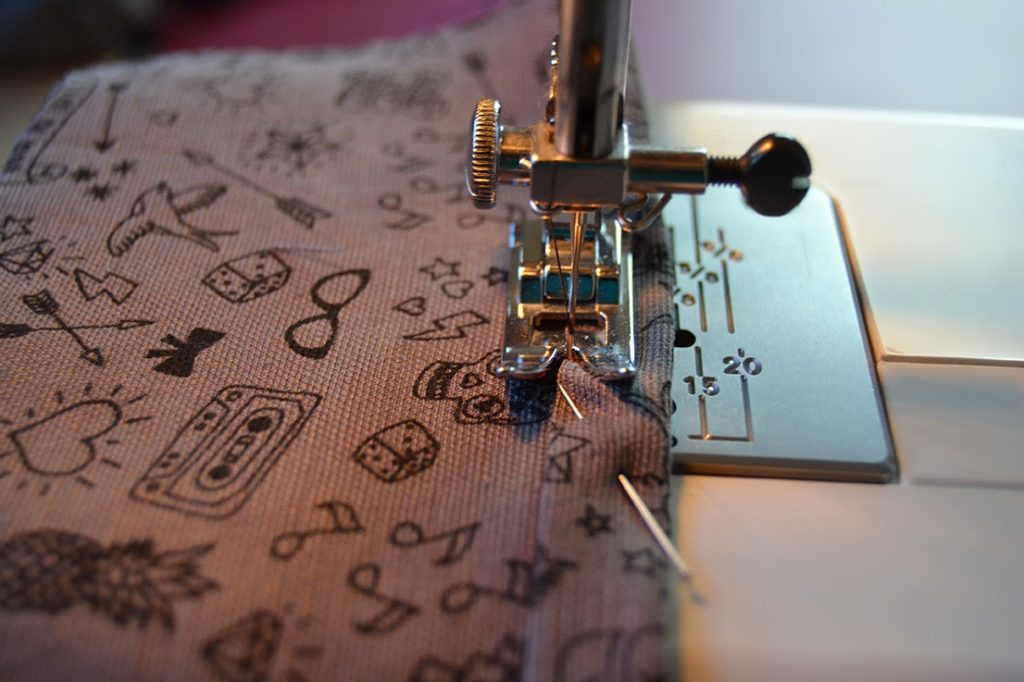
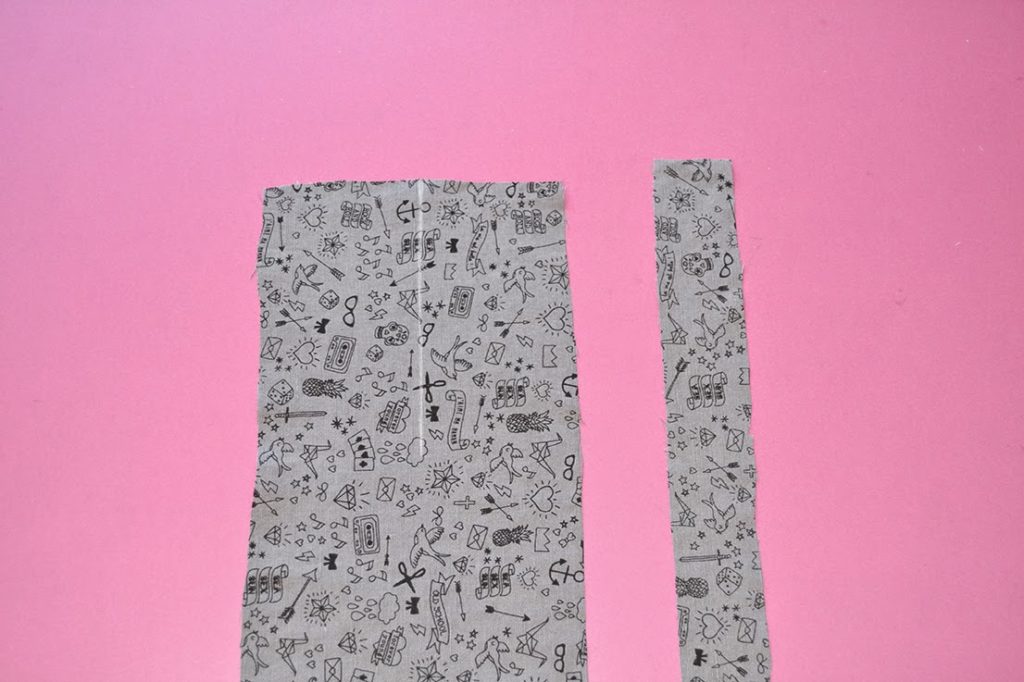
You’ll need your fabric piece (sleeve or bodice) and a strip of fabric cut on grain twice as long as your opening and about 1″ large (you can also use bias binding, just know that it may not sit as flat as on grain fabric).
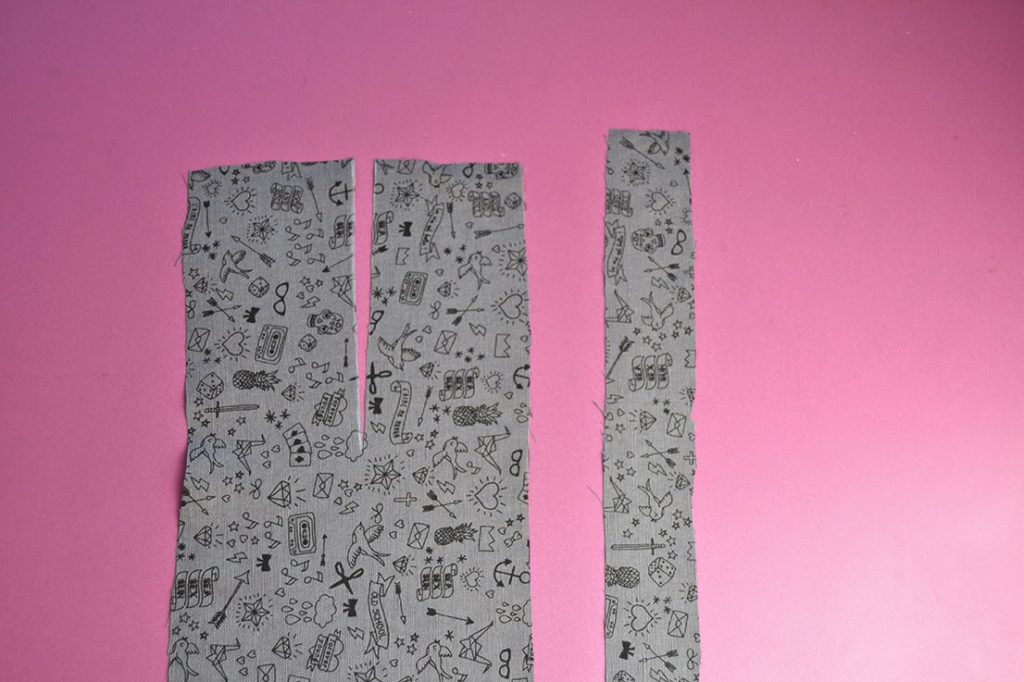
Step 1:
Cut the opening.

tutorial-easy-binding-vent-sewing-pattern-3Step 2:
With right sides facing you, pin the sleeve/bodice opening and the vent together. The center of the sleeve/bodice opening will sit about 1/4″ from the vent edge, this will account for the pivot/shit of fabric.

tutorial-easy-binding-vent-sewing-pattern-4
Step 3:Stitch 1/4″ from the edge. When you reach the center, put the needle down, lift the foot and pivot the fabric to the back. Make sure there is no fold at the corner: the stitching line is just barely on the sleeve/bodice.
Then continue until the end.

tutorial-easy-binding-vent-sewing-pattern-5tutorial-easy-binding-vent-sewing-pattern-6

Step 4:
Press the seam allowance toward the vent. Then fold the other edge of the vent by 1/4″ and press.
Fold the vent over the seam allowances. The folded edge of the vent should sit just over the stitching line. Pin in place.

tutorial-easy-binding-vent-sewing-pattern-7tutorial-easy-binding-vent-sewing-pattern-8
Step 5:
Edgestitch. Remember to pivot when you reach the center.

tutorial-easy-binding-vent-sewing-pattern-9
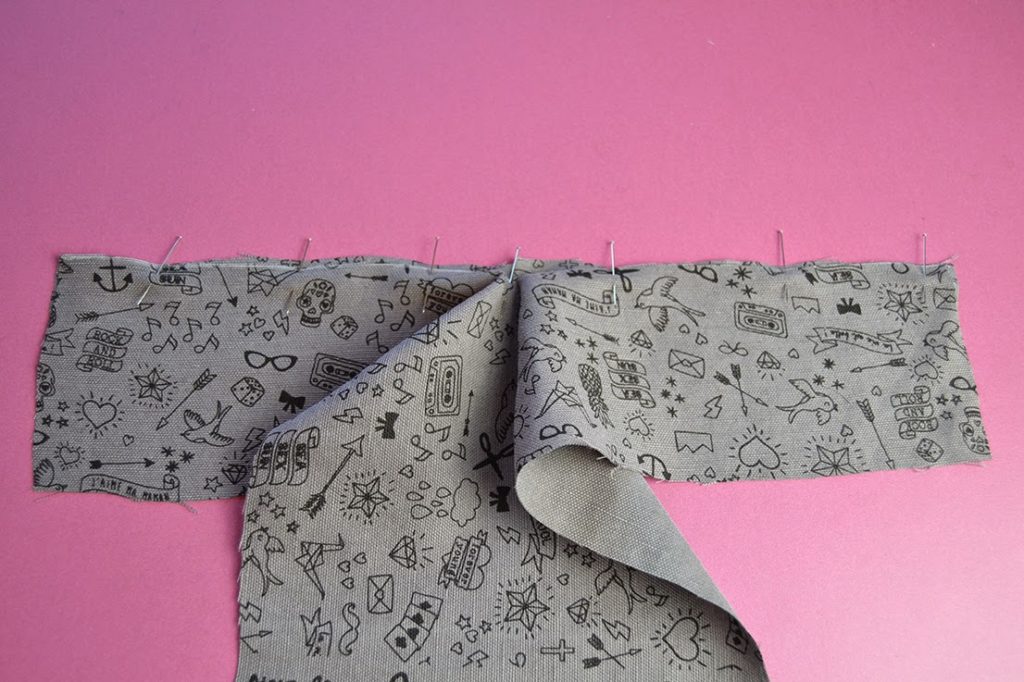
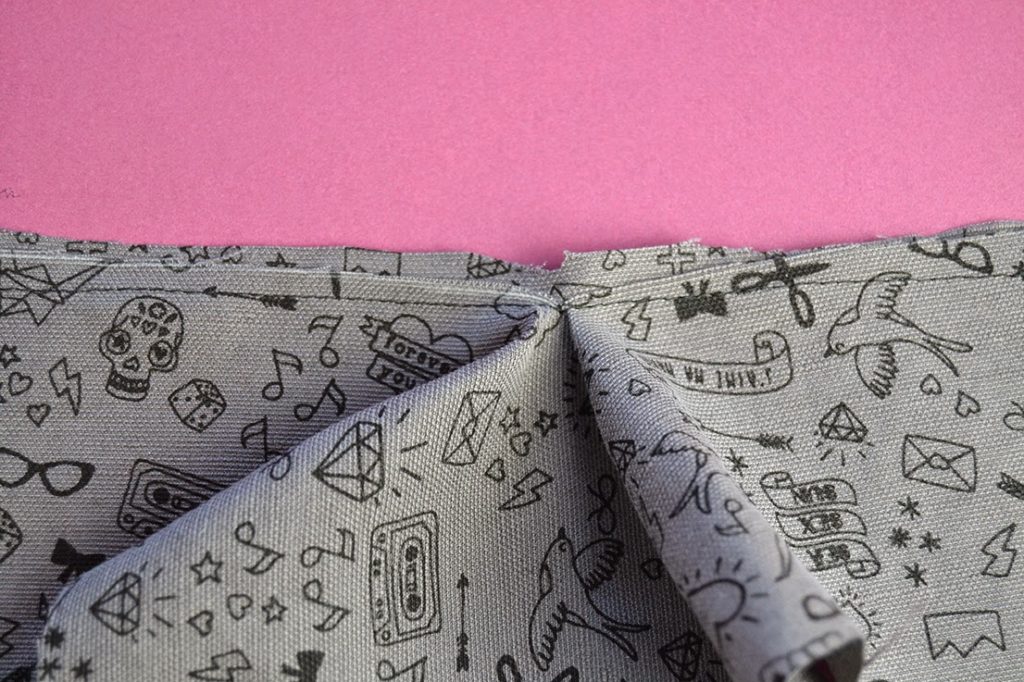
Here is how it looks from the right side:
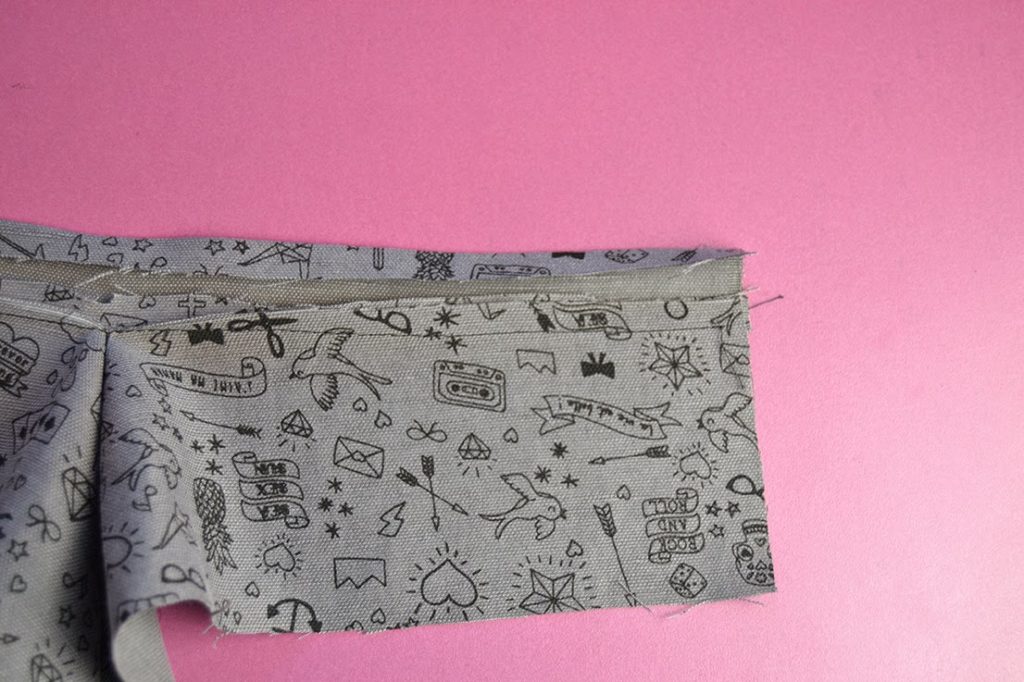
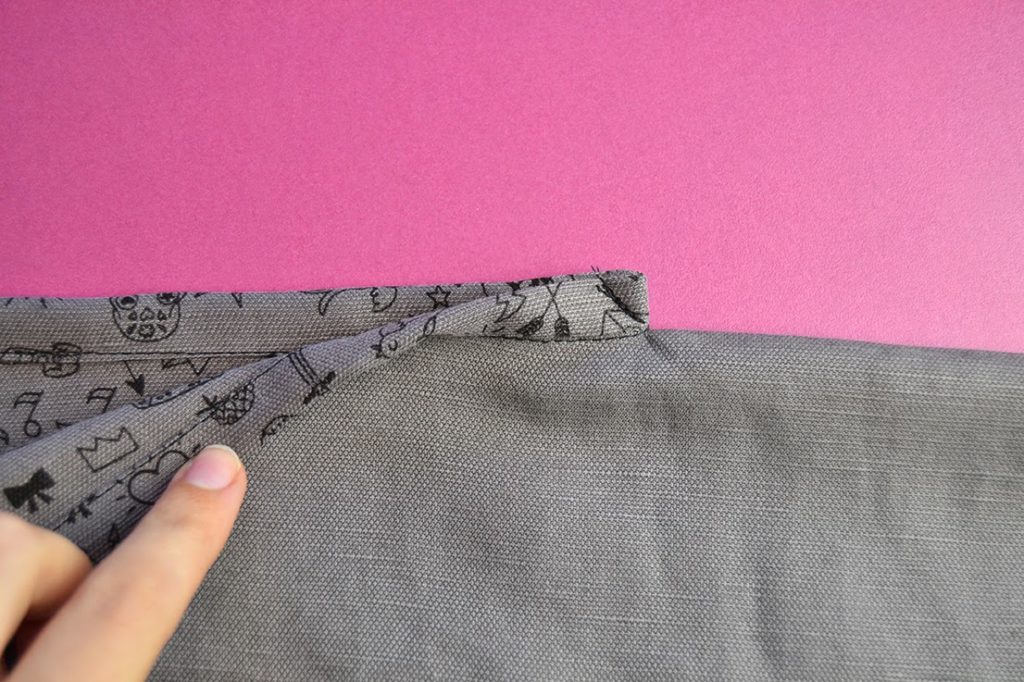
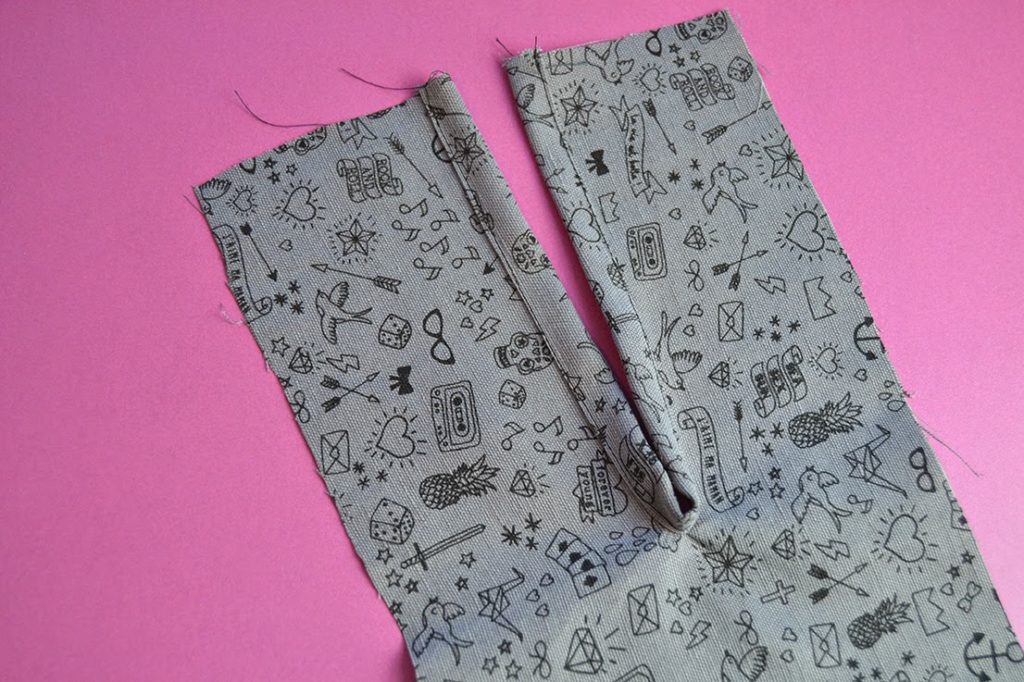
tutorial-easy-binding-vent-sewing-pattern-10Step 6:
Fold the vent with right sides together. Stitch diagonally across the end, it will keep the vent inside and flat.

tutorial-easy-binding-vent-sewing-pattern-11tutorial-easy-binding-vent-sewing-pattern-12
Press the vent to one side.

tutorial-easy-binding-vent-sewing-pattern-13
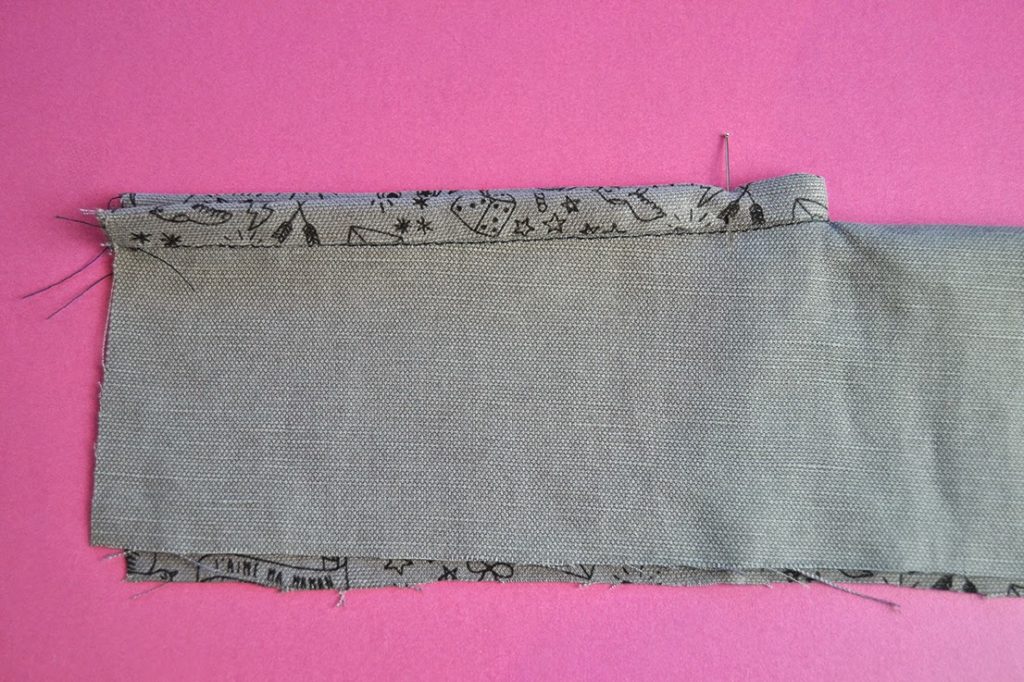
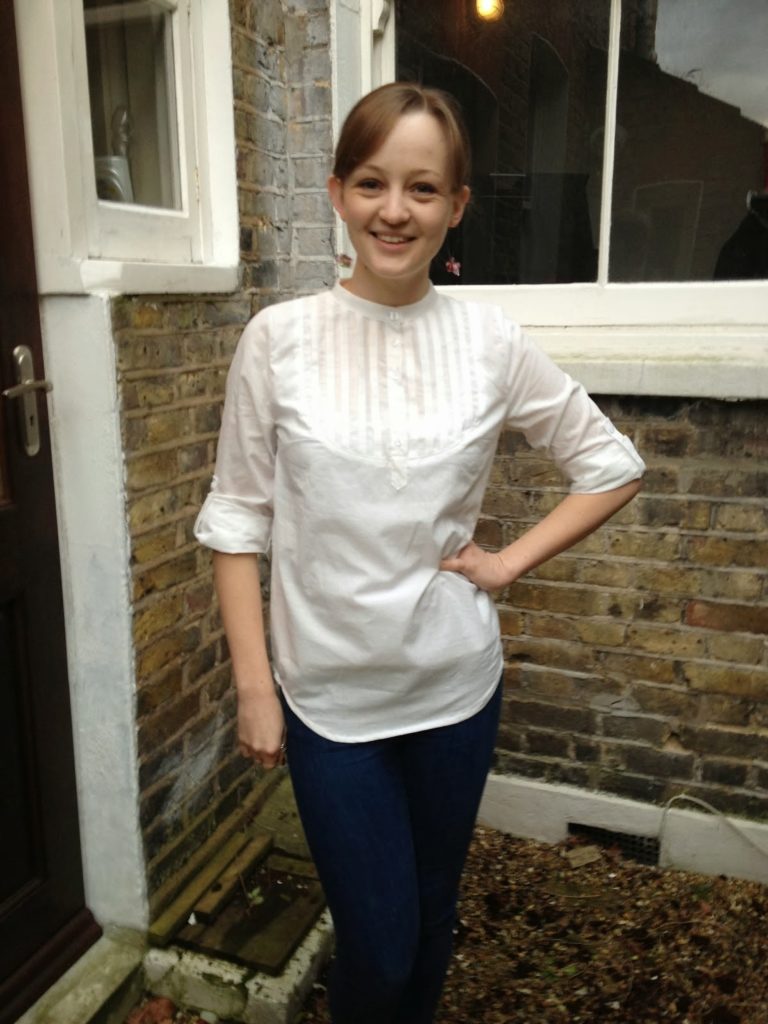
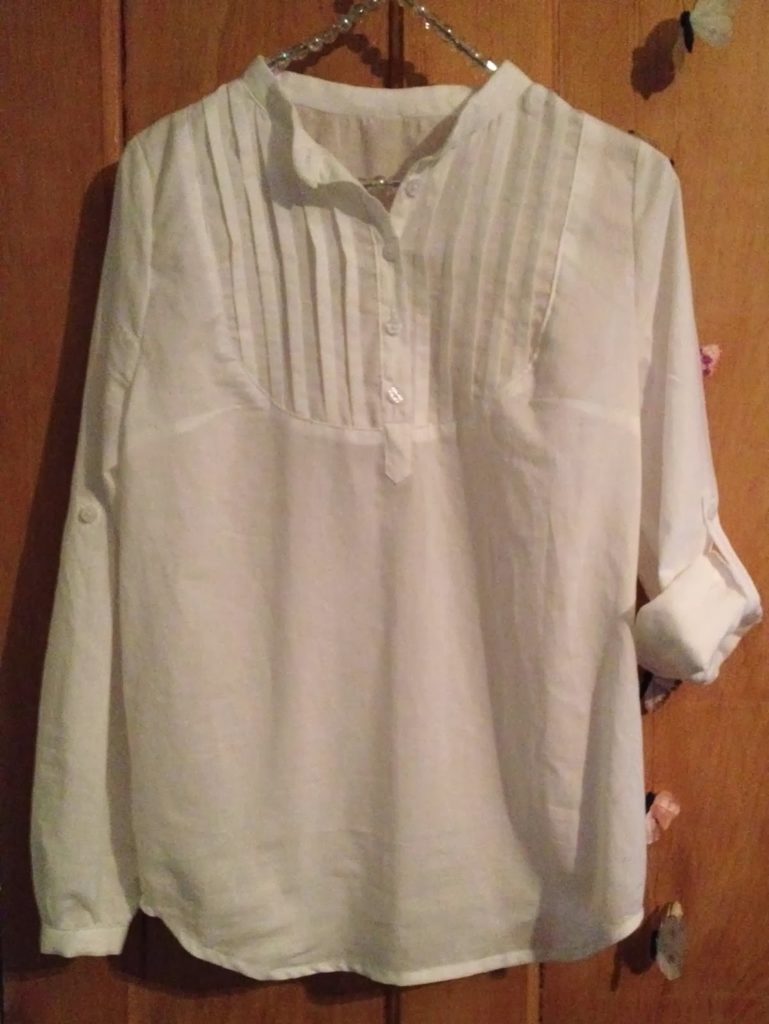
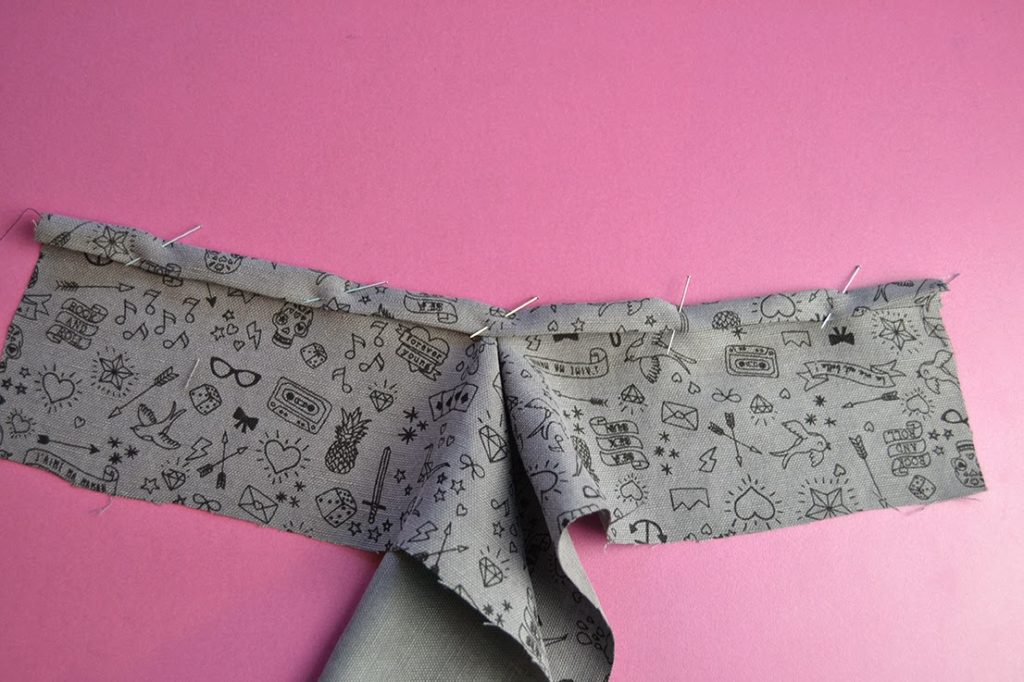
There you go! Now you can add cuffs or hem your sleeves for the Carme and stitch the bias binding neckline on the Eliana.

signature1_editado-1


12 comments
1 FacebookTwitterPinterestEmail

Today, we’ll start with the first video tutorial of the #AlamedaSewAlong! Yeah!

I had a lot of fun last spring making the videos for the Carme blouse Sew-Along and you were a lot to tell me that it was a huge help to have these visual tutorials, so here come the Alameda videos!

You’ll recognize the music 😉

Piping is a great decorative option and such an easy way to add a pop of colour to your Alameda dress. I invite you to see the inspiration boards to get ideas on what colour you want to choose: contrast, patterned piping, the same colour, leather…

And remember that you can buy it already-made or you can make it yourself! See for yourself on this tutorial I made back in April.

To watch the video in Youtube, click here.

I hope you liked it. See you on Monday with the bodice video…


0 comment
0 FacebookTwitterPinterestEmail


How do you feel about a Sew-Along?
You’ve been asking for one for the new pattern, the Alameda dress, so I thought I would repeat the experience and prepare some videos for you like for the Carme blouse (you seemed to like it, no?).
The Alameda dress is not difficult, it’s an intermediate seamstress level, but I think a beginner with good bases would be more than ready to make it. The more complex steps are adding the piping to the princess seams, stitch the lining and the invisible zipper. And with the help of a Sew-Along, no need to fear these techniques.
Let’s see what we’ll cover in the first week:
  • Choose the right fabric and lining for your Alameda
  • Make the ajustements (FBA and SBA, shortening or lengthening, join different sizes)
Then we’ll start with the video tutorials:
  • Stitch the piping
  • Make the bodice and bodice lining
  • Sew the skirt (with pocket option)
  • Attach the zipper
  • Finish (fellsticth and hem)
Grab your Alameda Sew-Along button, prepare your hastags #AlamedaSewAlong, get the pattern if you don’t have it (Alameda Dress pattern) and #paulinealice and start thinking about your fabric. We’ll talk about that on Monday, July 21st for the official start of the Alameda Sew-Along!


10 comments
0 FacebookTwitterPinterestEmail

¡Olé!

I have just realised that February is coming very soon and that means that the Sevillan Party I will be attending as well. And I don’t have a dress! Or a pattern for that matter!
But the crisis is avoided: I have the fabric.
inspiration-flamenca-dress-sewing-pattern-10
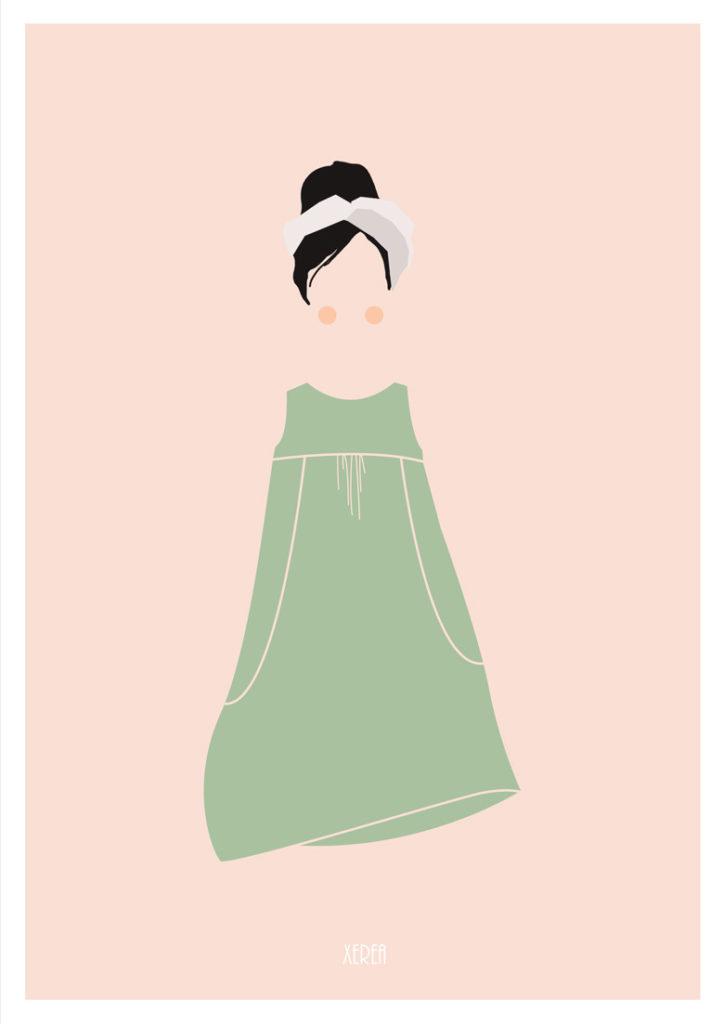
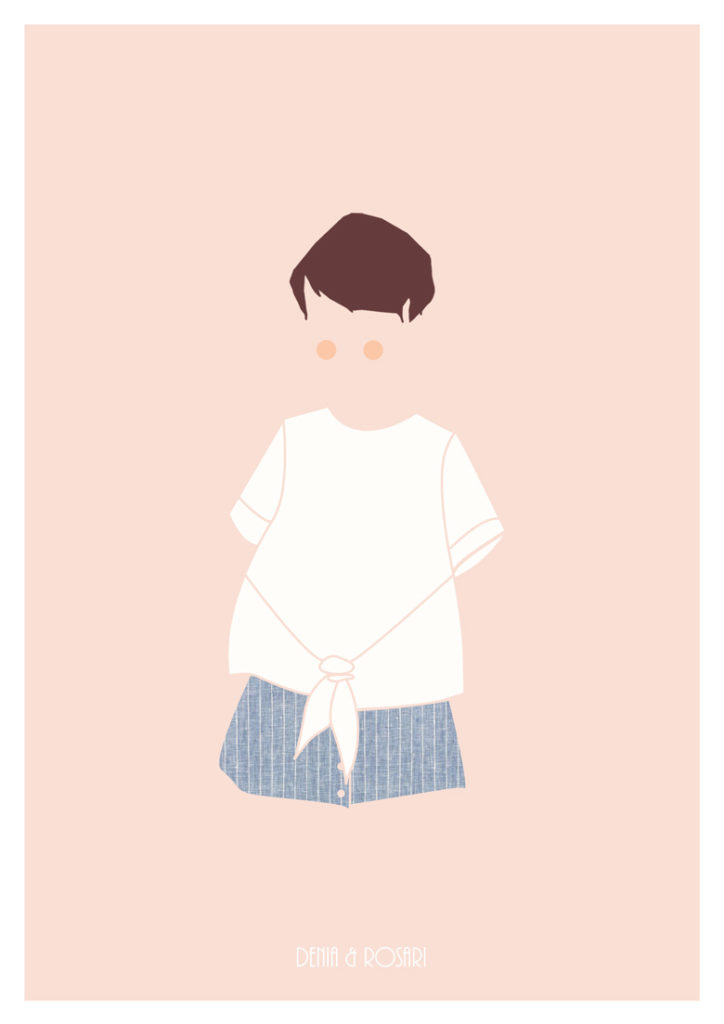
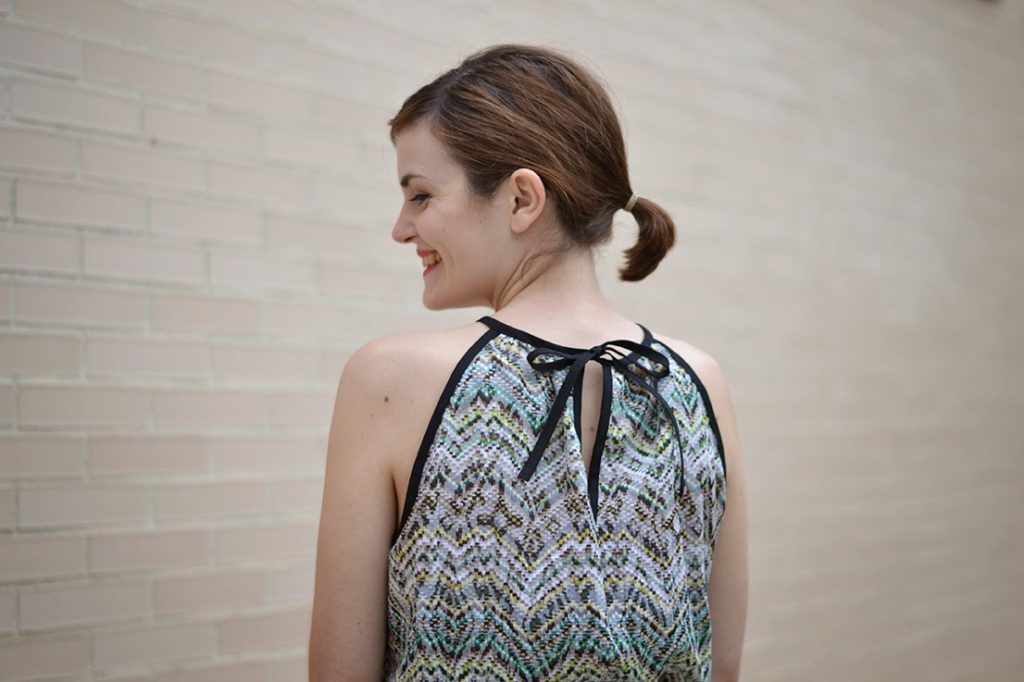
This week-end, while searching the internet for inspiration, I found Claudia’s blog Entre cirios y volantes and I went crazy looking at all the amazing pictures she posted. Her blog is dedicated to the Flamenco world and particularly about fashion shows, advices, inspiration, makeup and traditions.
I sure found what I was looking for!
I thought I would show you my favourite looks and then explain how I am going to make the dress.
Voy a enseñaros mis estilos favoritos y luego explicar como voy a hacer el traje.


SIMOF 2011

SIMOF 2011

2.Cañavate, coleción What Lola wants, Simof 2011
inspiration-flamenca-dress-sewing-pattern-7
1.Cañavate, coleción What Lola wants, Simof 2011
inspiration-flamenca-dress-sewing-pattern-8
4.Cañavate, coleción What Lola wants, Simof 2011
inspiration-flamenca-dress-sewing-pattern-6
3.Cañavate, coleción What Lola wants, Simof 2011
inspiration-flamenca-dress-sewing-pattern-5
6.Claudia, Entre cirios y volantes
inspiration-flamenca-dress-sewing-pattern-4
5.Claudia, Entre cirios y volantes


inspiration-flamenca-dress-sewing-pattern-2
8.Flamenka, Simof 2012


inspiration-flamenca-dress-sewing-pattern-3
7.Carmen Latorre, coleción “Entre naranjos, Simof 2012


As I said on the fabric post, the main fabric will be the blue one. I think it will look better with my fair skin.
I will base the bodice and skirt-just-above-the-knee on the Butterick 6582 pattern I have used to make my last dress, the burgundy velvet one as the fit was spot on. I just have to make some alterations to account for above-the-elbow sleeves. There wille be two ruffles on the sleeves, the top one in blue and the bottom one in white.
The skirt/underskirt will be white and there will be three ruffles attached to it (the first one in blue, the other two in white). I just hope I have enough fabric: 3 meters in 1,5m width in each colour (what the girl in the shop recommended).
Here is a diagram to see all the different pieces (my bodice will be different, this one is with princess seams instead of darts):


inspiration-flamenca-dress-sewing-pattern-1

Now I have to find time during the week-ends to accomplish this challenge and I have until the end of February. I want to document the pattern-making and sewing process so I will be able to share my progress with you. And if you have any knowledge or questions on Flamenco dresses, please let me know.
Thanks and Olé!
signature1_editado-1
19 comments
2 FacebookTwitterPinterestEmail
  • 1
  • 2