
8.3K


 6. Draw parallel
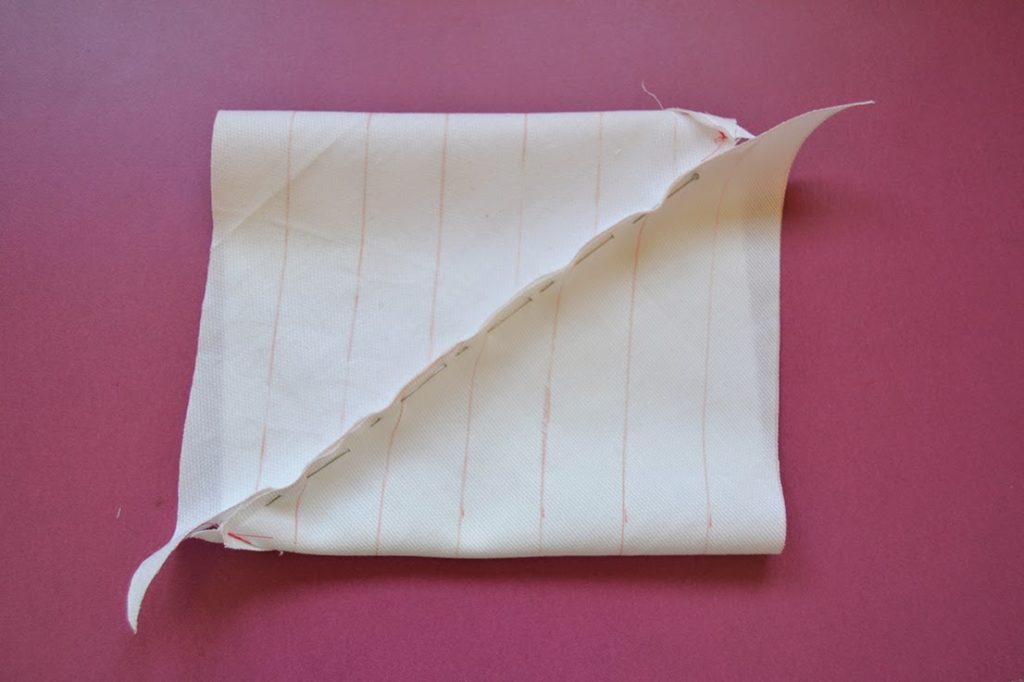
lines every 2,5 cm (1″) starting at the top (along the bias) on the wrong side of the fabric. The last line might be slighty smaller (mine’s 2,2 cm), that’s because my seam allowances were a little bit too deep.
 12. There you go! You made your own piping! Now use it in some great outfits!

Piping! That’s such a great detail to add to any design and so easy to make as well.
I’ve been playing with piping lately and eventhough you can find quite a lot of colours at the store, wouldn’t it be great to make piping in your favourite fabric?
Let’s see how to do it!

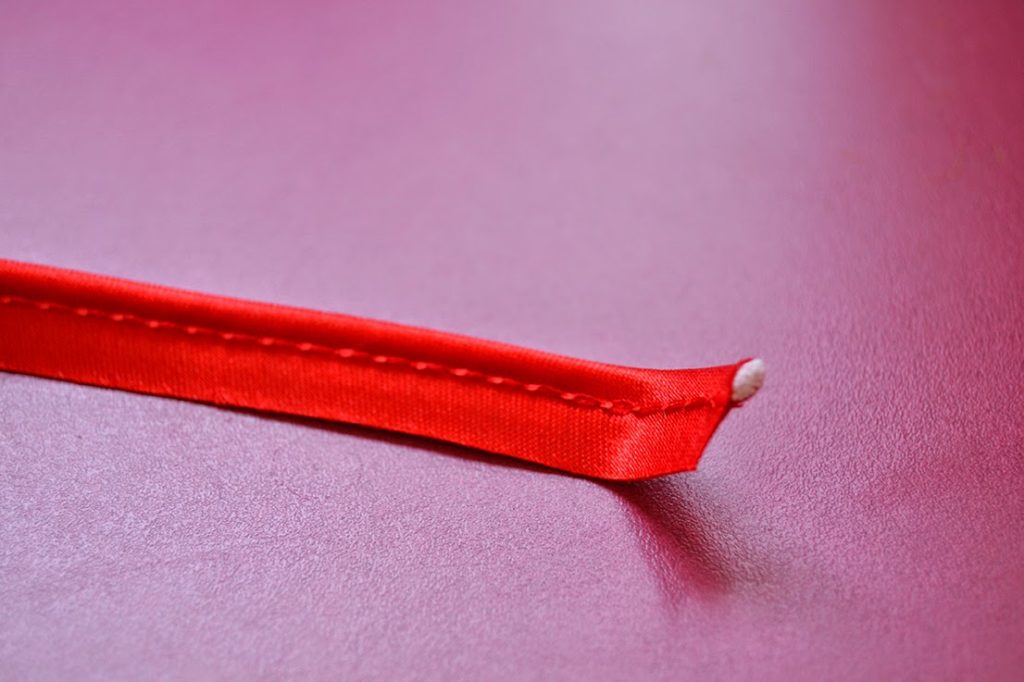
1. This is some store-bought piping. You can see how it’s made: a cord is sandwiched between a bias strip of fabric and there is a stitching line very close to that cord. The strip of fabric beeing cut on the bias allows for a lot of flexibility in the piping, making it great to outline any curve seam line.
2. Cut a square piece of fabric. I made mine 25 cm x 25 cm (10″ x 10″) but you can make it as big or small as you want. With this size, I was able to make a 2,4 m strip of bias (2 1/4 yards).

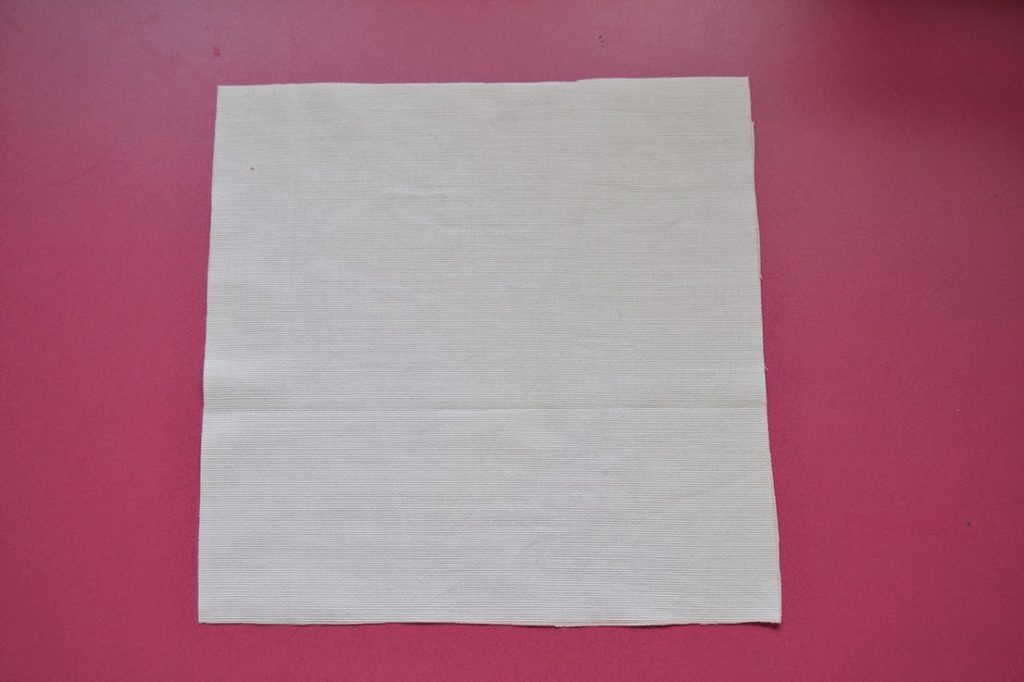 2. Cut a square piece of fabric. I made mine 25 cm x 25 cm (10″ x 10″) but you can make it as big or small as you want. With this size, I was able to make a 2,4 m strip of bias (2 1/4 yards).
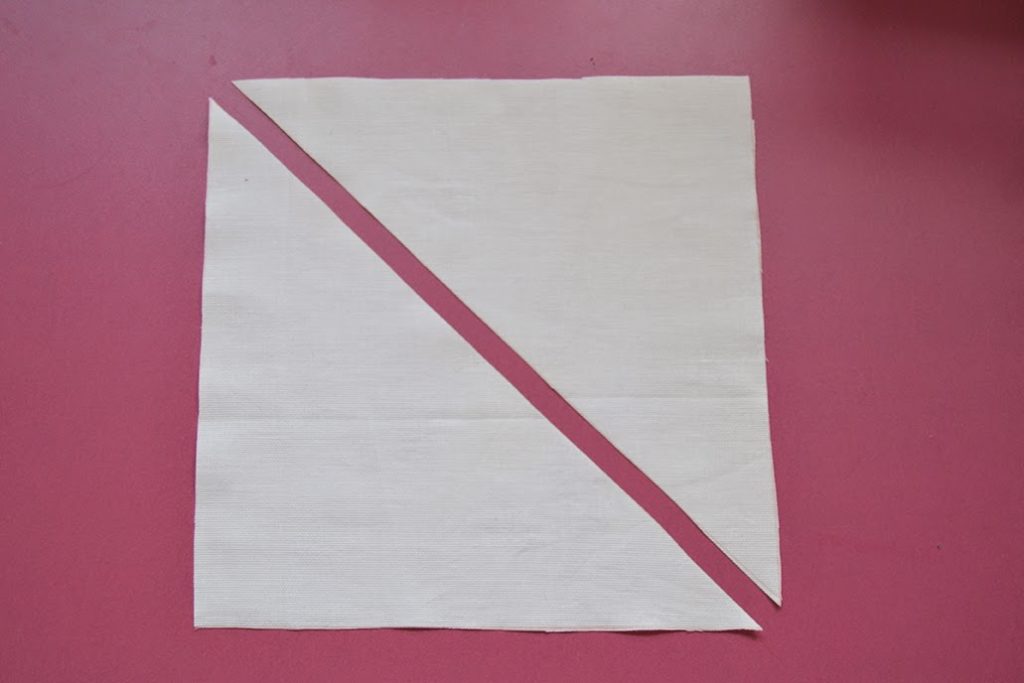
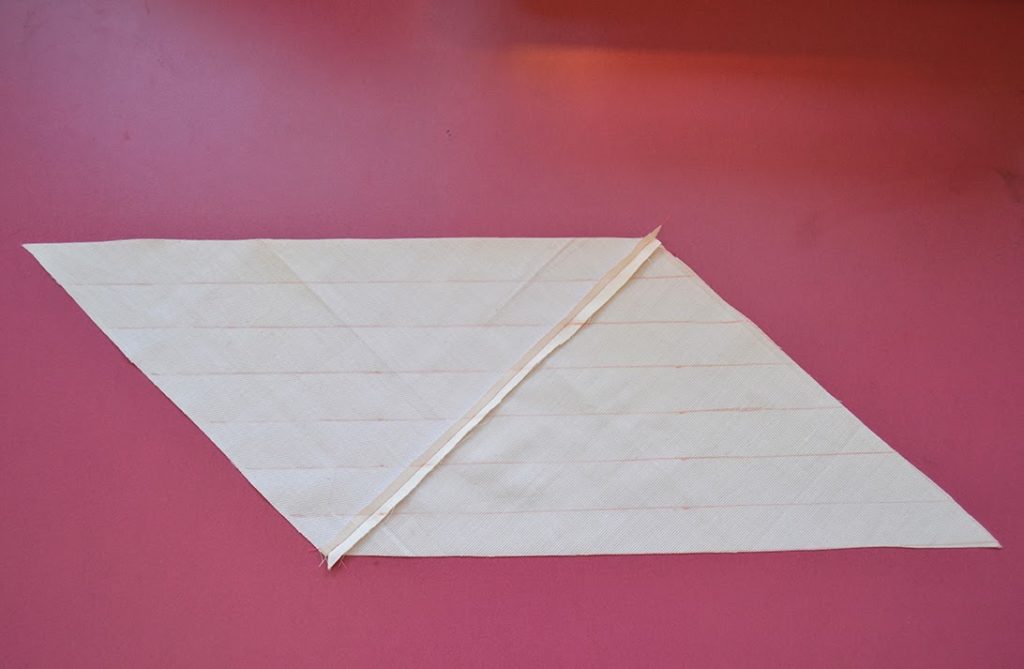
3. Cut the square in half diagonally. This will give the bias.
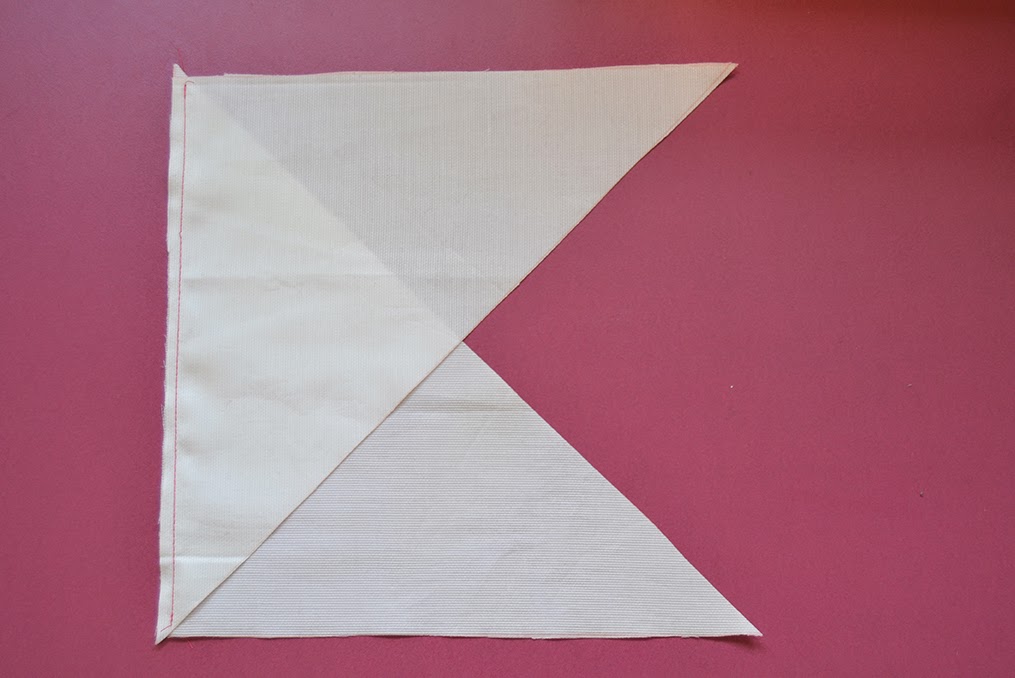
4. With right sides together, stitch the sides together (the straight ones, not the diagonal ones!) very close to the edge. 

5. Press the seam allowances open with the tip of the iron.
 6. Draw parallel
lines every 2,5 cm (1″) starting at the top (along the bias) on the wrong side of the fabric. The last line might be slighty smaller (mine’s 2,2 cm), that’s because my seam allowances were a little bit too deep.
7. That’s the tricky part, at least for me. With right sides together, bring the edges together and match the lines along the seam line. The first row of each side should be offset, like on the picture. Pin together and stitch very close to the edge.
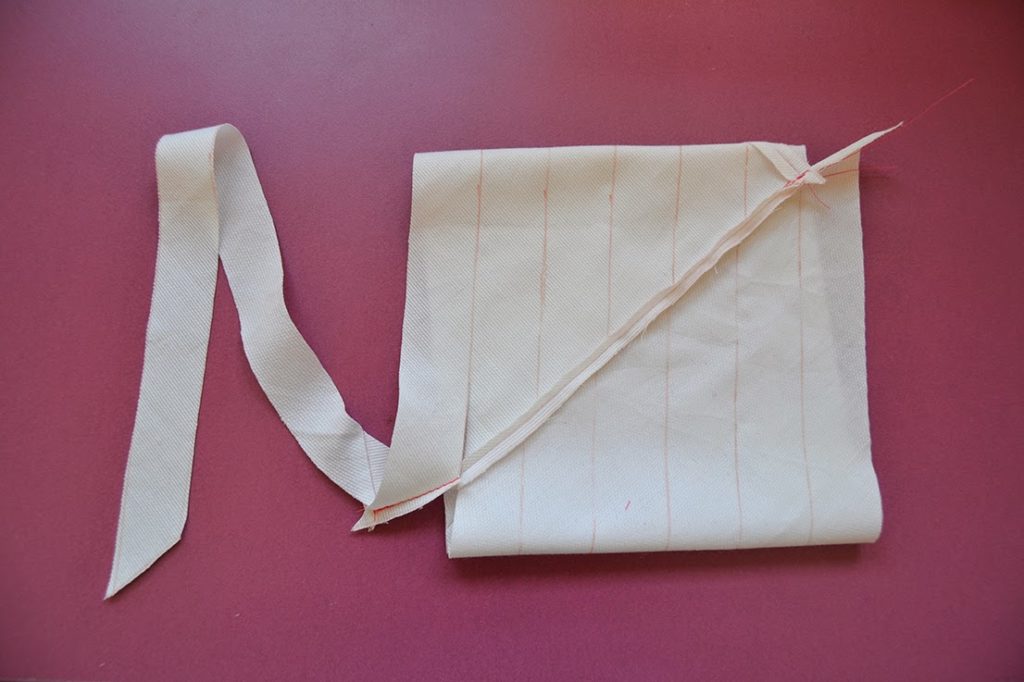 8. After the tricky part, the fun one! Now that you have a tube, start cutting the first offset row following the continuous line until the end.
 9. Now you have the strip of fabric cut on the bias and you need your cord.
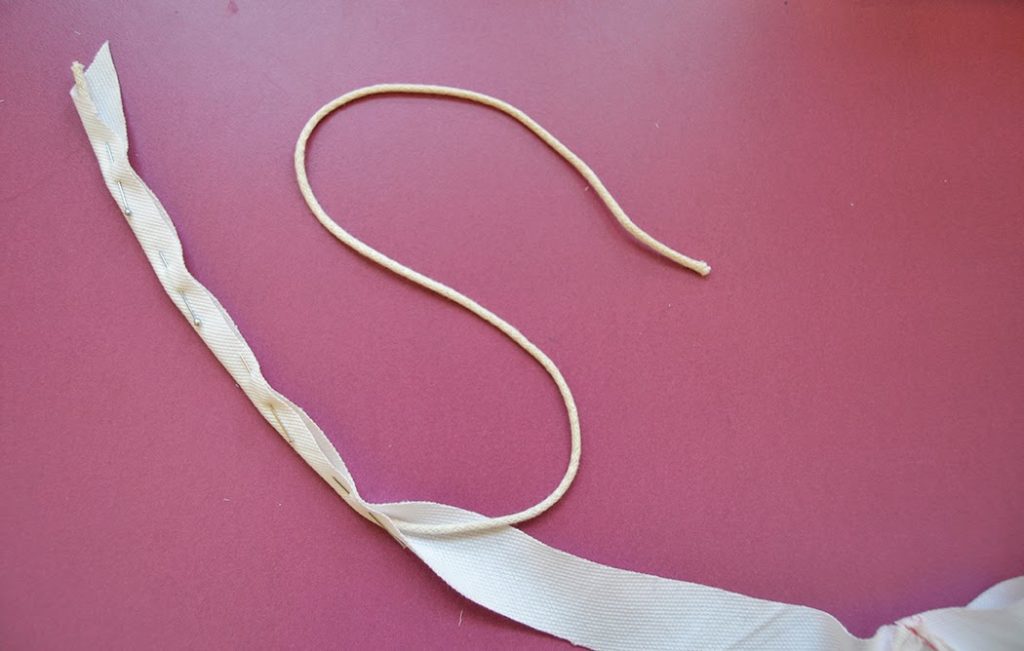 10. Place the cord on the wrong side on the bias, fold the bias in half to sandwich the cord and secure it in place with pins.
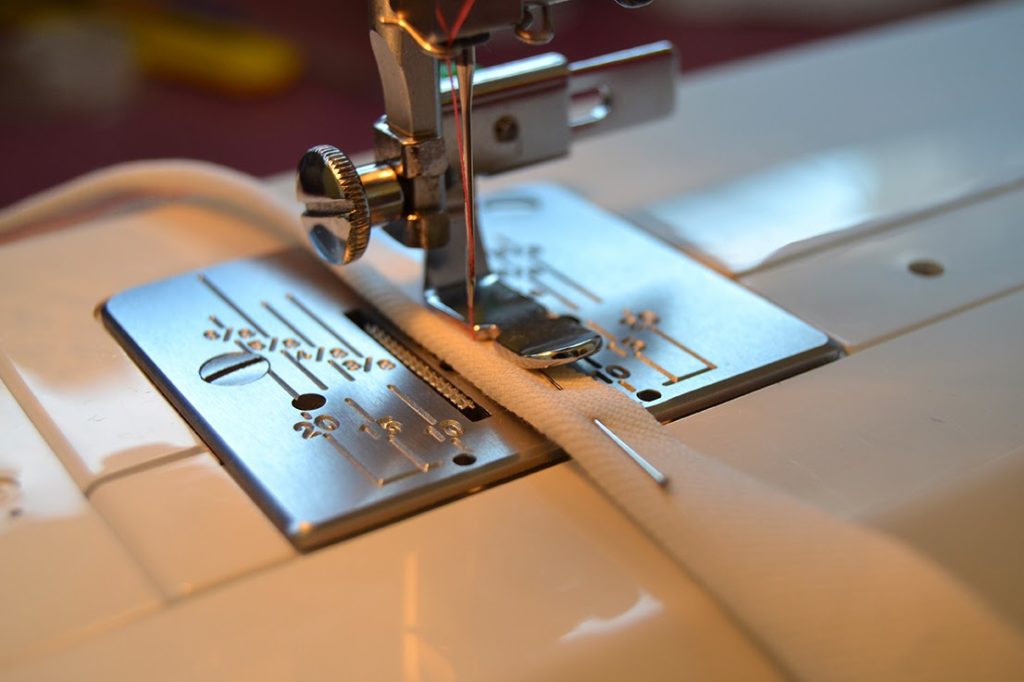 11. With a zipper foot, stitch as close as possible to the cord (possibly with a matching thread! I’m using a constrating one so you see it better).
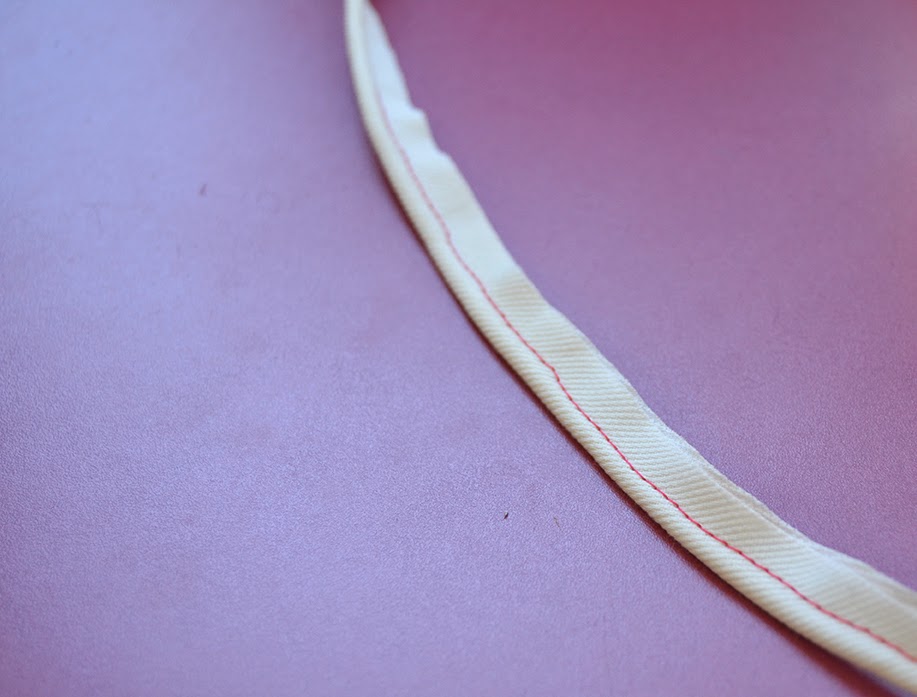 12. There you go! You made your own piping! Now use it in some great outfits!
Do you use piping often? And do you buy it or make it yourself?

20 comments
Mira que eres oportuna 🙂 El otro día tuve una iluminación y quería poner uno a un vestido que tengo en mente, pero no sabía muy bien como hacer uno. Dentro de poco lo pondré en práctica 🙂 Besos!
Jaja, me alegro que te sirva Alicia! Y tengo ganas de ver el vestido…
thanks for the tutorial!
You're welcome Maddie!
Si no se hace con bies, no funciona??? Con tela al hilo o atravesada no sirve?, es para costuras rectas. Qué te parece?. Gracias hoy justamente lo necesitaba!!!
Si es para costuras rectas, puede ser que funciona con tela cortada al hilo. Siempre lo he visto hecho con tela cortada al bies para tener esta flexibilidad pero ¿porque no pruebas con un trocito de tela a ver lo que pasa? Y no dirás si funciona por fi…
Un tutorial muy util y practico!!!!.
Muackkk!!!.
Guapa
Gracias Sonia!
Thank you for the tutorial. I will give it a go.
Oh yes, give it a go!
I make it too, but I join together long bias strips using my rotary cutter against a metal ruler as I find the method you have detailed has too many seams for my liking 🙂
Hi Lizzie, it's true that there are many seams 🙁 But I like how fast you can cut a long strip of bias with this technic. If you make a bigger square, the seams are sparer. Maybe I should invest in a good rotary cutter and try you method!
thanks thanks for the tutorial!! such a great detail to have!
Piping is really a cute detail to add. I'm glad you liked the tutorial Nat!
Merci de ces explications simples et détaillées.
Thanks for the tutorial! I really like your method for making a long strip of bias tape… so much easier than cutting a bunch of little bias strips and sewing them all together individually.
Qué buen tutorial. En las mercerías se conoce como "vivo", la cinta al bies no lleva el cordón. Si la tela es elástica también lo puedes "rellenar" de elástico redodito 😉
Fantástico tutorial!! lo comparto en facebook!! un besito guapa!
Muy claro Pauline! también comparto!
maravilloso aprenderlo así, gracias por compartirlo