9.4K

 2-Remember to press flat (if the curve isn’t round, notch more closely but be careful not to cut into your row of stitches).

 7-Stitch the flounces separately, press the seam allowances open, finish the edges as you prefer (zigzag, serger, bias binding…).

I am getting ready right now for the Andalusian party tonight so I thought it would be appropriate to make a new post about the flamenca dress.
If you remember, I already made the dress body and the lining. Which leaves me the sleeves and the skirt: these are the parts that are more time-consuming.
Today I’ll start with the sleeve and tomorrow the skirt part will follow.
……………………………………………………………………………………………………………………………………
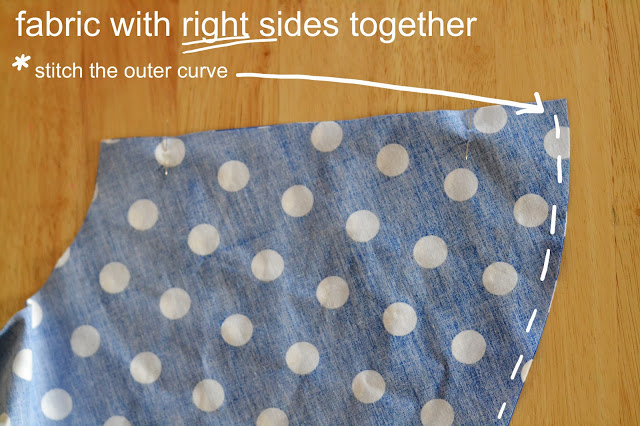
For the sleeves, I decided to line the flounces with self-fabric as the outside is going to show quite a bit.
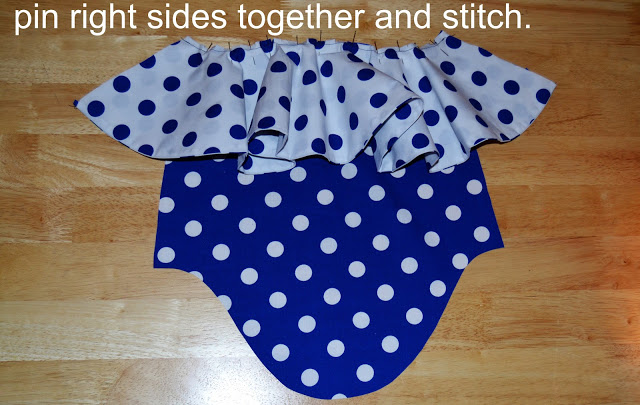
1-Take the sleeve flounces and place them right sides together.
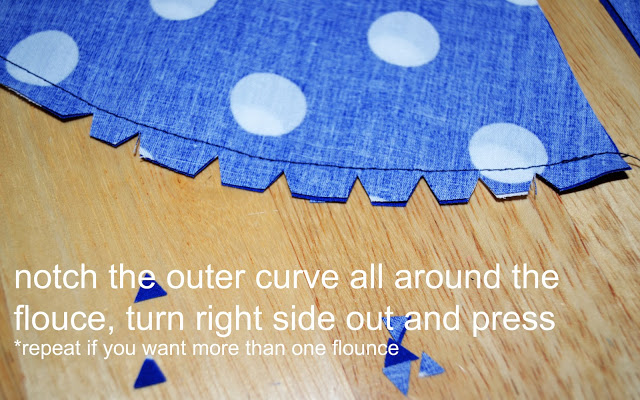 2-Remember to press flat (if the curve isn’t round, notch more closely but be careful not to cut into your row of stitches).
3-Add as many flounces as you want (I have two, one blue, one white).
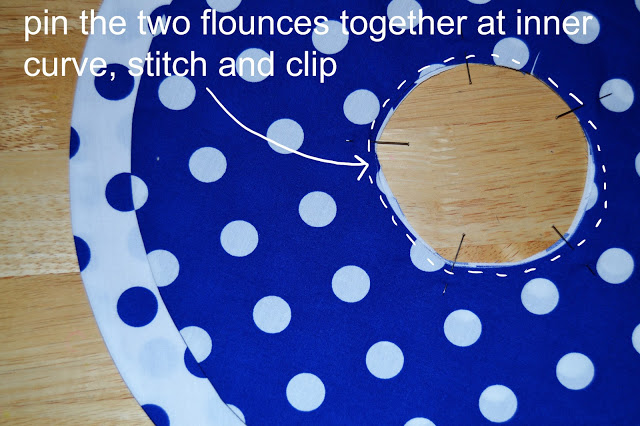
4-Sew the flounces together at inner curve.
 5-Take your sleeve piece.
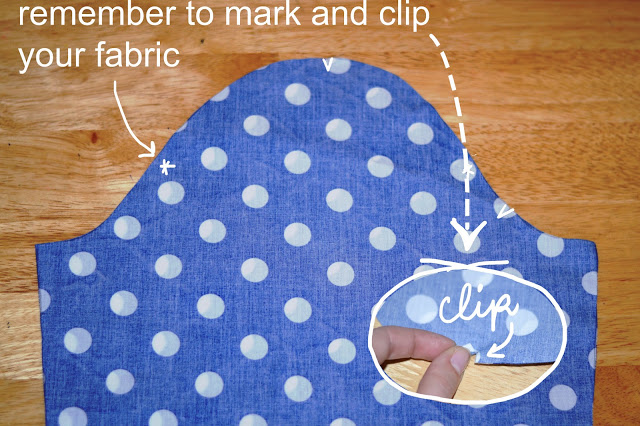
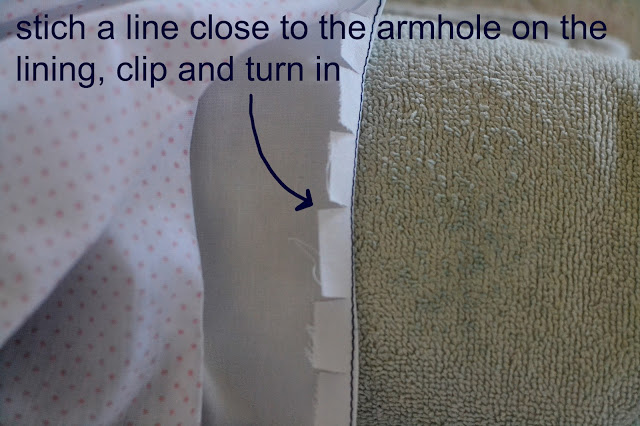
6-Pin the flounces to the sleeve right sides together (for example: blue against blue). Remember to clip the curve of the flounces so it’s easier to pin.
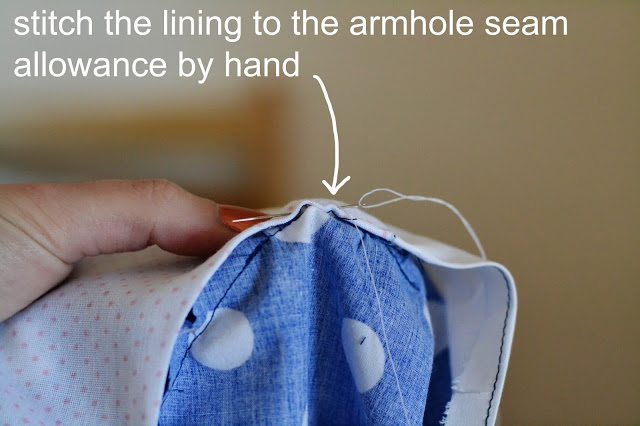
 7-Stitch the flounces separately, press the seam allowances open, finish the edges as you prefer (zigzag, serger, bias binding…).
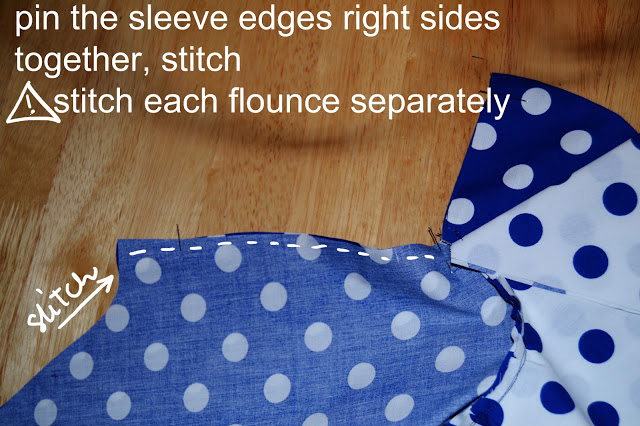
There you go for the moment! I hope it was useful and I will post the skirt explanation tomorrow and the final pictures during the following days.
Now excuse me, I have to finish my make up for the party… Bye!

10 comments
Hola Pauline:
He descubierto tu blog gracias al de La inglesita y me tienes maravillada jeje. Yo coso para mis pequeñas pero algun dia me gustaria coser para mi jeje. Aunque antes tengo que perder algunos kilos jajaja.
Un saludo y espero que no te importe tenerme por aqui mirando y babeando con tus creaciones jejeje.
Por supuesto que no me importa, al contrario, estoy encantadísima (María es un cielo y si vienes de su parte, ¿que más puedo pedir?) Espero que te guste y no duda en comentar y preguntar, estoy aquí para eso. Un beso.
Merci beaucoup!!!
Ohhh! Esto me tiene intrigadísima! ME encanta la explicación paso a paso para cuando me de por hacerme uno de estos. Es más, hace unos años estuve tentada, pero no habia nada en internet que explicase como hacer un traje de gitana de modo inteligible para las pobre mortales. Te animo a que sigas con este paso a paso. Besos
¡Que alivio! Tenía miedo de que sea demasiado pesado y que no se entendía nada. La parte final del paso a paso sale esta tarde. Espero que te va a gustar… ¡Por cierto, el vestido ha sido todo un exito ayer!
Qué bien está quedando!!! Estoy deseando ver el resultado final.
Al final has forrado el volante, no? Queda muchísimo mejor que no se vea el revés de la tela.
Si, he forrado los volantes de las mangas como me lo habías aconsejado. Tenías razón, queda mucho mejor. Mucahs gracias por la ayuda. Un besito.
Caramba Pauline, para se tu primer traje de gitana, te estás luciendo, qué destreza! El paso a paso está tan bien que animas a hacer uno. Estoy deseando ver fotos del resultado y del estreno.
Muchas gracias Almudena. Estoy muy contenta que te esté gustando el paso a paso, es de mis primeros y todavía no sé si lo estoy explicando bien. Un besito guapa.
Eres una costurera excelente y explicas muy bien los pasos a seguir.
Si quieres que los volantes queden tiesos (perdona la expresion), forra el filo de los volantes con cinta al bies y cordoncillo (piping) y asi le das cuerpo al vestido. Pero esto es solo una sugerencia, tu traje esta muy bonito.
Gracias.
Comments are closed.