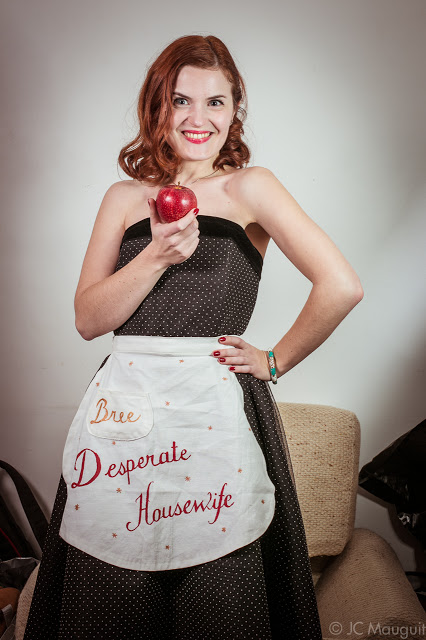
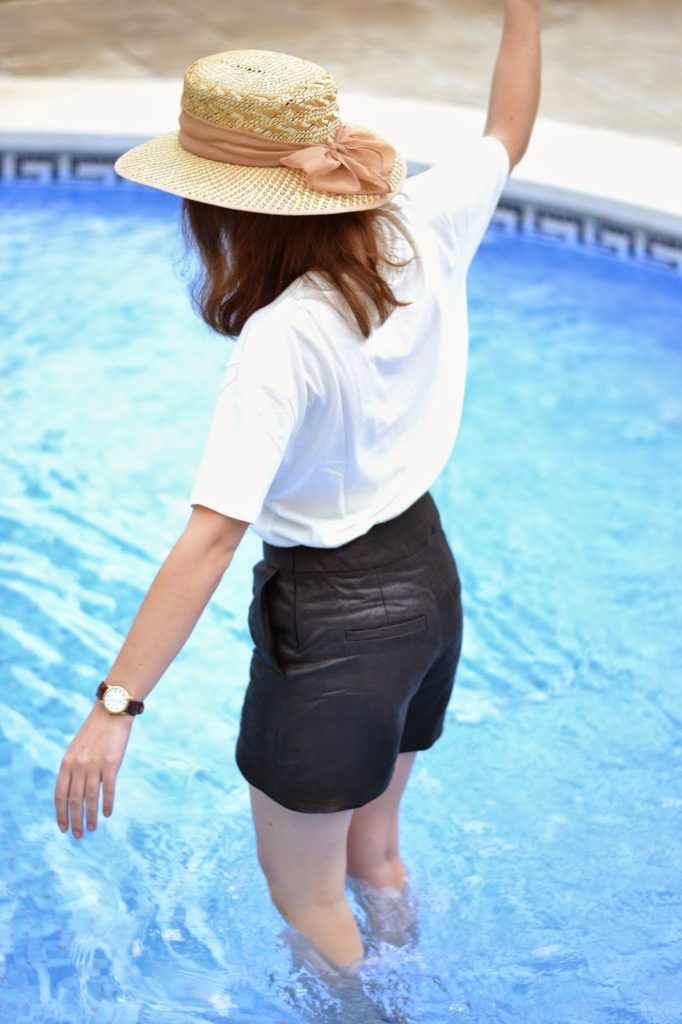
Ça y est, l’été est là et j’ai besoin de vêtements confortables et jolis à la fois. Je peux vivre un été entier en robe mais parfois, j’ai envie d’enfiler un pantalon, un short ou même une salopette quand il fait chaud et que je veux être à l’aise dans quelque chose d’ample… Mais à l’aise ne veut pas dire moche, non, il faut quand même que la dite pièce soit jolie et un minimum habillée pour pouvoir sortir avec.
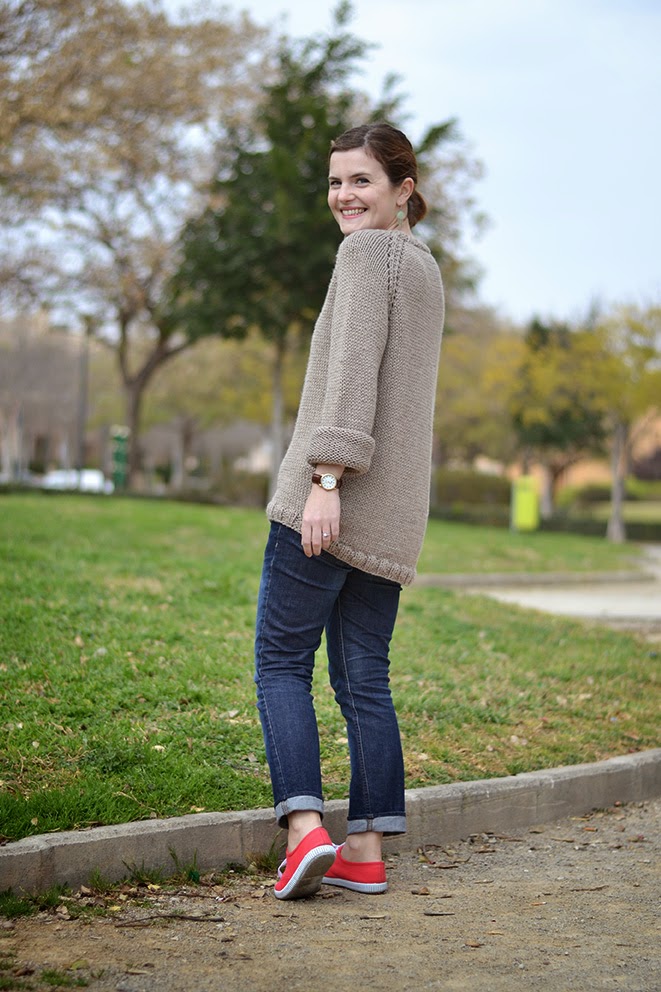
Et j’enchaine donc avec ma découverte du patron Scalloped Hem Shorts de Pattern Runway (ourlet festonné). Il est parfait: le juste mélange entre cool et chic, pour ces jours chauds où on passe d’une matinée à la plage à un après-midi shopping et une soirée entre potes (en vrai, j’ai passé ma journée assise devant mon ordi, mais pour ça aussi il est parfait!).
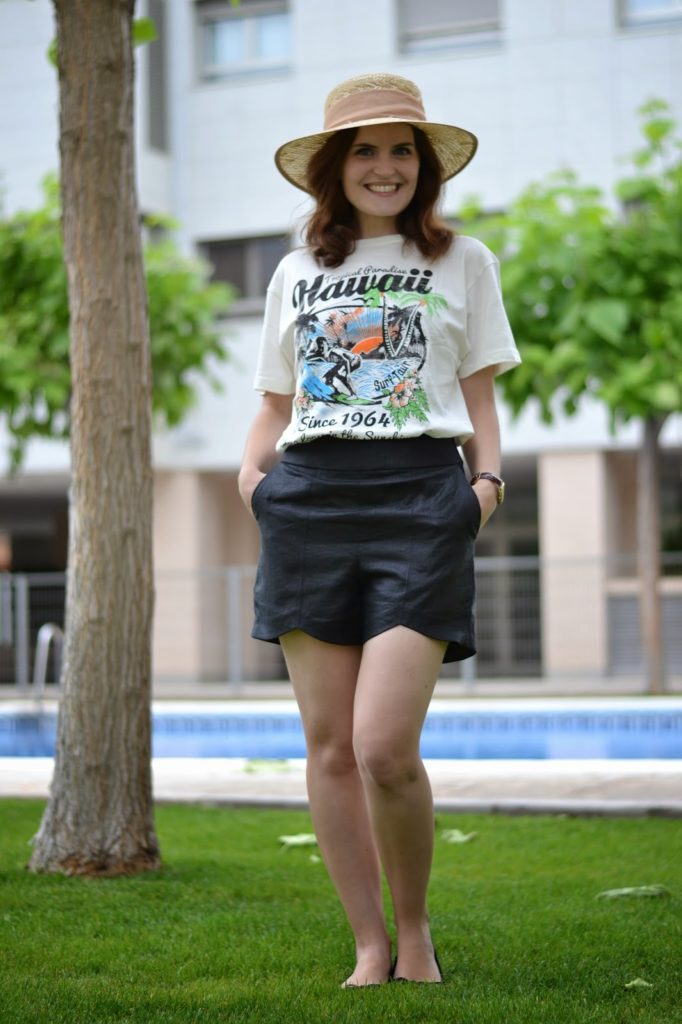
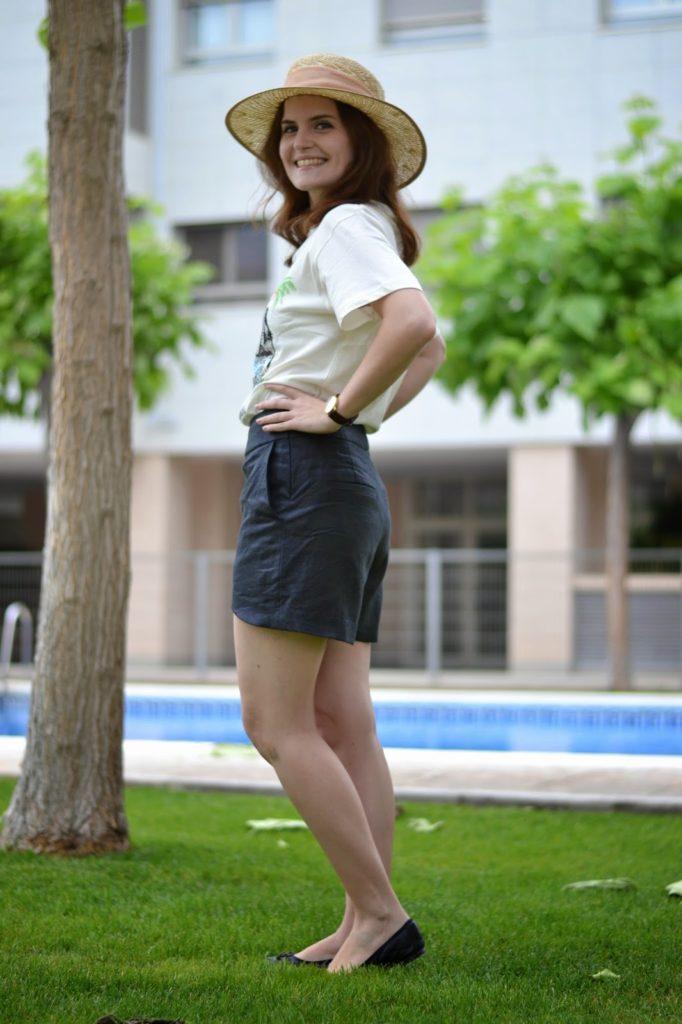 Enfin si vous voulez le mettre toute la journée, je ne vous recommande pas de le faire en lin comme moi. Et oui, le lin, ça se froisse, je le sais bien pourtant! Mais ce lin enduit je l’ai depuis un an et j’adore son aspect cuir, je trouve que ça allait bien au côté chic du patron. Mais après être restée assise seulement 15 minutes avant de prendre les photos, il était déjà tout froissé!
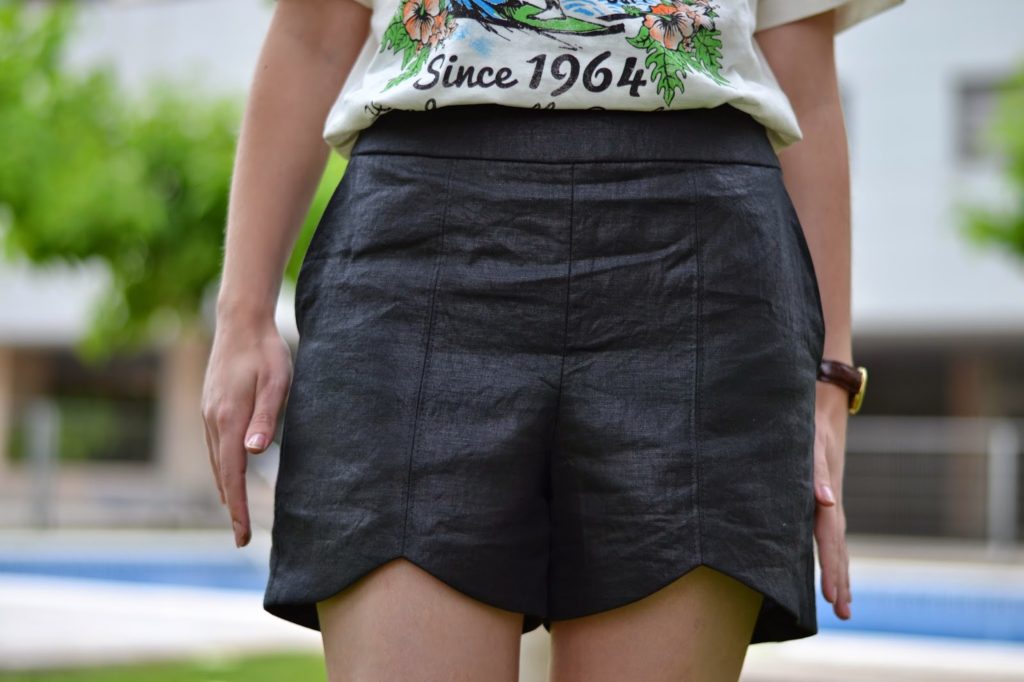 Le patron est très bien fait: j’adore les détails! La couture sur le devant, les poches italiennes, les poches passepoilées au dos, l’ourlet (évidemment!) avec juste une vague (plus chic que les petits festons je trouve)… des petits plus élégants qu’on trouve rarement sur des shorts.
Comme il n’y a pas de table de mesures du vêtement fini, j’aurais du faire une toile au lieu de découper la taille qui correspondait à mes mensurations. J’avais lu en plus que le patron taillait un peu grand. En effet, j’ai coupé la taille XS mais j’ai du coudre des marges de 1,5 cm au lieux de celles d’1 cm comprises dans le patron car il était trop grand à la taille et aux hanches. Il est toujours un peu grand donc la prochaine fois je découperai directement la taille en dessous (XXS, je n’ai jamais fait une taille aussi petite). Mais bon, c’est ma faute pour ne pas avoir fait de toile avant, fainéante que je suis.
 Les instructions sont très claires (bon, si vous n’avez jamais posé de poche passepoilée, je vous recommande quand même de prendre votre temps et d’aller voir le tutoriel sur le blog de Pattern Runway). J’ai cousu des fausses poches passepoilées car je n’avais pas envie que les marges se voient à travers le lin assez fin et car je n’allais pas les utiliser. Pour le reste, j’ai suivi les instructions à la lettre et je suis ravie du résultat.
Et vous, vous avez un patron de shorts préféré?


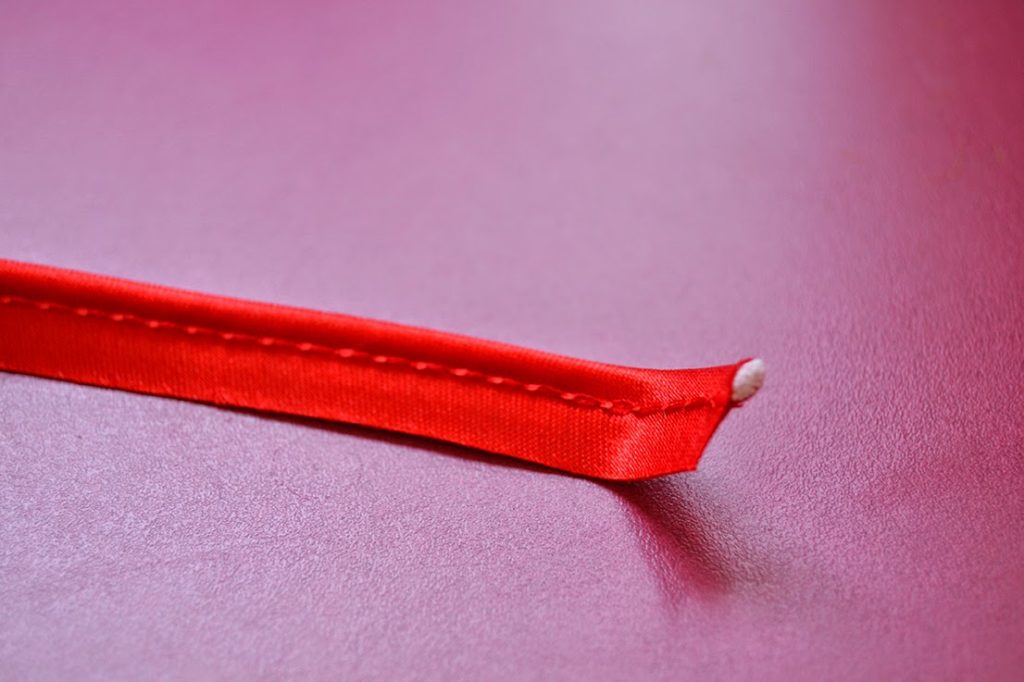 1. Voilà du passepoil acheté. Voyons donc la construction: un cordon pris entre un ruban de biais, avec une ligne de piqure très près du-dit cordon. Le fait que le ruban soit coupé dans le biais donne au passepoil une grande souplesse et en fait un parfait allié des coutures en courbes.
 2. Découper un carré dans votre tissu. Le mien mesure 25 cm x 25 cm (ça m’a donné un ruban de biais de 2,4 m) mais vous pouvez choisir plus ou moins grand si vous voulez.
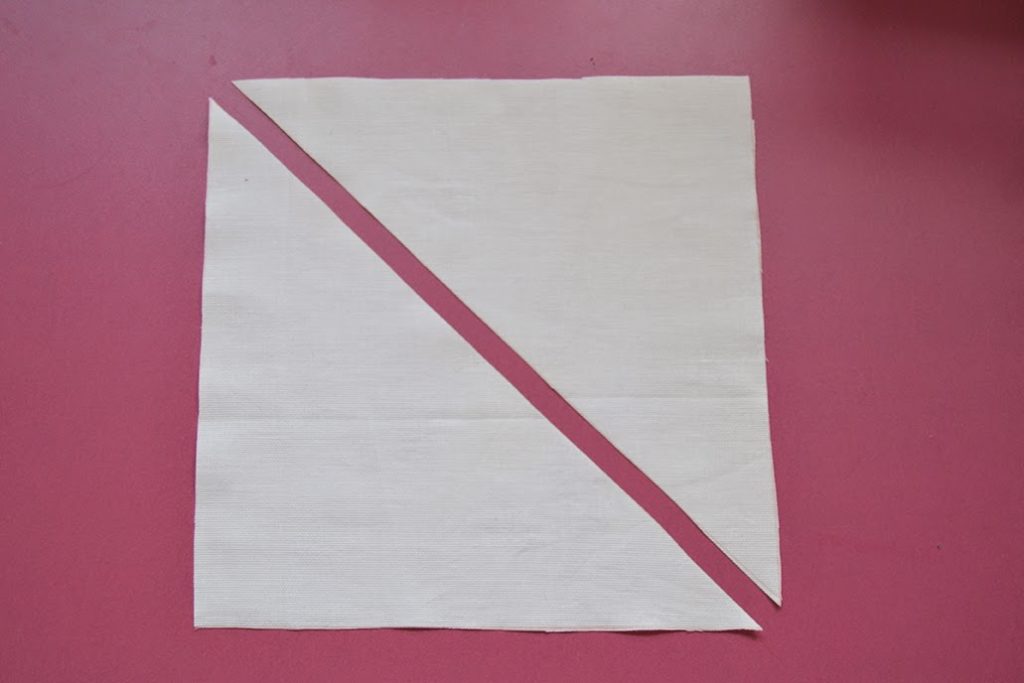 3. Découper le carré en deux dans le sens de la diagonale. Cela nous donne le biais.
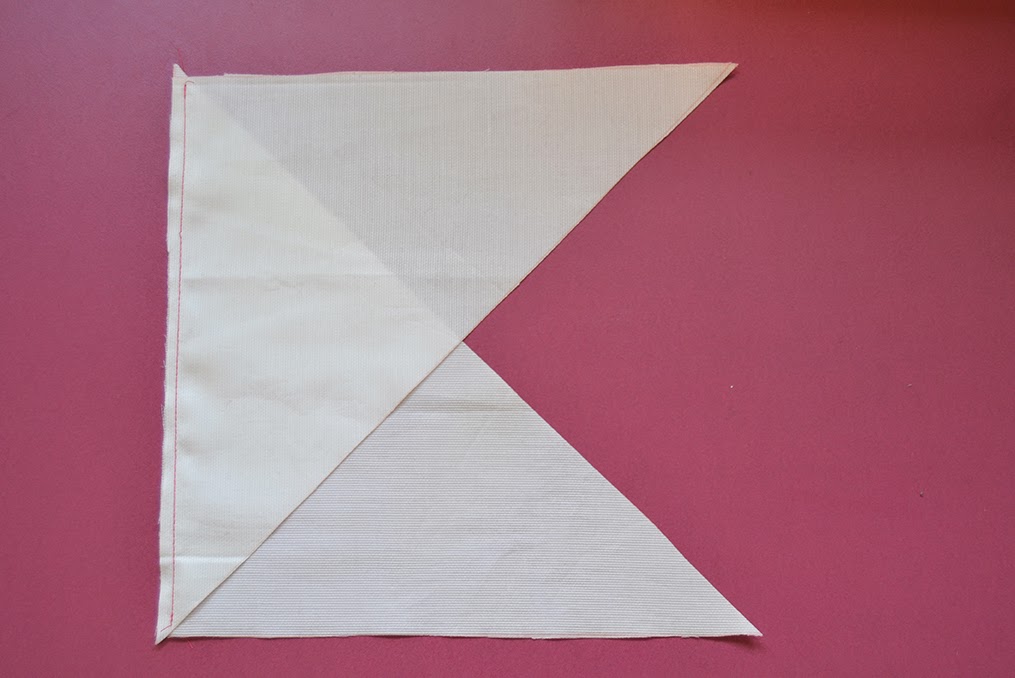 4. Endroit contre endroit, piquer les côtés ensemble (les côtés droits, pas les diagonales) très près du bord.
 5. Ouvrir les marges au fer à repasser.
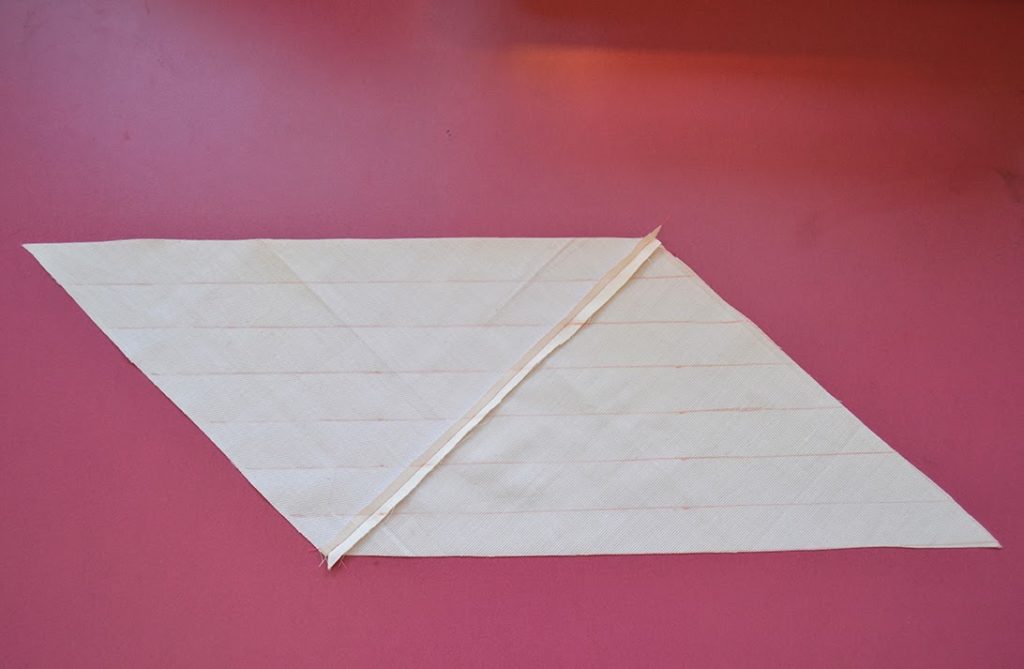 6. Dessiner des lignes parallèles à 2,5 cm du bord (le long du biais) sur l’envers du tissu). La dernière ligne peut être moins large (la mienne mesure 2,2 cm) selon la profondeur des marges piquées auparavant.
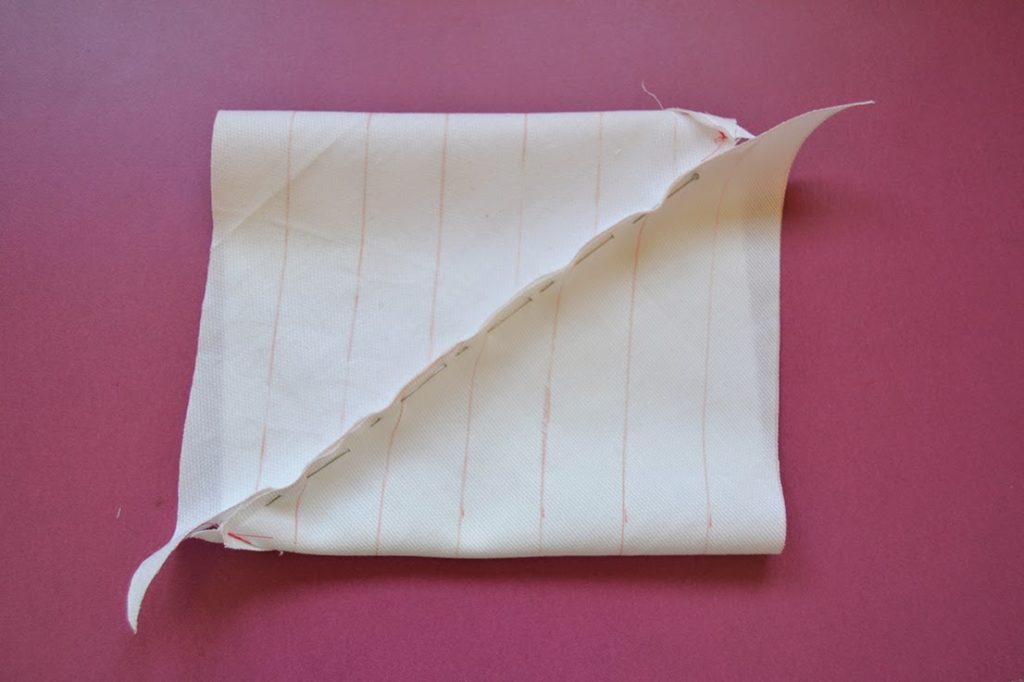 7. La partie un peu plus complexe, en tout cas pour moi. Endroit contre endroit, faire revenir les bords l’un contre l’autre en faisant coïncider les lignes le long de la ligne de piqure (0.3 cm environ). La première rangée de chaque côté est déportée, comme sur la photo. Épingler en place et piquer.
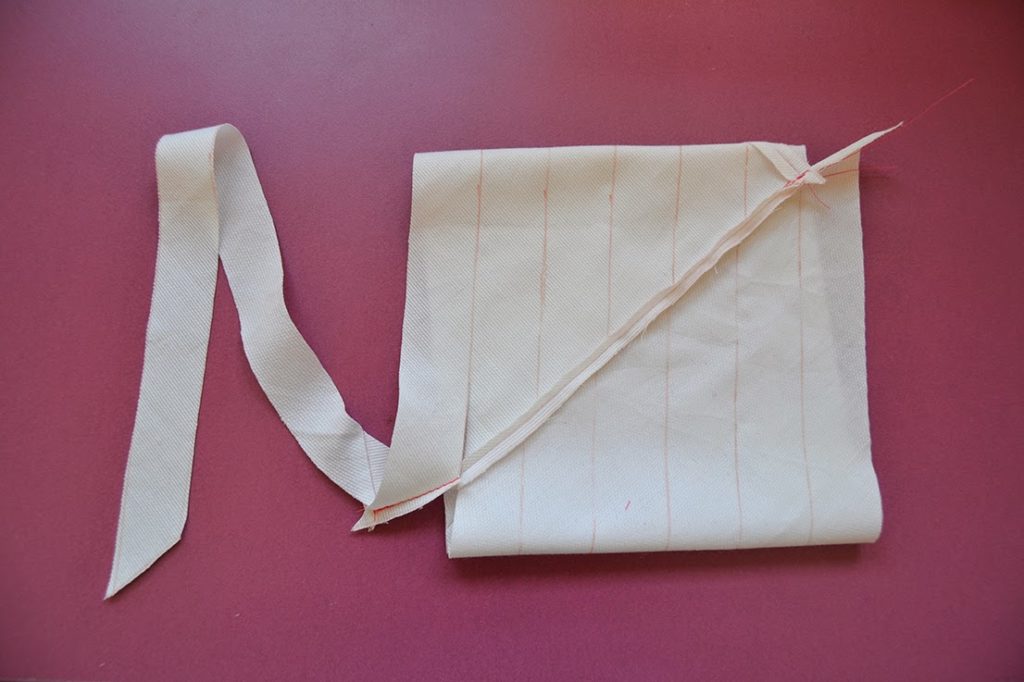 8. Maintenant la partie que j’adore. La pièce ressemble à un tube. Découper le long des lignes en commençant par la première rangée jusqu’à arriver au bout.
 9. Nous avons donc le ruban de biais et nous avons besoin du cordon.
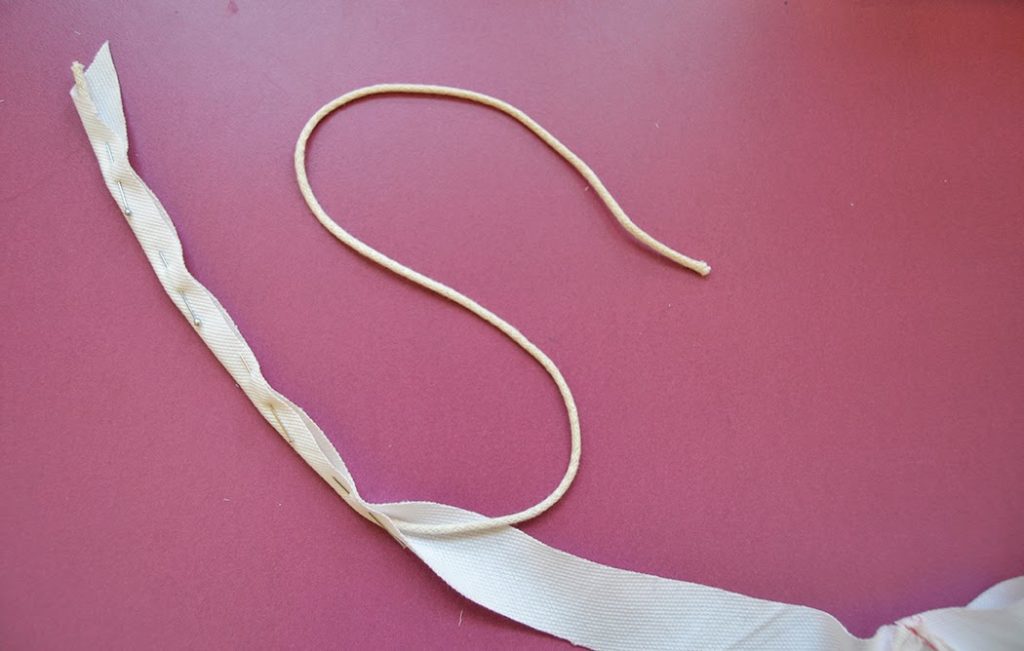 10. Placer le cordon au centre du ruban de biais, sur l’envers du tissu. Plier le ruban en deux et refermer les bords sur le cordon, épingler pour maintenir en place.
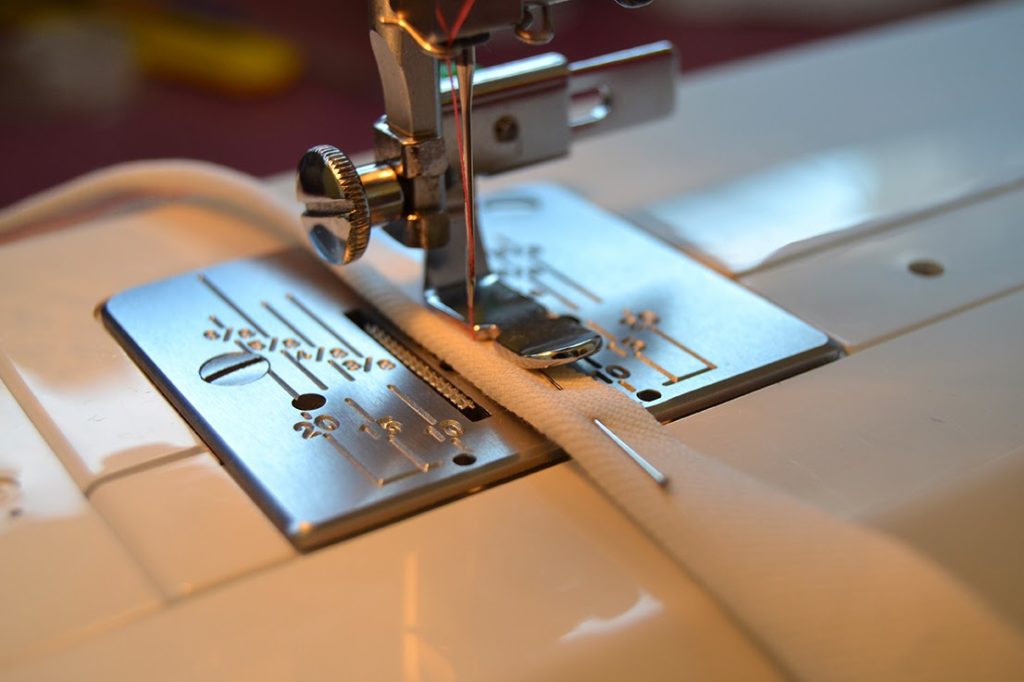 11. Avec un pied de biche à fermeture éclair, piquer le plus près possible du cordon (si possible avec du fil assorti! J’ai utilisé un fil constrastant pour qu’on voit mieux).
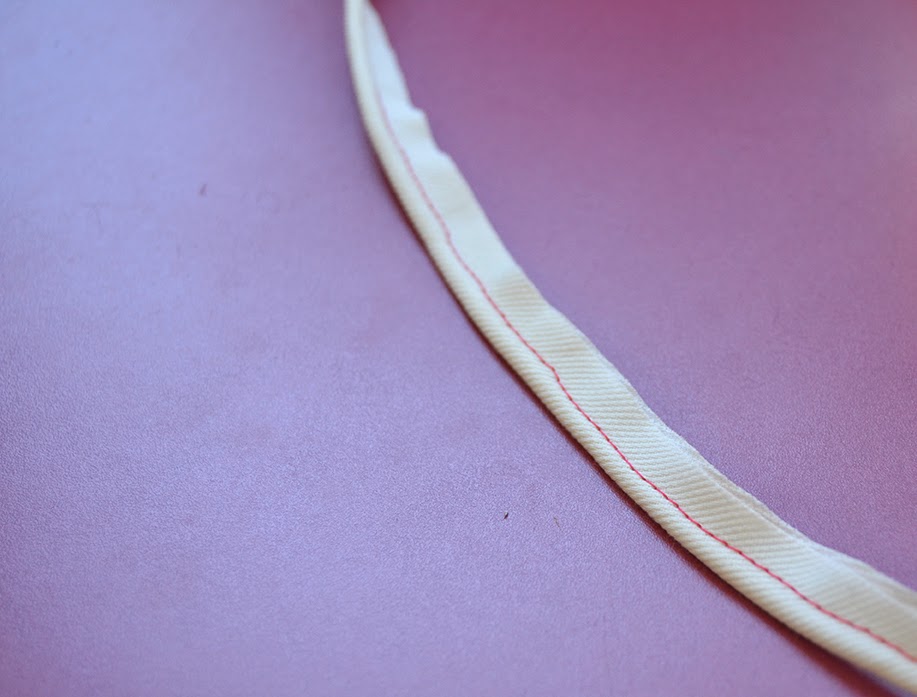 12. Et voilà, un passepoil maison! Maintenant, il vous faut juste un projet où l’incorporer!


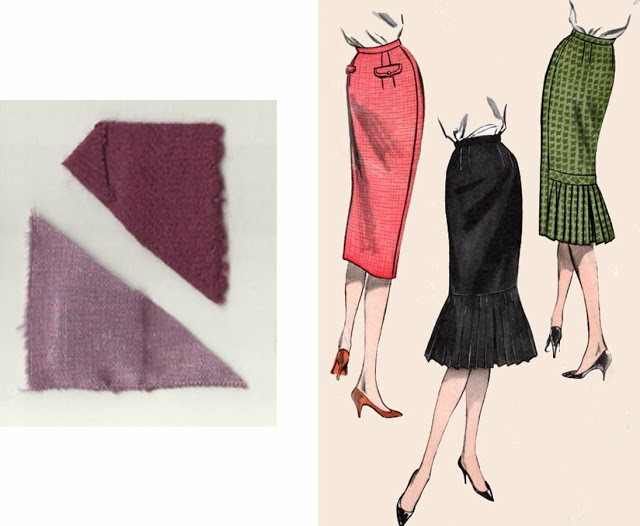 I have this beautiful burgundy wool that will be perfect for a jacket/skirt ensemble. I’m thinking of a short swing jacket and a pencil skirt with knife pleats at the back. And the light pink lining for a little bit of contrast.
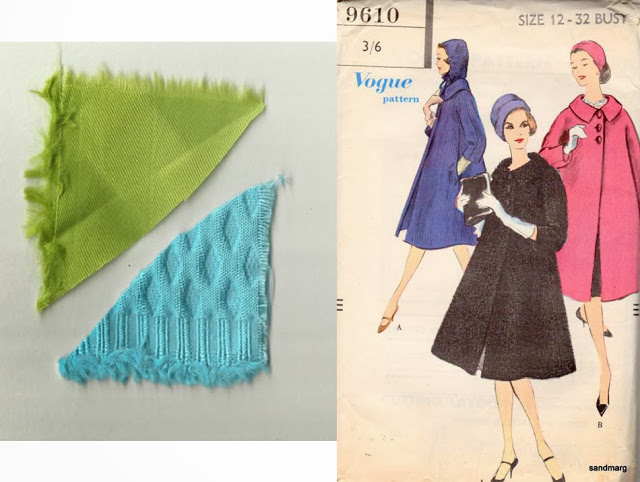 With the same pattern as the short swing jacket, I want to make a swing coat. I will just make it longer (or I hope it will work like that). I have a bright baby blue wool/cotton fabric with a diamond pattern in relief. With a bright green lining, it will be a very nice coat to brighten the winter.
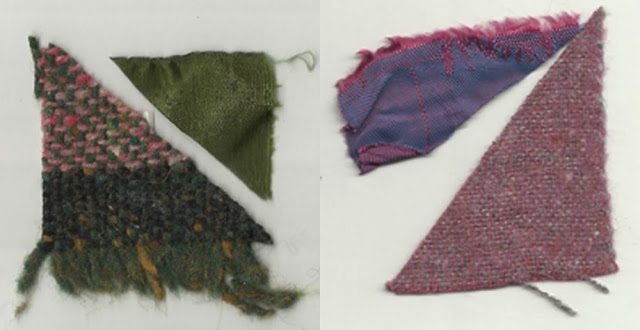 These two combinations are for skirts: A-line skirts with pleats. I need more skirts, I have lots of dresses but very few skirts. So I will add two for the winter: one in wool tweed in green, pink and brown with a bottle green lining and the other one in purple wool with blue/purple lining.
 And a winter Camí dress of course! 3/4 sleeves or long, I still don’t know. I have a nice cotton/wool fabric but I might have to change the collar, it might be too heavy. It’s dark grey with purple leaves, very subtle.

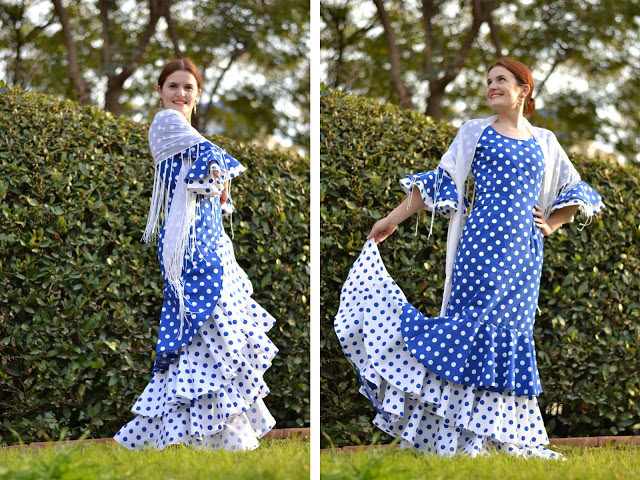
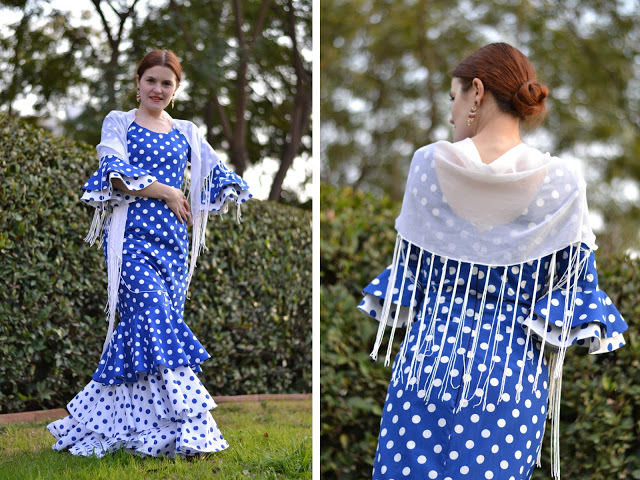

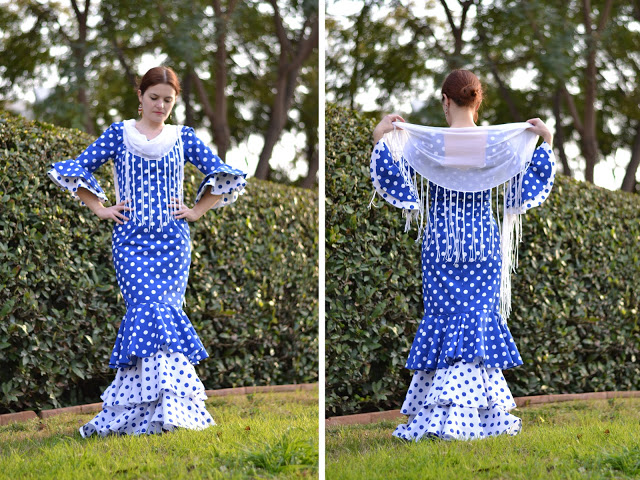

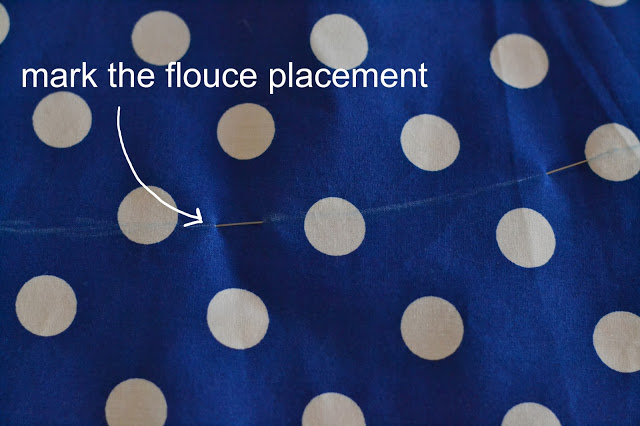 3-Here is a drawing (very bad!) I made to explain how to place the flounces on the skirt. You see that the first flounce is sewn right side up and the following ones wrong side up with the flounce facing upward (that way, the seam allowance is hidden nder the flounce when folded).
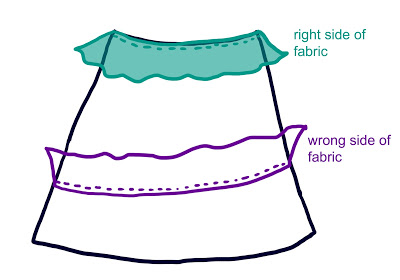
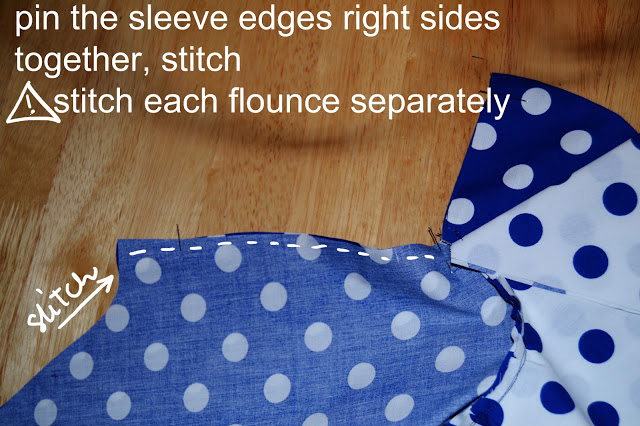
 4-Repeat step 7 of the previous post to sew the back the dress (remember to sew each flounce separately).
 6-Hem the skirt and the flounces as you choose (decorative binding, turn in hem…).

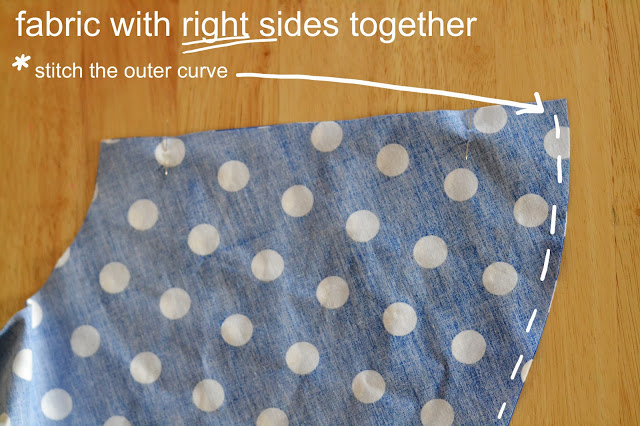
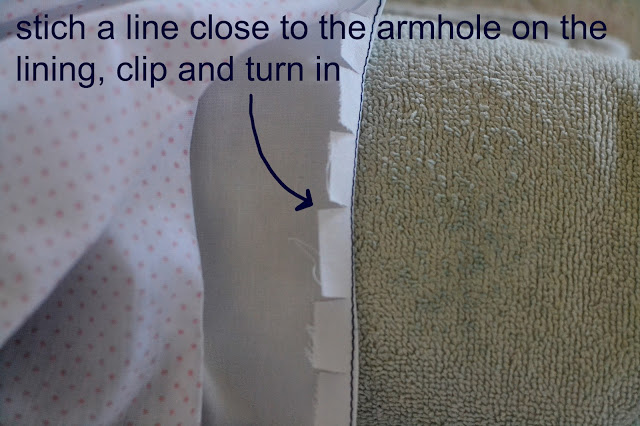
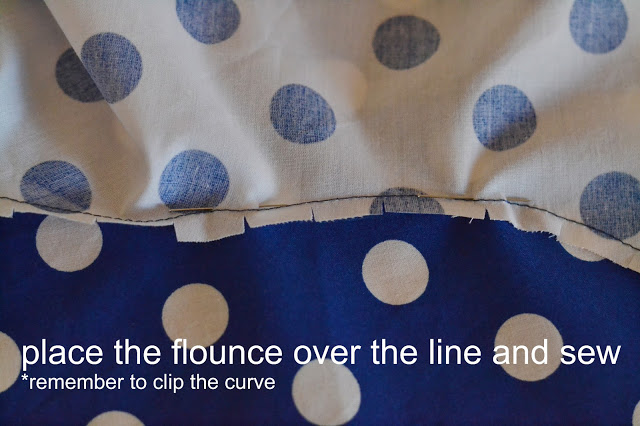
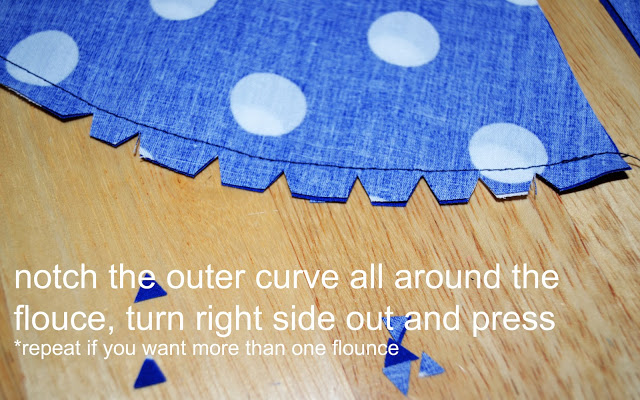 2-Remember to press flat (if the curve isn’t round, notch more closely but be careful not to cut into your row of stitches).
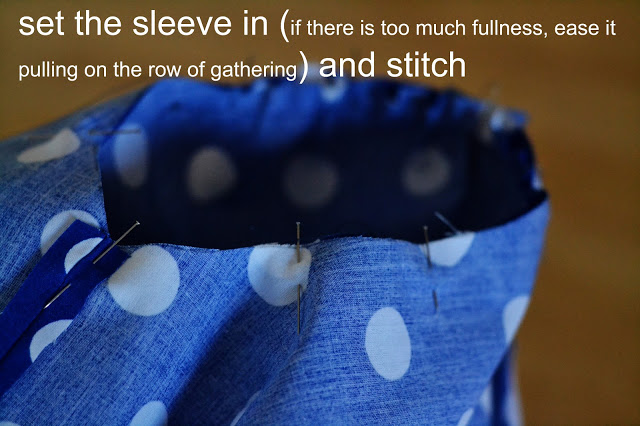
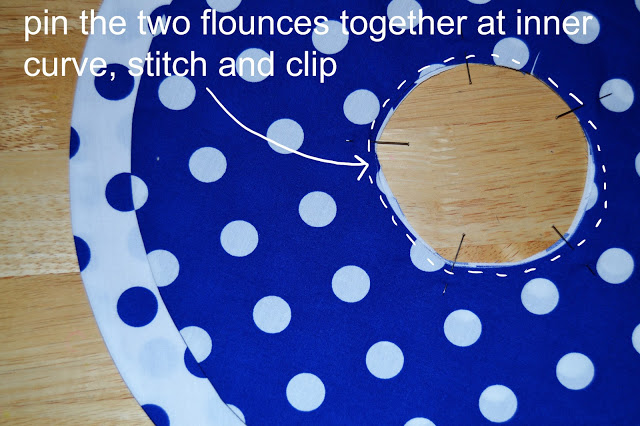 5-Take your sleeve piece.
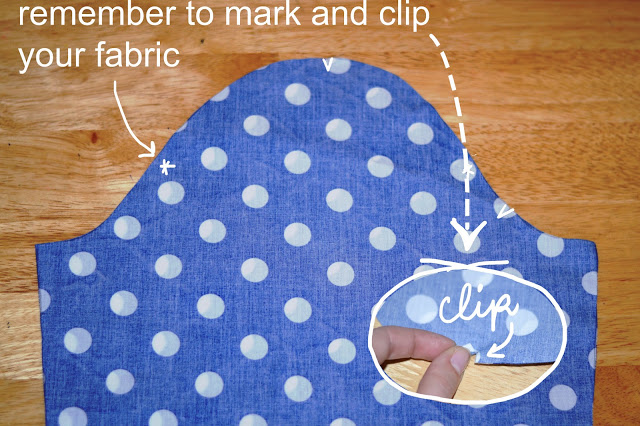
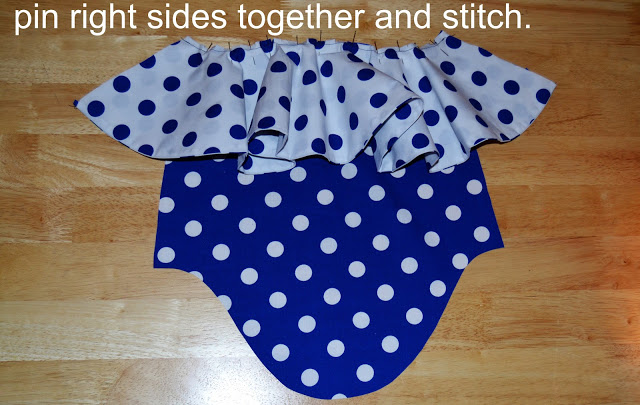
 7-Stitch the flounces separately, press the seam allowances open, finish the edges as you prefer (zigzag, serger, bias binding…).