I’ve been meaning to write a tutorial on how to sew the pockets of the Xerea dress for quite some time now. I know that some of you also requested it as these pockets are not set the usual way and they can be tricky.
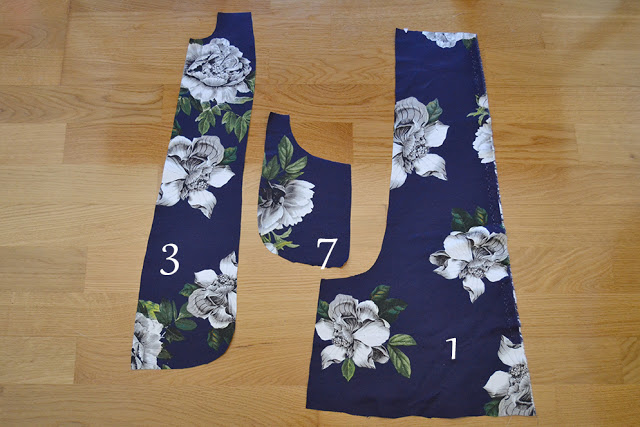
So here we go, a step-by-step photo tutorial on the Xerea pockets: Here are the pieces involded in the pocket construction:
– 1 Front (it can either from view A or view B. If you’re making view A, remember to stitch the dart before).
– 3 Side Front
– 7 Pocket
So here we go, a step-by-step photo tutorial on the Xerea pockets:
 Here are the pieces involded in the pocket construction:
– 1 Front (it can either from view A or view B. If you’re making view A, remember to stitch the dart before).
– 3 Side Front
– 7 Pocket
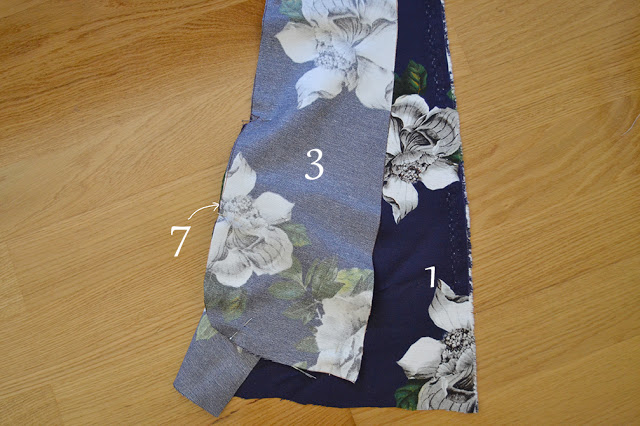
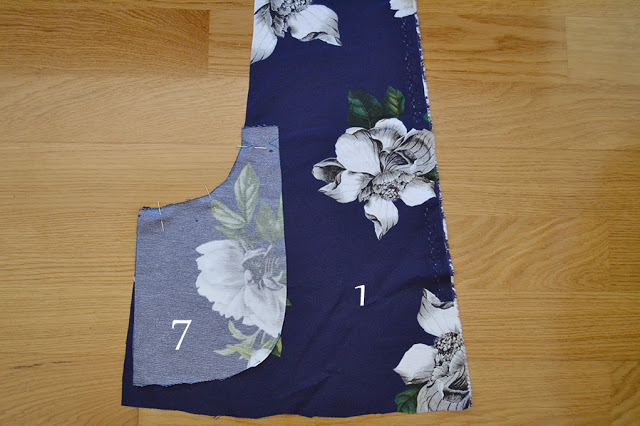 1. With right sides together, pin the pocket (7) to the front (1), matching the marks.
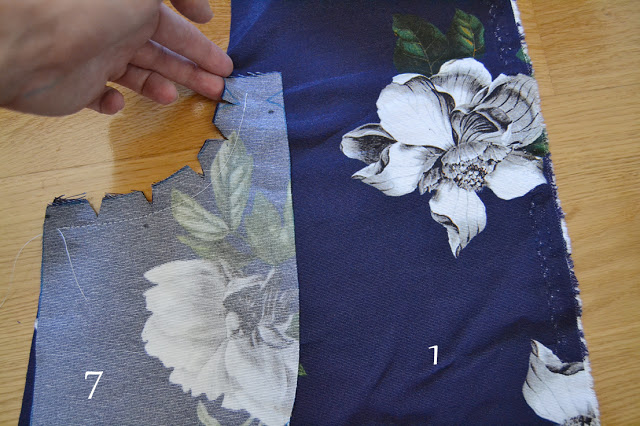 2. Stitch along the pocket curve. Notch the seam allowances. Clip the seam allowances at the top mark.
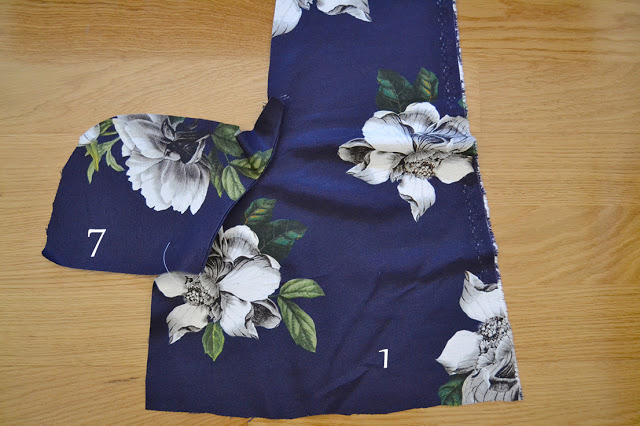 3. Press the pocket seam flat (you can understitch the seam allowance if you want). Open the pocket like on the picture.
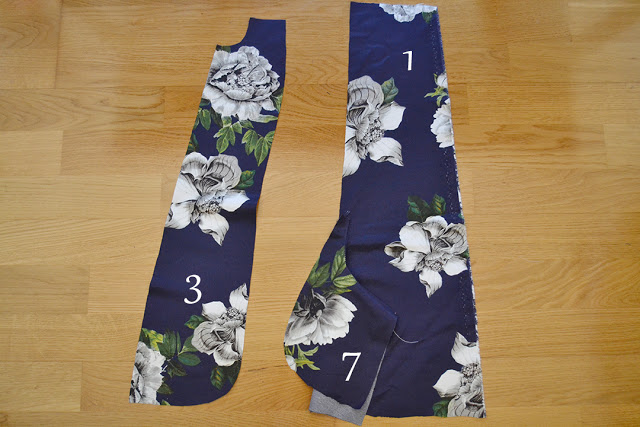
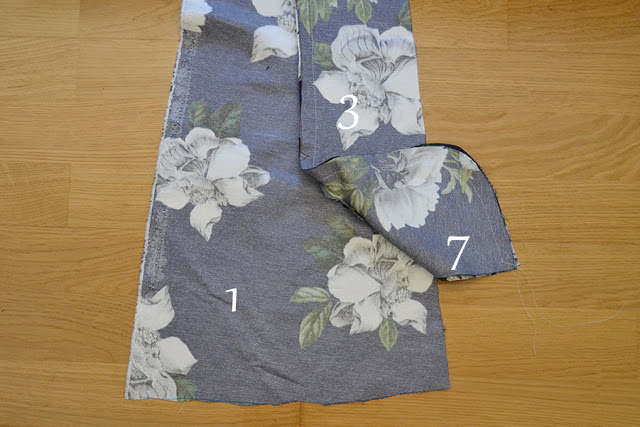
 4. We are going to stitch the side front (3) to the front/pocket piece. With right sides together, pin the side front (3) to the front/pocket. Start pinning from the top, side front to front and when you reach the pocket, continue to pin to the pocket curve as if it was one unique piece, matching the marks. Stitch.
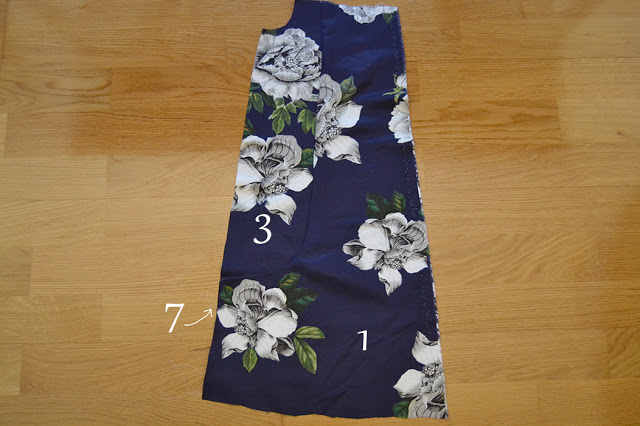
 5. Place the pocket inside and press the pocket opening flat and the seam allowances toward the front. Trim and finish them.I hope this will help you. It’s a difficult step to photograph but if you make a pratice pocket before sewing your Xerea, I’m sure it will be easier to understand.
If you have any questions, feel free to ask.
Best,


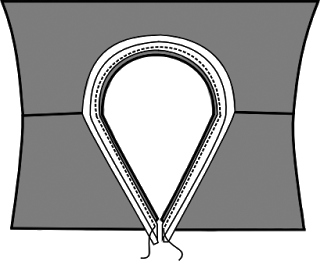 Here is the illustration for this step in the instructions booklet. The instructions tell you to “finish the neckline with bias binding: with right sides together, pin the bias binding to the neckline matching the edges. Stitch on the first fold line. Fold the bias binding to the inside twice and edgestitch.”In pictures, this would look like that:
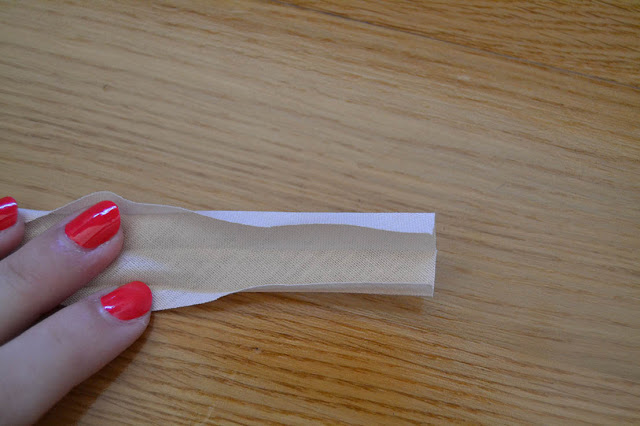 Here is your bias binding: double fold and a pretty normal width, here approx. 2,5 cm (1″) when completely open.
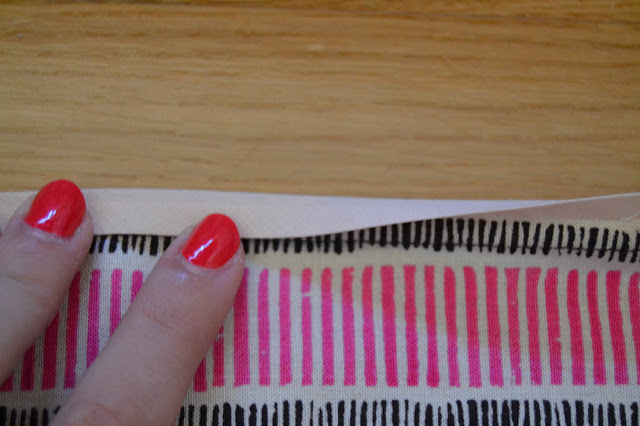
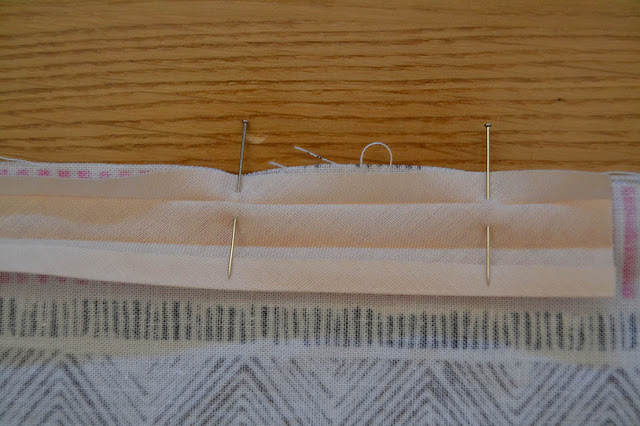 First, pin the bias binding on the neckline, with right sides together (oups, my fabric is upside down, make sure yours is with right sides together!). The bias binding raw edge should match the fabric raw edge.
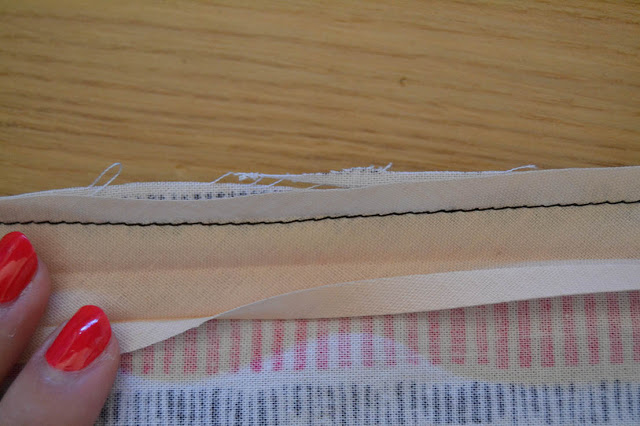 Then stitch inside the first fold line crease. This should be between 0,3 and 0,5 cm (1/8″ and 3/16″) from the edge.
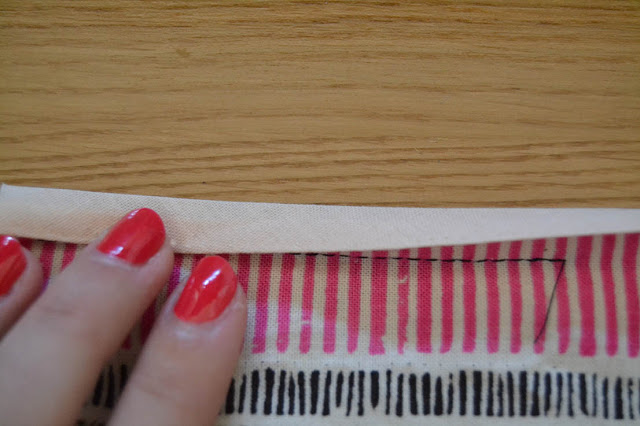
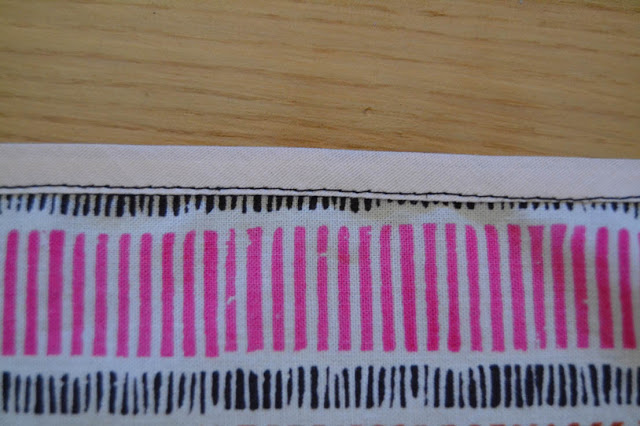
 Fold the bias over the seam allowances along the center fold and then fold it again to the inside. Press. Edgestitch.
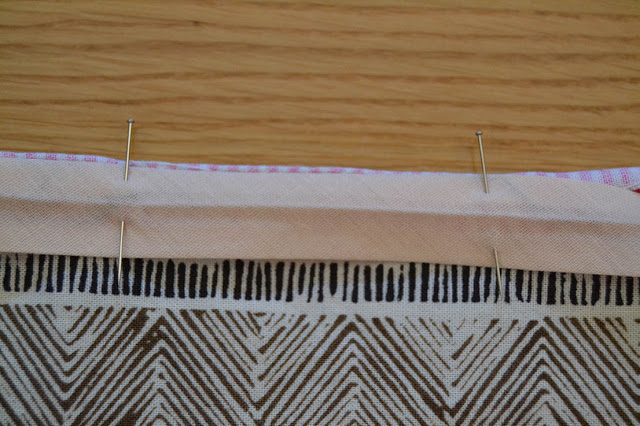
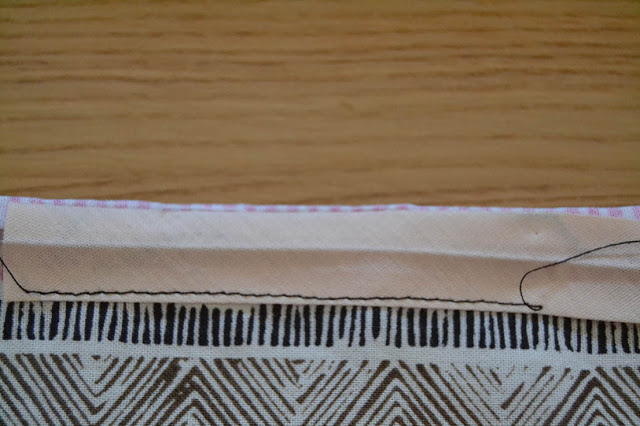 You can also fold the bias binding only once to the inside. This will give you more structure to the hem, but I would recommend this only for the sleeve and dress hem, not the neckline.
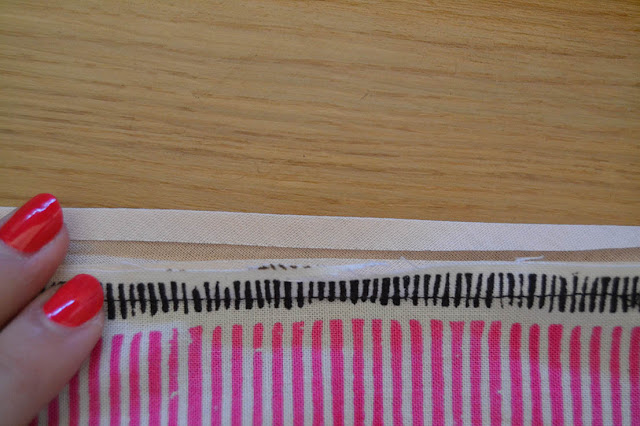
 Pin the bias binding to the neckline, matching the raw edges. I like to pin it to the wrong side but this is a personal preference, you can also pin it right sides together. Stitch inside the first fold line crease. Fold the bias binding over the seam allowances to cover them and edgestitch (make sure your binding covers the first line of stitching you did). This would look nice with a constrating color binding.Please let me know if you have any questions.

 Today let’s talk about the perfect summer dress: the
  Xerea
Xerea For fabrics, I would recommend fabrics with some drape, in particular if you choose the shift dress.
 The yoke design allow you to use contrasting fabric very easily: how about color blocking or lace accents? All the hems are finished with bias binding, make your own with matching fabric for an invisible finish or add some subtle contrast to your dress.
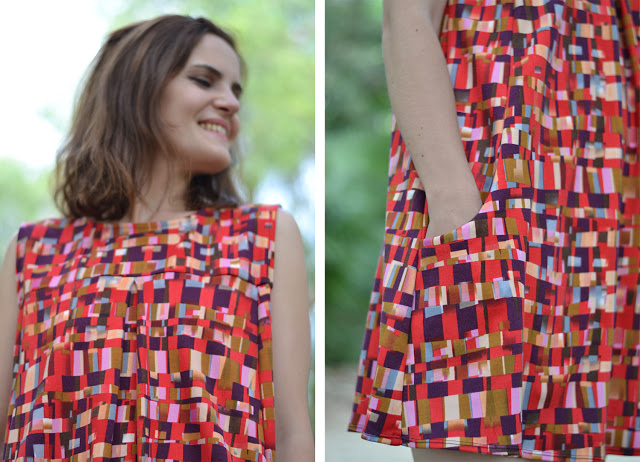 I hope you’ll like the new patterns, the
 The
The 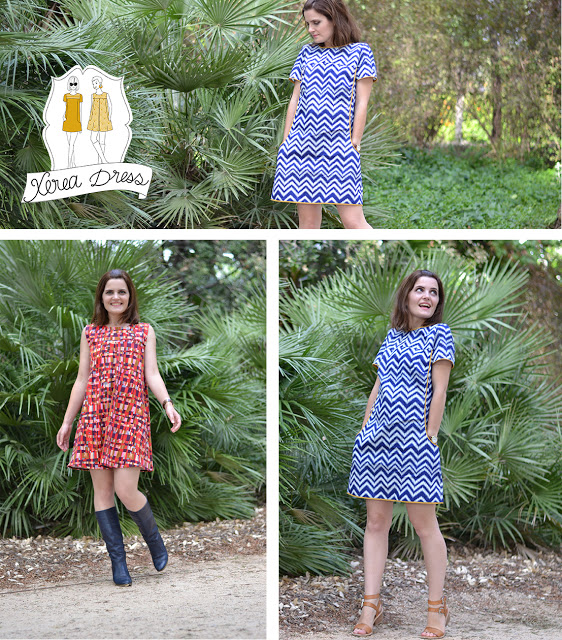 The
The  I also wanted to tell you we are opening today the collective blog «