Home Pauline alice patterns Hemisfèric

Hemisfèric

We are very excited to share this new video tutorial about the Hemisfèric Coat with you today!

It’s a perfect visual help for all of you who don’t feel secure enough to try this project. So, don’t be afraid anymore and take your sewing machine, your fabric and your scissors and enjoy watching our video tutorial!

If you have any question, feel free to ask in the comment section or send us an email at info@paulinealicepatterns.com, we’ll be happy to help. And don’t hesitate to share your Hemisfèric Coat with us on social media with the hashtag #HemisfericCoat.

0 comment
16 FacebookTwitterPinterestEmail

Hemisfèric is a semi-fitted coat that flares at the hips, designed for a B cup and a medium height of 1,65 m (5 ft ).

In this post, we’ll share some tips and advices to adapt the pattern to your body. From taking your measurements to sleeve and bust adjustments or coat length, let’s see together how to proceed to these different modifications.

MATERIAL
  • The Hemisfèric coat pattern
  • Kraft or pattern paper
  • Pencils in various colours
  • Tape
  • Scisors
  • A measuring tape
  • A straight ruler and a curved one
TAKING YOUR MEASUREMENTS

The first a important step is to take your measurements. With a measuring tape, take the following measures and compare them to the measurements chart.

  1. The length. The coat length is measured from the base of the neck (the highest point of shoulder) to the hem, passing over the bust.
  2. The bust. Place the measuring tape over the bust, at the apex and make sure the tape is straight in the back.
  3. The waist. To measure the waist, place the tape around your waist where it’s the smallest.
  4. The hips. To measure the hips circumference, place the tape at the widest, about 25 cm (10″) below the waist.
  5. The sleeve length. To measure the sleeve length, place the tape below your arm and measure from the armscye to the wrist with your below slightly bent.
  6. The sleeve width. Place your tape around your biceps at its widest.


BODICE HACKS

Before making any modification, place the waistline (see the illustration) on your pattern. Trace this line perpendicular to the grainline and make sure they are at the same level on all pattern pieces.

We’ll then add the adjustments lines. Trace a new line about 3 cm (1 ¼”) above the waistline to adjust the bust length and another one about 30 cm (12″) below the waistline to modify the coat length.

Once these two lines are made, you’ll be able to shorten/lengthen your coat easily. You can apply this method on almost any given pattern to adjust the length.

Shorten a pattern piece

1 – Choose how many cm/inches you need to remove. Cut your pattern piece along the adjustment line.

2 – Overlay the two pieces the number of cm/inches you want to remove. Make sure the grainline is straight.

3 – Tape the pieces together.

4 – Redraw the pattern shape.

Lengthen a pattern piece

1 – Cut your pattern piece along the adjustment line.

2 – Place a piece of kraft or pattern paper under the two new pieces. Decide how many cm/inches you need to add and spread the two pieces apart accordingly. Make sure the grainline is straight.

3 – tape the pieces to the kraft/pattern paper and redraw the new lines.


SLEEVE HACKS

It’s rather easy to modify a raglan sleeve and adapt it to your arm or shoulder width. Here are some modifications that can be useful.


Reduce the sleeve width

If you have small arms or you want a more fitted sleeve, you can reduce the width on the upper seam of your front and back sleeve pieces, drawing a new line between the top and bottom notches.

Increase the sleeve width

If the sleeve width seems too tight, you can increase the width over the upper edge of the front and back sleeves like we did to reduce it.

large arm

Shorten the sleeve

As for the coat length, you need to determine how many cm/inches you need to take off the total length of the sleeve. Cut the sleeve along the adjustment line and overlay the two pieces the number of cm/inches needed. Tape the pieces together, make sure the grainline is straight and redraw the sleeve edges.

Lengthen the sleeve

As for the coat, cut your pattern piece along the adjustment line and spread the pieces apart the number of cm/inches you need to add. Tape to a kraft paper and make sure the grainline is straight. Redraw the pieces if necessary.

Widen the shoulders

If you have broad shoulders, you don’t want your coat to pull when you move your arms. You need to add some ease at the shoulder edge, on the upper seam of your front and back sleeve pieces.

Reduce the shoulders

If you have small shoulders, you need to reduce the shoulder curve of the front and back sleeves.

These adjustments are easy to make and will help you get the best fit possible for your Hemisfèric coat!

Don’t hesitate to contact us at info@paulinealicepatterns.com or leave us a comment if you have a question.

3 comments
8 FacebookTwitterPinterestEmail

I LOOOOVE coats! I might have said it a few times now but it’s true. And nothing pains me more than leaving in a city where coat wearing is almost optional (it’s compulsory for a few weeks in January only). But I won’t complain about sun and warmth…

Anyway, I love coats and a new coat pattern is always a great excuse to make at least a couple of prototypes and wearable muslins. For the Hemisfèric coat pattern, I wanted to offer a mix between classic and modern: a classic fit and flare shape that goes over a dress or a pair of denims allied to some modern details like the raglan sleeves and zipper closure. I hope you’ll like the design! Here are some styling and fabric inspiration for you:

, , 3, 4

A coat is a piece you’ll be likely to wear everyday for a couple of months so choosing a neutral fabric is always a good idea. Grey, navy, black, camel… these will go with everything and are perfect for a chic and timeless outerwear.

And you can always choose a bright lining, topstitching or a contrasting facing to bring a little fun to your coat.


1 , 2 , 3 , 4

Another option is to go for a colourful fabric to brighten up any dark winter day! Nothing better to cheer you up than a bubblegum pink or pastel blue coat, am I right?

Personally, that’s how I like my outerwear: with a pop of colour! You can also play with the style lines and choose a colorblock look (one neutral fabric and another one more saturated).


1 , 2 , 3 , 4

For the ones who love a one-of-a-kind look, why not choose a graphic fabric? Polka dots or animal prints will be easy to match, whereas a plaid will be more difficult but oh-so-pretty. You could also use trimmings on the collar, sleeves, zipper placket or hems or a brocade fabric for a party version.

Which style is your favourite? Neutral, colourful or prints? Let me know what kind of fabric you’ll use for your Hemisfèric coat…

2 comments
6 FacebookTwitterPinterestEmail

Designing coats may be my favorite activity. I mean I love a great dress but nothing like a coat gives me so much excitement and joy. Three years after releasing a coat pattern, I was itching to do design a new outerwear piece. And it’s with mix of happiness and thrill that I’m presenting the Hemisfèric Coat pattern!

In the Hemisfèric coat pattern, you’ll find a classic fit and flare silhouette mixed with very contemporary details such as the two-piece raglan sleeves or hidden front zipper closure.


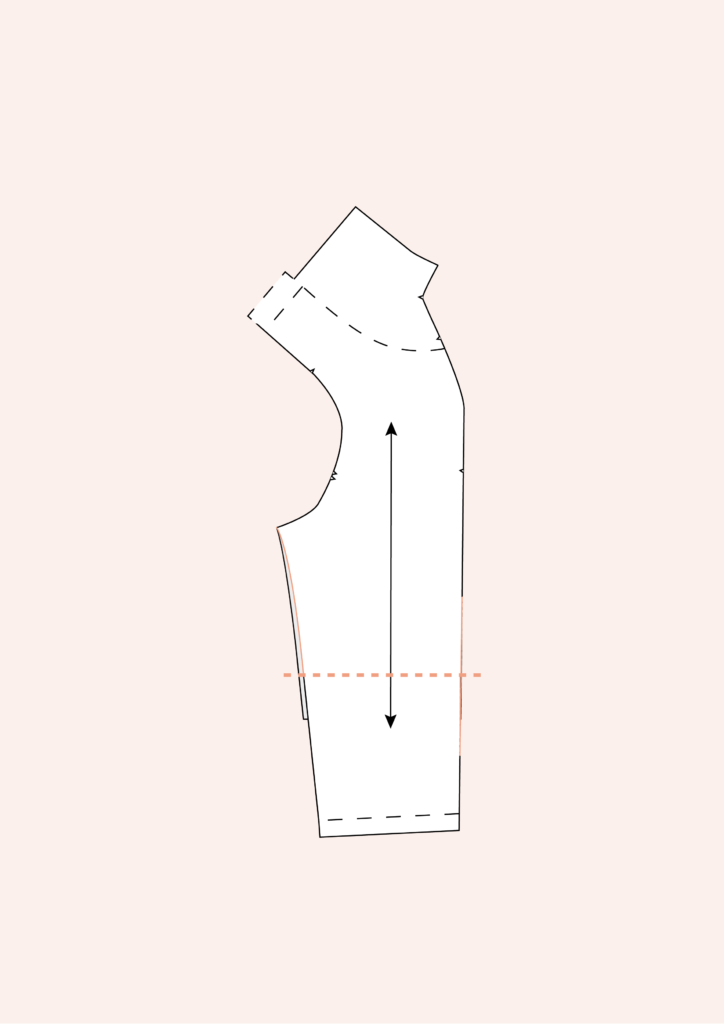
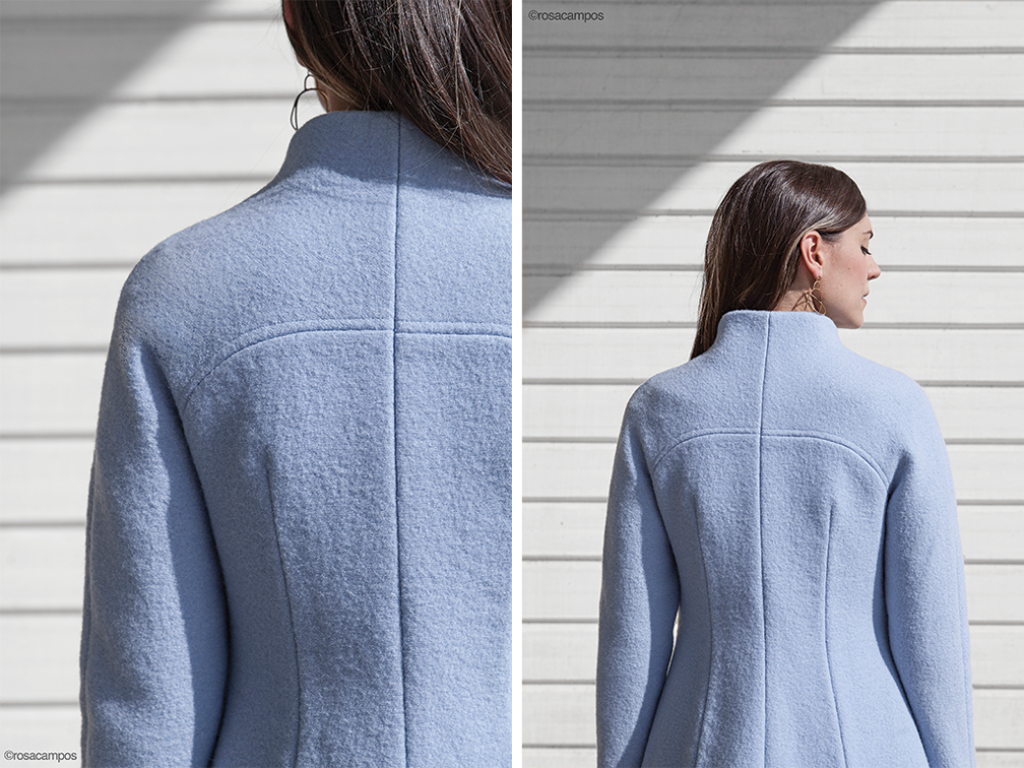
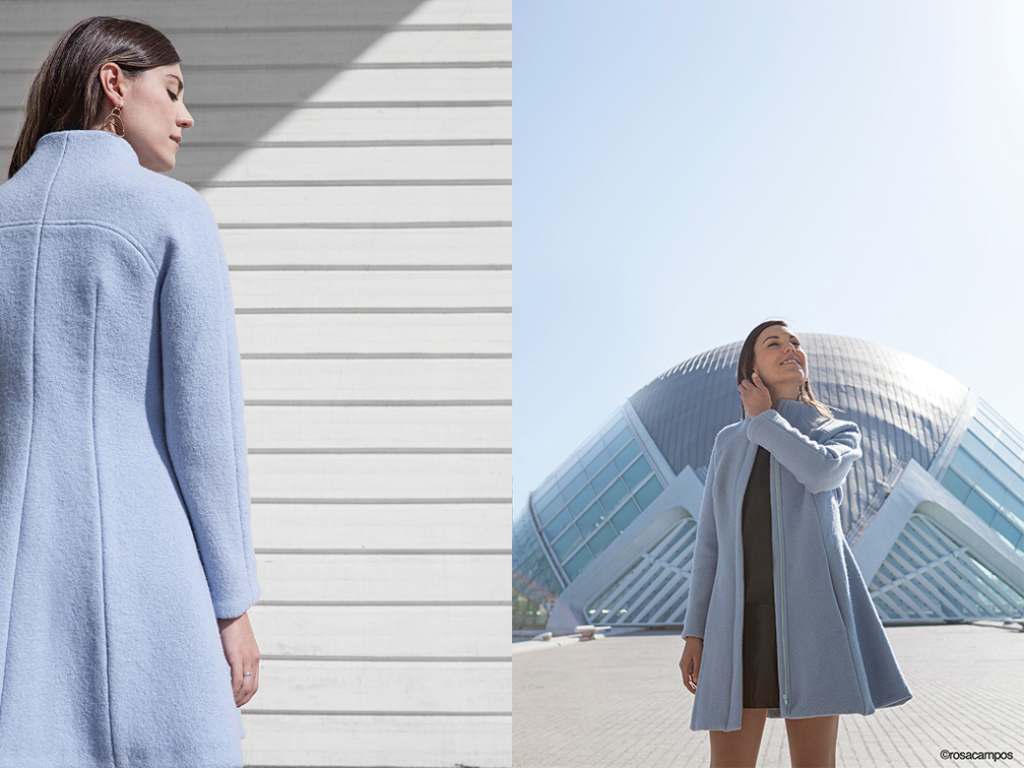
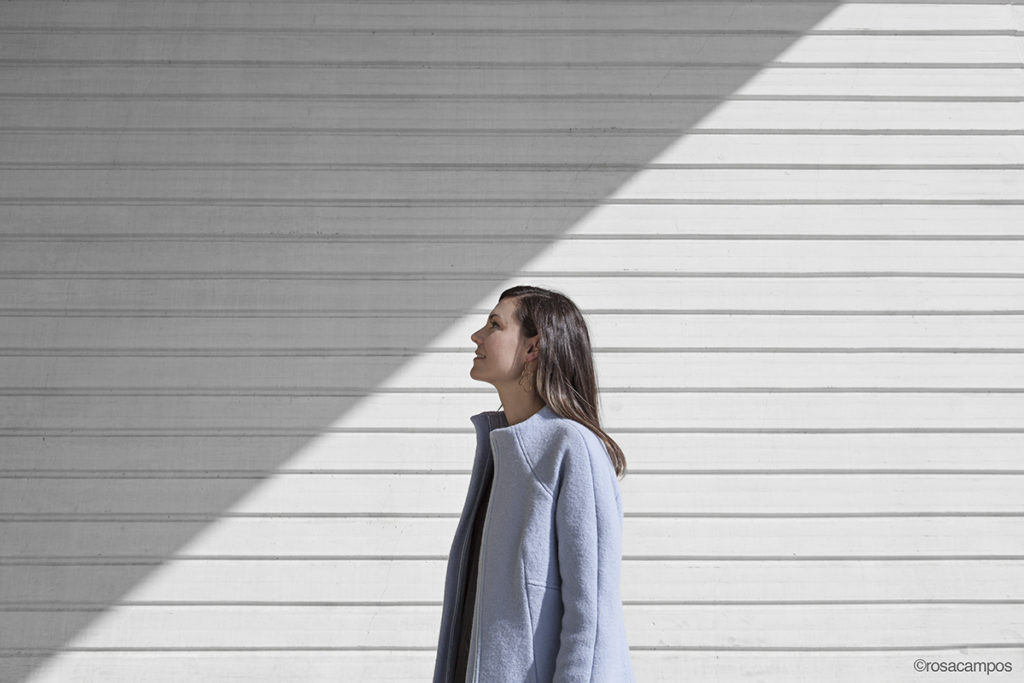
Hemsifèric features a classic shape with strong construction lines: waist darts in the front with shaped side panel, back darts and shaped raglan sleeves… The short funnel collar will keep you warm and stylish. There are inseam pockets and the coat ends at mid-thigh.

As for a modern touch, how about a front zipper, hidden by a central placket? This coat is great to play with topstitching, as I’ve done with the presentation model. That’s the perfect way to highlight the construction details. As the coat is fully lined, it will look as good from inside as it does out.


As for fabric, I recommend using medium to heavy wool fabric to keep the coat structured. You want the raglan sleeves to keep their shape at shoulders and the skirt part to stay flare. Here’s a few examples of wool fabric you should look for: felt, boiled wool, Melton, tweed… The great thing with wool is that it loves being shaped with heat and steam. If you don’t want to use wool, another option is medium to heavy weight wovens such as gabardine, brocade or twill.

Whether you choose a bright or neutral main fabric, a colorful lining is always a great idea: choose silk or Bemberg for a luxurious feel, or flannel for extra warmth. And make sure you don’t skip interfacing! For this coat, I recommend using fusible weft interfacing. It will keep your fabric’s drape while giving it structure.

Even if this pattern requires a great dose of patience, it’s a great project for intermediate seamstresses as the darts and the raglan sleeves make it easy to fit and there are few tailoring techniques. So don’t be afraid, grab your wool fabric, your Hemisfèric coat pattern and make yourself a pretty coat for winter! And as extra help, we’ll share a tutorial next week…

– You can find the Hemisfèric coat pattern in the shop in both printed and PDF version. –

11 comments
13 FacebookTwitterPinterestEmail