
11.4K
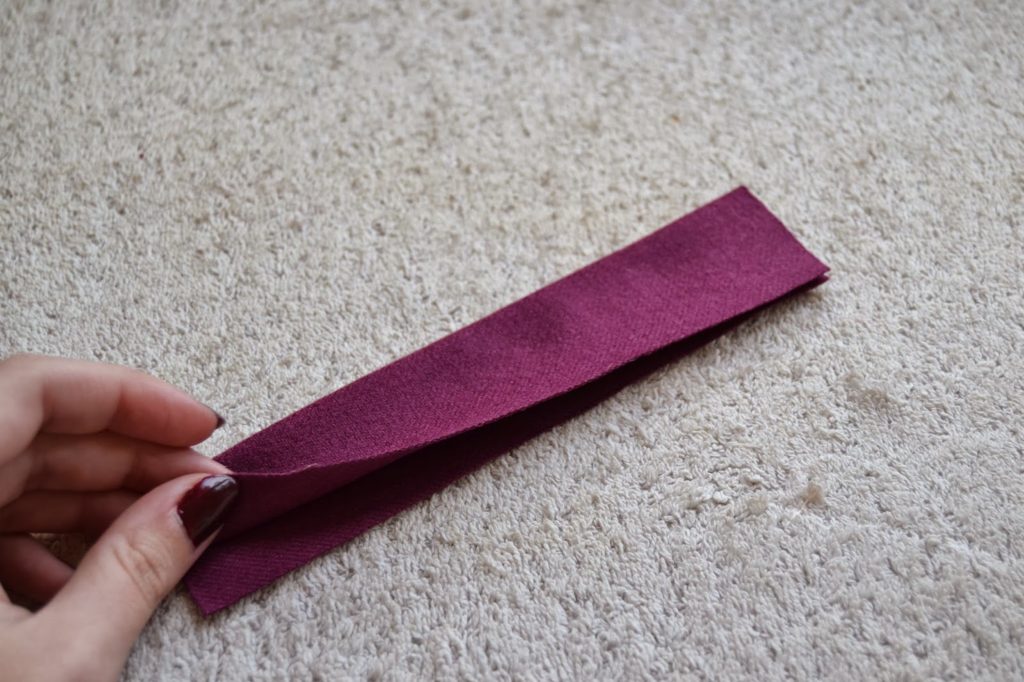
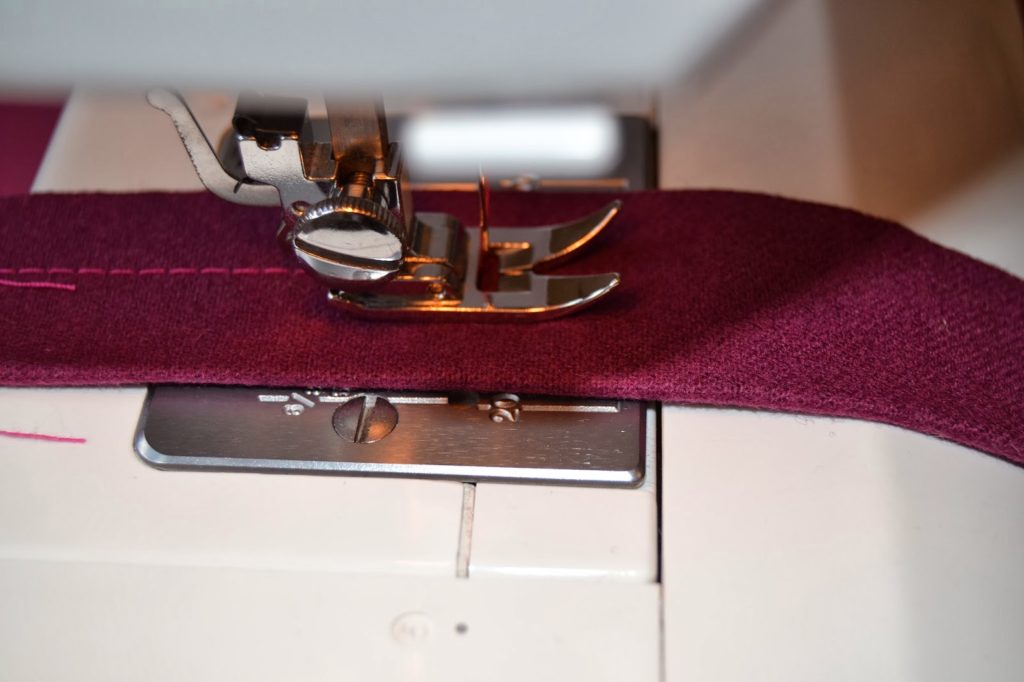
 3.Fold the welt piece in two with wrong sides together. Baste it at 1,5 cm (5/8″) from the outer edge.
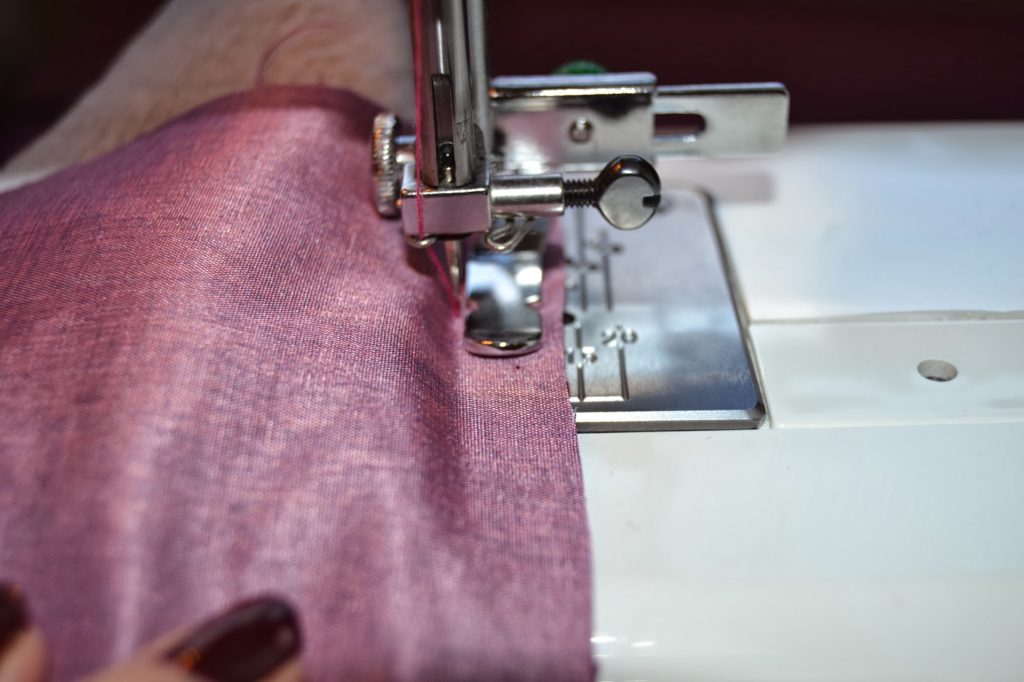
6.With right side facing down (and the pocket upside down), pin the pocket facing to the pocket opening matching the basted lines. Stitch over the basted line, starting and ending 1,5 cm (5/8″) from the edges.
3.Fold the welt piece in two with wrong sides together. Baste it at 1,5 cm (5/8″) from the outer edge.
6.With right side facing down (and the pocket upside down), pin the pocket facing to the pocket opening matching the basted lines. Stitch over the basted line, starting and ending 1,5 cm (5/8″) from the edges.
Let’s make some Welt Pockets today! After making the bound buttonholes and the buttonholes opening for our Ninot jacket, you’ll see some similarities so it will look so much easier…
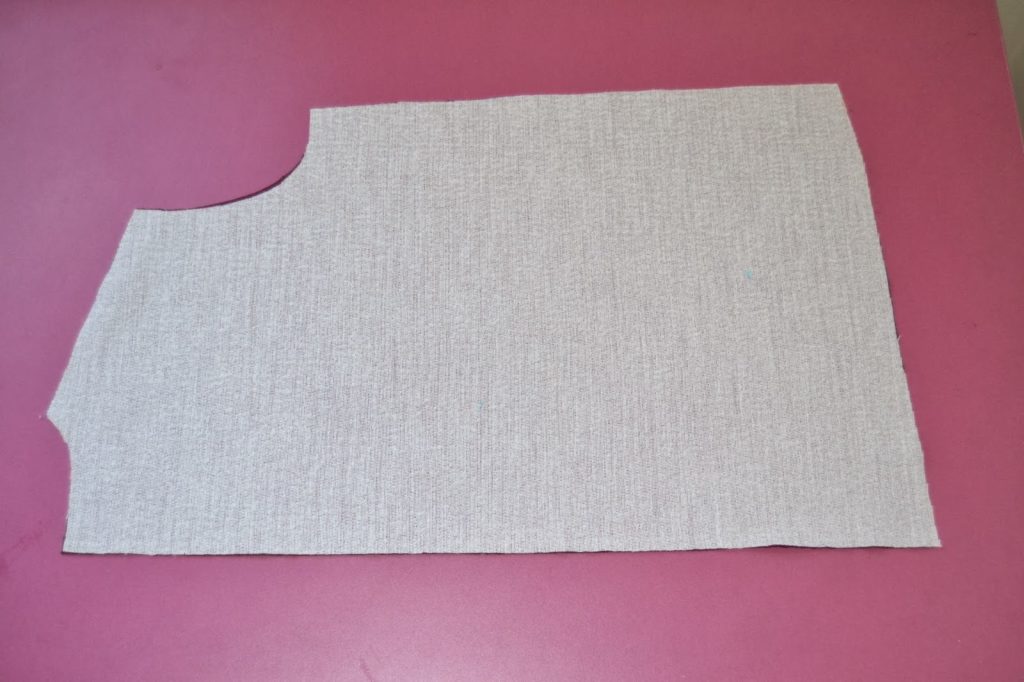
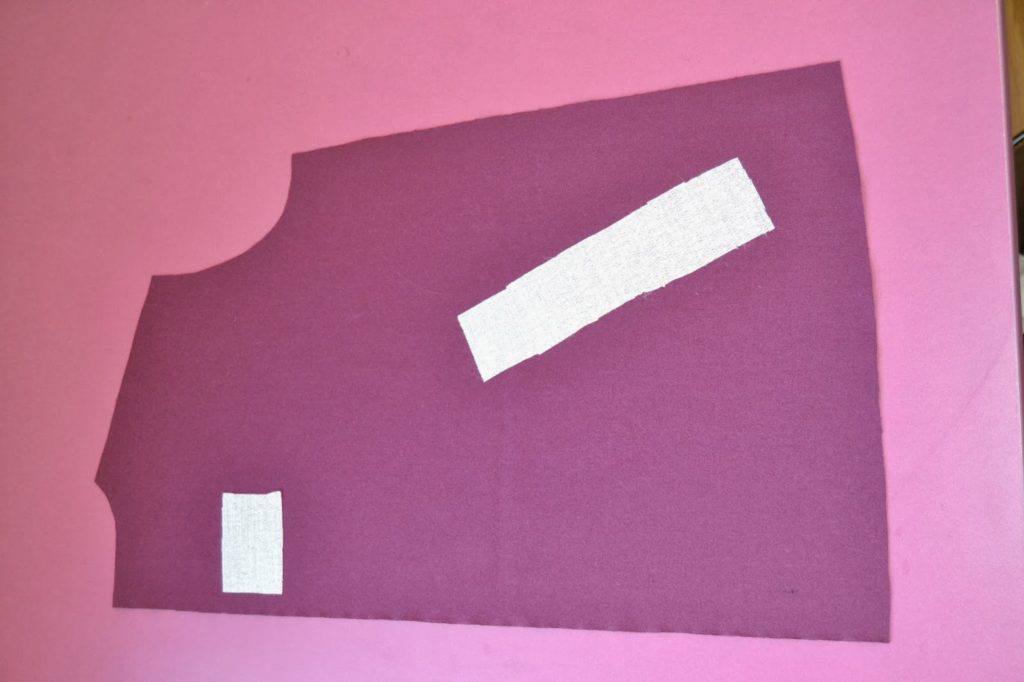
1.If you are making the lined version A of the Ninot jacket, your front piece is already fully interfaced. If you are making unlined version B, apply interfacing on the pocket opening (you can make the interfacing rectangle a little bigger than the pocket opening).
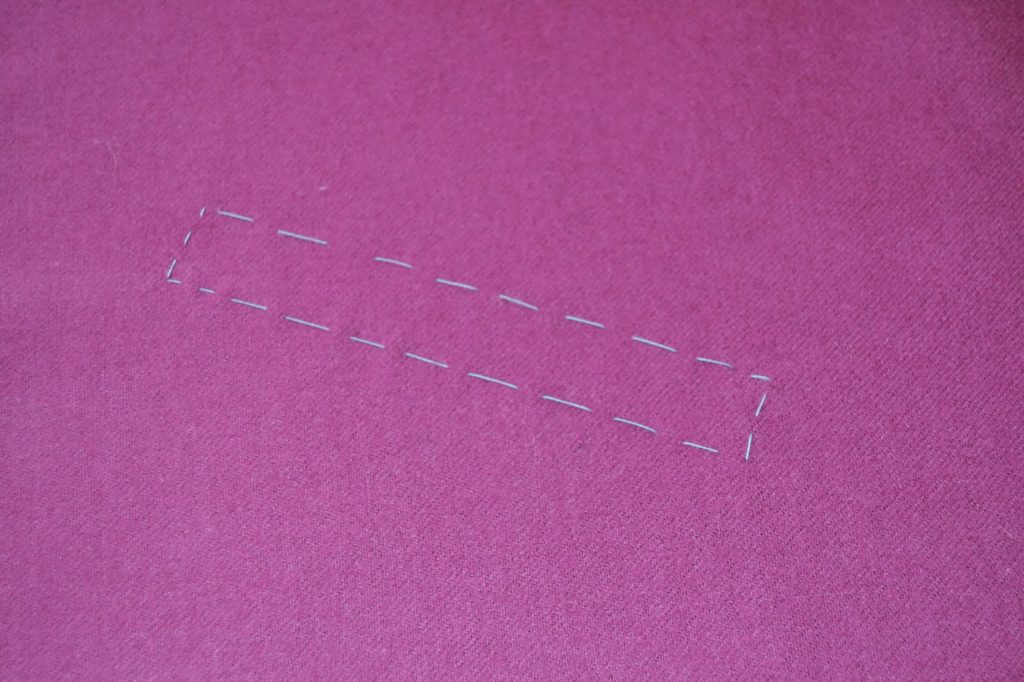
2.Baste around the pocket opening.
 3.Fold the welt piece in two with wrong sides together. Baste it at 1,5 cm (5/8″) from the outer edge.
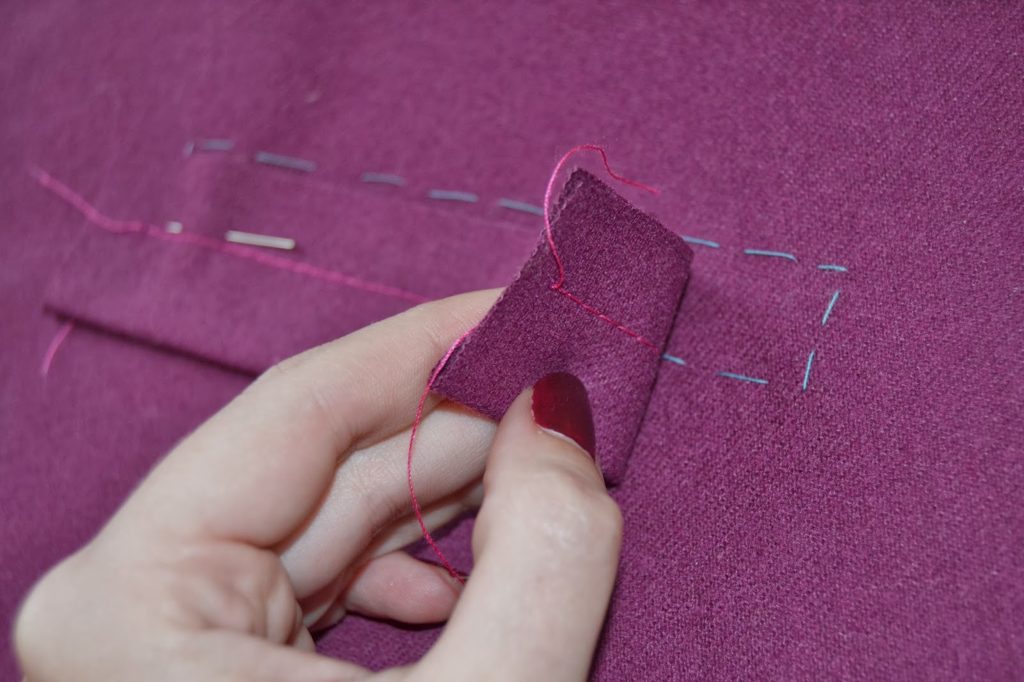
4.Place the welt over the bottom line of the pocket opening, matching the basted lines. The folded edge is facing down. Stitch over the basted line, starting and ending about 1,5 cm (5/8″) from the edges.
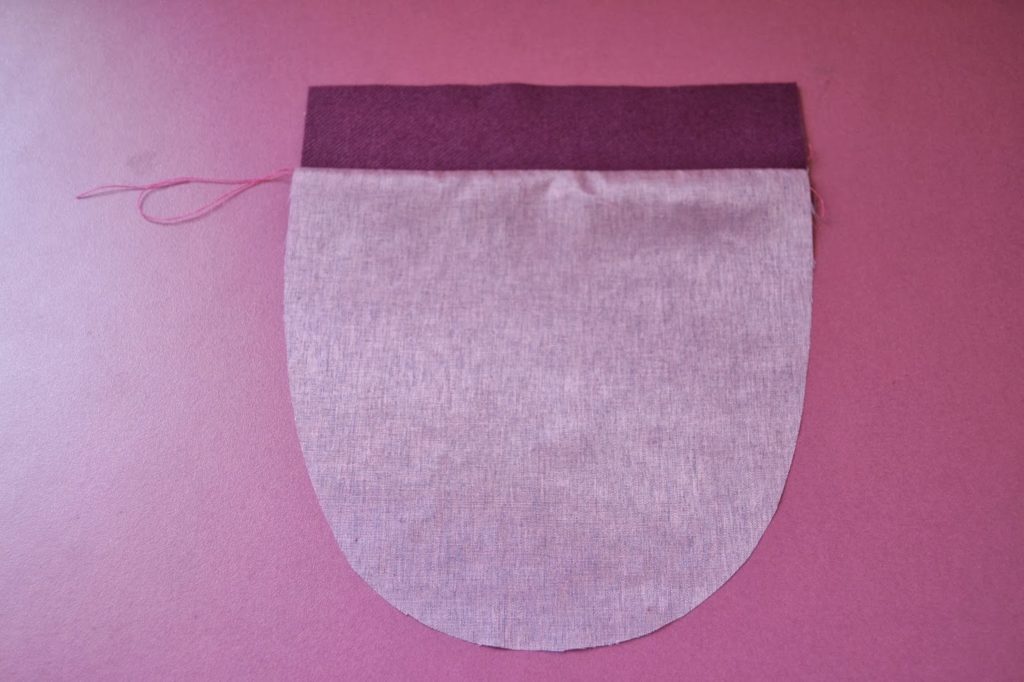
5.Pin the pocket (cut in lining fabric) and the pocket facing with the right sides together. Stitch. Press the seam allowances open. Baste at 1,5 cm (5/8″) from the upper edge.
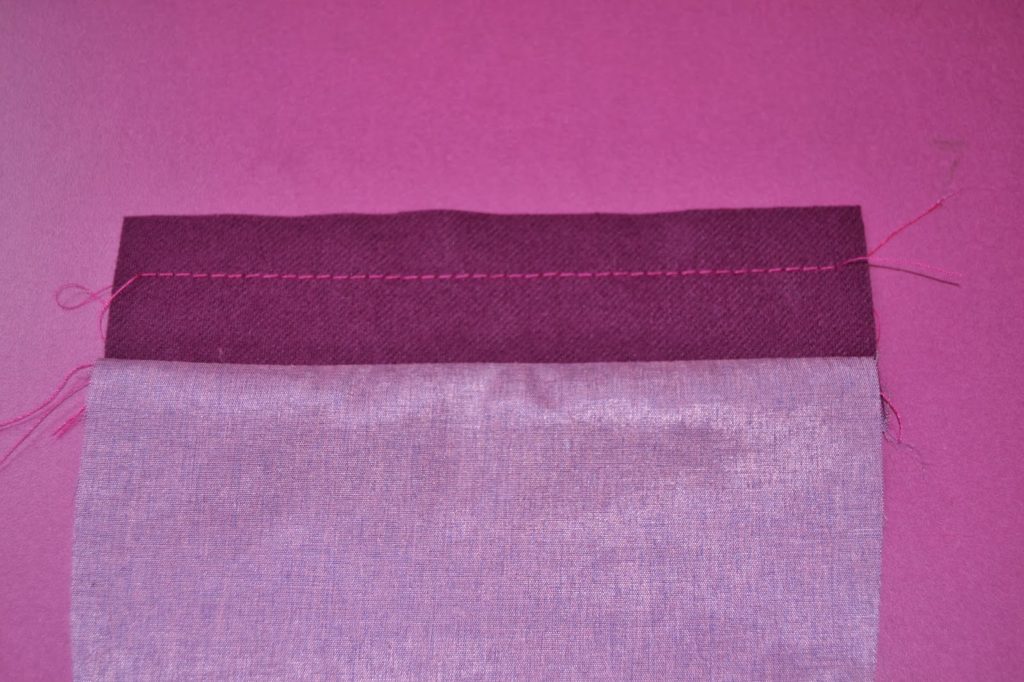
 6.With right side facing down (and the pocket upside down), pin the pocket facing to the pocket opening matching the basted lines. Stitch over the basted line, starting and ending 1,5 cm (5/8″) from the edges.
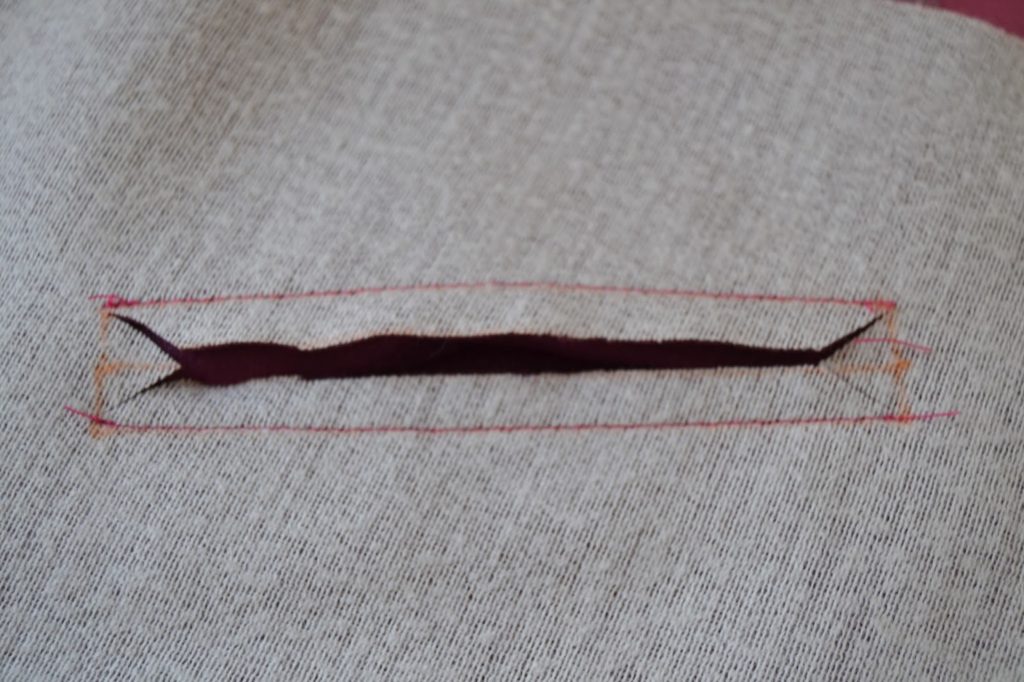
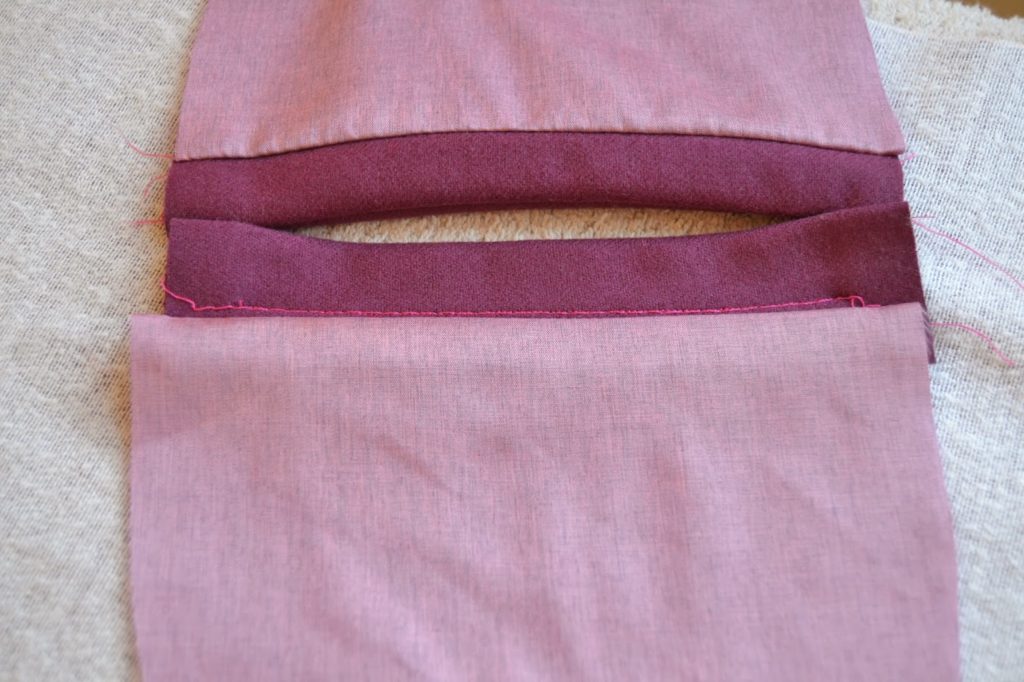
7.Cut the pocket opening, cutting diagonally into the corner in a V shape the closest possible to the stitches. Be careful and remove the seam allowances from the welt and pocket facing from the other side before cutting.
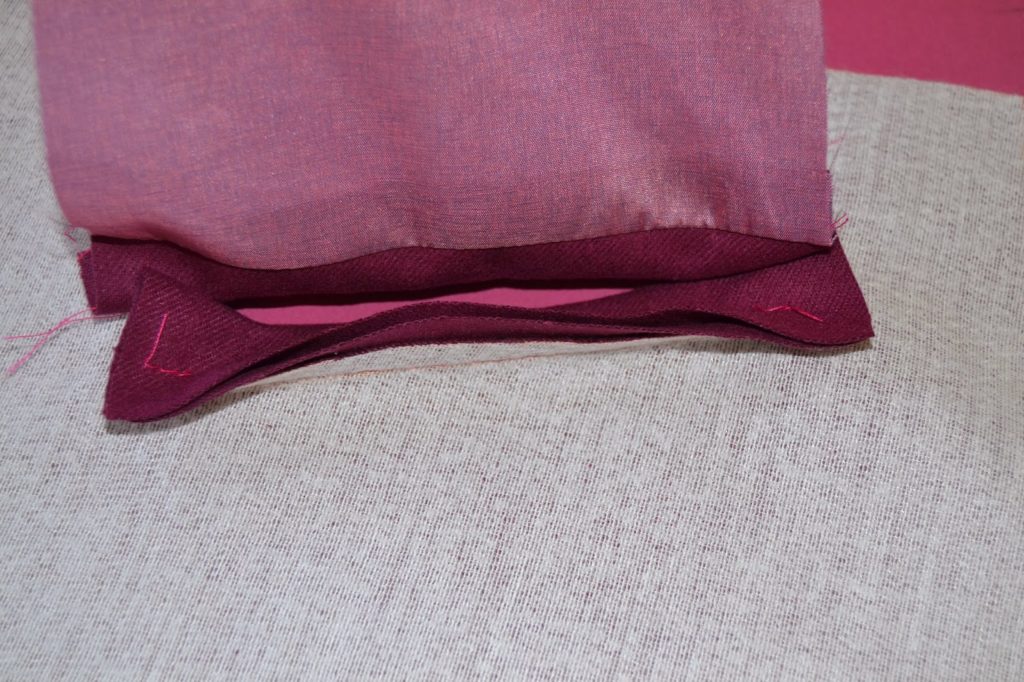
8.Pass the welt and the pocket facing throught the opening. Fold the little triangles like in the picture and press lightly to keep in place.
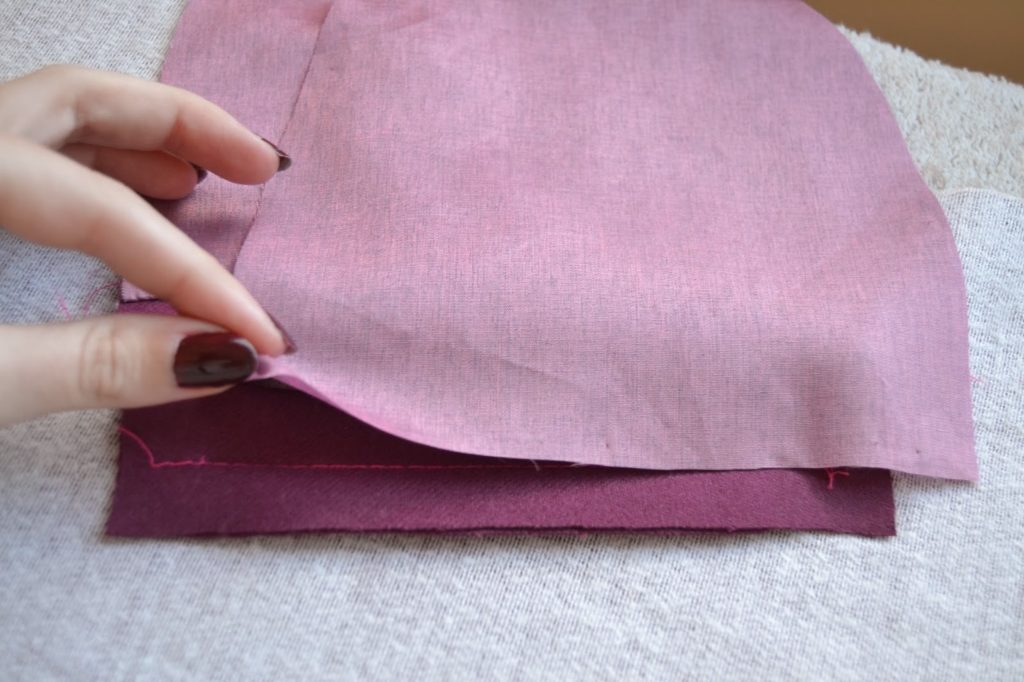
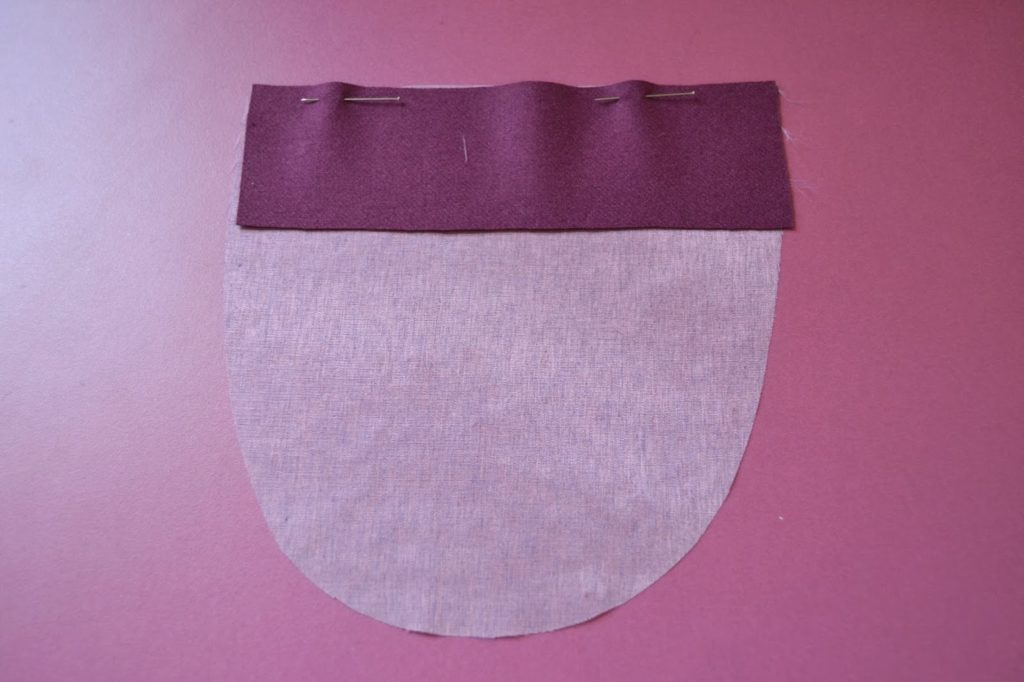
9.Take the other pocket piece in lining fabric and place it over the welt pocket, matching the outer edge. Pin together and stitch at 1,5 cm (5/8″) (it’s easier if you use a zipper foot). Press open.
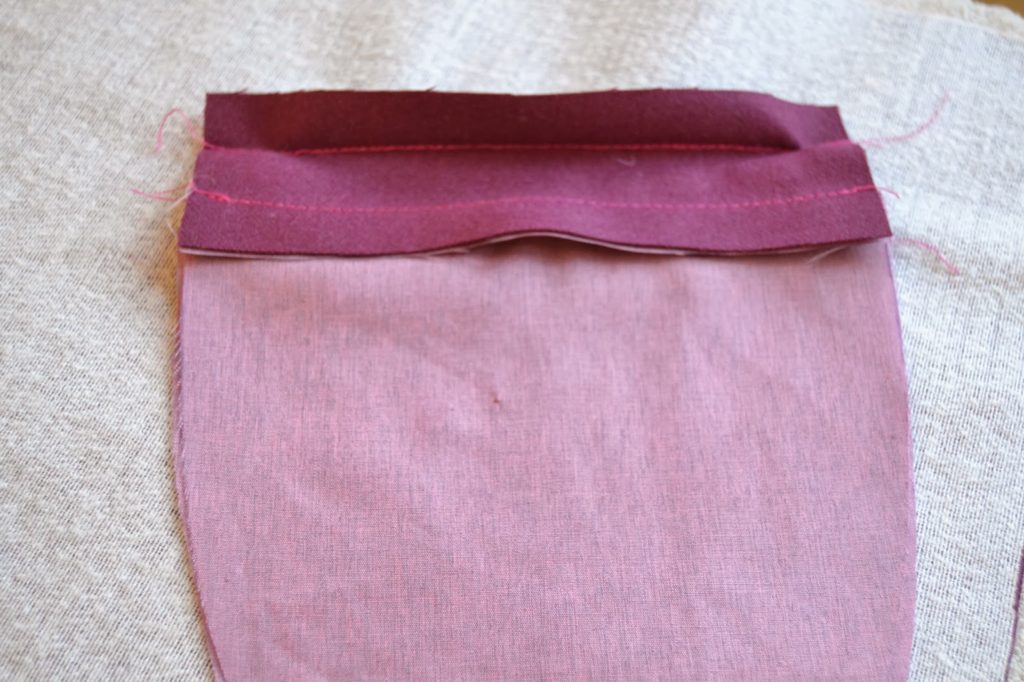
10.Place the welt first and then the facing over it. Press lightly. Pin the pocket edges together.
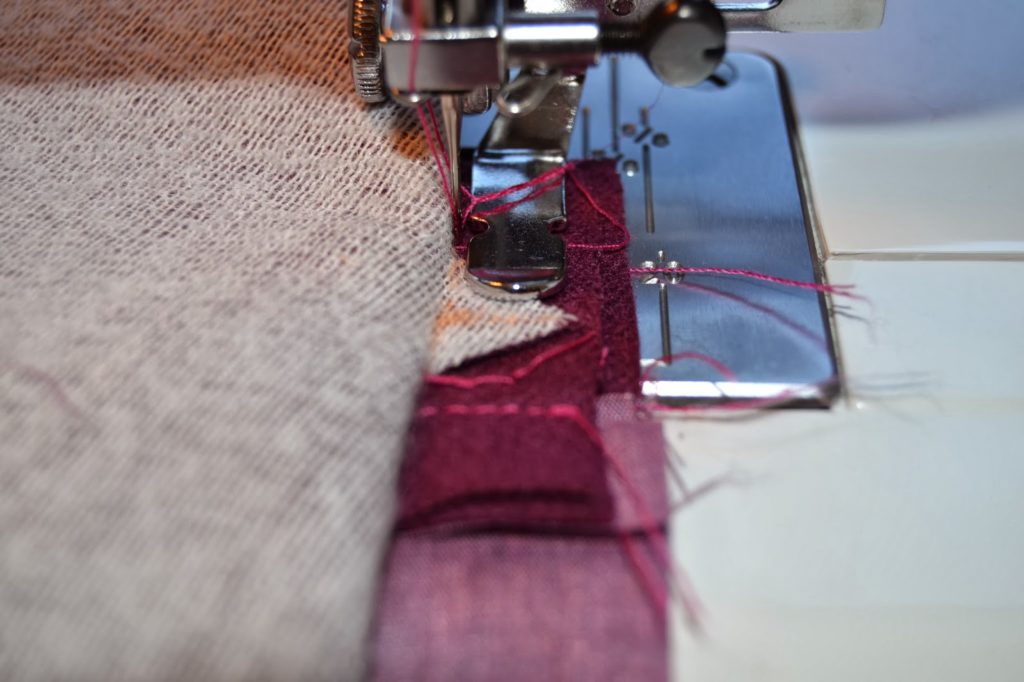
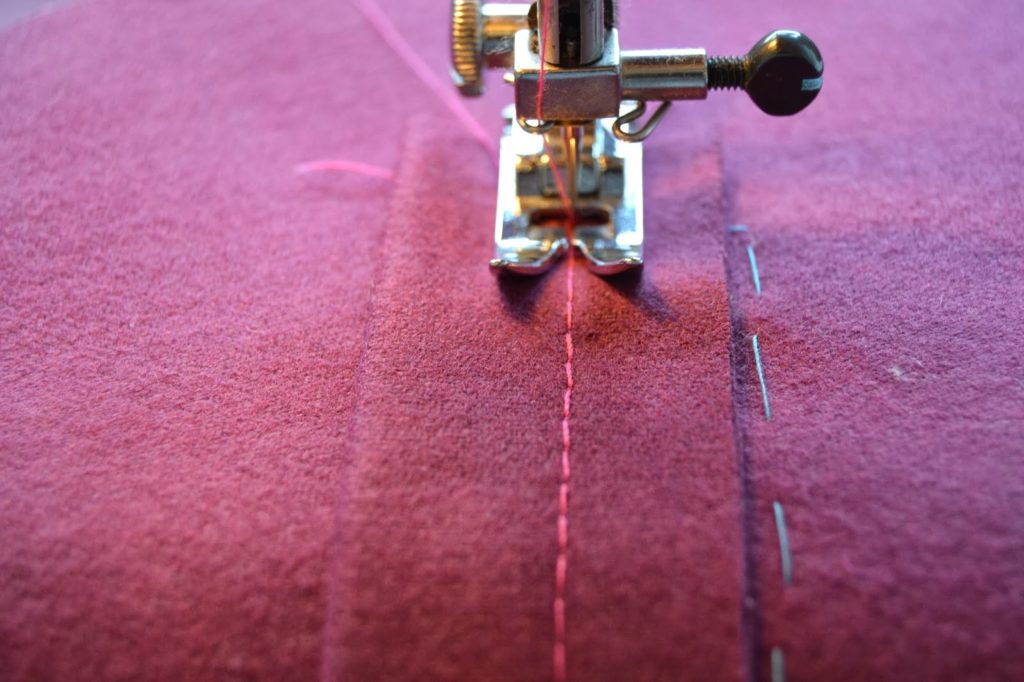
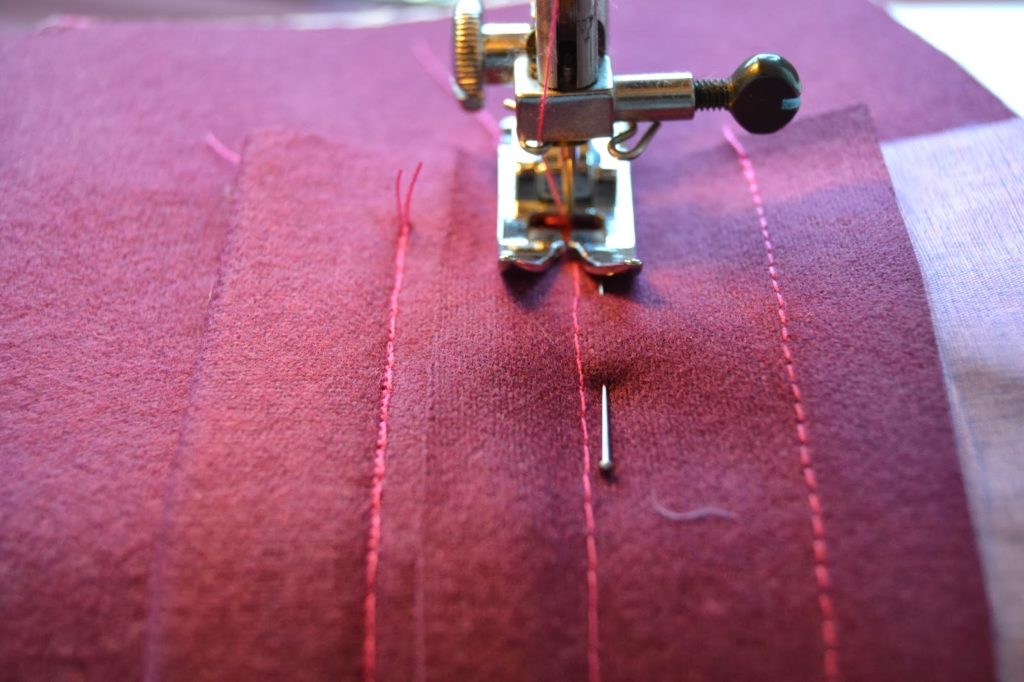
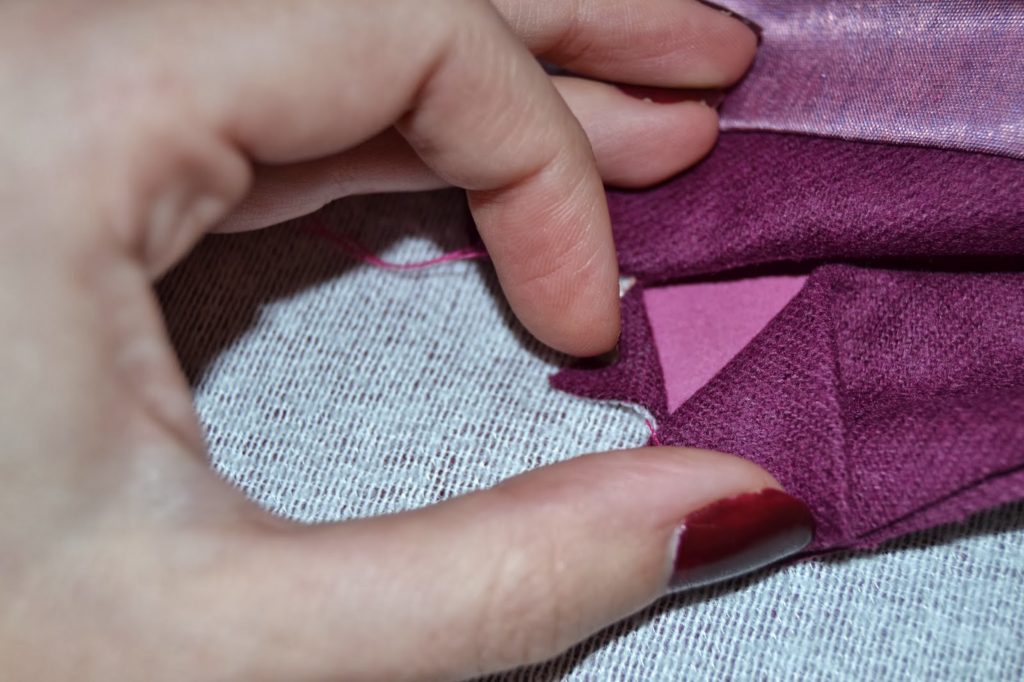
11.Stitch the little triangle to the pocket welt and facing, the closest possible to the triangle base, using a short stitch length.
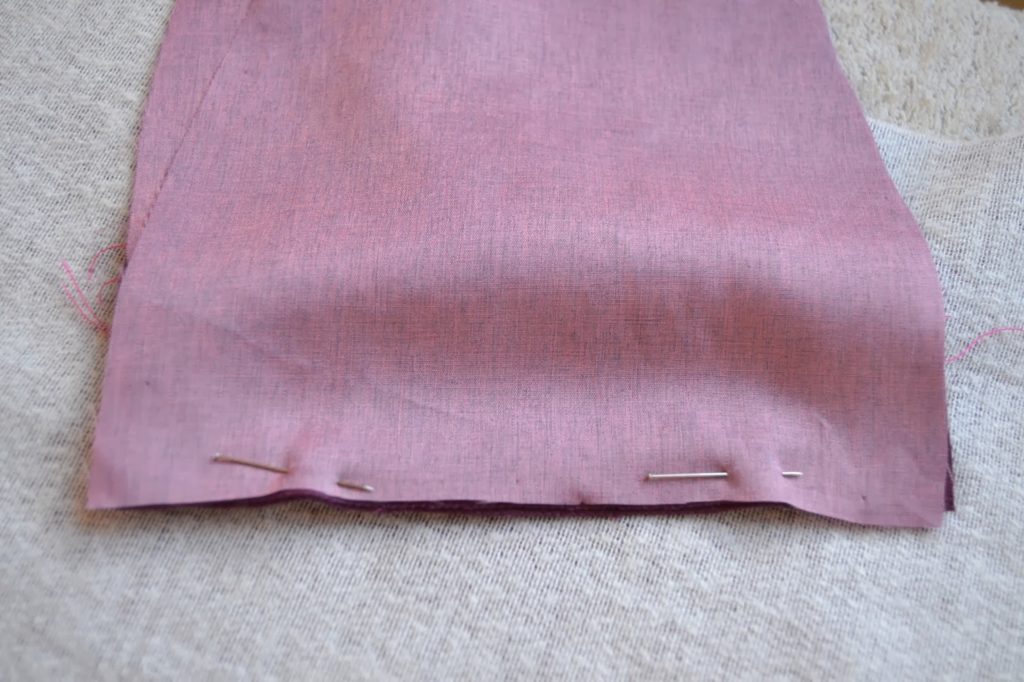
 12.Now stitch the pocket edges together. If you are making version B, finish the edge with bias binding.
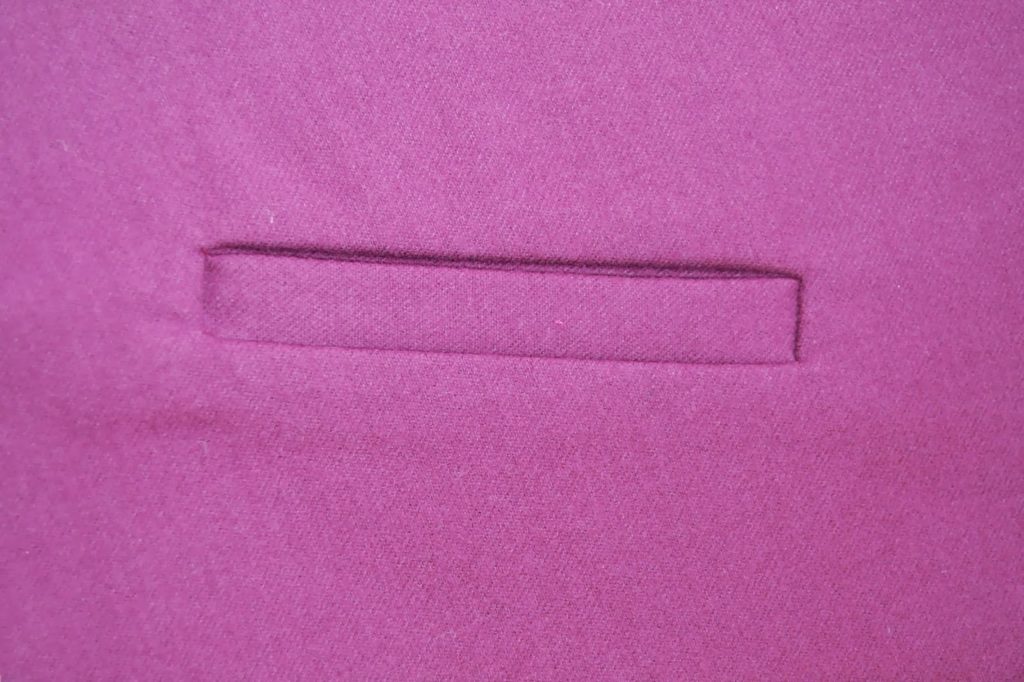
13.Here is the welt pocket from the right side: pretty, no? Remove the basting, make the second pocket and you’re done!
On Friday, we’ll see the last Ninot jacket tutorial: the collar and facing. See you then…

6 comments
Je me répète, mais vraiment bravo pour la clarté des explications, et la qualité des photos… Désormais, chacune pourra faire des poches passepoilées avec une main dans le dos ! 😉
Merci Anna! Je suis contente que ça puisse être utile à quelques unes… (Tu noteras peut-être que j'avais même assorti ma manicure au tissu, hehe)
Me han encantado tus tutoriales, y mira que he visto muchos en google, pero me gustaron much los tuyos, no he cosido nada este ultimo mes pero ya me quiero poner a hacer un abriguito como este 🙂
¡Muchas gracias Lizzy! Me alegro que te hayan gustado 😉
Gracias Pauline! Estoy cosiendo una chaqueta y me gusta más este acabado que el propone Burda. Este tutorial me ha venido genial!!
bss
Je suis trop contente ! Ma ninot à ses poches passepoilées !!!! Merci pour ton super tuto!
Comments are closed.