
5.5K
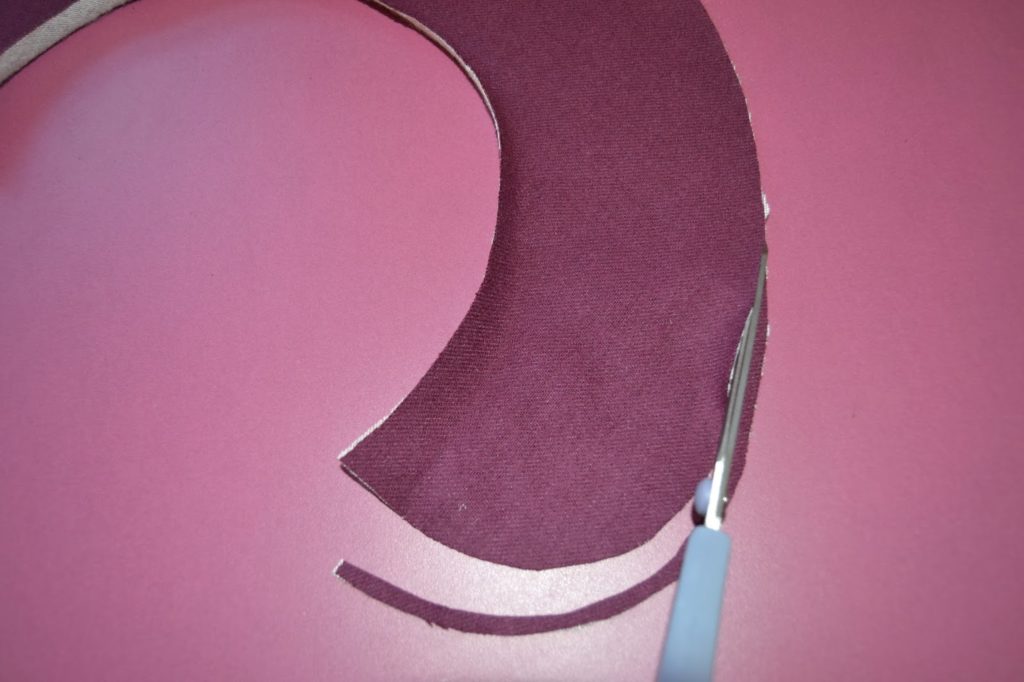
 2.Take the under collar piece and trim about 2 – 3 mm (2/16″ – 1/8″) from the outer edge. This will account for the turn of cloth and keep the stitching line from showing.
3.Shape the under collar around your dress form if you have one (if you don’t you can use a folded towel about the size of your neck). Fold gently around the collar roll and pin in place. Steam the collar and leave it cool down at least a few hours (a full night is better).
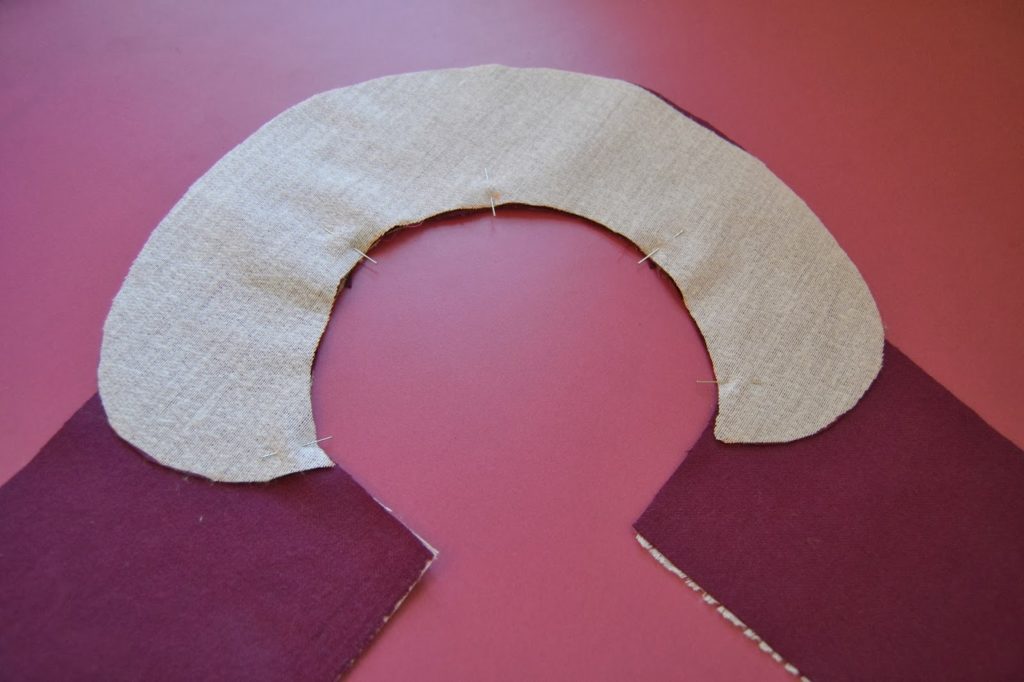
4.After the under collar is completely dry, pin it to the jacket shell matching center back and front marks. Stitch. Trim and clip the seam allowances to reduce bulk.
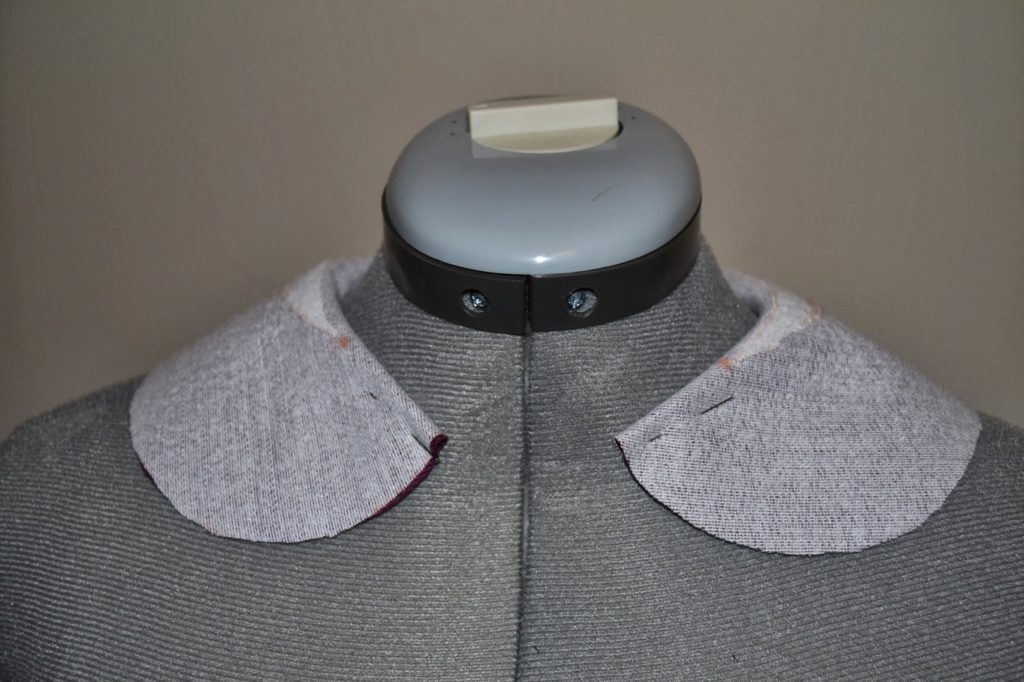
6.Pin the upper collar to facing, matching center back and front marking. Stitch. Trim and clip the seam allowances to reduce bulk
2.Take the under collar piece and trim about 2 – 3 mm (2/16″ – 1/8″) from the outer edge. This will account for the turn of cloth and keep the stitching line from showing.
3.Shape the under collar around your dress form if you have one (if you don’t you can use a folded towel about the size of your neck). Fold gently around the collar roll and pin in place. Steam the collar and leave it cool down at least a few hours (a full night is better).
4.After the under collar is completely dry, pin it to the jacket shell matching center back and front marks. Stitch. Trim and clip the seam allowances to reduce bulk.
6.Pin the upper collar to facing, matching center back and front marking. Stitch. Trim and clip the seam allowances to reduce bulk

Hello! Are you ready for the last Ninot jacket Tutorial?
I remind you that we saw previously how to make a bound buttonhole, the buttonhole opening on the facing and the welt pocket (click on the link to see the tutorial). Let’s start!
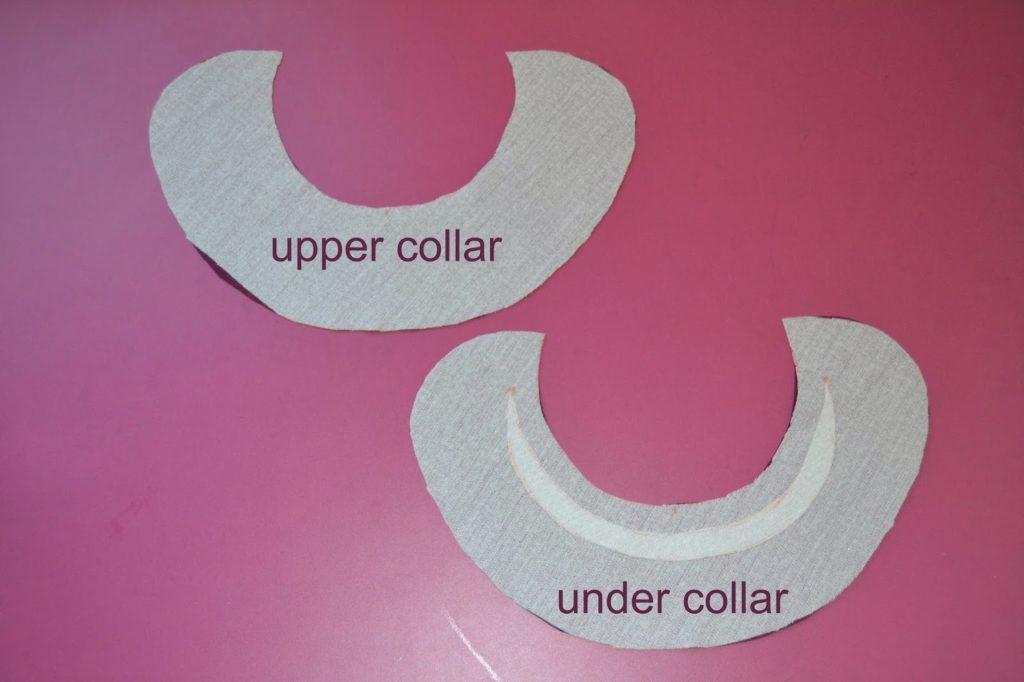
1.Apply interfacing to the under collar piece (here I have interfaced both to give more strength to my fabric, but you should interface only the undercollar with both interfacing pieces). Cut a piece of interfacing to form the collar roll, it should look like the bottom collar piece in the picture. This become your under collar and the other piece is then the upper collar.
 2.Take the under collar piece and trim about 2 – 3 mm (2/16″ – 1/8″) from the outer edge. This will account for the turn of cloth and keep the stitching line from showing.
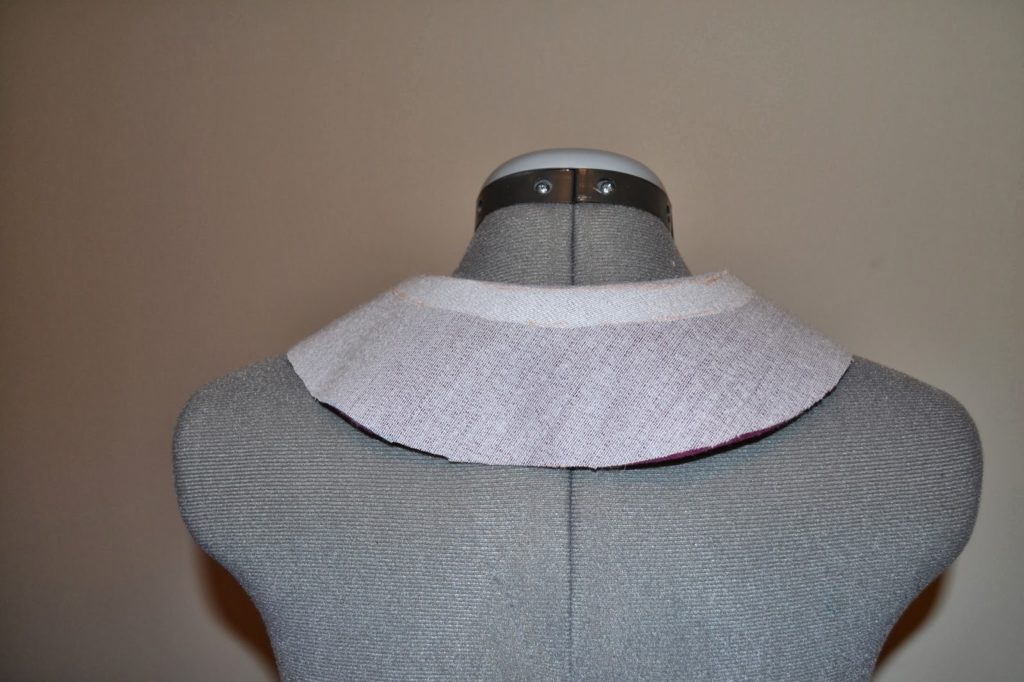
 3.Shape the under collar around your dress form if you have one (if you don’t you can use a folded towel about the size of your neck). Fold gently around the collar roll and pin in place. Steam the collar and leave it cool down at least a few hours (a full night is better).
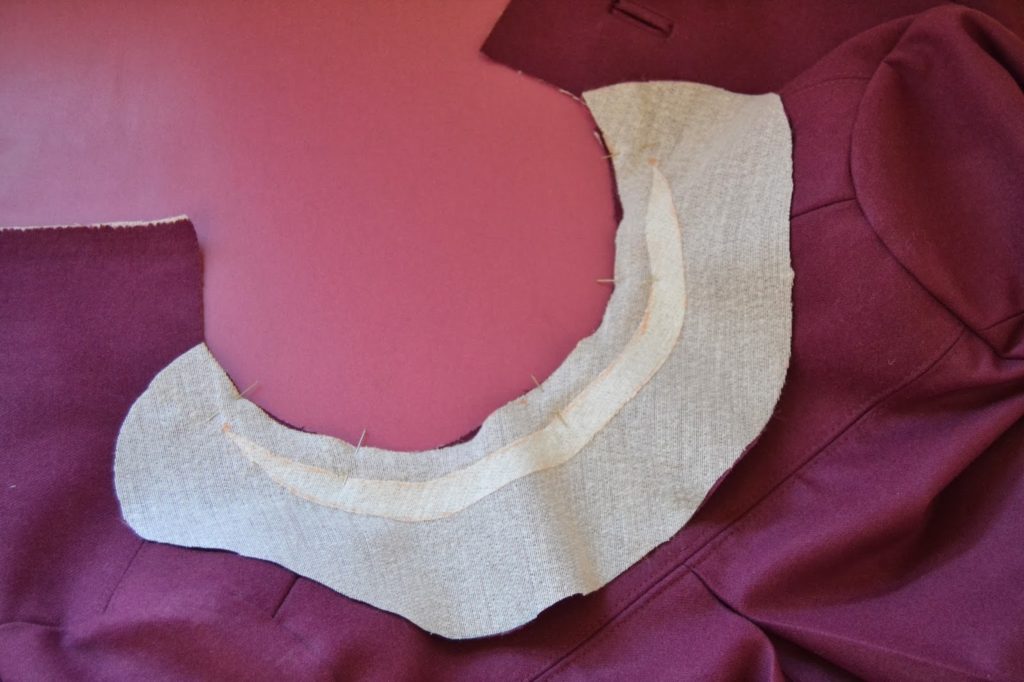
 4.After the under collar is completely dry, pin it to the jacket shell matching center back and front marks. Stitch. Trim and clip the seam allowances to reduce bulk.
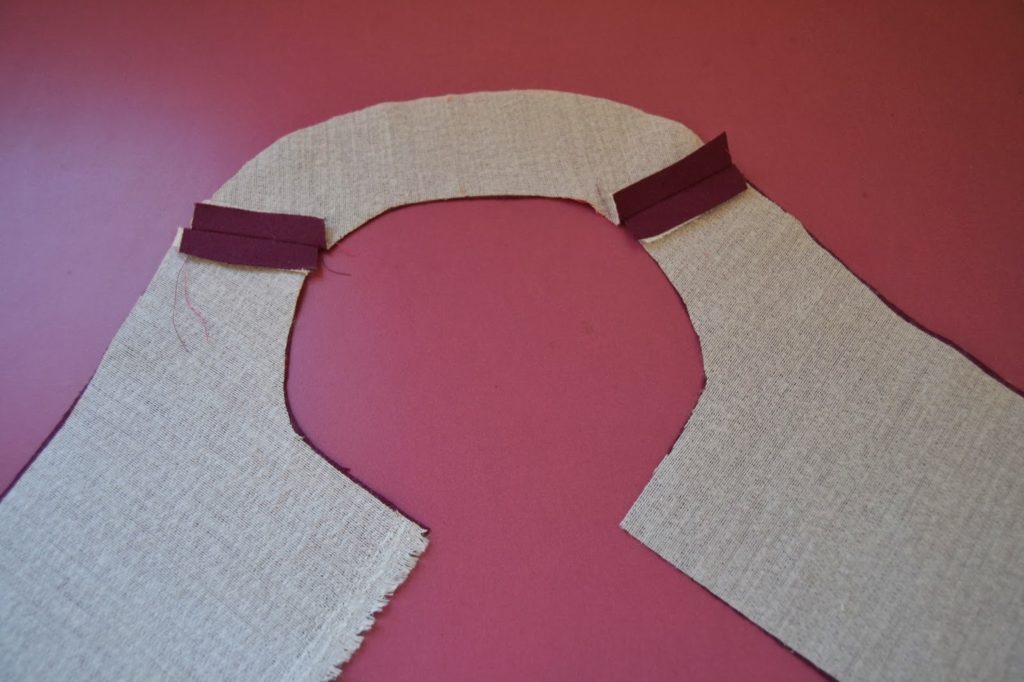
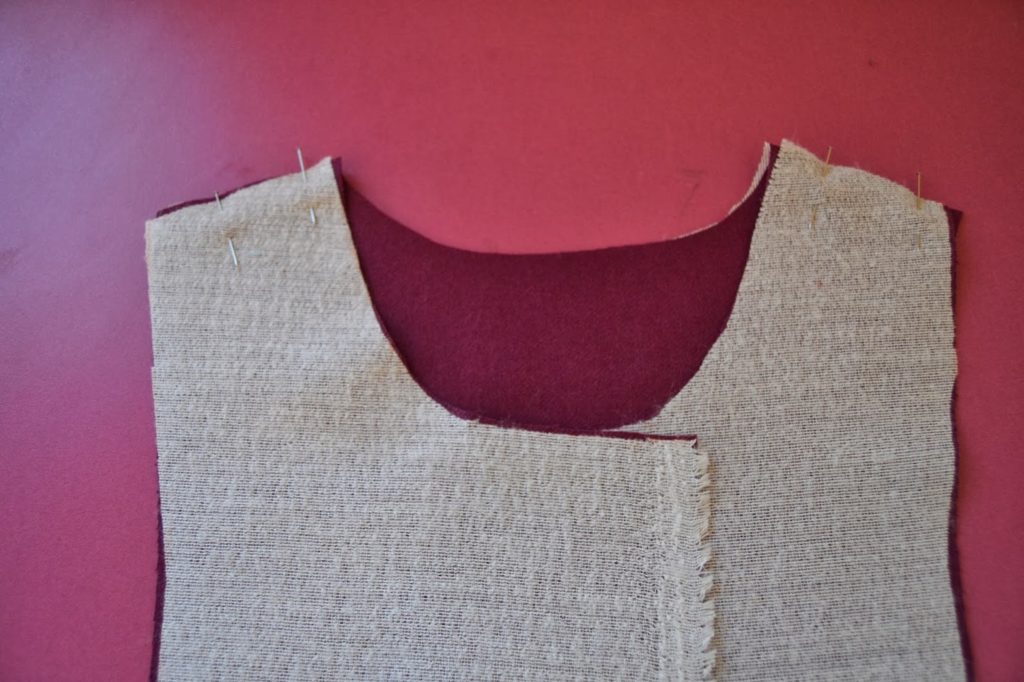
5.Take the front and back facing pieces and interface them. Match the shoulder seams, pin and stitch together. Press the seam allowances open.
 6.Pin the upper collar to facing, matching center back and front marking. Stitch. Trim and clip the seam allowances to reduce bulk
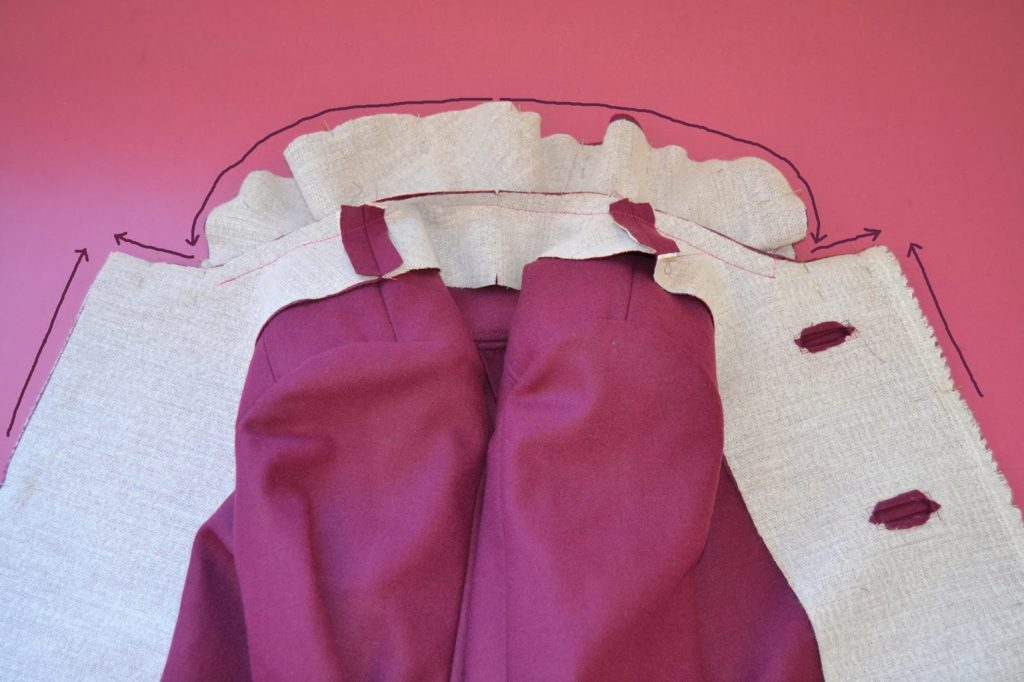

7.Pin the facing to the jacket like you would do for a normal jacket, pinning also the collars together. The under collar is slightly smaller than the upper collar because we trimmed it, so you will have to ease it a little bit while pinning them together. Start stitching from the center of the collar and stitch down to the collar end. Repeat on the other side. Then stitch the facings corners.
Clip and trim the seam allowances to reduce excessive bulk, especially where the collar meets the jacket.
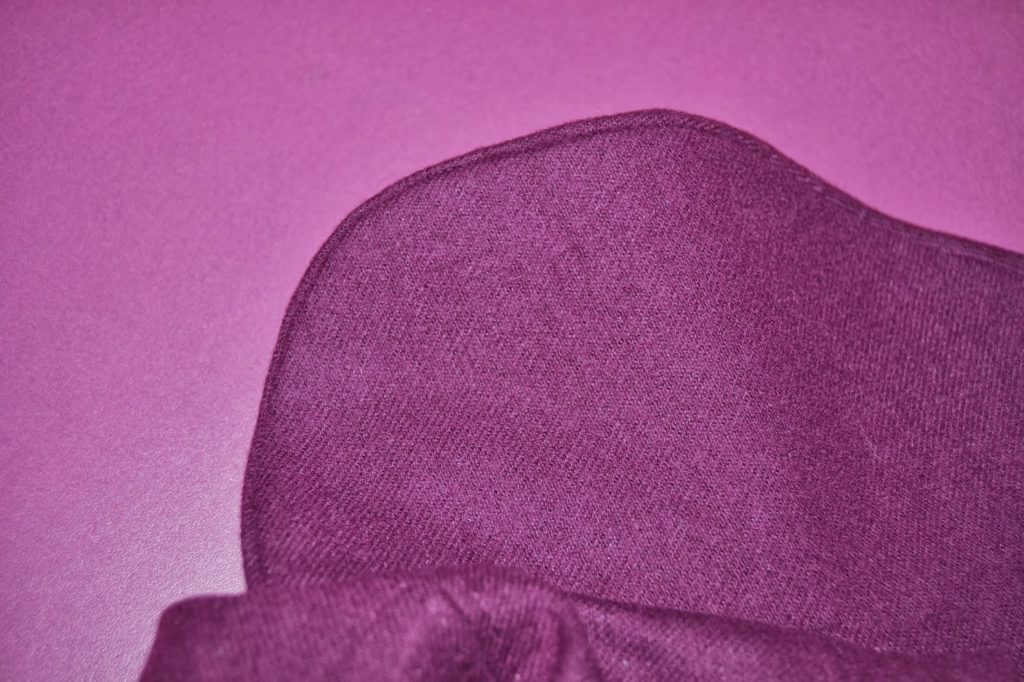
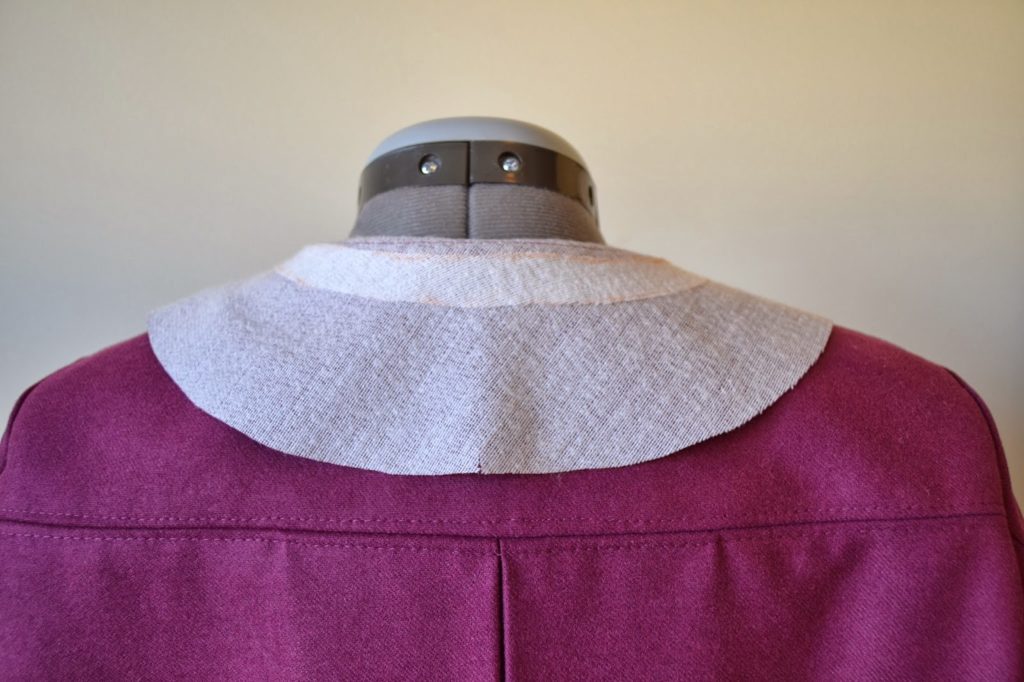
8.Here is the turn of cloth: see how the stitching line is kept under the collar? Press it flat nicely.
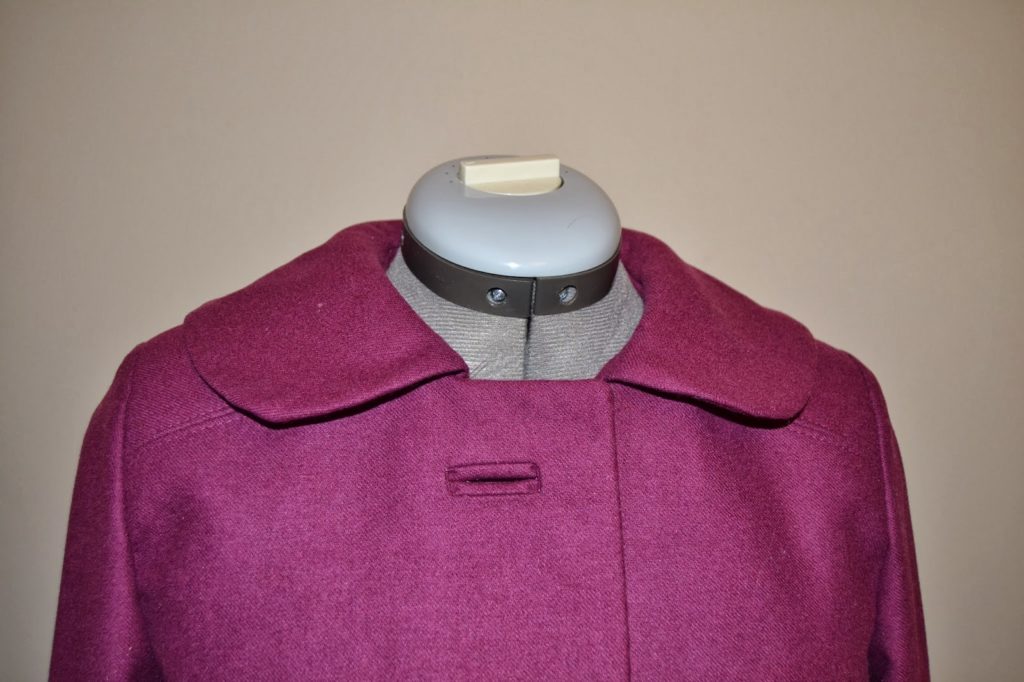
9.The finished collar! And as the facing is stitched to the jacket, now is the moment to finish your buttonholes and handstitch the opening to the buttonhole.
I hope the tutorials were useful for the confection of the Ninot jacket or any other jacket by the way.
Have a wonderful week end!

12 comments
Genial, un gran tutorial.
Gracias guapa!
UN GRAN TUTORIAL!!!!
Bravo!!!.
Besitos guapa
Gracias Sonia. Un besito
Pauline, I'm not making this right now, but it's on my list of things to make this year. I'm actually headed up to New York at the end of the month to buy fabric. I've been following along this tutorial and I can't wait to get started!
I'm glad you'll be making the Ninot jacket! I can definitely see you with it! Will you make the complete outfit with the Malvarosa dress? This is a plan I have but it will depend of the fabric I can find…
Can't wait to see what you'll make! Something amazing as usual I'm sure.
You got that right – I want to make a Malvarosa and Ninot jacket. I'm making Ralph Pink's Maxi dress right now, but after that, I'm going to tackle this. I have the most amazing fabric in mind for it, which is why I'm headed to NYC, and I'm so excited to start.
I'm looking forward to starting on this too! Just need some fabric – and cooler weather 🙂
How about a fall version in gabardine (with or without lining)? Or is it still too hot for thinking about fall now? Anyway, I'm sure your version will be beautiful!
I've done the buttonholes, pockets, collar and facings..Now to do the sleeves, lining and hem and it will be complete. Your tutorials were extremely helpful!
Excellent tutoriel! Merci!
Merci pour ce tuto bien expliqué. Voilà le col est cousu sur ma ninot
Comments are closed.