When I first designed the Camí dress pattern, I spent a long time deciding whether I should make a classic shirt collar or a cute peter pan one. Well, you which one won but I kept the peter pan collar as a backup idea. I am going to show you how to draw your own peter pan collar for the Camí dress (or any other dress or blouse). If you don’t feel confident enough for the shirt collar or want to go for a super cute look, that’s a great alternative!
Pendant la conception du patron de la robe Camí, j’ai longtemps hésité entre faire un col chemisier classique et un col claudine. Bon, vous savez lequel l’a remporté mais j’ai quand même gardé l’idée du col claudine dans un coin de ma tête, juste au cas où. Je vais donc vous montrer comment dessiner votre propre co claudine pour la robe Camí (ou toute autre robe ou blouse). Si vous ne vous sentez pas prête à attaquer le col chemisier ou que vous voulez une robe au style encore plus féminin, voilà la parfaite alternative!
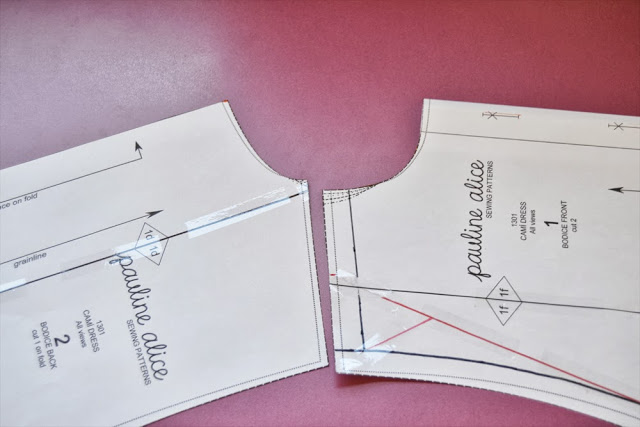
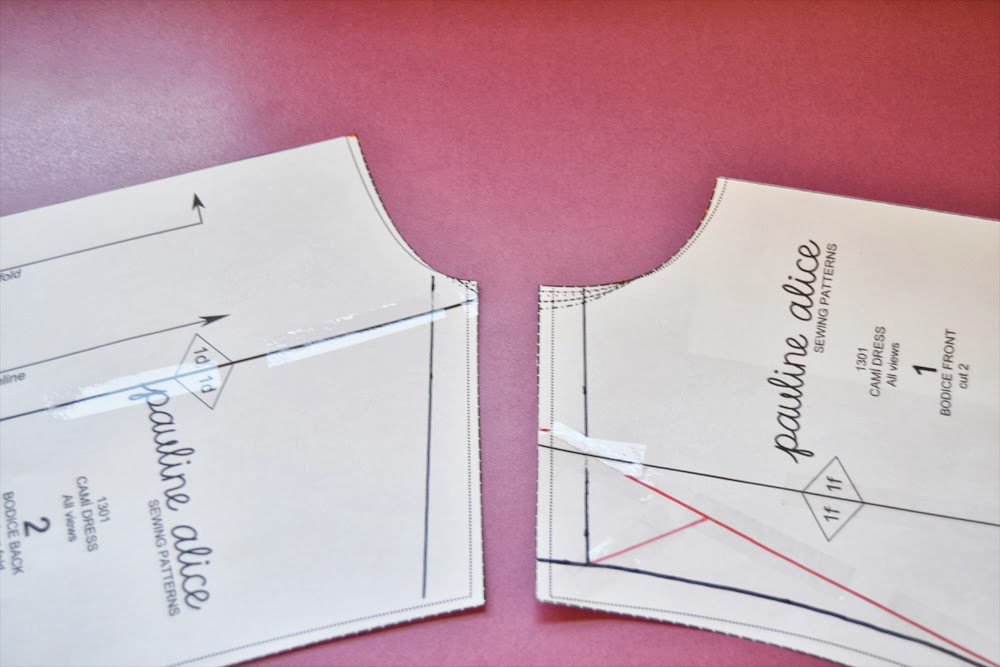
1. Take your front and back bodice pattern pieces. On the bodice front, decide where you want your collar to arrive: cross over the button placket (first picture – fold the first part of the placket), join at the middle of the button placket (no picture – fold the placket on the button line), before the button placket (second picture – fold the whole placket). Mark the seam allowances at the shoulder (1,5 cm or 5/8″).
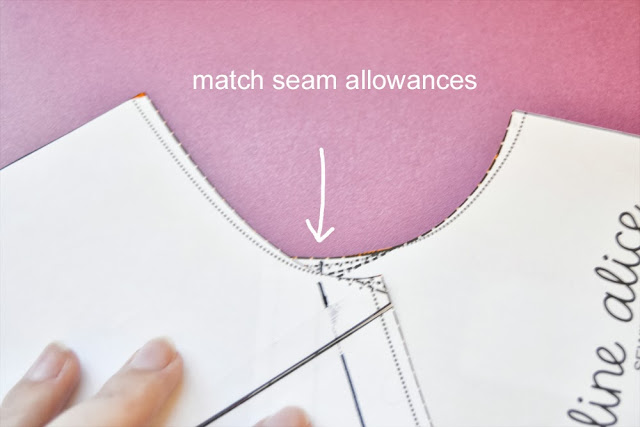 2. Match the seam allowances at the neckline.
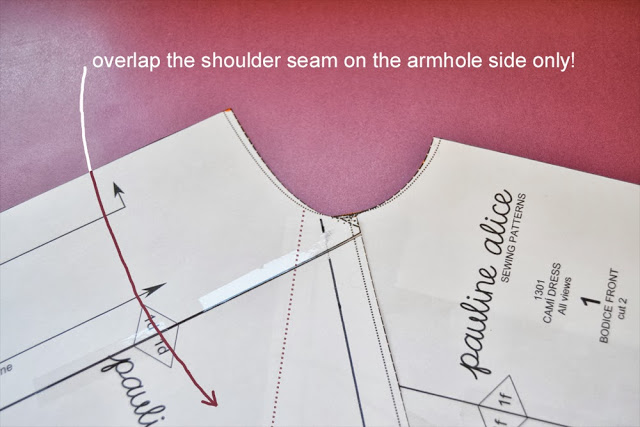 3. On the other side (armhole), overlap the shoulder seam. The more you overlap, the more the collar is going to stand up. A good measure would be about 2 or 3 cm (6/8″ or 9/8″).
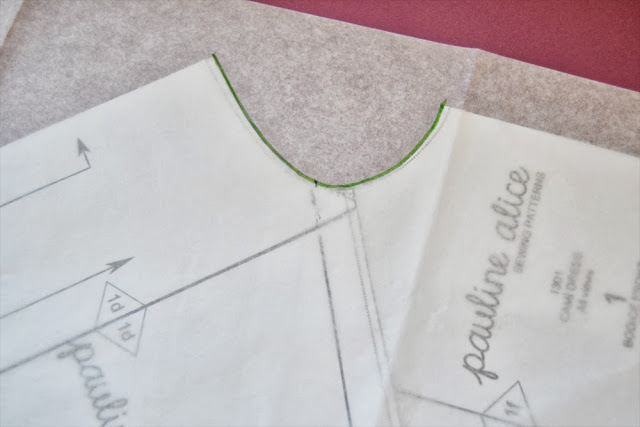
4. Now you’ll need to paste the pattern pieces together so they don’t move and get some pattern paper. Trace the neckline.
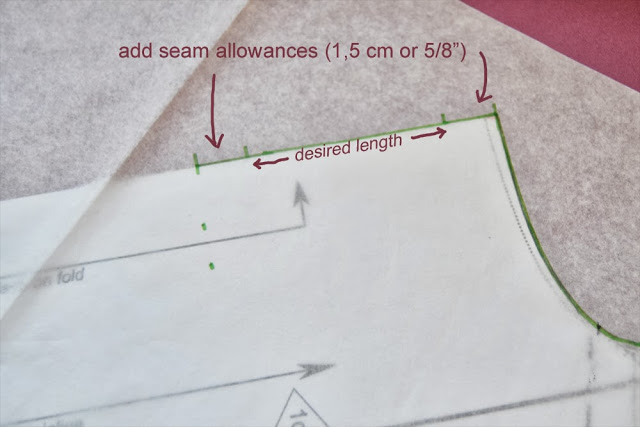 5. As my back bodice pattern is cut on the fold, I am going to draw a full collar on the back. The peter pan collar pattern will be cut on the fold as well. Decide how long you want it to be and add 3 cm or 4/5″ (1,5 cm or 5/8″ seams at the top and bottom). Start tracing the total length all around the neckline.
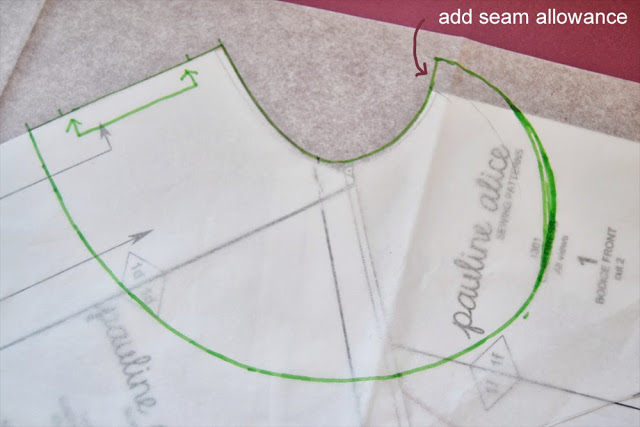 6. Once you arrive at the front seam, add a 1,5 cm or 5/8″ seam allowance. Finish the collar with a nice curve.
7. Cut two pieces of this pattern on the fold in the fabric and interfacing. Interface and stitch the exterior seam with right sides together. Clip the seam allowances or cut close to the edge, turn inside out and press flat. Ready to attach to your neckline!

2 comments
Thank you so much for this tute! It's great.
Thanks Kirsty! Are you going to use it or stick to the original collar?
Comments are closed.