Home Tags Posts tagged with "collar"
Tag:

collar

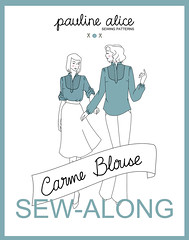
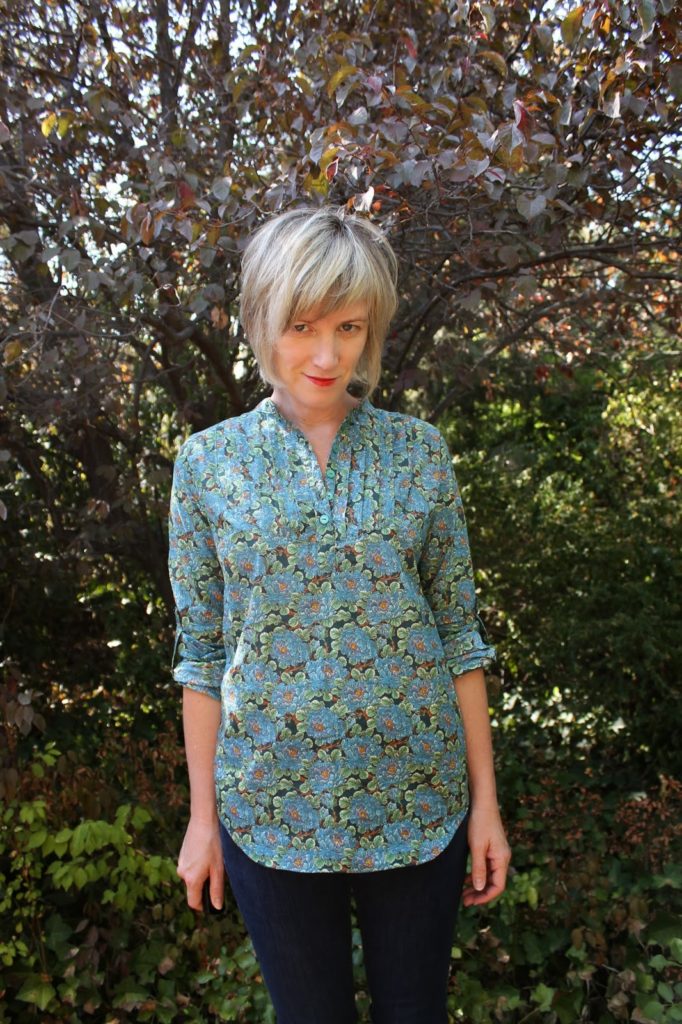
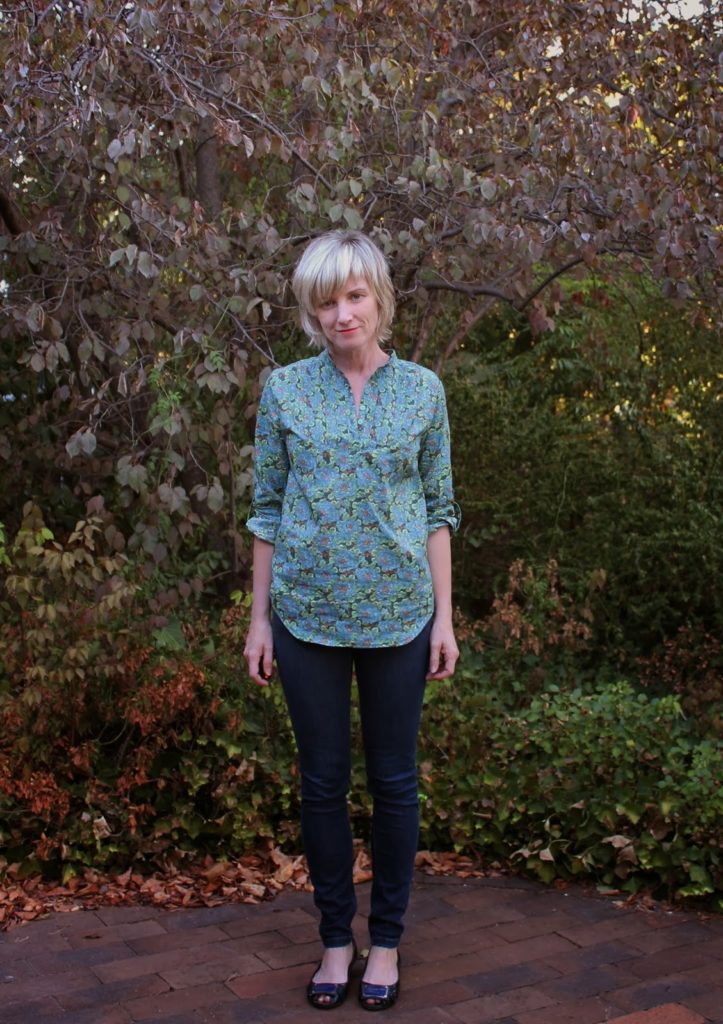
The Carme blouse pattern 2.0 is here! As it’s one of my first pattern, the sizing was not up to date, but I’m happy to tell you that you can now sew this blouse from size 34 to 52.
The pattern includes a print-at-home file as well as copyshop version. Get your copy here: Carme blouse pattern.

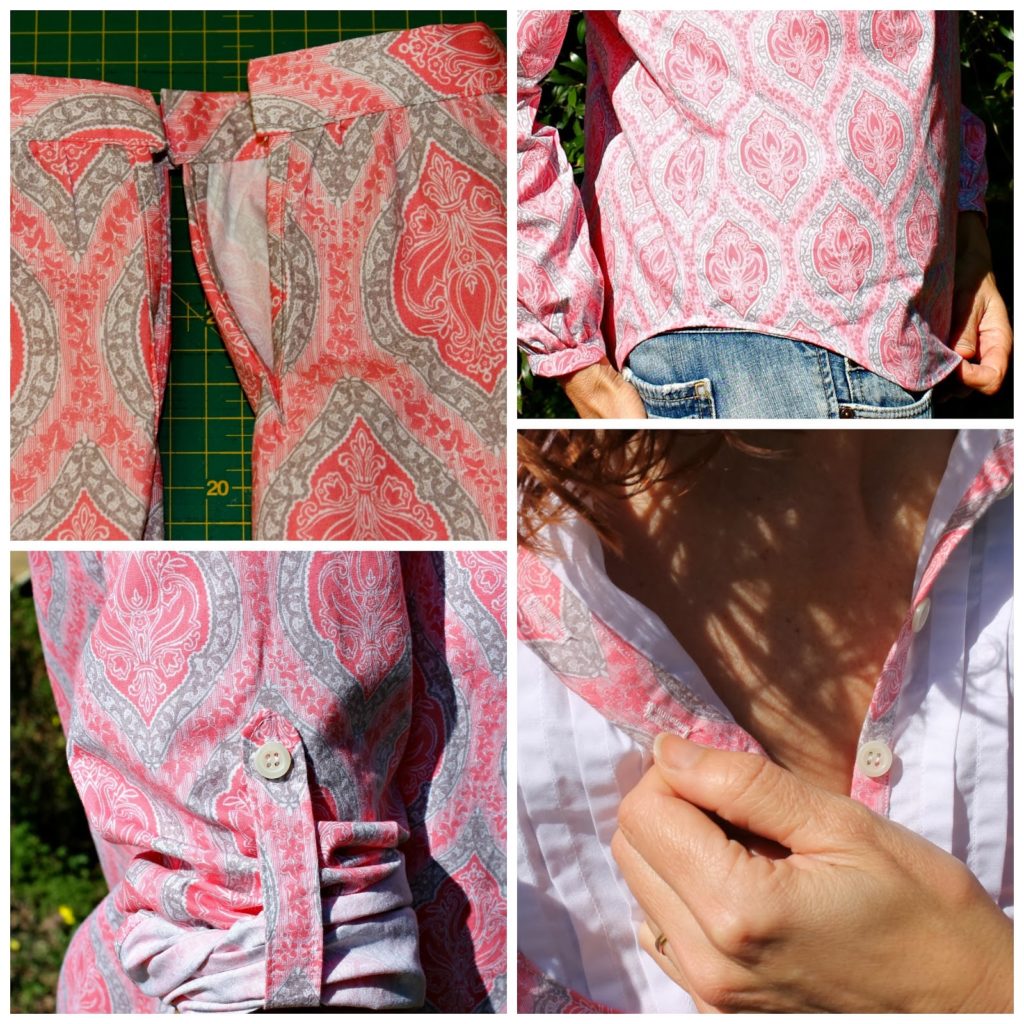
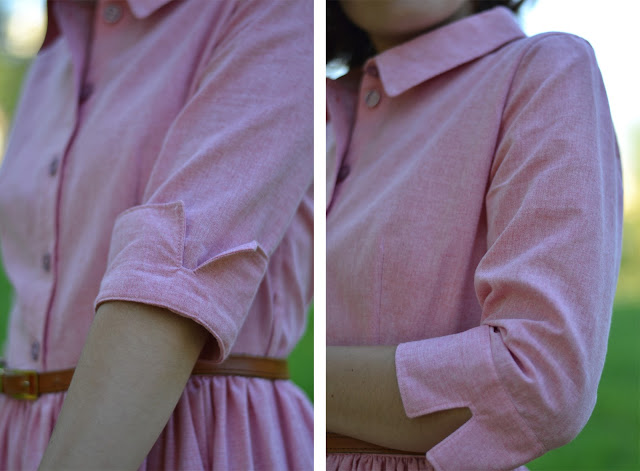
Have you tried your Carme blouse yet? There are just a few steps to finish now and you’ll be ready to wear your lovely creation out on the street…

I don’t know about you, but sewing the collar has always been kind of stressful for me. What if it doesn’t fit into the neckline? And if the fabric doesn’t lay flat?
With this method of attaching the collar (thanks so much to Anna from the blog Paunnet for suggesting it while she was testing the pattern!), collars are going to be so easy now…

Have a great weekend and see you on Monday!


8 comments
1 FacebookTwitterPinterestEmail
I hope sewing the pin tucks was not too difficult. Remember that you can check the previous Sew-Along videos here.
Today, we’re going to see 2 tutorials:  first we’ll stitch the darts on the front bodice and join it to the yoke and then we’ll make the button placket. A little bit more work as the week-end is here!
FRONT BODICE

BUTTON PLACKET


I wish a very nice week-end! I’m going to enjoy the visit of my parents from France for the traditional festivities of Valencia, the Fallas.
8 comments
0 FacebookTwitterPinterestEmail
new-pattern-quart-coat-sewing-1
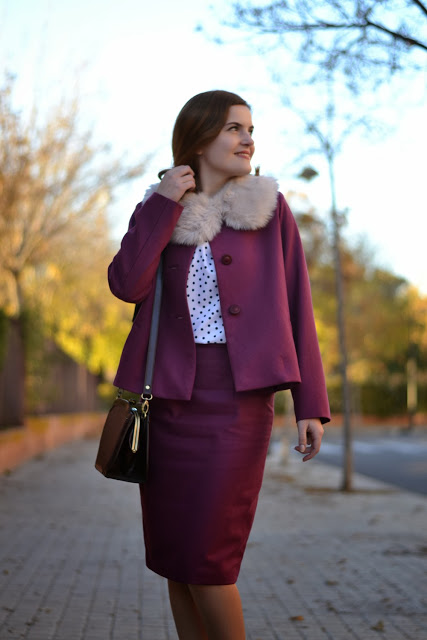
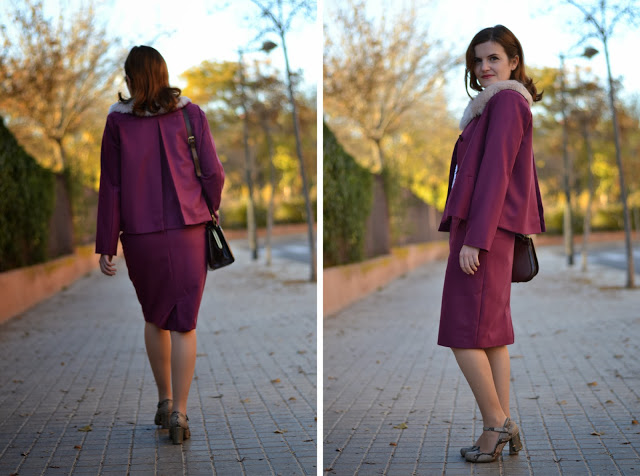
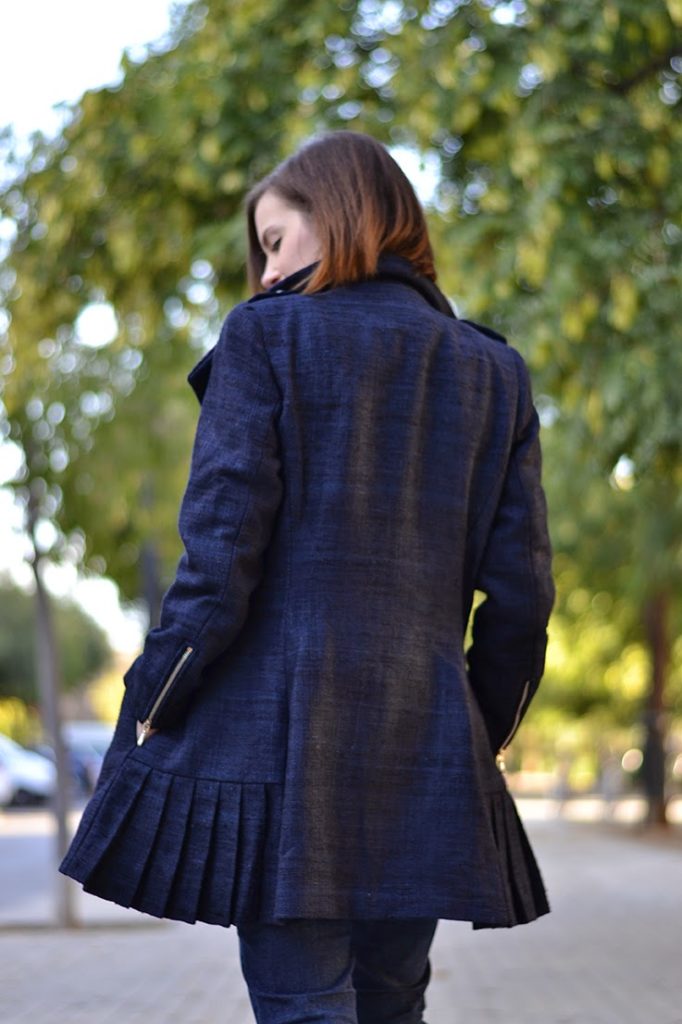
There’s nothing I like more to sew and wear than coats! And more than once I’ve cursed my sunny (and too warm) city because winter is too mild to wear heavy outerwear.
But it was time for me to take my pencils, my ruler and my fabrics to offer you the pattern of a nice coat full of possibilities: the Quart coat!
new-pattern-quart-coat-sewing-2new-pattern-quart-coat-sewing-3
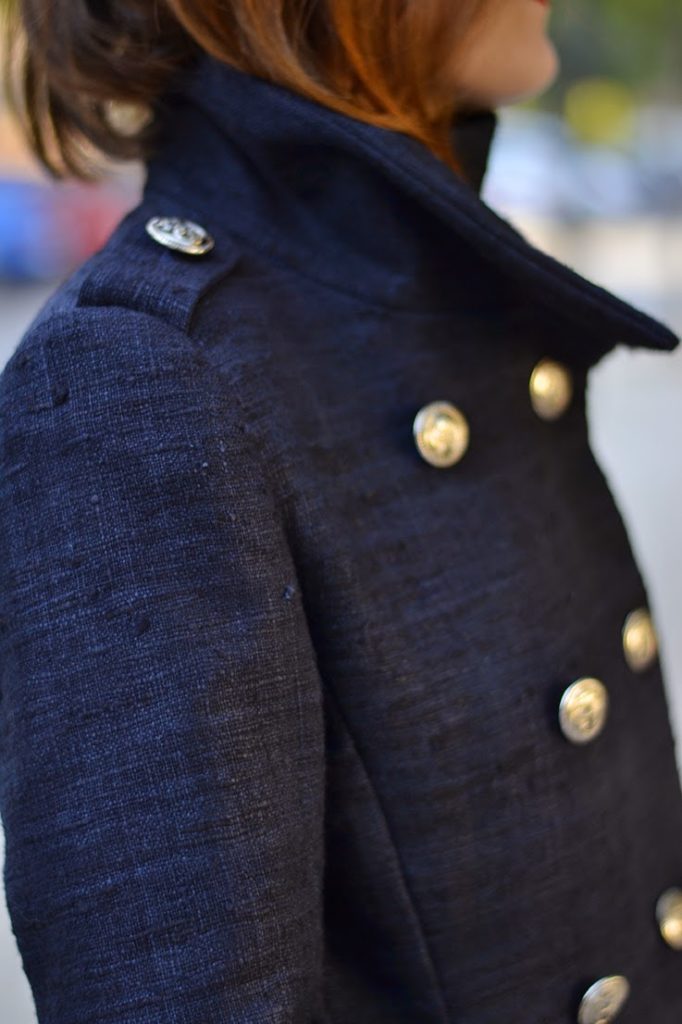
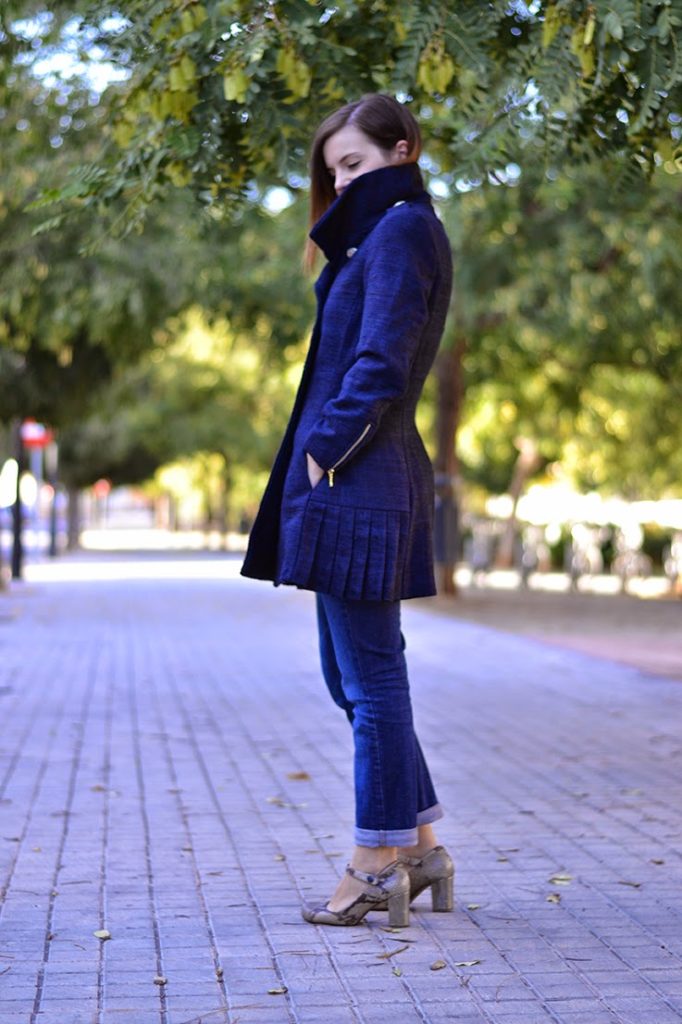
With its high collar, pockets and long zipped sleeves, the
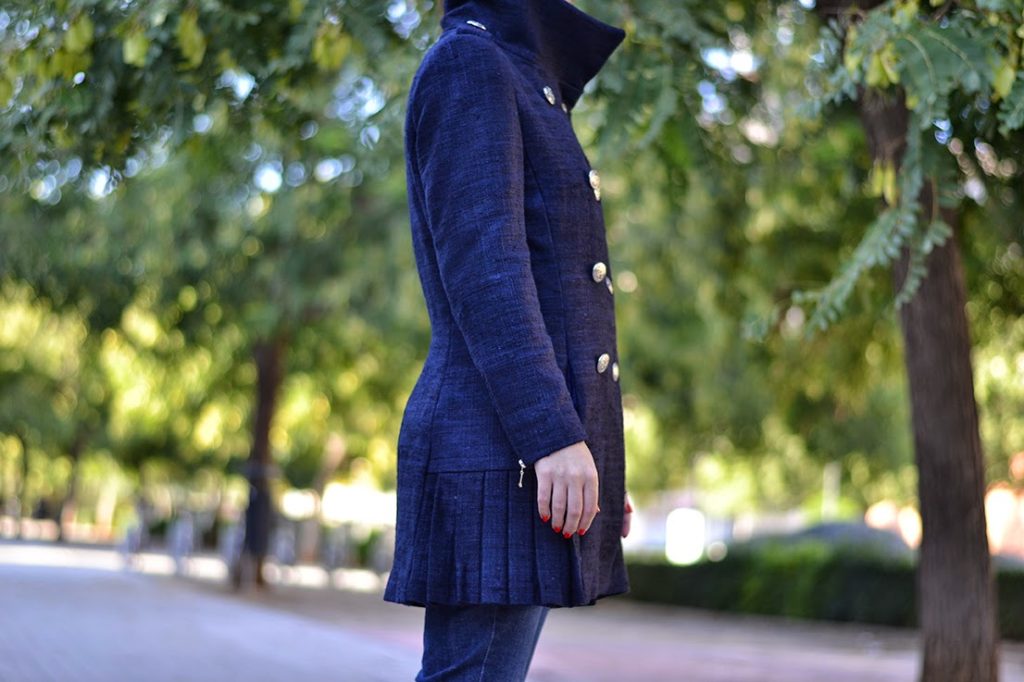
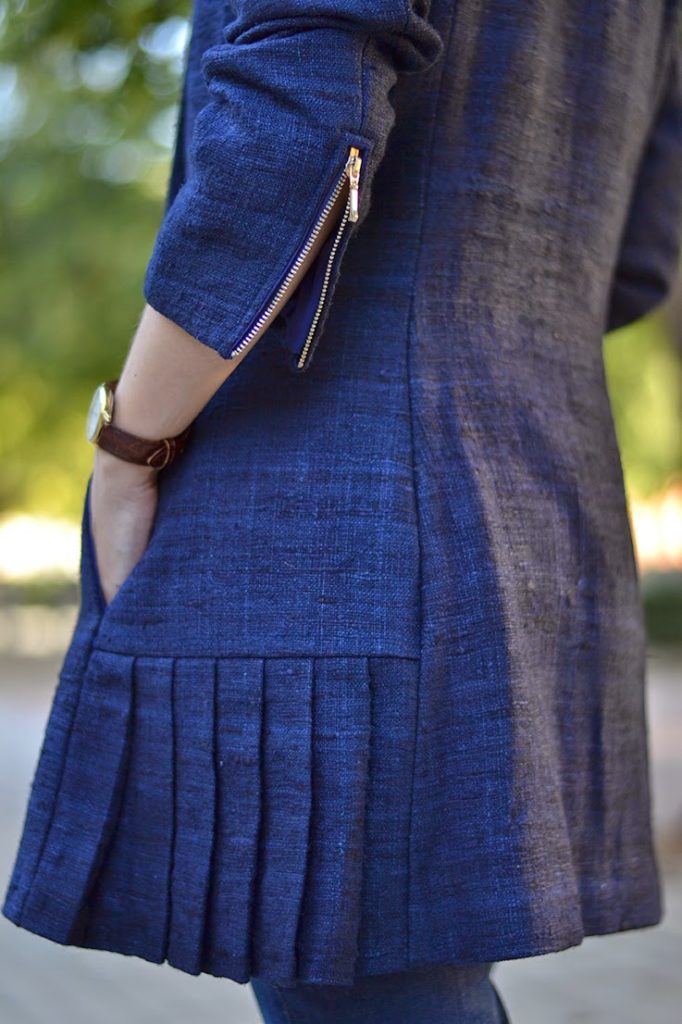
 Quart coat will protect you from the cold with style. The princess seams will highlight your figure nicely and the pleated side is the perfect girly detail.
new-pattern-quart-coat-sewing-4
Quart coat pattern made in navy blue raw silk.
I was inspired by Burberry’s military style: elegant and classic outerwear that will match easily with whatever you’re wearing and that you’ll love wearing year after year.
Besides, the Quart coat can be made in wool coating for winter as well as lighter fabrics (gabardine, twill…) for a trenchcoat version perfect for mid-season.
new-pattern-quart-coat-sewing-5new-pattern-quart-coat-sewing-6The Quart pattern, with its advanced level, has these small details that will make the intermediate seamstress progress and will please the expert ones (think handstitched interfacing, bound buttonholes, zipped cuffs, epaulettes…).

The glossary on the last page comes back on the terms and techniques essentials to make this pattern. And because it’s starting to be an habit now, I’m already preparing a photo tutorial to follow in depth the Quart coat construction.

new-pattern-quart-coat-sewing-7
Head to the shop and get the Quart coat pattern!
I can’t wait to see what you’ll come up with, your thoughts on the pattern and to show you the testers versions.
Have a great week!
new-pattern-quart-coat-sewing-8
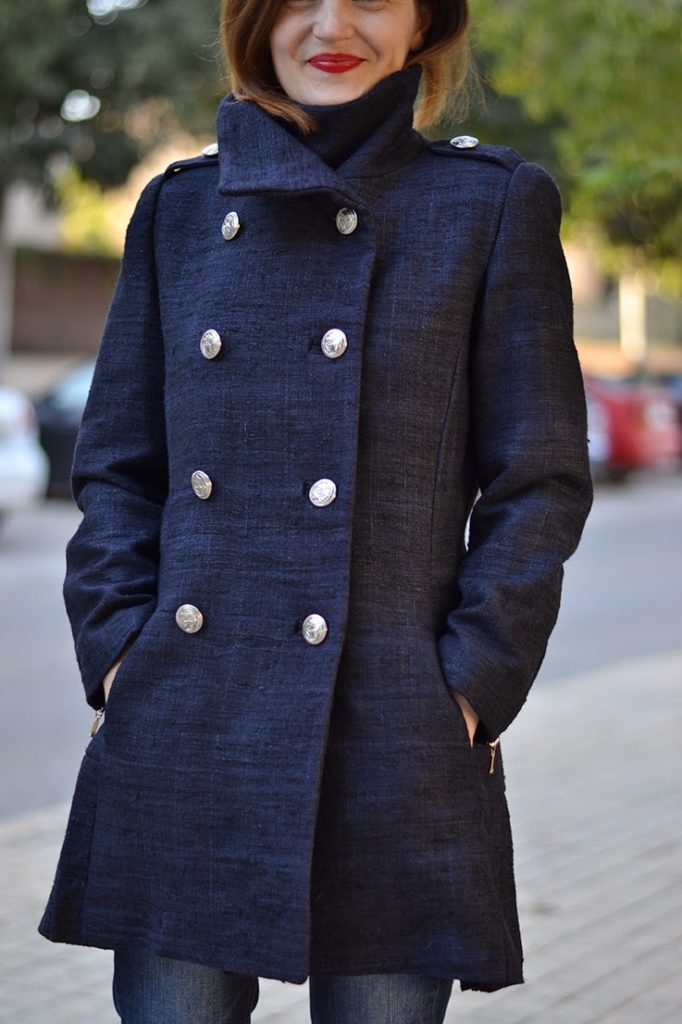
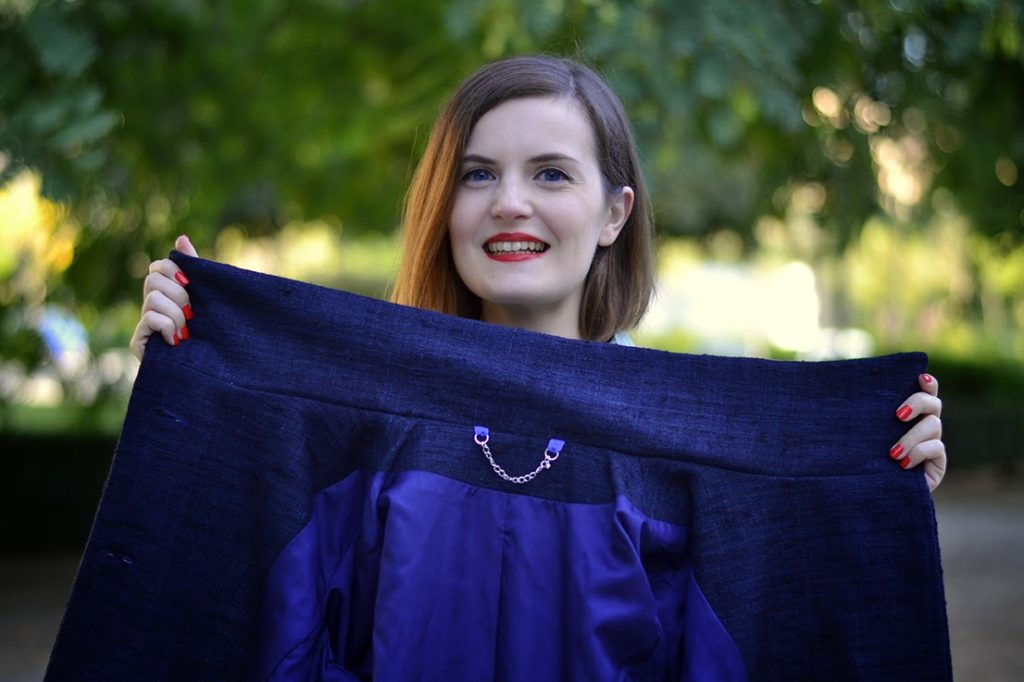
ps: I’d like to remind you that you can take advantage of your order of the printed pattern to receive the new folders for free! If you have pauline alice printed patterns still in their (thin) envelopes, add their names in the comment box when confirming your order and they’ll be sent without any additional cost.


signature1_editado-1

57 comments
0 FacebookTwitterPinterestEmail

I’m very happy to make a Sew-Along for the Carme blouse, and with videos! How great is that? I think it’s going to be really cool and easy for you to follow (and you won’t have to read a 10 km long post everyday other day, hehe). The other good thing is that all the videos will be available indefinitely, so even if you can’t join right now, you’ll be able to access them here on the blog or through Youtube.Let’s talk about the schedule. As you might want to buy fabric (and maybe make a muslin), I’ll give you more than a full week to gather the tools and material for the Carme blouse. Here is the schedule:

Monday, March 3rd: inspiration and variation
Monday, March 10th: Cut the fabric
Wednesday, March 12th: Pin tucks
Friday, March 14th: Yoke and placket
Monday, March 17th: French seams
Wednesday, March 19th: Sleeves
Friday, March 21st: Collar
Monday, March 24th: Hem
Wendesday, March 26th: Buttonholes
Monday, April 7th: Your Carme Party!!!

You can start collecting your material right now, here’s what you’ll need:

  • Lightweight woven fabric such as cotton voile, lawn, batiste,dotted swiss, chiffon, linen, chambray…
  • Fabric (150 cm wide): 1,7 m  (60″ wide: 1,9 yard)
  • Fabric (115 cm wide): 2 m   (45″ wide: 2 1/4 yards)
  • 10 small buttons
  • matching thread
  • optional: fusible interfacing for the collar if your fabric is too light on its own (20 x 50 cm or 19,7″ x 7,9″)

And here is the Sew-Along button (Click right on the image to save it):

So let me know if you’re going to join and don’t hesitate to ask me anything in the comment section so that everybody can share. I also created a flickr group so you can post pictures of your Carme blouse.
I’m really looking forward to start sewing with you!
Have a wonderful weekend!


25 comments
0 FacebookTwitterPinterestEmail
Thank you all for the amazing reception to the Carme blouse over the first weekend! Your comments (and your orders of course!) were so nice, I’m really touched!
So for those who have ordered the pattern or need some inspiration to get it, let’s see the beautiful versions of the pattern testers (second part is coming on wednesday).
Go read all the details about their Carme blouse on their blogs:

Carme Shirt 071PicMonkey Collage

Merche from Aventuras de costuras, made this beautiful cashmere print blouse with a white contrasting yoke. I don’t know about you but I want to make one lie that as soon as possible.

IMG_5698IMG_5727

The master of Liberty fabric, Kirsty from Top Notch, used this beautiful blue and green Liberty. It feels really romantic and easy going.

Carme-Blouse-Tucked-in-1-568x1024Sleeve-tabs

What a delicate and feminine fabric! Andrea from Stitch Parade chose this pretty cotton voile to sew her Carme blouse. A detail I love: the buttons and topstitching in red!
See you Wednesday for part 2…


13 comments
0 FacebookTwitterPinterestEmail
carme blouse pattern, blouse pattern, pauline alice, pin tuck, yoke, button placket, sleeve tab
I’m really happy to present the brand new pattern: the Carme blouse!
This is a casual, and yet feminine, blouse with a button placket, a pin-tucked yoke, a small mao collar and long gathered sleeves that can be rolled up with the sleeve tab.
carme blouse pattern, blouse pattern, pauline alice, pin tuck, yoke, button placket, sleeve tab
I wanted to design a blouse that you could wear everyday and still look elegant. With your favourite pair of trousers or your favourite skirt, it will be perfect to wear from the morning to work until the night for a drink, or on the weekend walking in the city.
2copiacarme blouse pattern, blouse pattern, pauline alice, pin tuck, yoke, button placket, sleeve tab
I really hope you’ll love the pattern as much as I do! I’m preparing a series of video tutorials so you don’t have to feel intimidated by the yoke detail and the button placket. The pattern is for an intermediate level, but with the tutorials, an advanced beginner can easily make it.
Buy the pattern here: Carme blouse pattern.
Have a great weekend!


54 comments
0 FacebookTwitterPinterestEmail

like-arish-agoriup-sewing-pattern-1

From the very beginning, I’ve imagined the Ninot jacket as part of a suit. So when I bought the fabric for the jacket, I took enough for a pencil skirt as well.
I just love the contrast of the fitted skirt and the boxy swing jacket.


like-arish-agoriup-sewing-pattern-2

The post is called “Like Arish Agoriuq” because she is one my favorite character right now. She’s the main character of “El Tiempo Entre Costuras” a TV serie set in the 40’s in Spain. Arish is her spy name while living in Madrid as a very stylish seamstress.
I love the show for the fashion: the 40’s were so elegant! In the serie, Arish is wearing a lot of two pieces suits with pencil skirts, blazer jackets and big fur collars. You can see more pictures here.

like-arish-agoriup-sewing-pattern-3


The skirt is the typical pencil skirt with a kick pleat at the back. I made the pattern. The wool crepe is so soft, it’s the perfect fabric for such a suit. I’m wearing it with a light pink detachable faux-fur collar from H&M. I think this will be my Christmas outfit…
I wish you a Merry Christmas! I’m going home to France in my family but the shop is going to stay open during the holidays (last minute gift?). After the holidays I’ll be back with a serie of tutorials on the Ninot jacket, stay tuned!
pauline-sewing-pattern
35 comments
1 FacebookTwitterPinterestEmail
I can now show you the Camí dress I made for the Sew-Along! I used a floral cotton fabric and a white cotton sateen for the contrasted collar and cuffs (that’s a look I saw on a Dolce & Gabanna dress and I thought I could try to make a modest replica).
Now I really looking forward to show all your pretty dresses on the 25th…
And I remind you that there will be one lucky winner of the next pattern during the giveaway!


my-camy-dress-sewing-pattern-1my-camy-dress-sewing-pattern-2my-camy-dress-sewing-pattern-3my-camy-dress-sewing-pattern-4

pauline-sewing-pattern

32 comments
0 FacebookTwitterPinterestEmail

When I first designed the Camí dress pattern, I spent a long time deciding whether I should make a classic shirt collar or a cute peter pan one. Well, you which one won but I kept the peter pan collar as a backup idea. I am going to show you how to draw your own peter pan collar for the Camí dress (or any other dress or blouse). If you don’t feel confident enough for the shirt collar or want to go for a super cute look, that’s a great alternative!

Pendant la conception du patron de la robe Camí, j’ai longtemps hésité entre faire un col chemisier classique et un col claudine. Bon, vous savez lequel l’a remporté mais j’ai quand même gardé l’idée du col claudine dans un coin de ma tête, juste au cas où. Je vais donc vous montrer comment dessiner votre propre co claudine pour la robe Camí (ou toute autre robe ou blouse). Si vous ne vous sentez pas prête à attaquer le col chemisier ou que vous voulez une robe au style encore plus féminin, voilà la parfaite alternative!

cami-sew-along-collar-variation-peter-pan-collar-1cami-sew-along-collar-variation-peter-pan-collar-2

1. Take your front and back bodice pattern pieces. On the bodice front, decide where you want your collar to arrive: cross over the button placket (first picture – fold the first part of the placket), join at the middle of the button placket (no picture – fold the placket on the button line), before the button placket (second picture – fold the whole placket). Mark the seam allowances at the shoulder (1,5 cm or 5/8″).

cami-sew-along-collar-variation-peter-pan-collar-3
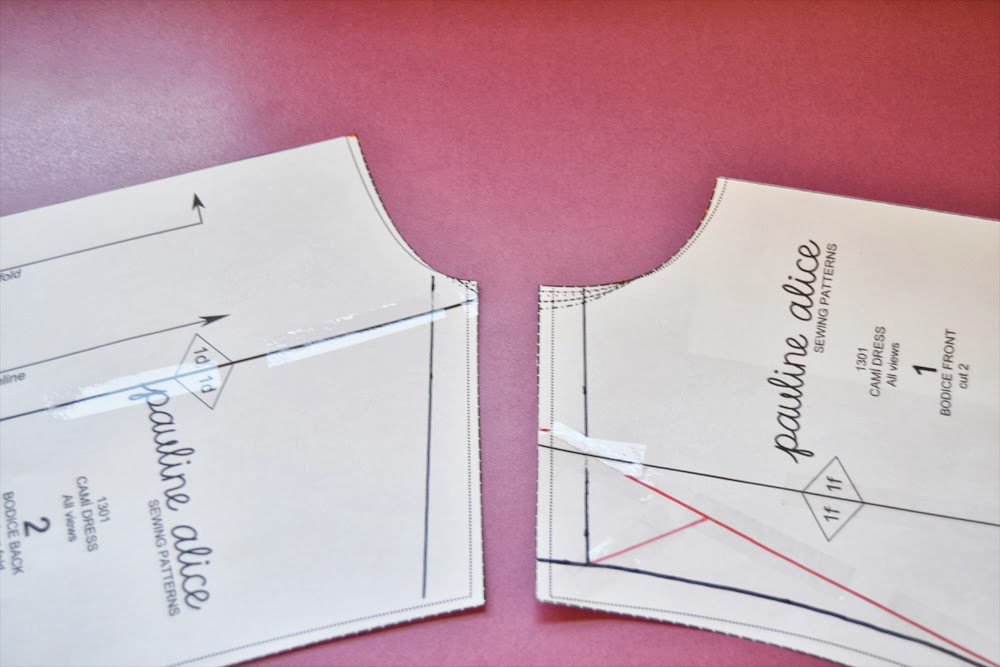
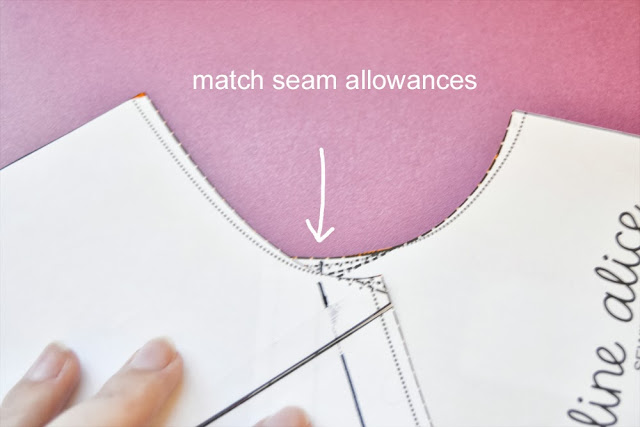
2. Match the seam allowances at the neckline.
cami-sew-along-collar-variation-peter-pan-collar-43. On the other side (armhole), overlap the shoulder seam. The more you overlap, the more the collar is going to stand up. A good measure would be about 2 or 3 cm (6/8″ or 9/8″).

cami-sew-along-collar-variation-peter-pan-collar-5

4. Now you’ll need to paste the pattern pieces together so they don’t move and get some pattern paper. Trace the neckline.

cami-sew-along-collar-variation-peter-pan-collar-6
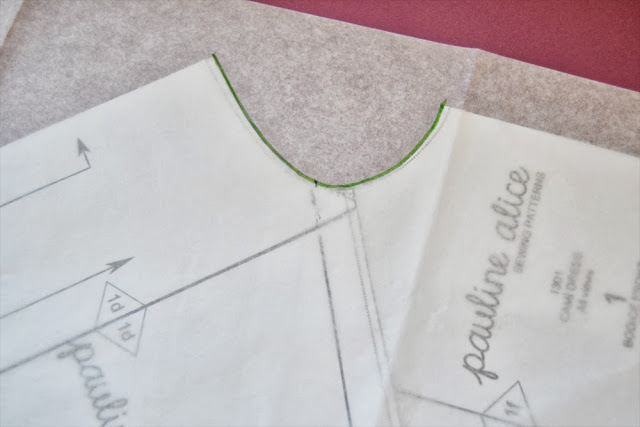
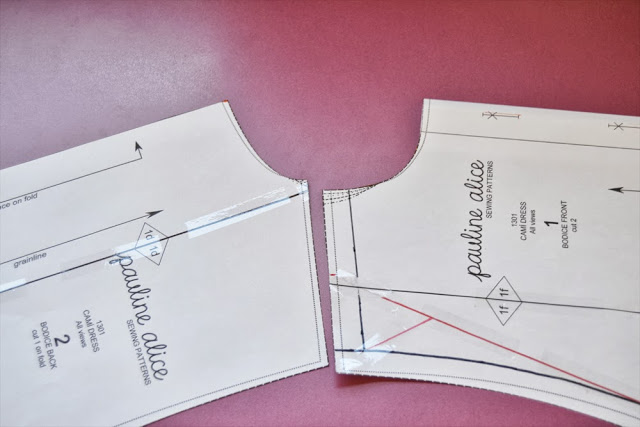
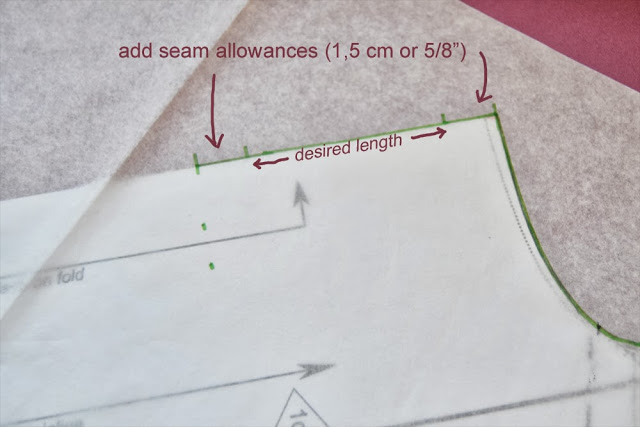
5. As my back bodice pattern is cut on the fold, I am going to draw a full collar on the back. The peter pan collar pattern will be cut on the fold as well. Decide how long you want it to be and add 3 cm or 4/5″ (1,5 cm or 5/8″ seams at the top and bottom). Start tracing the total length all around the neckline.

cami-sew-along-collar-variation-peter-pan-collar-7
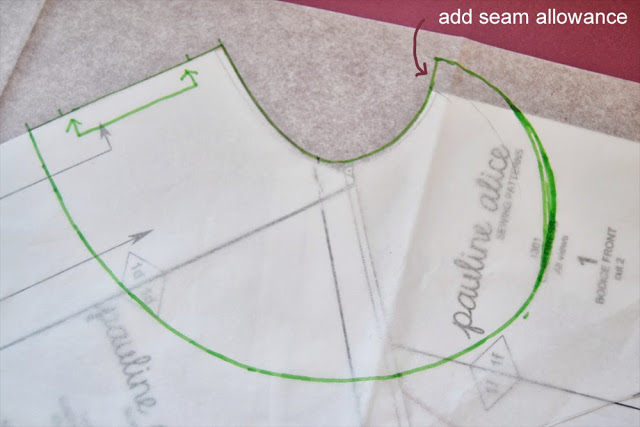
6. Once you arrive at the front seam, add a 1,5 cm or 5/8″ seam allowance. Finish the collar with a nice curve.

7. Cut two pieces of this pattern on the fold in the fabric and interfacing. Interface and stitch the exterior seam with right sides together. Clip the seam allowances or cut close to the edge, turn inside out and press flat. Ready to attach to your neckline!

pauline-sewing-pattern

2 comments
0 FacebookTwitterPinterestEmail


comi-sew-along-collar-sewing-pattern-1

As I have already made a tutorial on how to sew a shirt collar, here is the link to see it. The tutorial follows the exact same steps, I even used the Camí dress pattern to draw the shirt collar pieces 😉
Good luck! Not that it’s very complicated but you need to be careful and concentrated.


pauline-sewing-pattern

6 comments
0 FacebookTwitterPinterestEmail

camí5_editado-1

I am very happy to present you my first sewing pattern: the Camí dress!
The Camí dress is a very versatile shirt dress: with its sleeve variation, it can be worn all year long… Version A has short sleeves and version B has 3/4 length sleeve with cuffs.
pattern1
I have been in love with the classic style of shirt dresses for a long time and that’s why I wanted to design one as my first pattern. Make the Camí dress in a cute printed cotton for a casual look or choose a  bright cotton sateen or silk blend for a more elegant touch: from day to night, the Camí will make an impression with its retro silhouette.


Camí1

The dress buttons down from the clasic shirt collar to the waist and for more comfort, there is also a side zipper. There are inseam pockets as they are so practical. The high-waist and full, gathered skirt are so typical of the 50’s fashion, you know how much I love those details 🙂
5 copia
The pattern and instructions are available as PDF files in English, Spanish and French. When the order is made, the files will be sent to your e-mail within 48 hours.
cami dress, pauline alice sewing pattern, sewing pattern, shirt dress


camí2
Want to make the Camí dress? Get the pattern here!
I hope you’ll love it and thanks for your support!
Have a wonderful week!

signature1_editado-1

53 comments
2 FacebookTwitterPinterestEmail
How about a little step by step today?
I thought I would take photos while sewing the classic men shirt I made for my boyfriend in order to explain some tricky steps.
I mean the first shirt I made, I was terrified of sewing a collar, sleeve plackets and cuffs. And at the end they were not so difficult to sew once you knew the important steps.
Here are the important steps to follow when sewing a classic shirt collar:
1 copia1. These are your 4 collar pieces: 2 undercollar (which will be attached to the rest of the shirt) and 2 uppercollar (which fold over the tie for example). You need to interface the 4 pieces.
shirt collar, tutorial, undercollar, uppercollar
2. Take the 2 uppercollar pieces and with right sides together, pin them together like on the picture. Set the stitch length to 2 or 2,5 for more strength. Stitch following the red line, pivoting at the corner. Cut the seam allowance close to the stitch line and cut the angles in bias.
shirt collar, tutorial, undercollar, uppercollar
3. Turn right side out and press flat. Be careful when turning the collar points!
shirt collar, tutorial, undercollar, uppercollar
4. Take your first undercollar piece and matching the center and marks, pin it to one layer of the uppercollar like on the picture. The collar stays open.
5 copia (1)
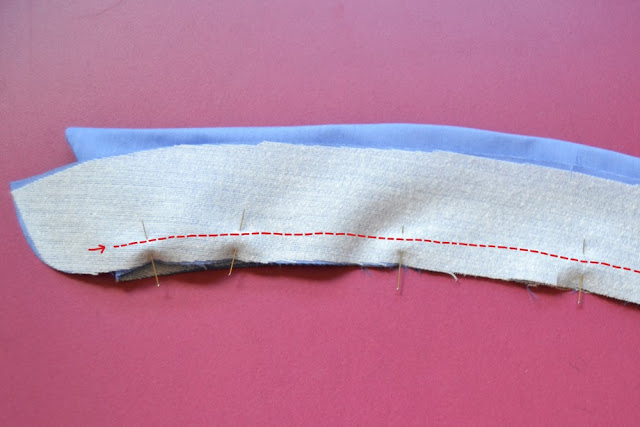
5. Stitch the undercollar to the layer of uppercollar following the red line from mark to mark (they depend of your pattern, but they should be more or less where the red line start).
shirt collar, tutorial, undercollar, uppercollar
6. It’s not easy to locate the collar to stitch, so just a picture to show you.
shirt collar, tutorial, undercollar, uppercollar
7. Repeat the steps 4 and 5 for the other undercollar piece. Pin it to the other uppercollar layer and stitch.

shirt collar, tutorial, undercollar, uppercollar
8. This is what you have now: the undercollar and the uppercollar are joined together between the marks. The ends of the undercollar pieces are free.

shirt collar, tutorial, undercollar, uppercollar
9. From the mark, stitch the undercollar pieces together following the red line. Cut the seam allowances close to the stitching lines or clip the curve.
shirt collar, tutorial, undercollar, uppercollar
10. Turn right side out and press flat. Look how nice it looks already!
shirt collar, tutorial, undercollar, uppercollar
11. If we open it, this is how it looks. It is best to cut your seam allowances with different length to avoid markings on the outside of the fabric when pressing.
shirt collar, tutorial, undercollar, uppercollar
12. Almost done! Now take your shirt and baste around the neckline (sorry, my thread is very matchy, almost invisible. But there is a red arrow.). Clip around the neckline.
15 copia
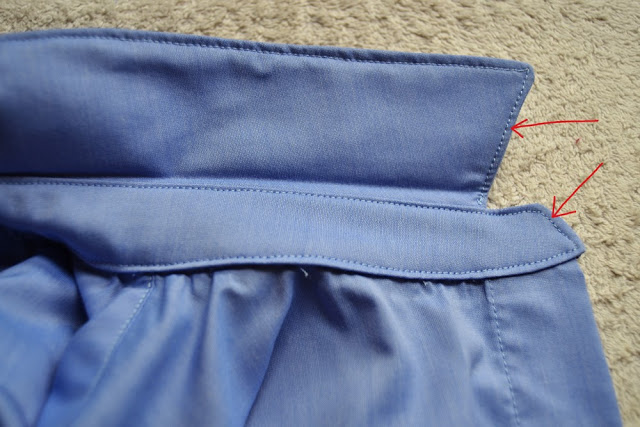
13. Matching the center and the extremities, pin the collar to the shirt. Stitch first the inside layer like you would for bias biding. Press the seam allowance toward the collar. Fold in the seam allowance of the other layer, pin and stitch with a topstitch very close to the edge (see the arrows). Continue the topstitching around the whole collar.
This is it! I hope it was useful and I will be back very soon with the next step by step on sleeve cuffs with placket.
This week end, I’ll try to take pictures of the photographer with his new shirt 🙂
Have a nice end of the week.
signature1_editado-1
15 comments
3 FacebookTwitterPinterestEmail