
If you grew up in the nineties like me, you must know the game “fashion designer”. I loved it! I was thinking about this game when developping the Serra jacket pattern: with one base, we worked on different lengths, pockets, necklines, details to offer 3 versions for 3 different looks:
- A parka for view A, A mid-thigh jacket inspired by the Pauline Alice Mini coat and the traditionnal breton raincoat.
- An athletic jacket for view B, A short jacket with hood, athletic style.
- A trench coat for view C, A knee-length jacket with trench coat details.
All the details can be mixed with the different versions to create infinite combinations! In this post, we’ll show you how to create 3 variations. You’ll see how to mix the pockets, lengths and other details. You can apply these modifications to all 3 versions, you just need your imagination run free and create your dream jacket!
To help you design your jacket, we’ve made a template available for free download. You can draw the details you want to incorporate to your jacket and see which version you prefer. You’ll find the download link at the end of the post.
HACK #1
Sportwear parka
You’ll need the following pieces to make this jacket:
-
-
- 1 FRONT A*+B*
- 2 BACK A
- 3 SLEEVE B
- 4 FRONT FACING A
- 5 BACK FACING A
- 6 SLEEVE FACING A
- 7 FRONT LINING A
- 8 BACK LINING A
- 9 SLEEVE LINING B
- 10 SIDE HOOD B / 10 bis SIDE HOOD B
- 11 BACK HOOD B
- 12 SIDE HOOD LINING B
- 13 BACK HOOD LINING B
- 14 FRONT HOOD FACING B / 14 bis FRONT HOOD FACING B
- 29 BREAST POCKET B
- 30 POCKET B
- 31 POCKET FACING B
- 17 ZIPPER PLACKET A
- 27 FRONT CASING A
- 29 BACK CASING A
-
*Pieces we will modify
—
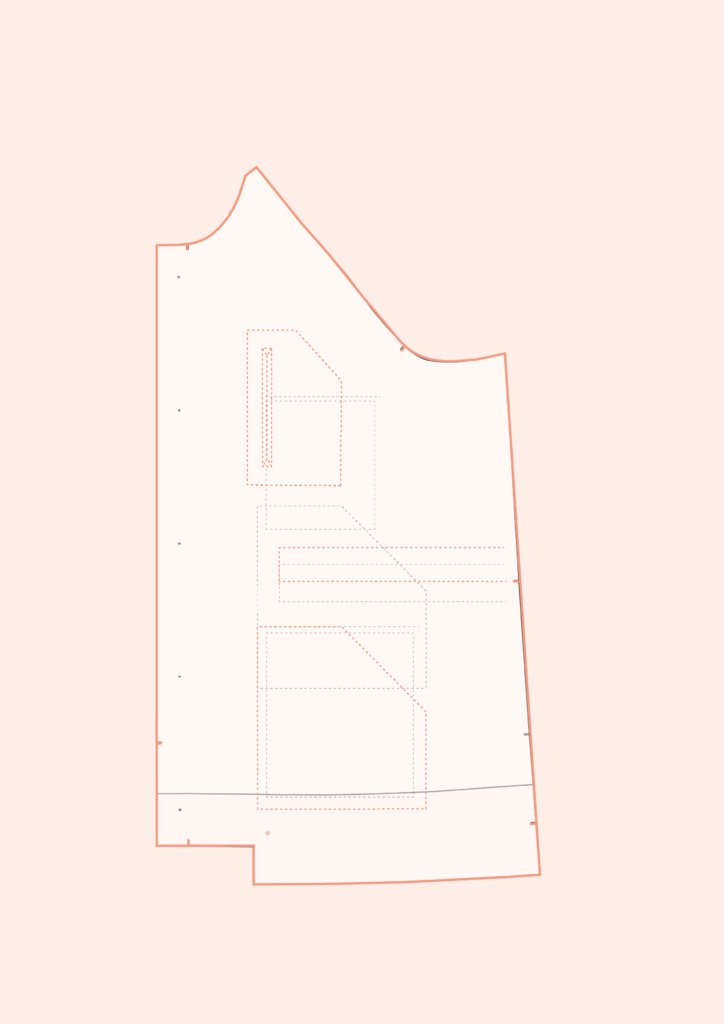
FRONT POCKETS
On the front piece of view A (1) add the placements of pockets (29) & (30) from view B.
—
HACK #2
Long parka jacket
You’ll need the following pieces to make this version :
-
-
- 1 FRONT A*+ C*
- 2 BACK A*+ C*
- 3 SLEEVE A
- 4 FRONT FACING A*+ C*
- 5 BACK FACING A
- 6 SLEEVE FACING A
- 7 FRONT LINING C
- 8 BACK LINING C
- 9 SLEEVE LINING A
- 10 SIDE HOOD A
- 11 BACK HOOD A
- 12 SIDE HOOD LINING A
- 13 BACK HOOD LINING A
- 14 FRONT HOOD FACING A
- 15 BACK HOOD FACING A
- 16 VISOR A
- 17 ZIPPER PLACKET A
- 19 COLLAR A
- 20 COLLAR BUTTON BAND A
- 21 FRONT BUTTON BAND A
- 22 BREAST POCKET FLAP A
- 23 BREAST POCKET A
- 24 POCKET FLAP A
- 25 POCKET A
- 26 OVER-POCKET A
- 27 FRONT CASING A
- 28 BACK CASING A
-
*Pieces we will modify
—
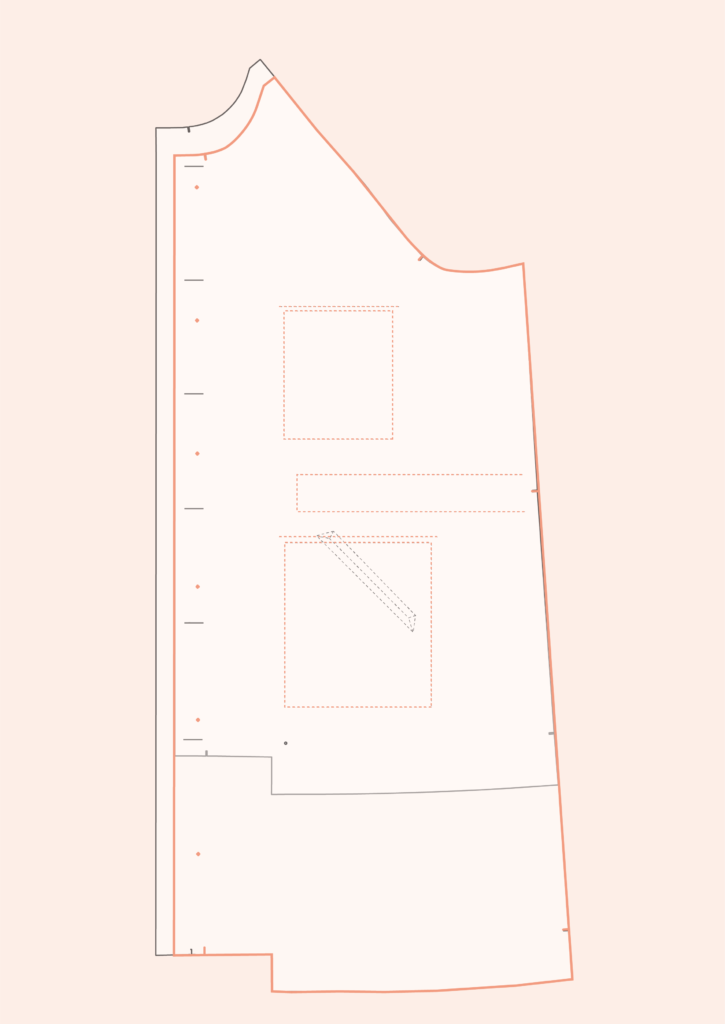
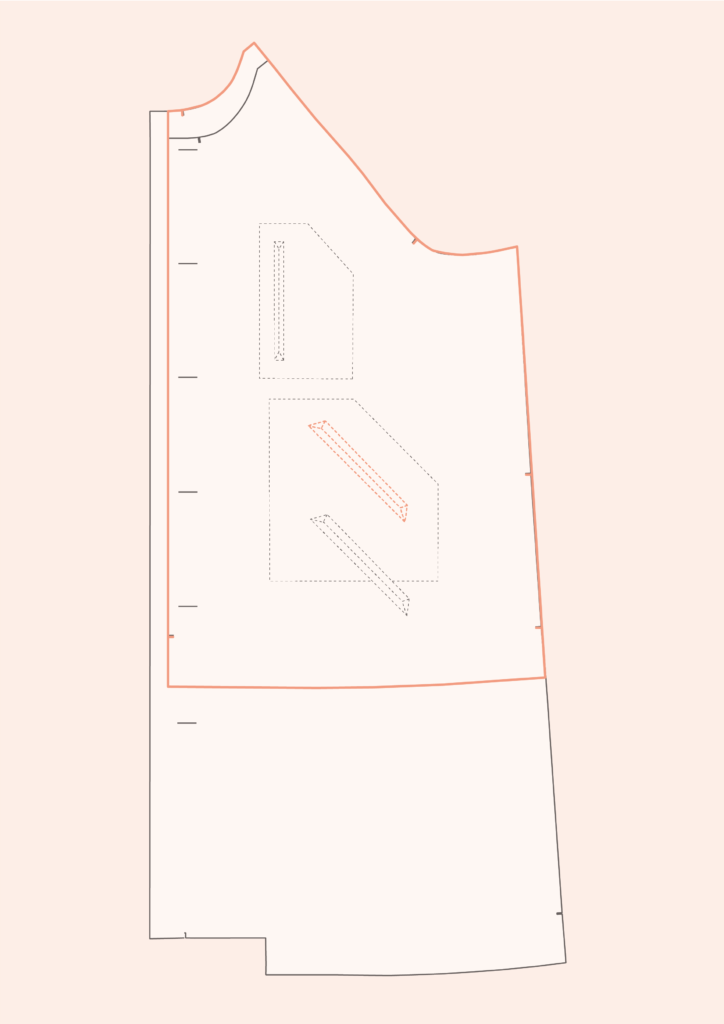
FRONT LENGTH, CENTER FRONT, NECKLINE, POCKETS AND CASING
On the front piece (1) of view C : draw the neckline and the center front of view A. On the front piece (1) of view C, draw the placements of the pockets flaps (22) (24), the pockets (23) & (25) and the front casing (27) of view A.
—
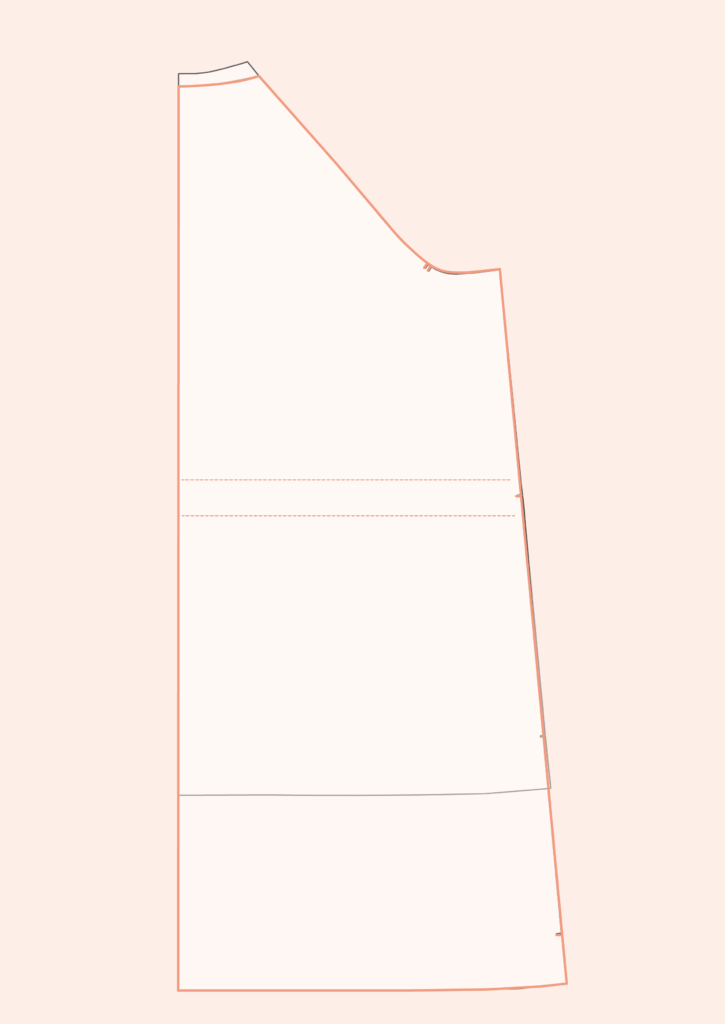
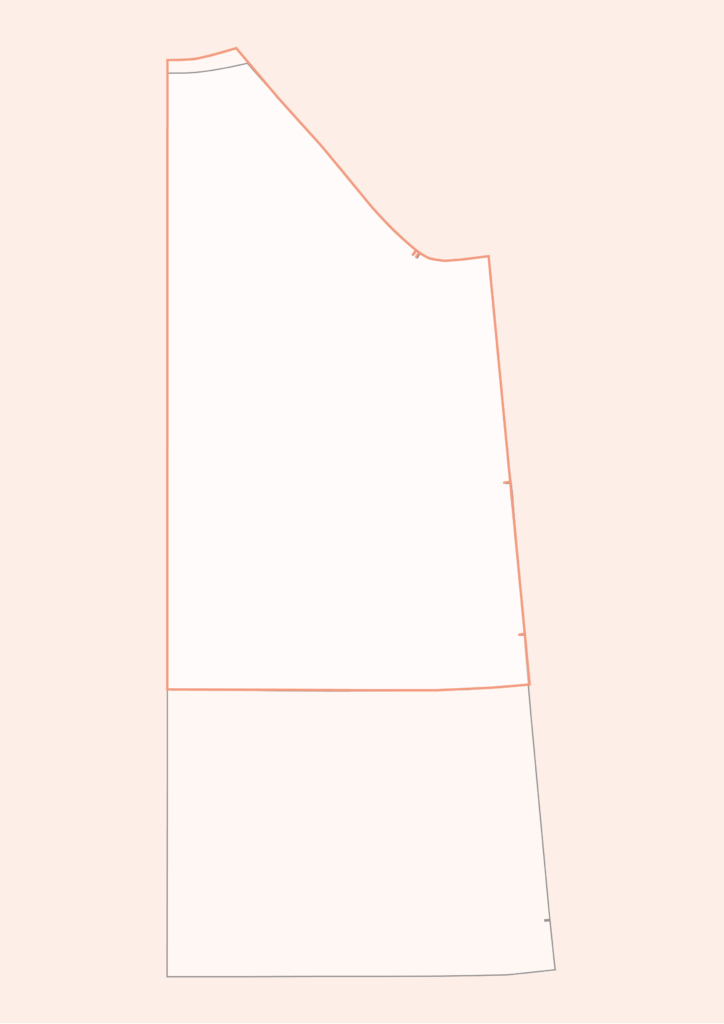
BACK LENGTH, NECKLINE AND CASING
On the back piece (2) of view C, draw the neckline and the casing of view A.
—
FRONT FACING LENGTH, NECKLINE AND CENTER FRONT
On the front facing piece (4) of view C : draw the neckline and center front of view A.
—

FRONT BUTTON PLACKET
Lengthen the front button placket piece (21) of view A to match the length of the new front piece.
—
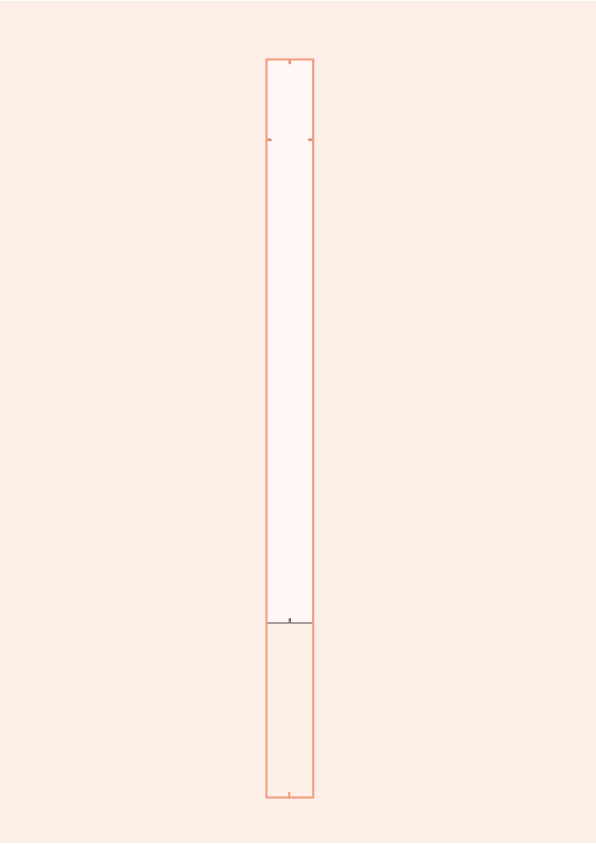
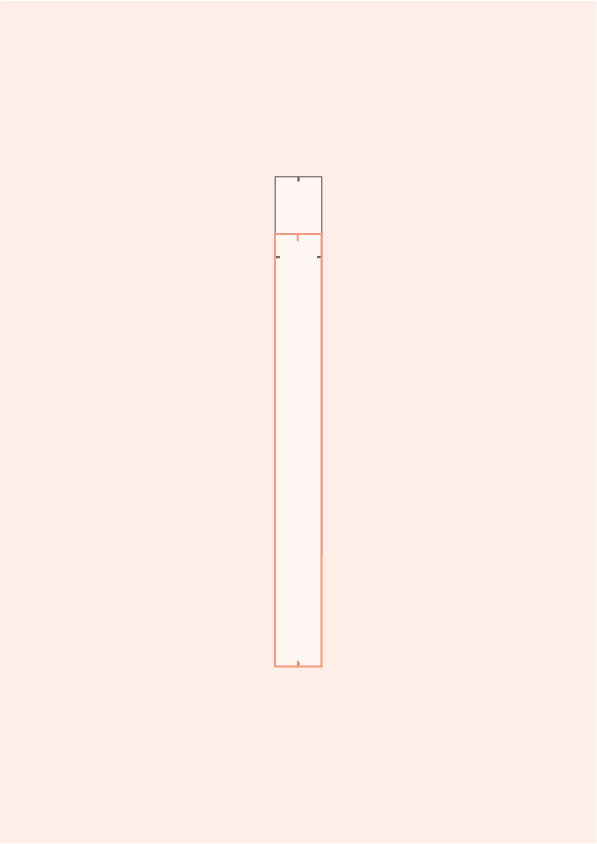
ZIPPER PLACKET LENGTH
Lengthen the zipper placket piece (18) of view A to match the length of the new front piece.
—
HACK #3
Aviator style jacket
You’ll need the following pieces to make this version :
- 1 FRONT B*+ C*
- 2 BACK B*+ C*
- 3 SLEEVE C
- 4 FRONT FACING B*+ C*
- 5 BACK FACING C
- 6 SLEEVE FACING C
- 7 FRONT LINING B
- 8 BACK LINING B
- 9 SLEEVE LINING B
- 10 SIDE HOOD C
- 11 BACK HOOD C
- 12 SIDE HOOD LINING C
- 13 BACK HOOD LINING C
- 14 FRONT HOOD FACING C
- 15 BACK HOOD FACING C
- 18 STORM SHIELD C
- 32 GUN FLAP C
- 33 COLLAR C
- 34 UNDER COLLAR C
- 35 COLLAR STAND C
- 36 WELT C
- 37 POCKET FACING C
- 38 POCKET LINING C
*Pieces we will modify
—
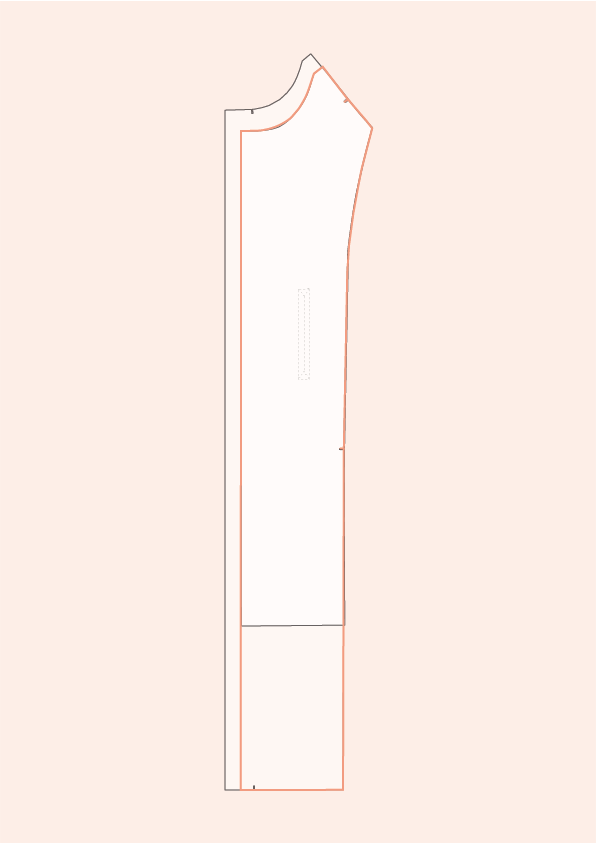
FRONT LENGTH, NECKLINE AND POCKETS
On the front piece of view B : draw the neckline of view C.
On the front piece of view B : draw the welt pocket placement at waist level.
—
BACK LENGTH AND NECKLINE
On the back piece of view B : draw the neckline of view C.
—

FRONT FACING LENGTH AND NECKLINE
On the front facing piece of view B : draw the neckline of view C.
—
ZIPPER GUARD
Shorten the zipper guard of view B to match the center front of the new front piece.
—