Home Tags Posts tagged with "skirt"
Tag:

skirt

saler jacket with safor skirt and reina shirt

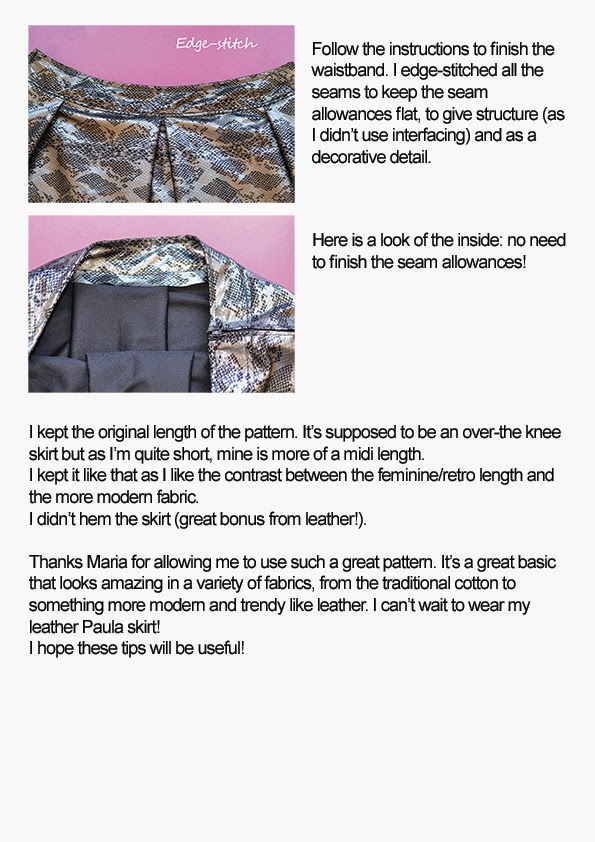
The day I release new patterns is always stressful, and today is no exception! During the last months, I’ve been working very hard on these 3 new patterns and I’m so happy (and a little bit anxious) to introduce you to the Reina shirt, the Safor skirt and the Saler jacket!

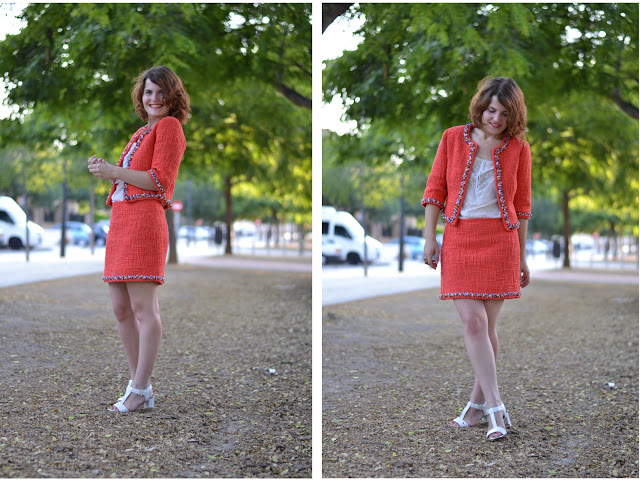
These 3 patterns have been designed as a mini collection: each piece can be worn individualy or as a complete outfit. Depending on the version and the fabric you choose, they can all be dressed-up or casual. I wanted classic pieces but with a twist, easy to wear on a daily basis or for a special occasion and that can be mixed with lots of other garments.

Reina shirt pattern versions

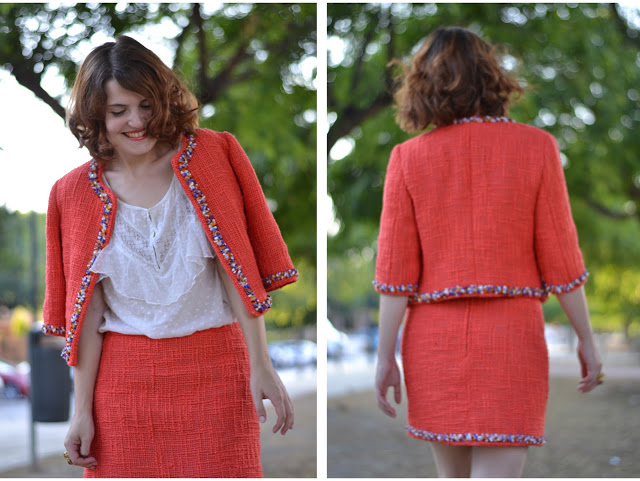
The Reina shirt was inspired by Victorian blouses, with loops fastenings and high cuffs. Wide, with a longer back and deep V-neckline, it can be worn with a skirt or pants quite easily.
There are two options: View A has a tie collar and long sleeves whereas View B is perfect for summer days with short sleeves, mandarin collar and small pockets.

Safor skirt pattern 2 versions

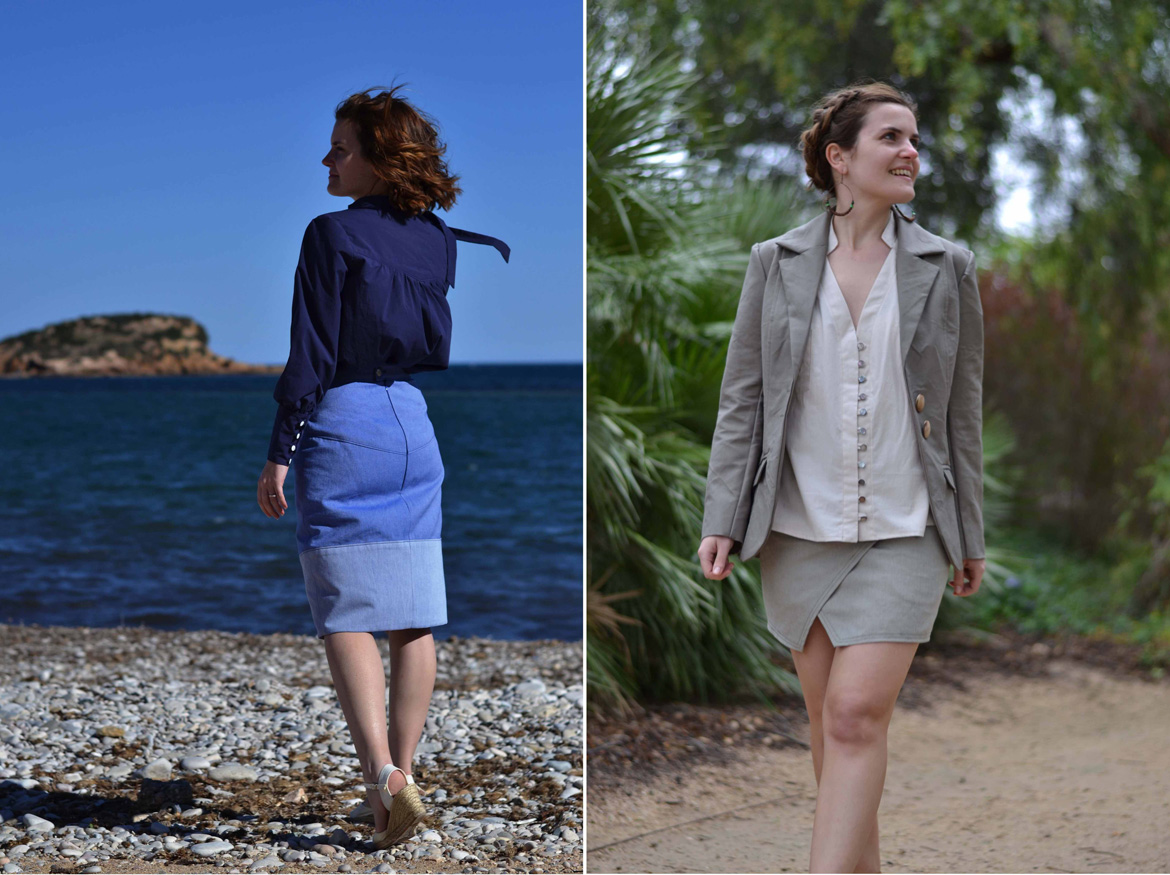
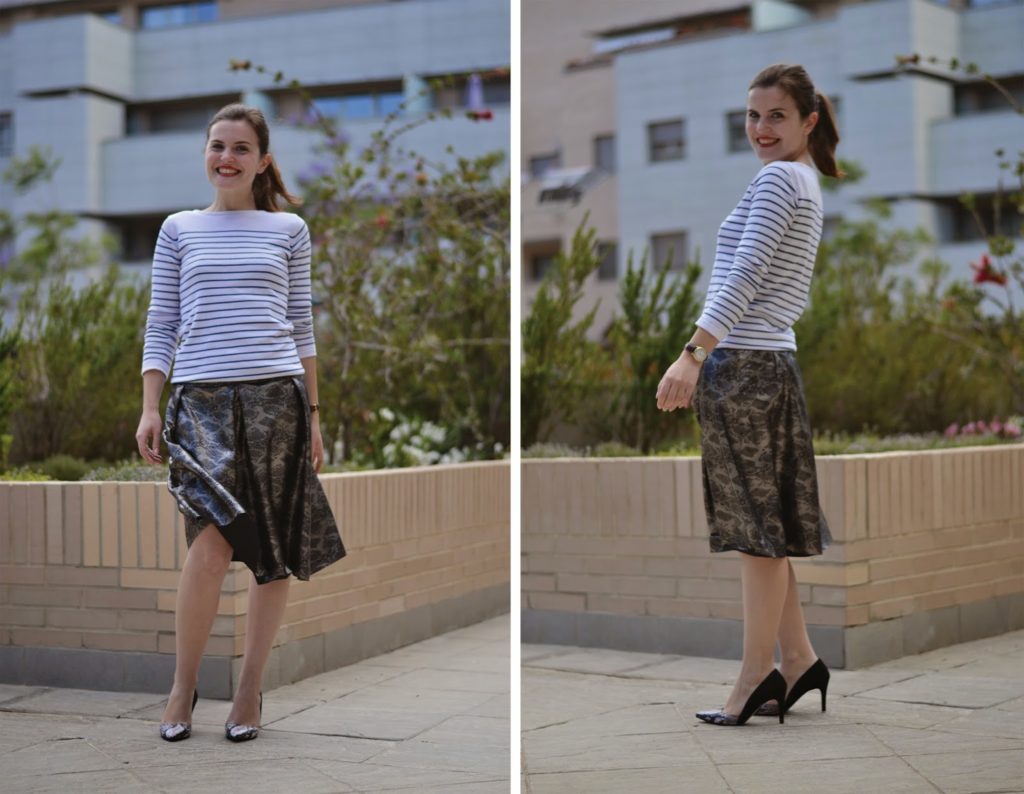
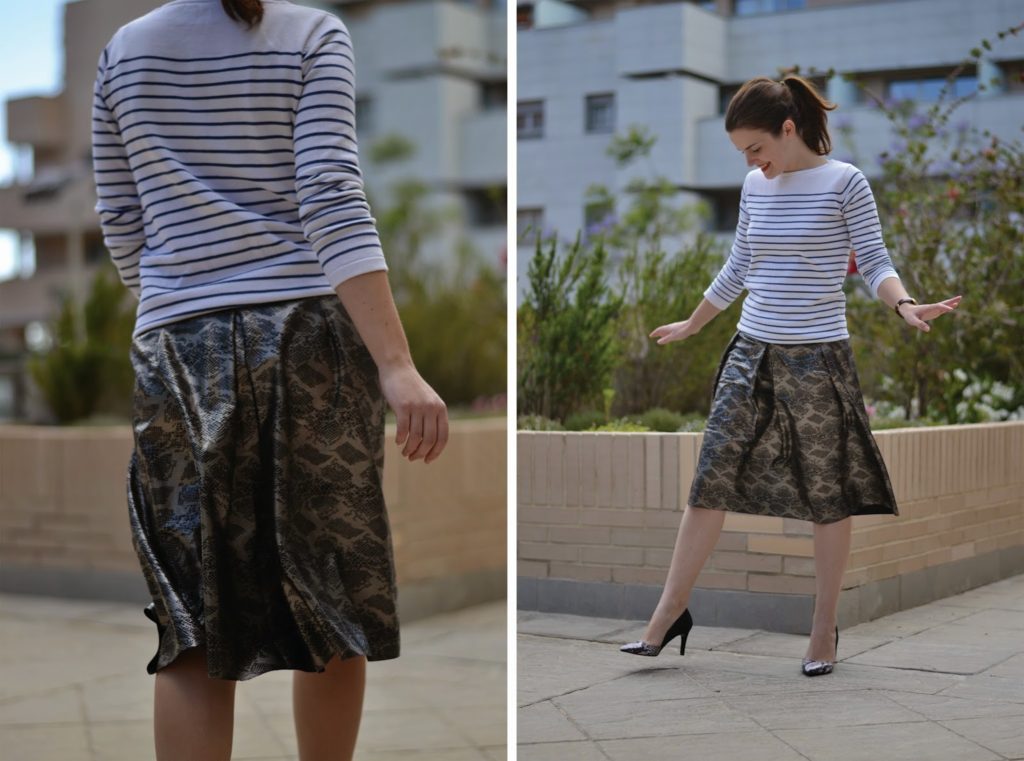
A faux-wrap skirt, the Safor skirt is very modern yet has a classic feel. With the yoke following the body curves and two lengths option, it’s versatile, elegant and confortable.

saler jacket pattern in white and kaki

saler jacket with safor skirt and reina shirt

Finally, the Saler jacket will be perfect all year-round and it just goes with everything. Classic tailored shape with princess seams, flap pockets and two pieces sleeves with button vent, it’s the perfect challenge for seamstresses.

You can find the Reina shirt, the Safor skirt and the Saler jacket in the shop!

I hope you’ll like these new patterns and I’ll be coming back during the week end and next week with details on each pattern.

Fabric credits: all fabrics are from Les Trouvailles d’Amandine.

15 comments
0 FacebookTwitterPinterestEmail
As part of the Sewing Indie month, I wrote a tutorial for Maria from Maria Denmark Patterns (find the original on her blog). She kindly sent me her Paula skirt pattern, a great basic pattern and I asked her if I could write a tutorial for sewing it with leather. I’m no expert, it was the first garment I made in leather (actually, it’s faux-leather) but I had this great fabric and I thought we could all learn from what I could come up with.


So here we go:
 

And just so you know, the Paula skirt pattern is on sale (15% discount)!


12 comments
1 FacebookTwitterPinterestEmail

Let’s continue with Fall/Winter sewing: after the inspiration, let me show you what I plan on sewing.

Hopefully the weather will behave and the temperatures will go down (but I really don’t know, I might just wear my bikini and go to the beach this afternoon. I’m not joking!).

The fabric is mine and the illustrations are to give you an idea of the shape, but I will draft my own patterns (you might even see some of them later if I am happy of how they turned out!)

fall-winter-sewing-plan-pattern-1
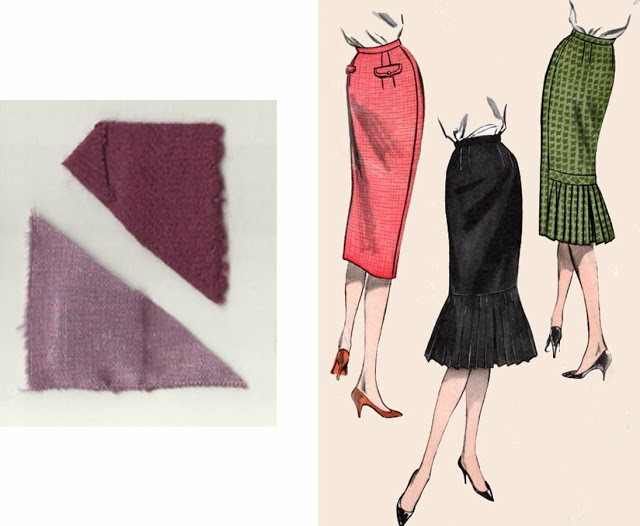
I have this beautiful burgundy wool that will be perfect for a jacket/skirt ensemble. I’m thinking of a short swing jacket and a pencil skirt with knife pleats at the back. And the light pink lining for a little bit of contrast.

fall-winter-sewing-plan-pattern-2
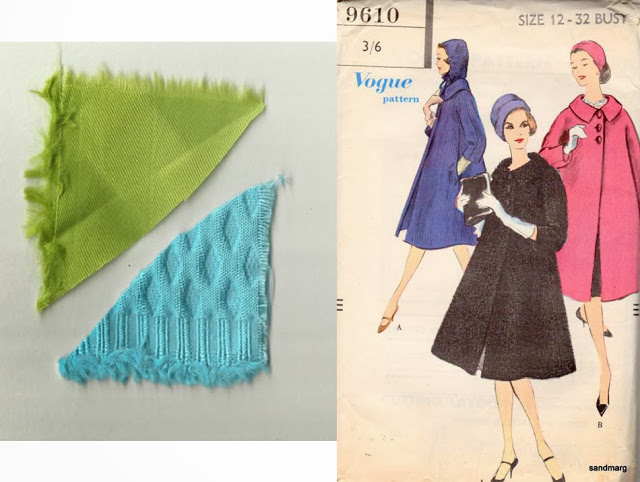
With the same pattern as the short swing jacket, I want to make a swing coat. I will just make it longer (or I hope it will work like that). I have a bright baby blue wool/cotton fabric with a diamond pattern in relief. With a bright green lining, it will be a very nice coat to brighten the winter.

fall-winter-sewing-plan-pattern-3
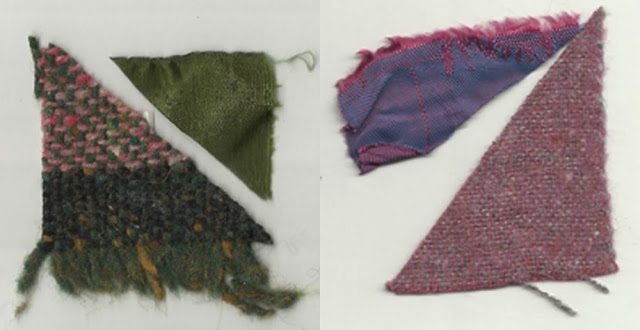
These two combinations are for skirts: A-line skirts with pleats. I need more skirts, I have lots of dresses but very few skirts. So I will add two for the winter: one in wool tweed in green, pink and brown with a bottle green lining and the other one in purple wool with blue/purple lining.

fall-winter-sewing-plan-pattern-4And a winter CamĂ­ dress of course! 3/4 sleeves or long, I still don’t know. I have a nice cotton/wool fabric but I might have to change the collar, it might be too heavy. It’s dark grey with purple leaves, very subtle.

Are you ready for next week? I’m so excited to show you the new pattern. I really hope you’ll like it!

It will be out on Thursday! Monday I’ll let you know more…

Have a great week end and see you then…

pauline-sewing-pattern

9 comments
0 FacebookTwitterPinterestEmail
I love a full gathered skirt. It’s dramatic and so vintage looking as its emphasize the small of the waist and hides the hips, but sometimes, if your fabric is a little bit on the heavy side, you don’t feel like adding too much volume to your waist seam line.
So let’s see how your can draw a circle skirt for an amazing vintage look as well as a sleeker figure.
This pattern is to be cut twice on fold.
DRAW A CIRCLE SKIRT (PATTERN TO CUT TWICE ON FOLD)


cami-sew-along-skirt-variation-add-lining-pattern-11.Get the finished measurement of the dress waist on the instruction page 2. For example, if you are making size 36, the waist finished measurement is 69 cm (27″). Divide it by 3,14 to obtain the diameter of your circle skirt pattern.
69 / 3,14 = 22 cm (approx.)
Then you need to divide it by 2 to have the radius.
22 / 2 = 11 cm
2.Start your pattern drawing a line the desired length of your skirt (for me 50 cm/20″ is a great length) and of your radius. For me, that would be a total of 61 cm (24″).
3.Draw a perpendicular line with the same length. Draw the waistline connecting the radius points in a nice and even curve. Do the same for the hem line.
4.Add the following seam allowances: 1,5 cm (5/8″) at 1 side seam and the waistline (not on the drawing, sorry) and the desired length at the hem. Draw a “cut on fold” bracket on the other side seam and you’re done.
ADD A LINING
1.This one is very easy! If your fabric is see-through or too light, you might want to line it. Take your skirt pattern and cut the 2 pieces in your lining fabric. Stitch the side seams together leaving the zipper opening unstitched and gather the waistline.
2.Attach the lining to your finished skirt before sewing it to the bodice. Treat the skirt and lining as one when attaching it to the bodice and setting the zipper in.
3.Hem the lining slightly higher than the skirt.


pauline-sewing-pattern
8 comments
0 FacebookTwitterPinterestEmail
I guess you’re looking forward to finish your CamĂ­ dress, no? Well, with today’s step, it’s going to be almost done and you’ll be able to try it and see the overall look and fit.
We are going to sew the pockets, gather the skirt and attach it to the bodice. I don’t know about you, but for me, the perfect garment (whether it is a dress, a skirt or a jacket for example) has to have pockets. They are to practical and it’s always a cute detail to add.
DRAW THE SKIRT PIECES
1.Following the instructions, draw the 2 skirts pieces and mark the zipper opening and the pocket start and end.
If you wish to make a circle skirt, there will be a tutorial on how to draw your own circle skirt pattern on Wednesday 9th.
STITCH THE POCKETS
 cami-sew-along-sewing-pockets-attaching-skirt-pattern-1
cami-sew-along-sewing-pockets-attaching-skirt-pattern-2
1.Match the pocket marks to the skirt marks and pin right sides together. Stitch with a 1 cm (3/8″) seam allowance.
cami-sew-along-sewing-pockets-attaching-skirt-pattern-3
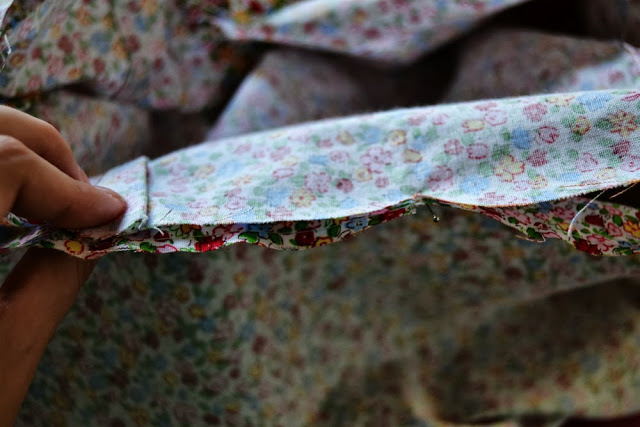
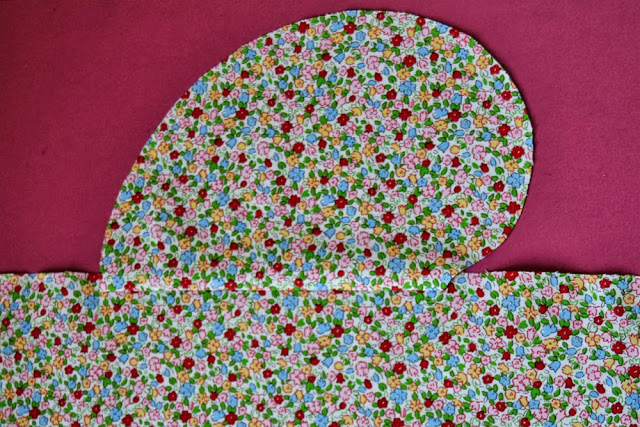
2.Fold the pocket over and press the seam allowances toward the pocket.
Repeat with the other pocket on the opposite side and the two other pockets on the other skirt piece.
STITCH THE SKIRT PIECES TOGETHER


cami-sew-along-sewing-pockets-attaching-skirt-pattern-4
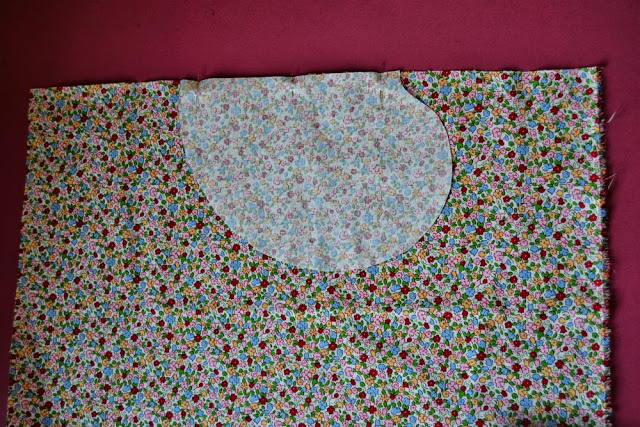
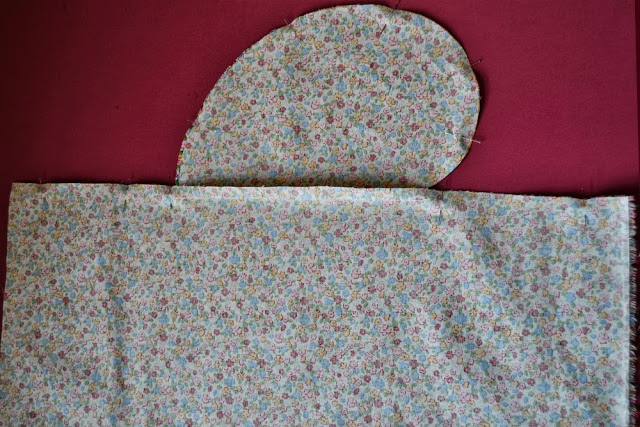
1.On the right side, match the seams of the two skirt pieces together all around the pockets, with right sides together and pin.

cami-sew-along-sewing-pockets-attaching-skirt-pattern-52.Stitch, pivoting at the pocket angle.

cami-sew-along-sewing-pockets-attaching-skirt-pattern-6
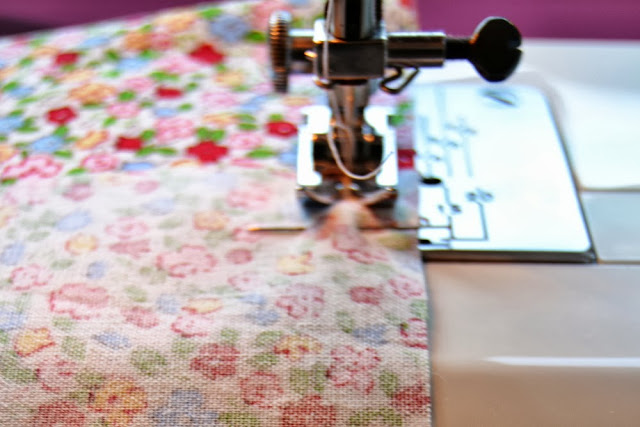
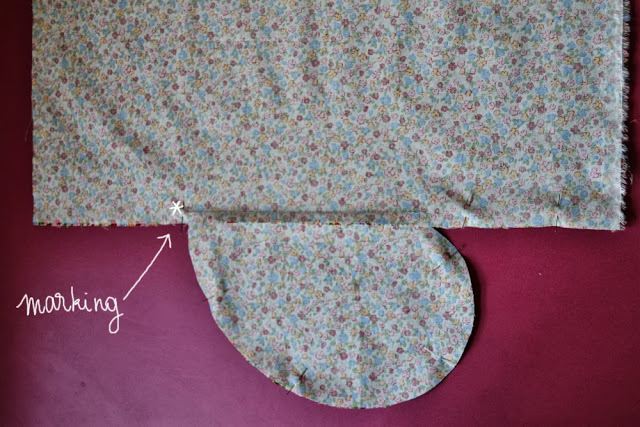
3. If you insert a regular zipper on the left side (that’s what I will do), match the seams, pin and start stitching from the zipper mark to the hem.
If you are inserting an invisible zipper, it will be easier first to gather the skirt, attach it to the bodice, set the zipper and then close the side seam.
cami-sew-along-sewing-pockets-attaching-skirt-pattern-7
4.Finissez les marges et repassez les poches vers le devant de la jupe.

GATHERING THE SKIRT

cami-sew-along-sewing-pockets-attaching-skirt-pattern-8
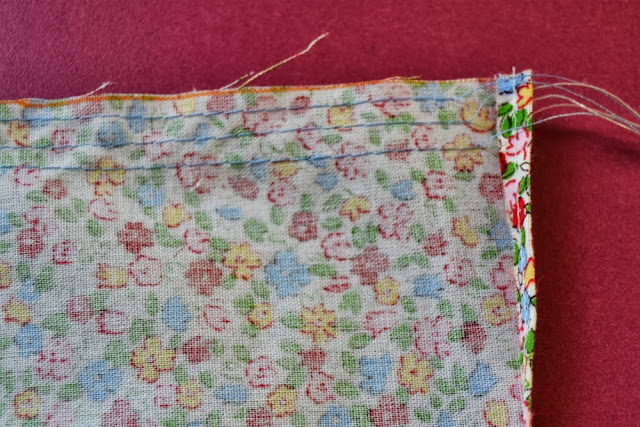
1.On the skirt waist seam, baste 3 lines of stitches at 1,5 cm, 1 cm and 0,5 cm from the egde (5/8″, 3/8″ and 1/4″).

cami-sew-along-sewing-pockets-attaching-skirt-pattern-9

2.Tie the bobbin threads (the ones at the bottom) together at both end. You will pull them to gather the skirt volume.
cami-sew-along-sewing-pockets-attaching-skirt-pattern-10cami-sew-along-sewing-pockets-attaching-skirt-pattern-11
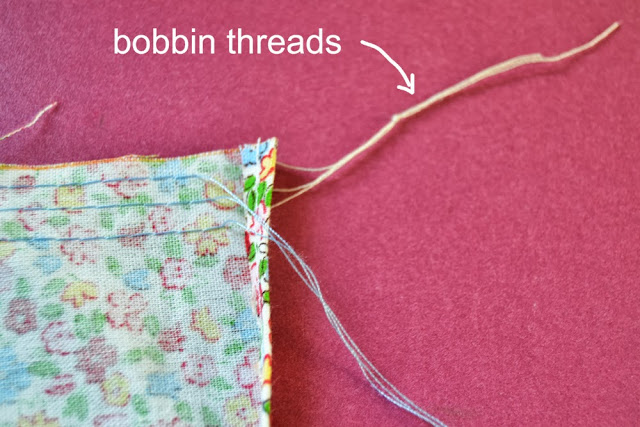
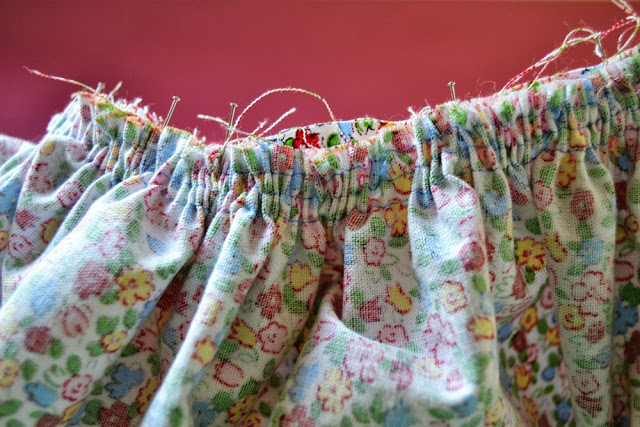
3.Match the skirt side openings, front and back center, side seam to the corresponding bodice marks, with right sides together and pin. Gather the skirt between the marks until it fits the bodice.
When it does, stitch and finish the seam allowances (I like to bind the seam with bias).
There you go! On Wednesday we’ll see how to draw a circle skirt and how to add a lining in case your fabric needs it. Now go try your almost finished dress! And the whole Sew-Along posts are here.
pauline-sewing-pattern


4 comments
0 FacebookTwitterPinterestEmail
Hello everyone,
I have taken some pictures this week-end of the red bouclé outfit I told you about last month (remember, I showed you the jacket).
red-bouclé-outfit-sewing-pattern-1


I am not usually one to follow the fashion trends as I normally have a retro/vintage style (quite the opposite of most of the modern trends, even if sometimes some designers got inspired by the past ( I could write an entire post about my favourite designers, well I guess I will)). But the recent trend of coordinated outfit was very nice and I really like the idea. This was the board I made, remember:

red-bouclé-outfit-sewing-pattern-2

I wanted a short and fitted jacket with 3/4 sleeves, in a very simple shape (no collar, no pocket) to make the beaded trim and the bright colour the most important features. I chose a pattern from Burda, jacket 109 from issue 03/2012, a pattern I already made for my mother as a Christmas present. I changed it quite a bit in order to get it more fitted: took the seams in, increase the curve of the princess seams, fitted the sleeves…
The same happened for the skirt: a clean shape to let the fabric and the trim shine. The pattern is the same one I made for my bow skirt, minus the pockets (and the bow of course!).
red-bouclé-outfit-sewing-pattern-3
red-bouclé-outfit-sewing-pattern-4
I hope your having a nice summer (here in Valencia it’s great, I was frying in the sun with the jacket while taking the pictures…) and I wish you a nice week!

pauline-sewing-pattern

37 comments
0 FacebookTwitterPinterestEmail
If you’re like me, when you see a garment you like on the internet, you want to know how it’s made. There is nothing more frustating than finding the perfect dress or skirt and having no idea of what pattern was used or good enough pictures to figure it out. What I love are blogs with construction pictures, that way, even if I don’t have the pattern, I can try to make something similar. If only I did that! But everytime I try to take pictures of the construction, I forget and keep on sewing until it’s almost finished… Do what I say, not what I do 🙂
Ok, I made an effort and took pictures of the construction of the Scarlett dress, good girl!
Let’s start with the corset:

scarlett-dress-construction-sewing-pattern-1scarlett-dress-construction-sewing-pattern-2scarlett-dress-construction-sewing-pattern-3scarlett-dress-construction-sewing-pattern-10

It’s made of heavy muslin (or coutil in the corset world). I am pretty happy with it being my first corset but I would make some changes for the next one. I wasn’t able to find spiral metal boning in any notion stores in Valencia so I had to use plastic boning. Not bad for a night but I don’t think it would be confortable for a longer time. Nor was I able to find a busk to close and open the front. So I have to lace it open everytime I want to wear it.
The pattern is made from my measurements and is amazing. I found it here, the fit is perfect and it’s very easy to follow and make, you just need a piece of paper, a ruler and a calculator. The same girl also has a tutorial on how to sew the corset here. I didn’t make the same flat-felt seams, just regular seams with slip-in-the-ditch to create boning channels.
I didn’t have metal grommets so I sewed them by hand like small buttonholes. Took me a whole movie, not so bad…

scarlett-dress-construction-sewing-pattern-4scarlett-dress-construction-sewing-pattern-5

Here is the hoop-skirt: the most important part of the costume as it support the whole dress. The volume depends of how many hoops you add and the width. Here is how I made mine:

scarlett-dress-construction-sewing-pattern-6 scarlett-dress-construction-sewing-pattern-7scarlett-dress-construction-sewing-pattern-8

Now the underskirt: you need it to cover the hoop skirt and smooth the boning lines. It’s very simple to make: gather a big rectangle of fabric! For example, mine is 4 meters wide (it has to be wider than the hoop skirt, important). I made a small gathered flounce at the bottom (6 meters x 20 cm) and sew it to the big piece. I also made a separate waistband so it would be easier to gather the ribbon around my waist to close the skirt.


scarlett-dress-construction-sewing-pattern-9
I also found this pattern on the internet but I think it’s out of print. Maybe you can find it on ebay or etsy.
And for the umbrella, I found the recover tutorial here. I had a vintage umbrella from the 20’s with a broken fabric so I decided to recover it. It’s not difficult to do and it’s a great way to customize an old umbrella.
I hope it was useful and that you enjoyed it. If you’re still reading, sorry, this has to be the longest post ever 🙂 If you have any questions, just ask in the comment section, I’d be happy to help.
Have a nice week end!

pauline-sewing-pattern


32 comments
0 FacebookTwitterPinterestEmail