10.4K

 Let’s take Maria’s measurements again: her bust measurement is 92 cm (36″) when the one corresponding to her size 38 is 88 cm (34 1/2″), there is a 4 cm (1 1/2″) difference. She’ll cut the pattern in size 38 and add 2 cm (3/4″) at each bust seam to make the full bust adjustment, without increasing the waistline or the neckline.
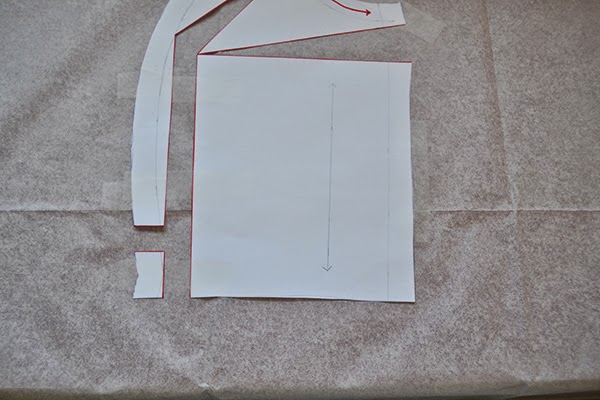
2. Cut lines 1 and 2 and stop when you reach the seam allowance.
Let’s take Maria’s measurements again: her bust measurement is 92 cm (36″) when the one corresponding to her size 38 is 88 cm (34 1/2″), there is a 4 cm (1 1/2″) difference. She’ll cut the pattern in size 38 and add 2 cm (3/4″) at each bust seam to make the full bust adjustment, without increasing the waistline or the neckline.
2. Cut lines 1 and 2 and stop when you reach the seam allowance.


Today we’ll see how to make a Full Bust Adjustment on the princess seam of the Alameda dress pattern. But first, you might be wondering: How do I know if I need a FBA?
Well, it’s not that difficult. The first clue is that you have more than a B bra cup (sorry to all the ladies with bosom, as the patterns are drafted by a small chested girl – me! – this fitted design will need a FBA to get fit on you). You also want to make a FBA if:
- compared to all your measurements, your bust measurements is one (or more) size bigger.
- when you made your muslin, you went for a bigger size for the bust but have now some extra fabric at the armscye.
- the waistline is pulling up at the front.
Let’s take an example: Maria’s measurements are bust 92 cm (36″), waist 70 cm (27 1/2″) and hips 95 cm (37 1/4″). For the waist and hips, she should cut a size 38 but her bust belongs to size 40. The problem if she cuts size 40 for the bust and 38 for the waist and hips is that the armscye and shoulder lines will also belong to size 40, which will be too big for her and most likely there will be some extra fabric where the princess seam starts and at the shoulder seams. The solution is to cut the pattern pieces in 38 and add extra volume only in the bust area.
And of course make a muslin before to check the fit and correct the adjustments!
Let’s see how to make the Full Bust Adjustment:
 Let’s take Maria’s measurements again: her bust measurement is 92 cm (36″) when the one corresponding to her size 38 is 88 cm (34 1/2″), there is a 4 cm (1 1/2″) difference. She’ll cut the pattern in size 38 and add 2 cm (3/4″) at each bust seam to make the full bust adjustment, without increasing the waistline or the neckline.
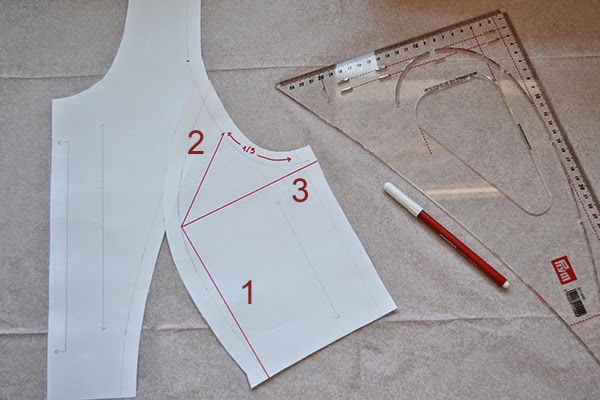
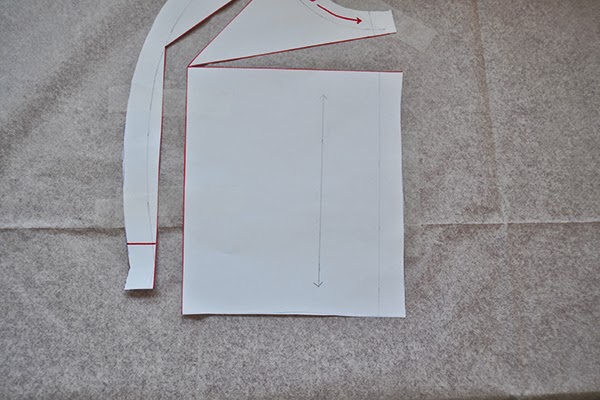
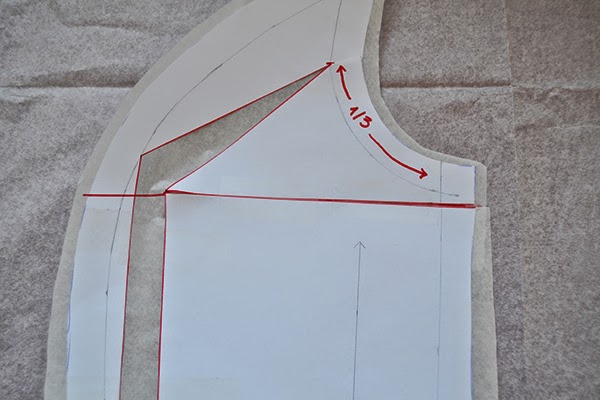
1. Take your pattern bodice front and bodice side front pieces. Draw the seam allowances and all the marks (notches, grainline…).On the bodice side front, we’re going to draw 3 lines:
- 1: from the waistline to the fullest part of the bust.
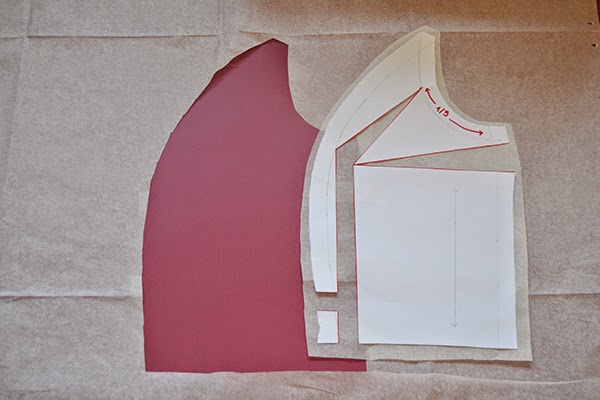
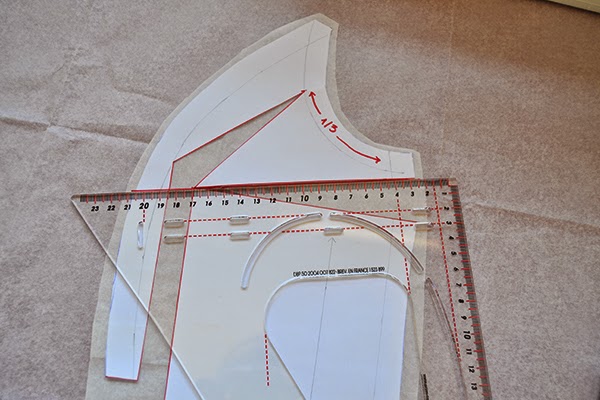
- 2: from 1/3 of the armhole (remember that the armhole is made of the the front and side front bodice pieces) to the fullest part of the bust.
- 3: from the fullest part of the bust, draw a diagonal line toward the side seam allowance, like a dart.
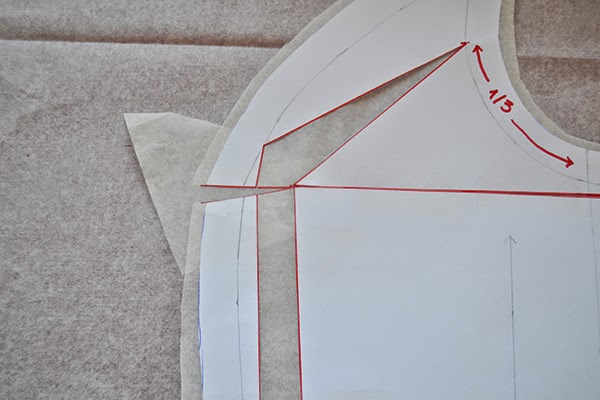
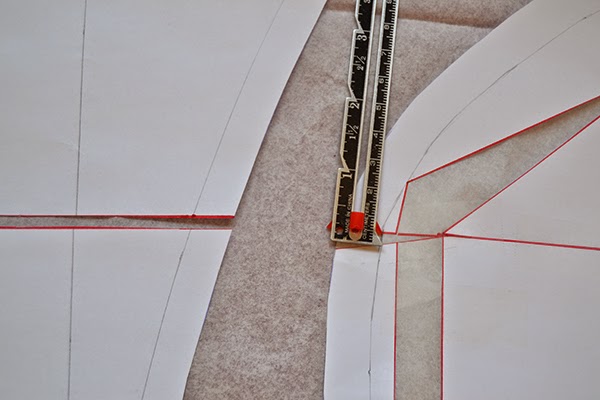
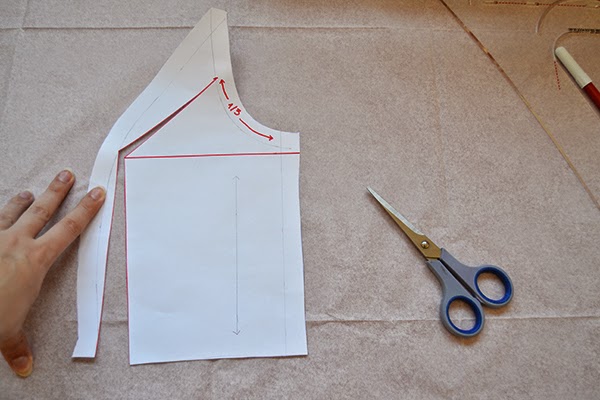 2. Cut lines 1 and 2 and stop when you reach the seam allowance.
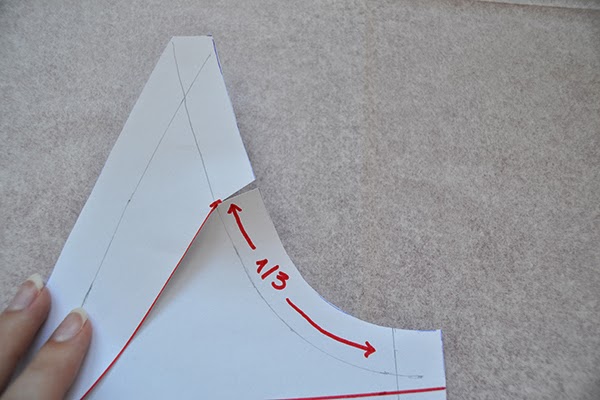
3. Cut the seam allowance but make sure it’s still attached.
4. Cut line 3 and stop just before you reach the fullest part of the bust.

5. Tape the princess seam to a piece of paper and pivot the pattern along lines 1, 2 and 3 so that the opening at line 1 measures the 2 cm (3/4″) increase we need. Make sure the 2 cm (3/4″) increase is even all the way down line 1. Tape the pattern in place on the paper.
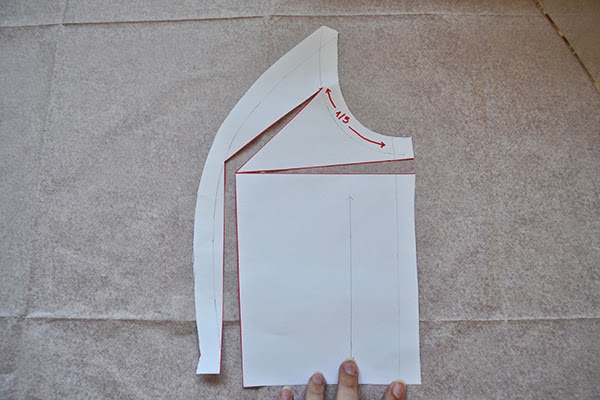
6. As you can see, the waistline is not even. Draw a line parallel to the waistline on the princess seam part.
7. Cut along the line and place the small piece on the continuity of the waistline, 2 cm (3/4″) from line 1. Tape.
8. Cut roughly around the new pattern piece.
9. Draw a line extending line 3 to the princess seam.
10. Cut along line 3 until you reach the first pivot. Close the “dart” and tape.
11. Cut the line 3 from the princess seam to the pivot. Place a piece of paper under the spread “dart” and tape.
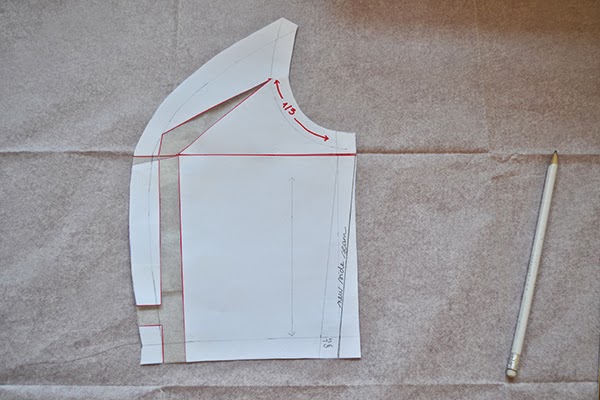
12. We need to take 2 cm (3/4″) in at the side seam to keep the waistline the original width (this is the measurement we added at the bust). Draw a new side seam starting from line 3 and ending 2 cm (3/4″) from the waistline edge.
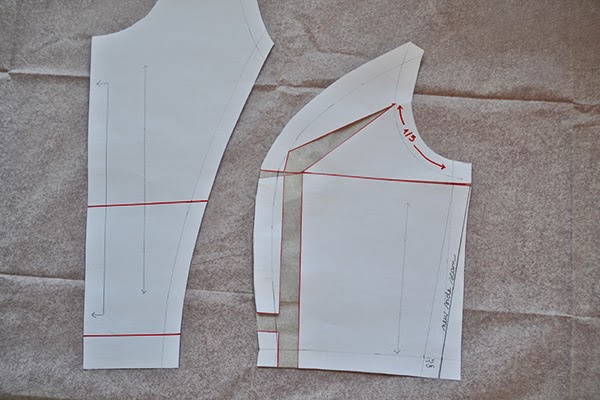
13. Now we need to add the increases we made to the side front piece to the front. Trace 2 lines at the same level you made the increases.
14. Measure how much you added to the side front piece and report that on the front piece. For the bust, measure the seam allowance line, not the cutting line.
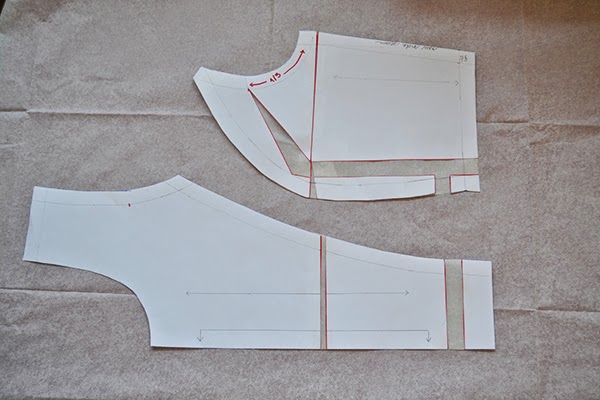
15. Here you go: your new pattern pieces! We have increased the bust area without touching to the waistline, armhole or neckline.
If you have any questions, let me know in the comments.
Are you going to make a FBA?

12 comments
Bonjour Pauline. J'ai besoin de tes conseils. Mes mensurations sont les suivantes : poitrine 92 (bonnet C), taille 75 et hanches 98. J'ai donc choisi la taille 40 pour faire ma toile, mais j'ai un excédent de tissu important au niveau des emmanchures devant, comme je te l'ai dit (ça baille). Je te précise, si cela a une importance (pour "annie coton" qui a fait des tutos sur le FBA, cela en a une), que mon tour de poitrine en passant sous les aisselles et le haut de la poitrine est de 87. Quelle taille me conseilles-tu de choisir?
Bonjour Sylvia, C'est vrai que tes mensurations correspondent exactement à la taille 40. Mais je pense que le problème d'excès de tissu aux emmanchures vient du fait que tu fasses un bonnet C et qu'il y ait une grande différence entre ton tour de poitrine et ton tour de buste (haut de poitrine). Je te conseille de faire une toile avec le tour de taille en taille 40 et le tour de poitrine en 38 qui correspond à ton buste en procédant à un ajustement pour forte poitrine (une toile du corsage suffit pour que tu aies une idée). Si tu as toujours trop d'excès, tu peux creuser la découpe princesse aux emmanchures pour qu'elle soit plus près du corps.
Tiens-moi au courant…
Merci beaucoup pour ces conseils. C'est ce que je pensais faire. Je te tiens bien sûr au courant. Je compte bien porter mon Alameda d'ici la fin de l'été!
Et merci également pour cet énorme travail d'accompagnement et ta grande gentillesse et disponibilité pour aider les couturières peu expérimentées comme moi. C'est très appréciable.
Thank you! This has to be one of the best tutorials on how to do an FBA on a princess seams.
Thanks! I'm glad you liked it.
Merci beaucoup pour ce tuto. Je vais devoir faire cet ajustement sur la robe de ma maman.
Bonne chance! Ce n'est pas évident de coudre pour quelqu'un d'autre, mais ta maman a beaucoup de chance.
Quel tissu as-tu choisi?
Pour les tissus, j'ai choisi une popeline assez fluide et pour la doublure un voile de coton. Je m'y mets d'ici 1 semaine, là je suis en vacances, loin de mes machines. Mais je ne perds pas une miette de tes tutos 🙂
Profite bien de tes vacances! Et comme ça, une fois les batteries bien rechargées, on reprend la couture avec encore plus de plaisir 😉
Popeline et voile de coton, ça m'a l'air tellement agréable et léger pour l'été, j'ai hâte de voir le résultat…
Coucou, ça y'est c'est parti, je me lance dans la robe de ma maman mais j'ai un doute. Les mensurations de ma maman correspondent à la taille 42 mais pour le tour de poitrine elle fait pile 96cm (bonnet D dans le commerce). Je ne sais pas si je dois faire un ajustement poitrine ?
Merci pour ce pas-à-pas très bien expliqué ! Je tenterai ma deuxième alameda la semaine prochaine, j'ai hâte de m'y mettre.
Hâte de la voir!