Home Tags Posts tagged with "Sew-Along"
Tag:

Sew-Along

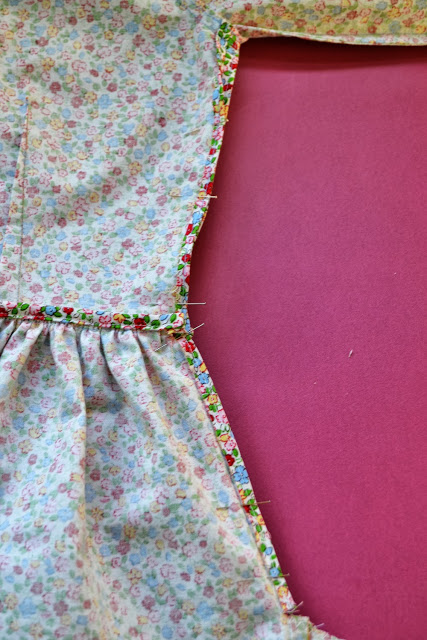
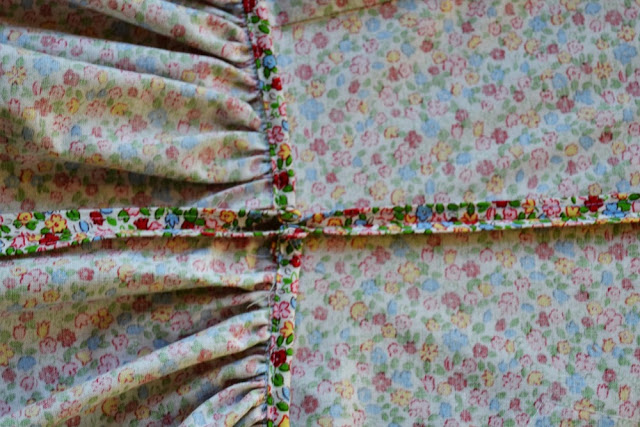
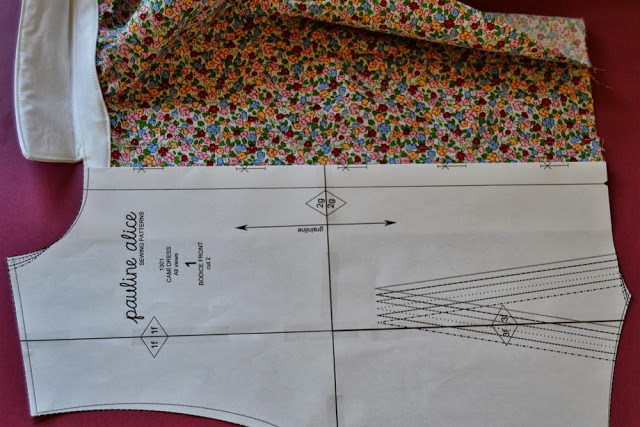
After choosing your fabric for the Alameda dress, let’s see some style inspiration to help you decide how to combine the colours, patterns or different fabrics to get the perfect dress!

You can use contrasting piping (buy it already made or make your own following this tutorial), contrasting panels, mix and match the skirt and top fabrics, go for a day version or a party look… there are so many options!


source: 1, 2, 3

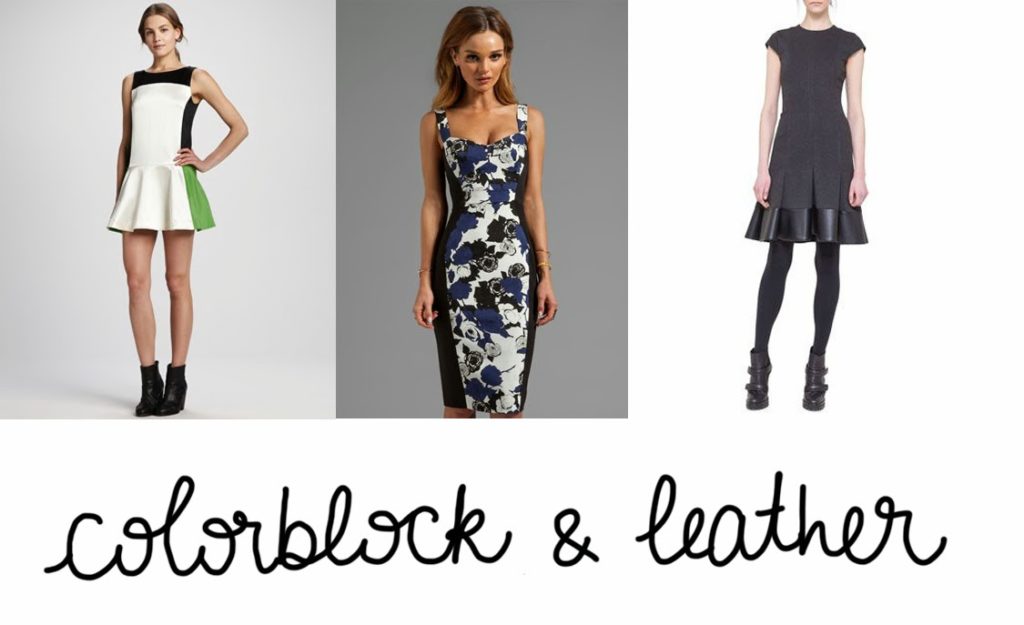
Use different colours or patterned and plain fabrics on the different pattern pieces. For example dark colours on the outside will make you waist appear smaller (great visual trick!). And what about making the flounce in leather? With maybe leather piping? Perfect for the rock’n roll chicks.

source: 1, 2, 3

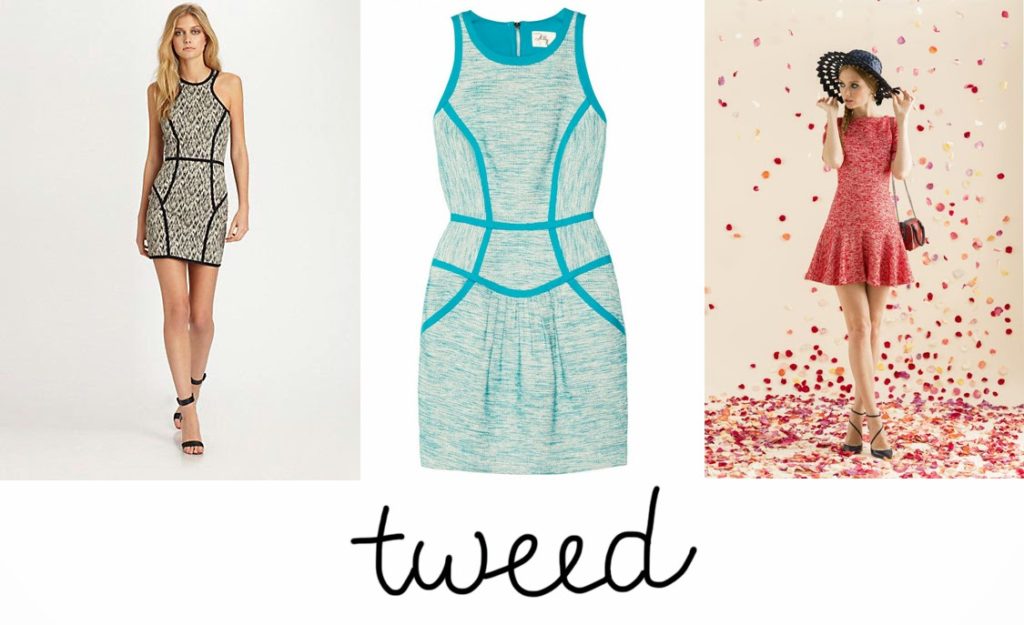
Prints are great! For a nautical look, go for stripes. Want to emulate the Dolce & Gabbana spanish look, polka dots will be your friends. And for the more romantics, florals can never go wrong.

source: 1, 2, 3
The Alameda dress can go from day to night in no time: just choose the right fabric. How about a brocade? And lace would look amazing as well (remember to underline the dress) for a wedding. Bright colours are a favourite of mine. Leave the piping out and add a big bow for fun.
source: 1, 2, 3
Last but not least, a Fall/Winter version in tweed is really elegant. Worn with a cardigan and tights, the Alameda will make a cute dress for work and for going out on the week-end.
I hope this has given you a lot of ideas for your
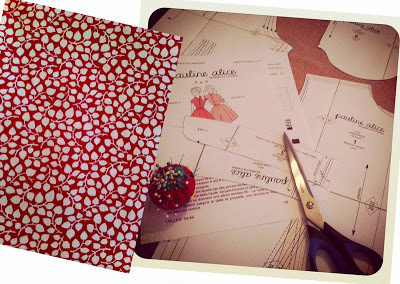
Alameda. If you have any questions, let me know here in the comments.


1 comment
0 FacebookTwitterPinterestEmail

Sorry for the silence, I’m working hard on the next pattern and times flies when you are glued to a computer screen all day long…

As a welcome interruption from all those pixels, I thought I would show you the Carme blouse I made during the Sew-Along. If you have seen the videos, you’ve seen my fabric. It’s an aqua green cotton, very fresh and spring-like, and so easy to work with.

I chose mother-of-pearl buttons with some gold for a delicate look.

As for the pattern and construction, I’m not going to say anything special as you can see every details on video tutorials 😉Carme blouse pattern, pauline alice patterns, in aqua green cotton and mother-of-pearl and golden buttons.2copiaCarme blouse pattern, pauline alice patterns, in aqua green cotton and mother-of-pearl and golden buttons.

Carme blouse pattern, pauline alice patterns, in aqua green cotton and mother-of-pearl and golden buttons.

I’ve already received some pictures of your beautiful Carme blouses, I can’t wait to show them all!

27 comments
0 FacebookTwitterPinterestEmail
I hope you had a nice week end! Let’s start this week with the actual Sew-Along!
Today, it’s going to be easy: cut the fabric for your Carme blouse.
I’ll let you watch this short video to show you all the pattern pieces you need to cut on your beautiful fabric (that you’ll have prewashed and pressed before of course):


See you on Wednesday to stitch the pin tucks!

6 comments
0 FacebookTwitterPinterestEmail
I’m very excited to show you the first videos of the Carme blouse Sew-Along!
Let’s start with some general information: all videos will be available here on the blog as well as on my Youtube channel with the tutorials in 3 languages. You can subscribe to the channel to see all the videos and the updates (and click “Like it” please!).
If you have any question, please ask them in the comment section of the blog below, that way we can all answer each other and profit from the answers.
Remember that here you can buy the Carme blouse pattern.And now, let start the show! I’m going to show you 3 style variations you can make easily to your blouse. Last week I received some comments and mails asking me to show how to make them and I thought it would be a good idea to make a small video for each.And before the variations, you might want to look at the inspiration file I gathered on Pinterest: gathered front for maternity wear, square yoke, plain front piece…
Let’s see if one of these variations  is appealing to you…
VARIATION 1: HOW TO MAKE A MATERNITY BLOUSE
Diana sent me a mail asking me how to change the pattern so she would be able to wear the blouse while pregnant. I answered that adding some ease to the front would do the trick but then thought it’s a style design that I’ve seen on a lot of “non-maternity” blouses as well. So adding some gathers to the front piece under the yoke is going to give space for your growing belly or just more ease and flow if you use a supper light fabric for example.
Let’s see how to draw the new pattern piece (I’m using a miniature drawing).

VARIATION 2: HOW TO DRAFT A PLAIN FRONT (NO YOKE)
As much as I like the pin tucks and the yoke, the Carme blouse would look great with a plain front. I’ve been asked to show how to draft a single front piece and it’s very easy: tape the front and the yoke together overlapping the seam allowances by 3 cm (1 and 1/4″) and matching the shoulder and front lines.

VARIATION 3: HOW TO DRAFT A SQUARE YOKE
You might want to change the round yoke (or bib) for a square one. Easy! Just draw the new lines on the yoke (pattern piece 4) and the front (pattern piece 1) with the same angle and measurements. And follow the same instructions: baste the yoke and the front around the edge, clip the seam allowances (in the angles), press them toward the inside and stitch both layers together (see the instructions for more details and illustrations).

I hope you’ll like the videos! If you have any questions, ask below!
Have a great day.


18 comments
0 FacebookTwitterPinterestEmail

I’m very happy to make a Sew-Along for the Carme blouse, and with videos! How great is that? I think it’s going to be really cool and easy for you to follow (and you won’t have to read a 10 km long post everyday other day, hehe). The other good thing is that all the videos will be available indefinitely, so even if you can’t join right now, you’ll be able to access them here on the blog or through Youtube.Let’s talk about the schedule. As you might want to buy fabric (and maybe make a muslin), I’ll give you more than a full week to gather the tools and material for the Carme blouse. Here is the schedule:

Monday, March 3rd: inspiration and variation
Monday, March 10th: Cut the fabric
Wednesday, March 12th: Pin tucks
Friday, March 14th: Yoke and placket
Monday, March 17th: French seams
Wednesday, March 19th: Sleeves
Friday, March 21st: Collar
Monday, March 24th: Hem
Wendesday, March 26th: Buttonholes
Monday, April 7th: Your Carme Party!!!

You can start collecting your material right now, here’s what you’ll need:

  • Lightweight woven fabric such as cotton voile, lawn, batiste,dotted swiss, chiffon, linen, chambray…
  • Fabric (150 cm wide): 1,7 m  (60″ wide: 1,9 yard)
  • Fabric (115 cm wide): 2 m   (45″ wide: 2 1/4 yards)
  • 10 small buttons
  • matching thread
  • optional: fusible interfacing for the collar if your fabric is too light on its own (20 x 50 cm or 19,7″ x 7,9″)

And here is the Sew-Along button (Click right on the image to save it):

So let me know if you’re going to join and don’t hesitate to ask me anything in the comment section so that everybody can share. I also created a flickr group so you can post pictures of your Carme blouse.
I’m really looking forward to start sewing with you!
Have a wonderful weekend!


25 comments
0 FacebookTwitterPinterestEmail

Congratulation to all of you! You’ve made amazing dresses!
So let’s start and show your beautiful creations:


cami-sew-along-parade-pattern-1cami-sew-along-parade-pattern-2
French seamstress, Charlotte from Hector&Celestine, made a lovely red and white Camí. Look at the fabric, isn’t it pretty? (I have the very same!).
cami-sew-along-parade-pattern-3Wow! Jen’s dress is amazing! Read more about it at her blog Tea for Two (she shares it with her twin sister, how cool is that?).

cami-sew-along-parade-pattern-4
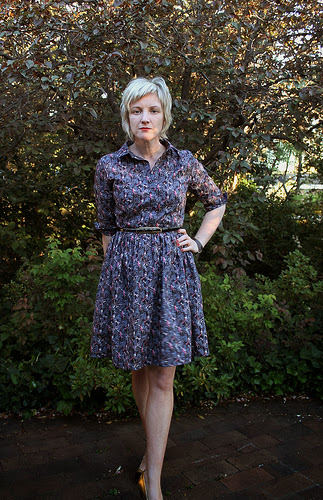
Kirsty’s gorgeous Liberty fabric looks so good. You can see more pictures of it here: Top notch.

cami-sew-along-parade-pattern-5 
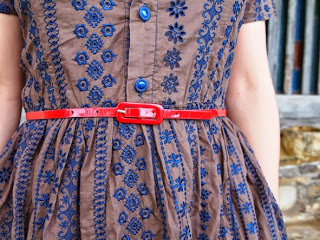
Alicia did a great job with her Camí, I love the colourful fabric. She blogs at Una Modista de Pacotilla.

cami-sew-along-parade-pattern-6
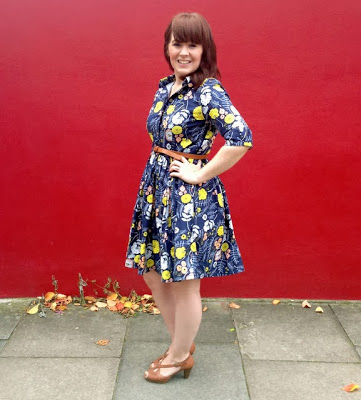
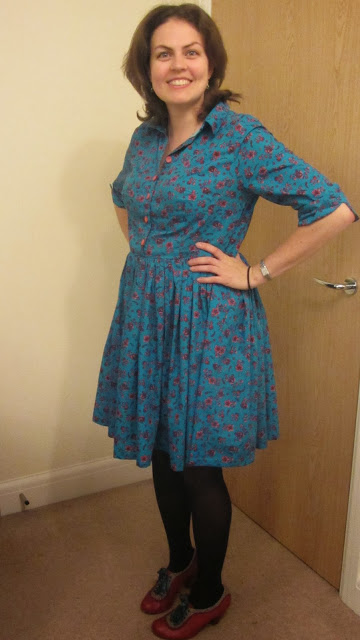
Another bold fabric: Claire from I want to be a turtle made a beautiful bright Camí. Perfect to brighten the coming winter…
cami-sew-along-parade-pattern-7
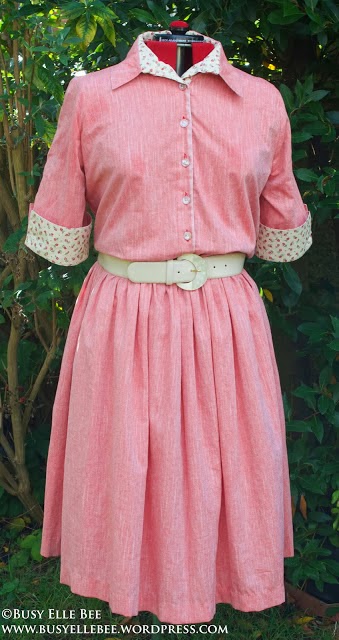
Elle went for a total vintage look and I love the contrast cuffs, collar and button placket. If you want to read more about her dress, go check her blog Busy Elle Bee: she’s made a very complete review of the Sew-Along.
cami-sew-along-parade-pattern-8cami-sew-along-parade-pattern-9Maider from Masustak eguzkitan made such a pretty dress, I had to include a detail picture of the fabric (I want the same).
cami-sew-along-parade-pattern-10
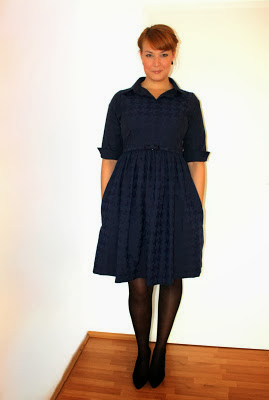
Smaida’s winter version is very elegant. See more pictures of her dress on her blog SewMeow.
cami-sew-along-parade-pattern-11Lara from Dreaming of Avonlea made a shirt version from the Camí pattern. Isn’t it great?
 cami-sew-along-parade-pattern-12
Nathalie was a pattern tester but her beautiful dress never got shown on the blog. It deserves to be as it was the first ever dress she made! See more on her blog Made in Home.
Now, if your dress is not here, please send me an email with the picture (paulineyalice @ gmail.com) and I’ll add it!

And now the GIVEAWAY!

cami-sew-along-parade-pattern-13
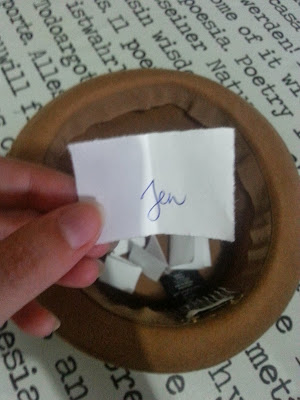
The lucky winner of the next pauline alice pattern is…………. JEN from Tea for Two!
As soon as the pattern is out, I’ll send it to you!

Thank to all of you for participating to the Sew-Along, I hope you had fun and that you enjoyed sewing the Camí dress pattern.

pauline-sewing-pattern

14 comments
0 FacebookTwitterPinterestEmail
I can now show you the Camí dress I made for the Sew-Along! I used a floral cotton fabric and a white cotton sateen for the contrasted collar and cuffs (that’s a look I saw on a Dolce & Gabanna dress and I thought I could try to make a modest replica).
Now I really looking forward to show all your pretty dresses on the 25th…
And I remind you that there will be one lucky winner of the next pattern during the giveaway!


my-camy-dress-sewing-pattern-1my-camy-dress-sewing-pattern-2my-camy-dress-sewing-pattern-3my-camy-dress-sewing-pattern-4

pauline-sewing-pattern

32 comments
0 FacebookTwitterPinterestEmail
It’s the final countdown! Tadadada Tadadada Tadadada Tadadadadada!
Sure that you have the song stuck in your head for the rest of the day now (at least I got it),  so it’s the perfect time to insert the zipper in our dress and start the final countdown of the Sew-Along: penultimate step!
I am going to show you how to insert a regular zipper. But if you prefer to have an invisible zipper, there are a lot of great tutorial on Youtube. The only difference would be to stitch the side seam after inserting the invisible zipper.
INSERT A REGULAR ZIPPER
cami-sew-along-zipper-pattern-1
1.Take the left side of the dress, pin the zipper opening right sides together and baste it (by hand or by machine). You might want to finish your seam allowances before depending of the finishing technic you are using (here, turned-and-stitched seams).

cami-sew-along-zipper-pattern-2

2.Press the zipper opening seams open.

cami-sew-along-zipper-pattern-3
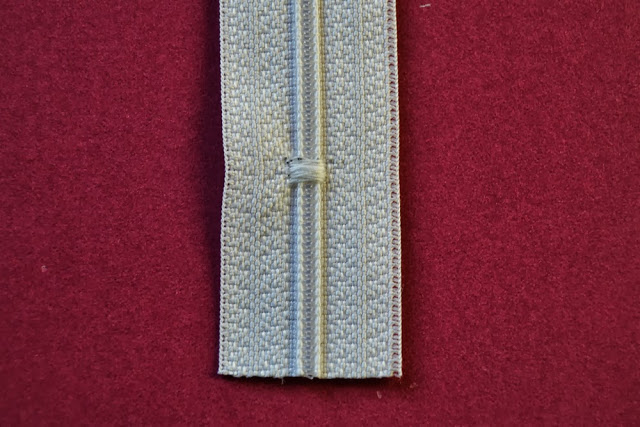
3.If your zipper is too long, secure the teeth closed by stitching over them at the desired length and cut the zipper at least 3 cm longer (1,2″).

cami-sew-along-zipper-pattern-4
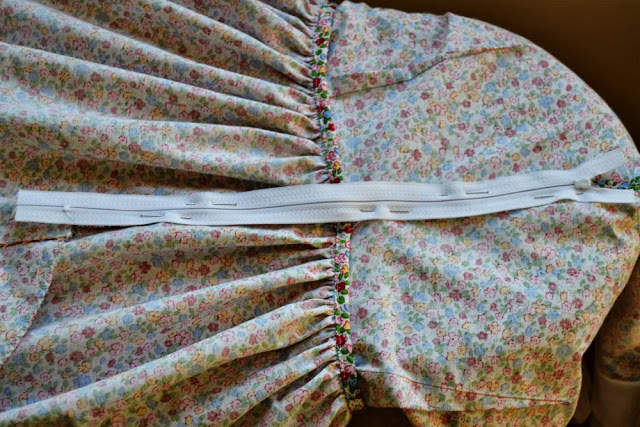
4.Place the zipper face down with the teeth on top of the seam allowances. Match the zipper top to the beginning of the zipper opening. Pin or baste in place. Make sure the zipper is well centered.

cami-sew-along-zipper-pattern-55.With the dress on the right side, stitch all around the zipper, using a regular zipper foot, following the basting line or the pins. When you are done, remove the bastings.
The last step will be to hem the dress so let’s see each other on Monday! When your dress is ready, don’t forget to send me a picture with a link to your blog or/and post for the virtual Catwalk we’ll be having the following week!
Get all the Sew-Along posts here.

pauline-sewing-pattern

8 comments
0 FacebookTwitterPinterestEmail
I love a full gathered skirt. It’s dramatic and so vintage looking as its emphasize the small of the waist and hides the hips, but sometimes, if your fabric is a little bit on the heavy side, you don’t feel like adding too much volume to your waist seam line.
So let’s see how your can draw a circle skirt for an amazing vintage look as well as a sleeker figure.
This pattern is to be cut twice on fold.
DRAW A CIRCLE SKIRT (PATTERN TO CUT TWICE ON FOLD)


cami-sew-along-skirt-variation-add-lining-pattern-11.Get the finished measurement of the dress waist on the instruction page 2. For example, if you are making size 36, the waist finished measurement is 69 cm (27″). Divide it by 3,14 to obtain the diameter of your circle skirt pattern.
69 / 3,14 = 22 cm (approx.)
Then you need to divide it by 2 to have the radius.
22 / 2 = 11 cm
2.Start your pattern drawing a line the desired length of your skirt (for me 50 cm/20″ is a great length) and of your radius. For me, that would be a total of 61 cm (24″).
3.Draw a perpendicular line with the same length. Draw the waistline connecting the radius points in a nice and even curve. Do the same for the hem line.
4.Add the following seam allowances: 1,5 cm (5/8″) at 1 side seam and the waistline (not on the drawing, sorry) and the desired length at the hem. Draw a “cut on fold” bracket on the other side seam and you’re done.
ADD A LINING
1.This one is very easy! If your fabric is see-through or too light, you might want to line it. Take your skirt pattern and cut the 2 pieces in your lining fabric. Stitch the side seams together leaving the zipper opening unstitched and gather the waistline.
2.Attach the lining to your finished skirt before sewing it to the bodice. Treat the skirt and lining as one when attaching it to the bodice and setting the zipper in.
3.Hem the lining slightly higher than the skirt.


pauline-sewing-pattern
8 comments
0 FacebookTwitterPinterestEmail
I guess you’re looking forward to finish your Camí dress, no? Well, with today’s step, it’s going to be almost done and you’ll be able to try it and see the overall look and fit.
We are going to sew the pockets, gather the skirt and attach it to the bodice. I don’t know about you, but for me, the perfect garment (whether it is a dress, a skirt or a jacket for example) has to have pockets. They are to practical and it’s always a cute detail to add.
DRAW THE SKIRT PIECES
1.Following the instructions, draw the 2 skirts pieces and mark the zipper opening and the pocket start and end.
If you wish to make a circle skirt, there will be a tutorial on how to draw your own circle skirt pattern on Wednesday 9th.
STITCH THE POCKETS
 cami-sew-along-sewing-pockets-attaching-skirt-pattern-1
cami-sew-along-sewing-pockets-attaching-skirt-pattern-2
1.Match the pocket marks to the skirt marks and pin right sides together. Stitch with a 1 cm (3/8″) seam allowance.
cami-sew-along-sewing-pockets-attaching-skirt-pattern-32.Fold the pocket over and press the seam allowances toward the pocket.
Repeat with the other pocket on the opposite side and the two other pockets on the other skirt piece.
STITCH THE SKIRT PIECES TOGETHER


cami-sew-along-sewing-pockets-attaching-skirt-pattern-41.On the right side, match the seams of the two skirt pieces together all around the pockets, with right sides together and pin.

cami-sew-along-sewing-pockets-attaching-skirt-pattern-52.Stitch, pivoting at the pocket angle.

cami-sew-along-sewing-pockets-attaching-skirt-pattern-63. If you insert a regular zipper on the left side (that’s what I will do), match the seams, pin and start stitching from the zipper mark to the hem.
If you are inserting an invisible zipper, it will be easier first to gather the skirt, attach it to the bodice, set the zipper and then close the side seam.
cami-sew-along-sewing-pockets-attaching-skirt-pattern-7
4.Finissez les marges et repassez les poches vers le devant de la jupe.

GATHERING THE SKIRT

cami-sew-along-sewing-pockets-attaching-skirt-pattern-8
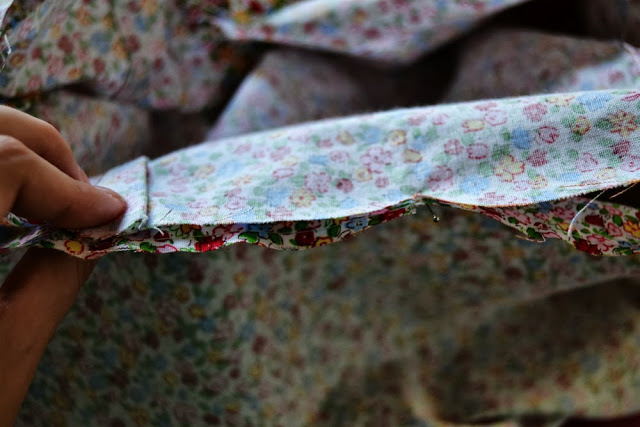
1.On the skirt waist seam, baste 3 lines of stitches at 1,5 cm, 1 cm and 0,5 cm from the egde (5/8″, 3/8″ and 1/4″).

cami-sew-along-sewing-pockets-attaching-skirt-pattern-9

2.Tie the bobbin threads (the ones at the bottom) together at both end. You will pull them to gather the skirt volume.
cami-sew-along-sewing-pockets-attaching-skirt-pattern-10cami-sew-along-sewing-pockets-attaching-skirt-pattern-11
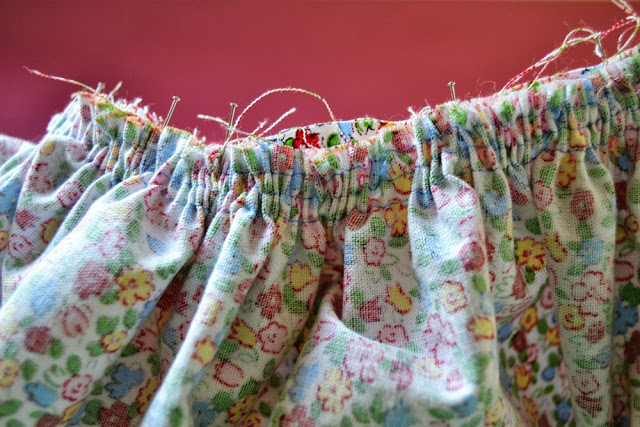
3.Match the skirt side openings, front and back center, side seam to the corresponding bodice marks, with right sides together and pin. Gather the skirt between the marks until it fits the bodice.
When it does, stitch and finish the seam allowances (I like to bind the seam with bias).
There you go! On Wednesday we’ll see how to draw a circle skirt and how to add a lining in case your fabric needs it. Now go try your almost finished dress! And the whole Sew-Along posts are here.
pauline-sewing-pattern


4 comments
0 FacebookTwitterPinterestEmail
When I went sewing machine shopping, I knew that one of the main feature I wanted was automatic buttonholes. I love that feature!
So let’s make the buttonholes and sew the buttons on our dress today!
The buttonholes/buttons on the pictures are inversed: buttonholes should be on the right side and buttons on the left. I had to make the change because of the way the collar way standing. Please follow the instructions and sorry for the confusion.
BUTTONHOLES
cami-sew-along-buttonholes-pattern-1
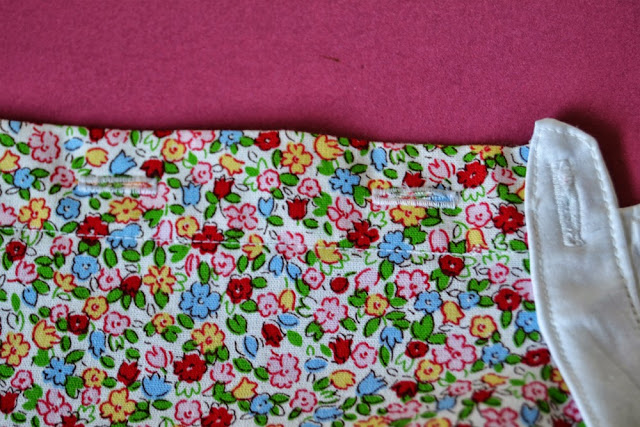
1.Mark the buttonholes on the right side and the buttons on the left side. Mark the buttonhole and button on the under collar as well.

cami-sew-along-buttonholes-pattern-22.Stitch the buttonholes on the right side. Sew the buttons on the left side.
cami-sew-along-buttonholes-pattern-3cami-sew-along-buttonholes-pattern-4

3.Open the buttonholes with your seam ripper. Be careful not the cut the threads!

cami-sew-along-buttonholes-pattern-5cami-sew-along-buttonholes-pattern-6

4.Overlap the buttonhole placket over the button placket and baste the edge. The bodice is now opened only on the left side (where we are going to insert the zipper).
Have a great week end (I’ll be having a great one at a wedding!) and see you on Monday for sewing the skirt up and attaching it to the bodice!
pauline-sewing-pattern
6 comments
0 FacebookTwitterPinterestEmail

When I first designed the Camí dress pattern, I spent a long time deciding whether I should make a classic shirt collar or a cute peter pan one. Well, you which one won but I kept the peter pan collar as a backup idea. I am going to show you how to draw your own peter pan collar for the Camí dress (or any other dress or blouse). If you don’t feel confident enough for the shirt collar or want to go for a super cute look, that’s a great alternative!

Pendant la conception du patron de la robe Camí, j’ai longtemps hésité entre faire un col chemisier classique et un col claudine. Bon, vous savez lequel l’a remporté mais j’ai quand même gardé l’idée du col claudine dans un coin de ma tête, juste au cas où. Je vais donc vous montrer comment dessiner votre propre co claudine pour la robe Camí (ou toute autre robe ou blouse). Si vous ne vous sentez pas prête à attaquer le col chemisier ou que vous voulez une robe au style encore plus féminin, voilà la parfaite alternative!

cami-sew-along-collar-variation-peter-pan-collar-1cami-sew-along-collar-variation-peter-pan-collar-2

1. Take your front and back bodice pattern pieces. On the bodice front, decide where you want your collar to arrive: cross over the button placket (first picture – fold the first part of the placket), join at the middle of the button placket (no picture – fold the placket on the button line), before the button placket (second picture – fold the whole placket). Mark the seam allowances at the shoulder (1,5 cm or 5/8″).

cami-sew-along-collar-variation-peter-pan-collar-3
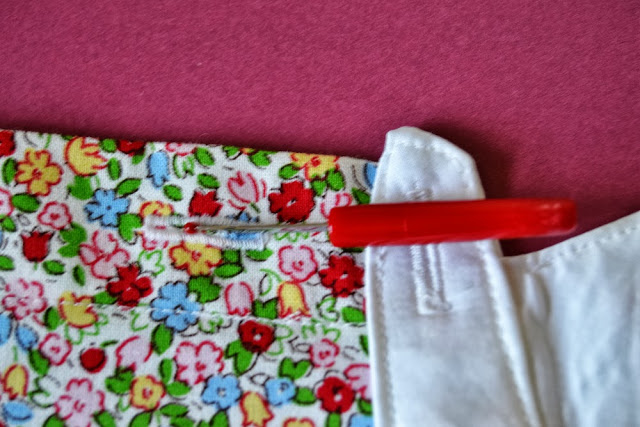
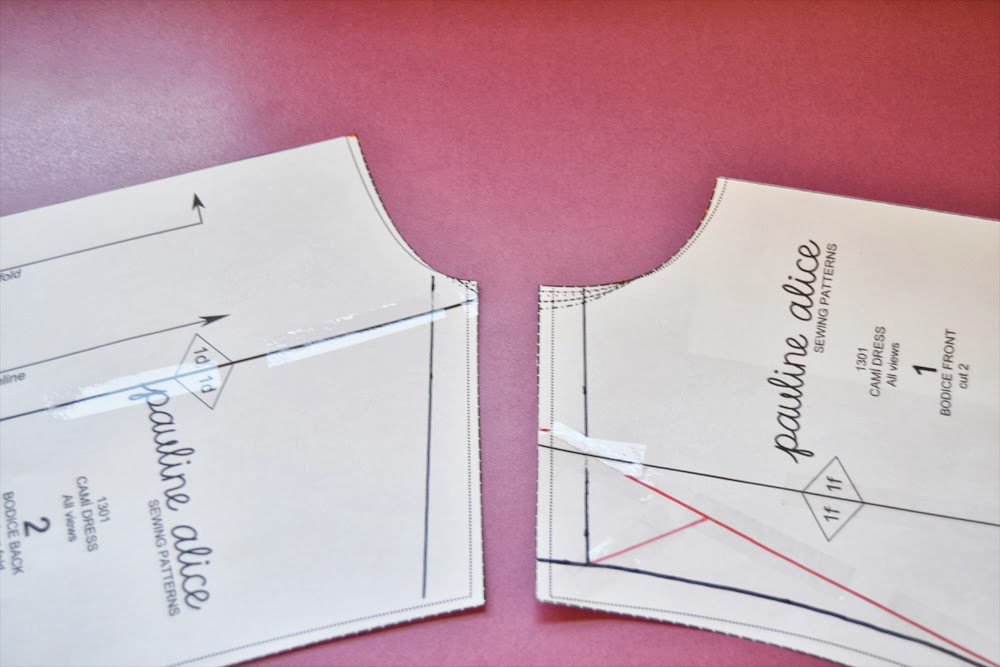
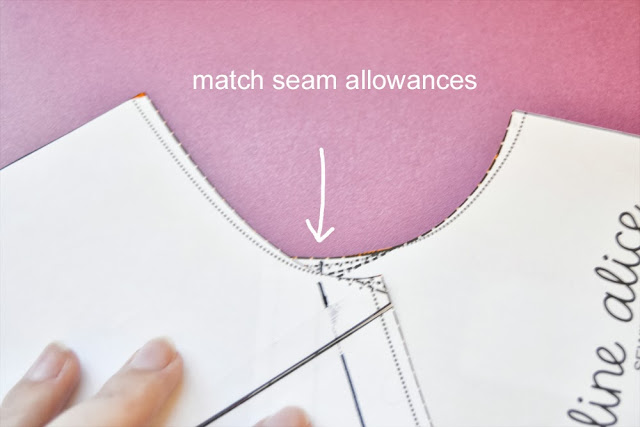
2. Match the seam allowances at the neckline.
cami-sew-along-collar-variation-peter-pan-collar-43. On the other side (armhole), overlap the shoulder seam. The more you overlap, the more the collar is going to stand up. A good measure would be about 2 or 3 cm (6/8″ or 9/8″).

cami-sew-along-collar-variation-peter-pan-collar-5

4. Now you’ll need to paste the pattern pieces together so they don’t move and get some pattern paper. Trace the neckline.

cami-sew-along-collar-variation-peter-pan-collar-6
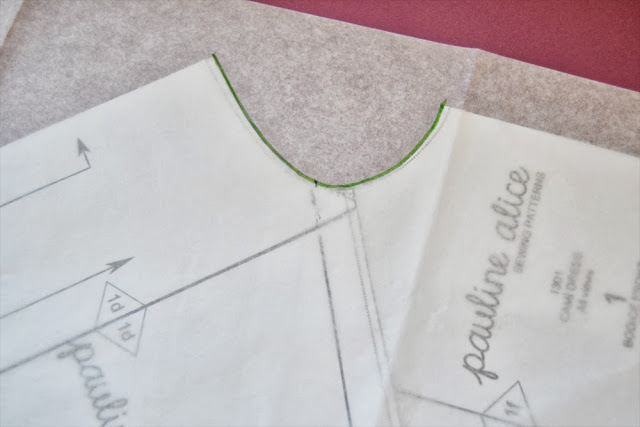
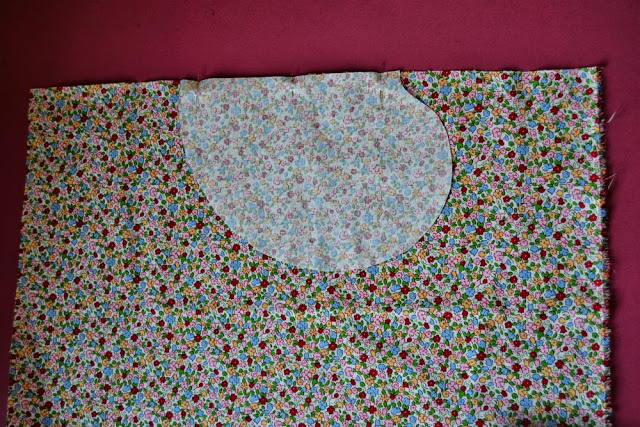
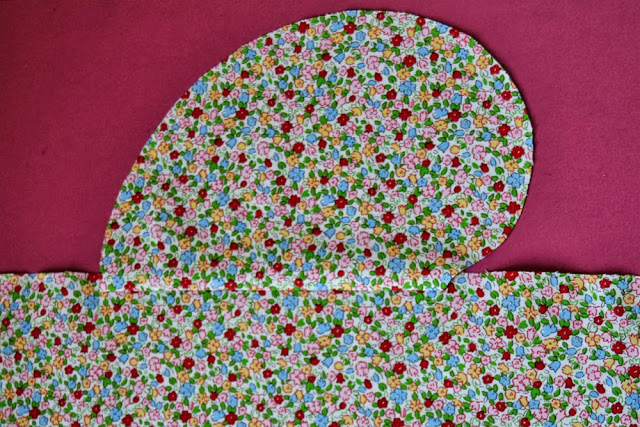
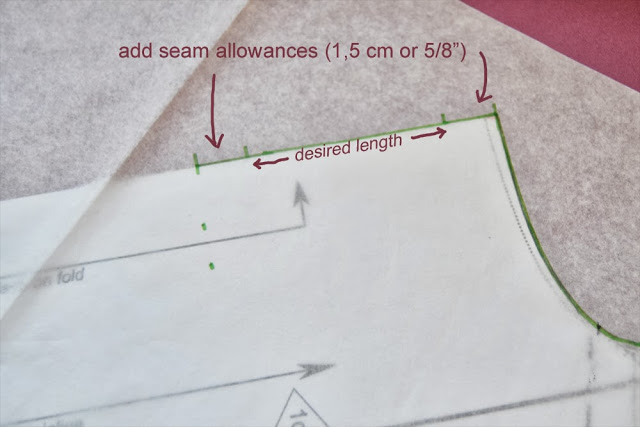
5. As my back bodice pattern is cut on the fold, I am going to draw a full collar on the back. The peter pan collar pattern will be cut on the fold as well. Decide how long you want it to be and add 3 cm or 4/5″ (1,5 cm or 5/8″ seams at the top and bottom). Start tracing the total length all around the neckline.

cami-sew-along-collar-variation-peter-pan-collar-7
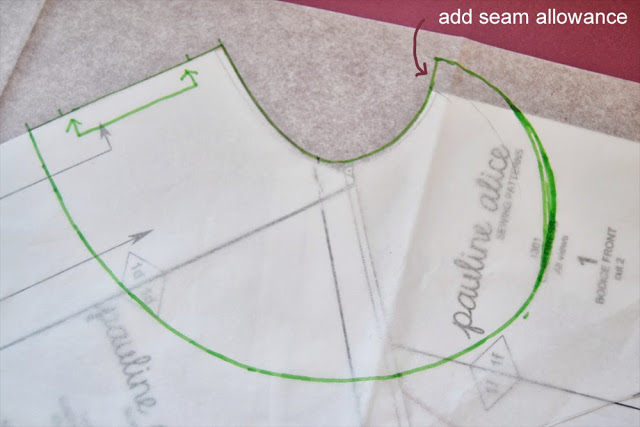
6. Once you arrive at the front seam, add a 1,5 cm or 5/8″ seam allowance. Finish the collar with a nice curve.

7. Cut two pieces of this pattern on the fold in the fabric and interfacing. Interface and stitch the exterior seam with right sides together. Clip the seam allowances or cut close to the edge, turn inside out and press flat. Ready to attach to your neckline!

pauline-sewing-pattern

2 comments
0 FacebookTwitterPinterestEmail