
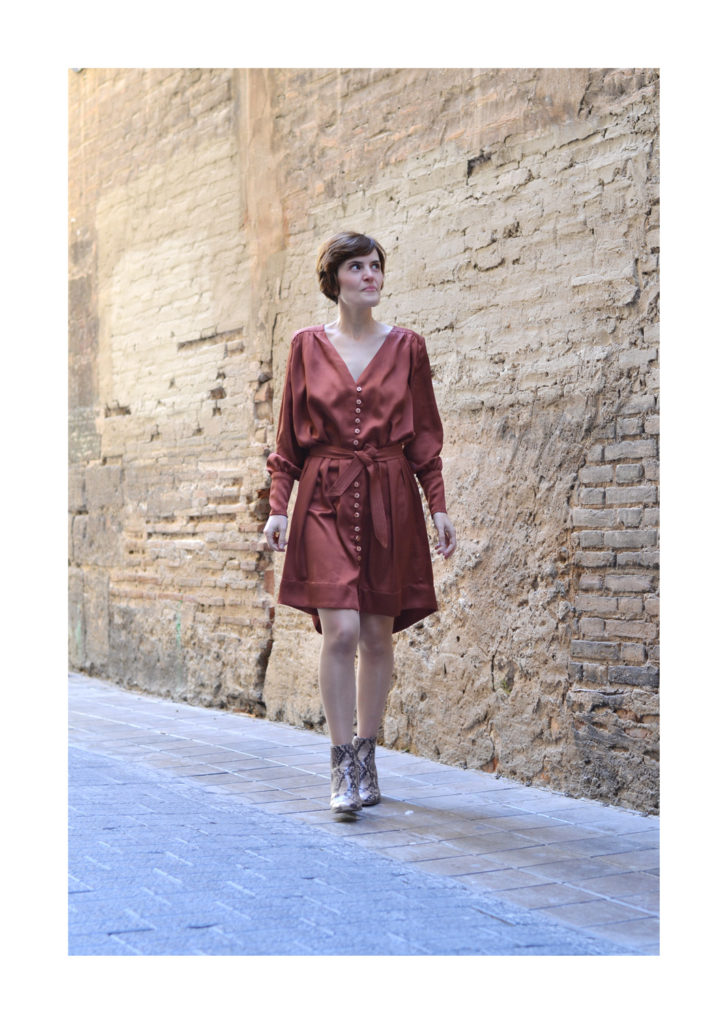
You might have seen my stories before Christmas and how I was sewing a special dress for the holidays. I didn’t have time to show it to you yet. I’ve wanted to make a dress from the Reina shirt pattern for ever (there’s a dress in that style in my inspirations photos). And what a better time to try and make it than the holidays?
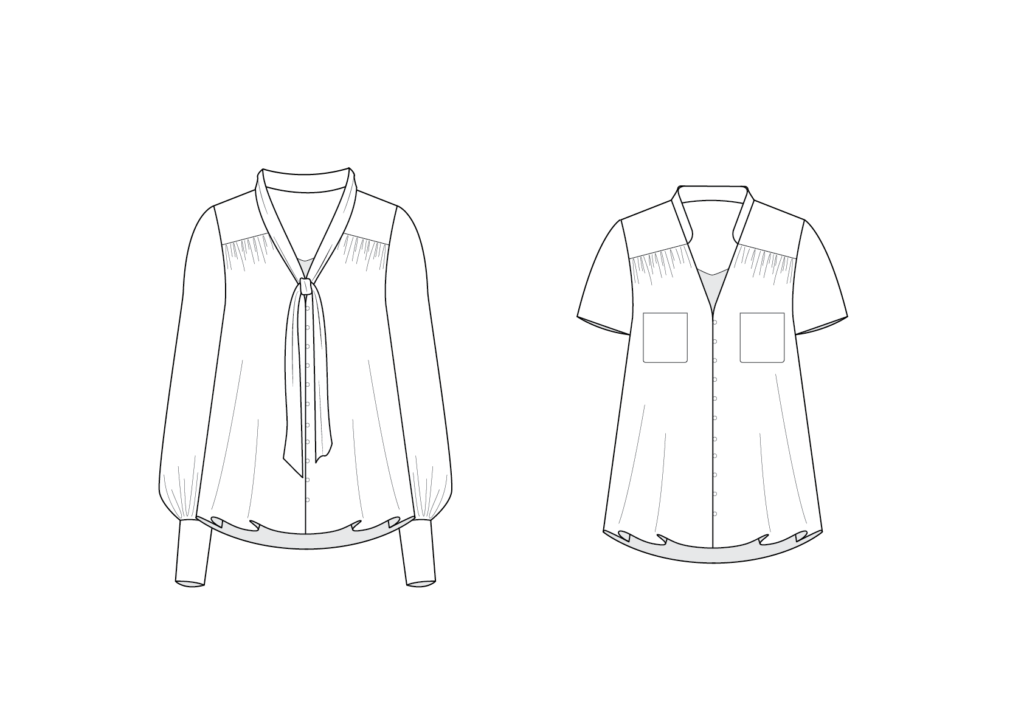
If you don’t know Reina, it’s a blouse pattern inspired by victorian style. It has a long collar that ties, wide sleeves gathered into a high buttoned cuff and it buttons on the front with nice little fabric loops. You can also make a more casual version with short sleeves and a standing collar.
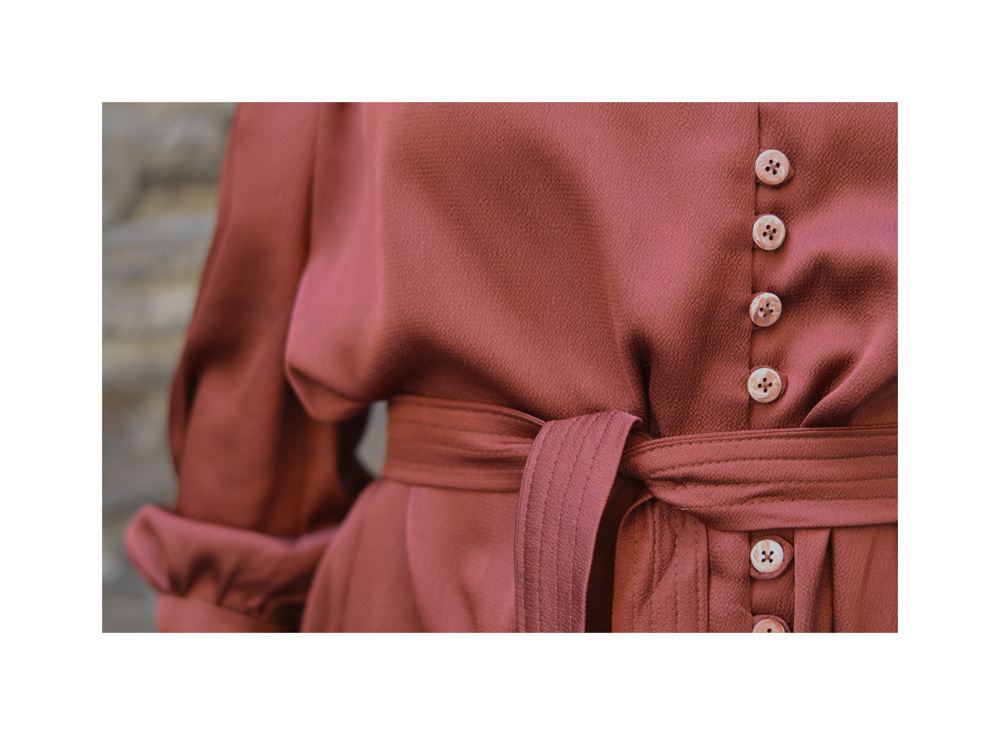
I found a beautiful textured crepe satin, in a sienna colour I’ve been obsessed with lately, in my local fabric shop. I started with View A, the long sleeves and tie collar version of the Reina pattern, and lengthened the front and back pieces to the desired length. I added about 35 cm so it would hit just above the knee. I also finished the bottom hem differently: instead of a simple hem, I made a facing to add some weight to the dress. For a simpler look, I omitted the collar and made a self-fabric belt with topstitching to adjust the dress at the waist. Overall, I’m pretty happy with the results! It was a nice dress to wear on New Year’s Eve!
Here are the instructions if you want to make a Reina dress :
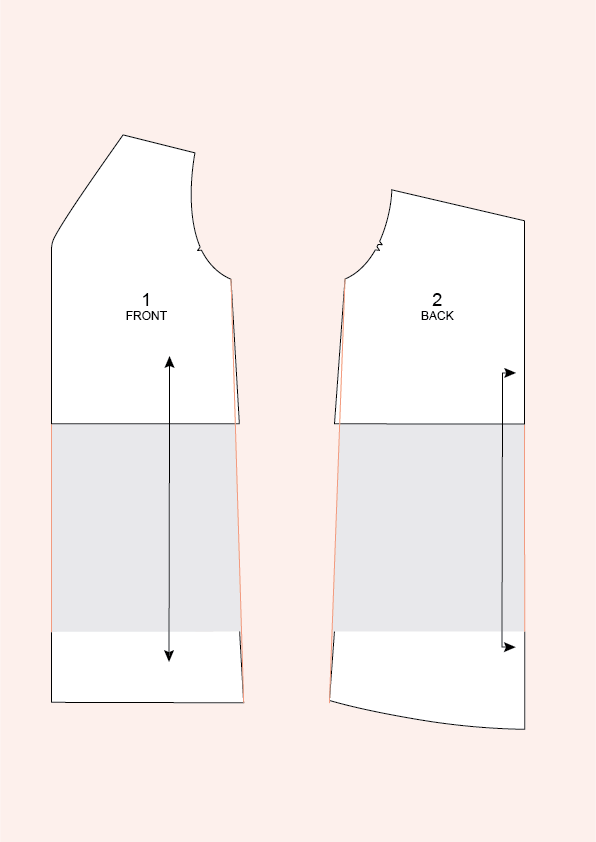 1/ Cut the front and back pieces along the cutting line. On a big piece of paper, place the pieces about 25 to 35 cm apart (or more if you want a longer dress). Draw the dress shape: trace a line from the neckline base to the bottom edge on the front and back, then from the armscye to the bottom edge.
—
 2/ Once the front and back pieces are modified, trace the hem facing at the bottom of the pieces at 5 to 10 cm above the hemline. Cut on the line and add the 5/8” seam allowances to the front and back pieces as well as the facings. Cut the front facing 4 times and the back facing twice on the fold.
—
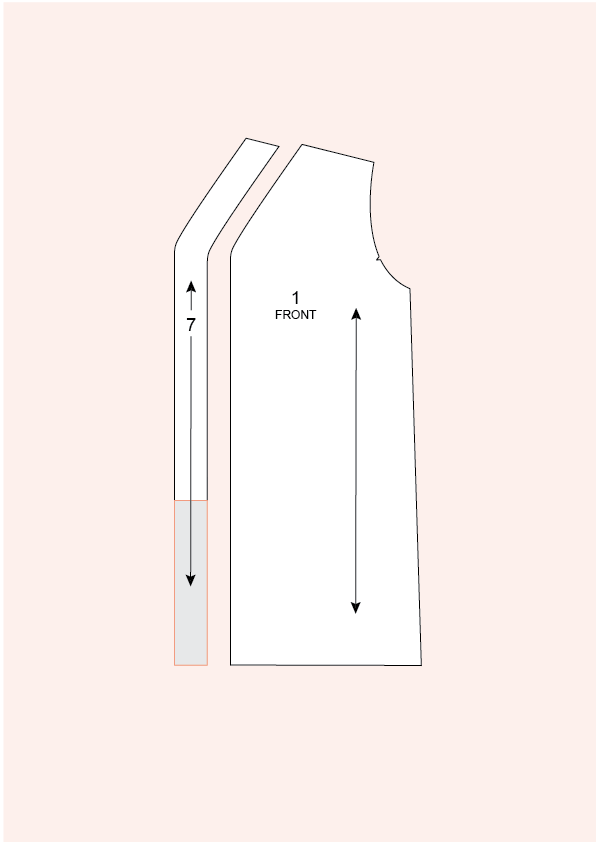
3/ Lengthen the front facing (7) like the front piece (1).
—
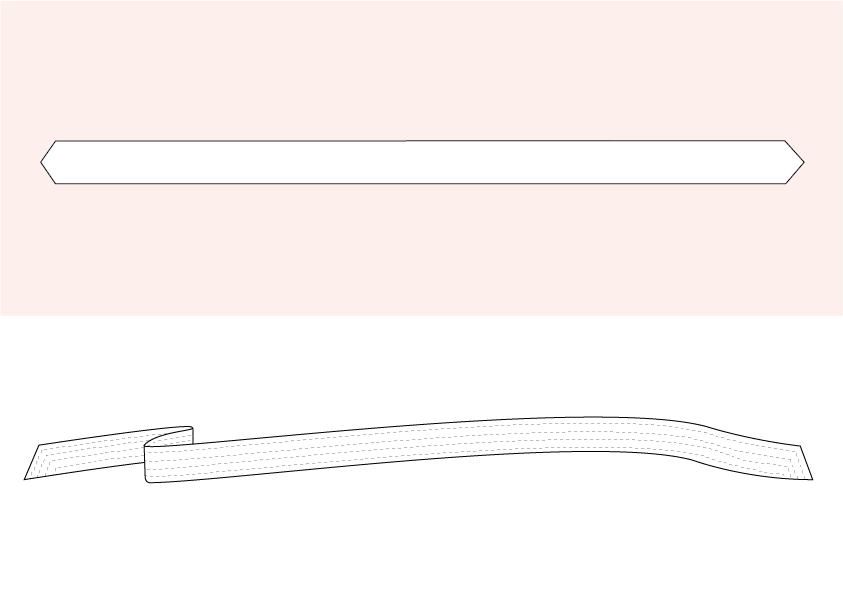
4/ Make a 4 cm (1 ½”) wide belt – the length will depend on your fabric width. Once it’s sewn, you can topstitch it several times.
—
That’s how you change easily a Reina shirt into a Reina dress. I think I’ll do something similar with the Vera shirt pattern (Céline from @aiguille.coupon.ciseaux made it and it’s great!). When I design a new pattern, I like to think of all the modifications that can be done, whether I include them in the pattern or add them later as tutorials like this one. Playing on length (blouse into dress or dress into blouse), adding or removing some elements (collar, sleeves, belt), it allows you to really take advantage of a single pattern. I don’t like to make twice the same clothes, so instead of make various time the same pattern, I like to make a variation of the same. I think the next pattern I will transform is the Vera shirt and I can also see a skirt based on the Romero trousers. What about you ? Do you like to modify your favourite patterns ? Which ones ?
![]()
Here’s a little anecdote: as I wanted to wear this dress for New Year’s Eve, I had a very short time to sew and I decided to “forget” the washing step before cutting my fabric. “Bad Pauline!” I know that’s what you all want to say. And normally, I would say you’re right. But in this particular case, it was “good Pauline”. On New Year’s Eve, the crepe fabric was behaving perfectly, with a beautiful drape. But while taking the pictures afew days later, and after washing the dress, imagine my surprise when it clinged to me everywhere. I think that the special products they put on new fabric prevented the static electricity to make this crepe fabric being glued to me ?.
So for once, not washing the fabric prior to sewing was a good thing!
1 comment
I love the amount of buttons you used on this! Looks so great! For some reason, despite my distaste for doing buttonholes, I love putting lots of buttons onto my garments.