7K
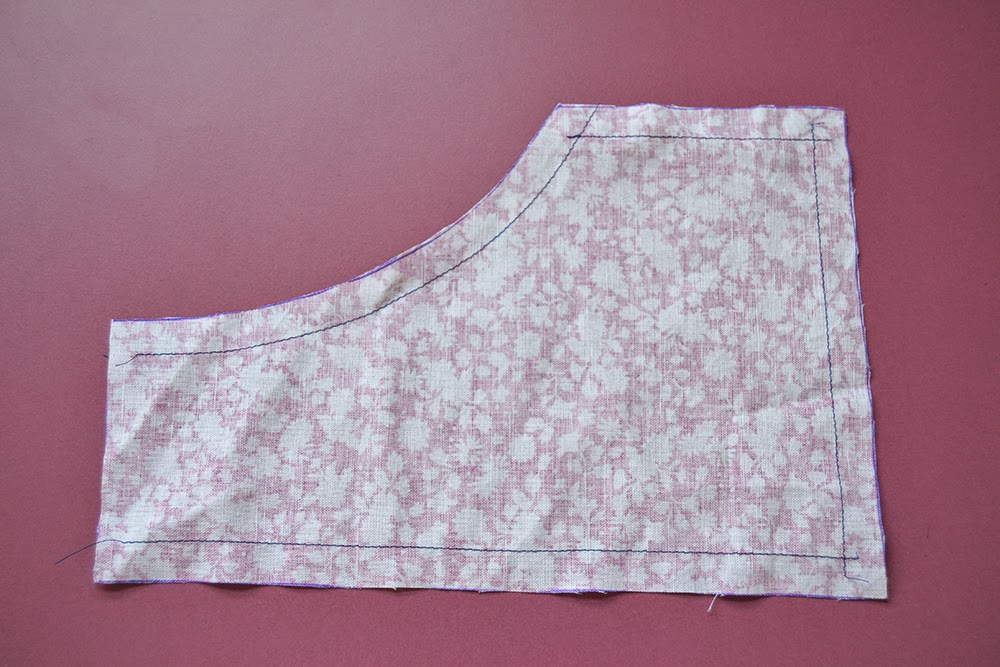
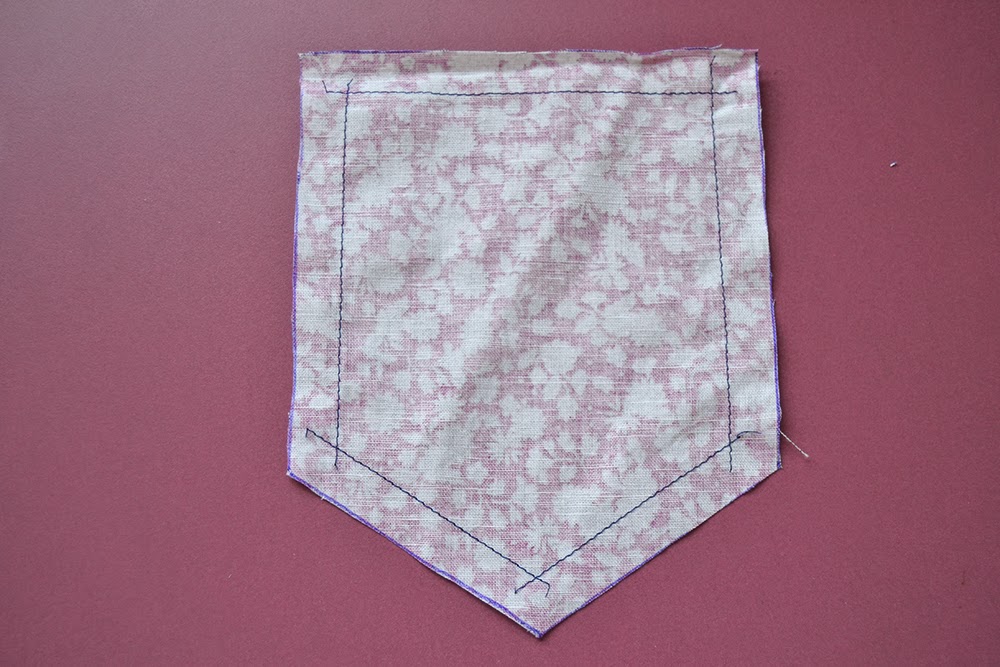
 To help you fold the seam allowances in, staystitch all around the front pocket just inside the seam allowance (about 1,2 cm from the edge or 1/2″). You don’t need to staystitch the top edge of the front pocket.
Clip the seam allowance of pocket opening: that’s the curved edge. Be careful not to cut the stitches!
Fold the seam allowance to the inside and press.
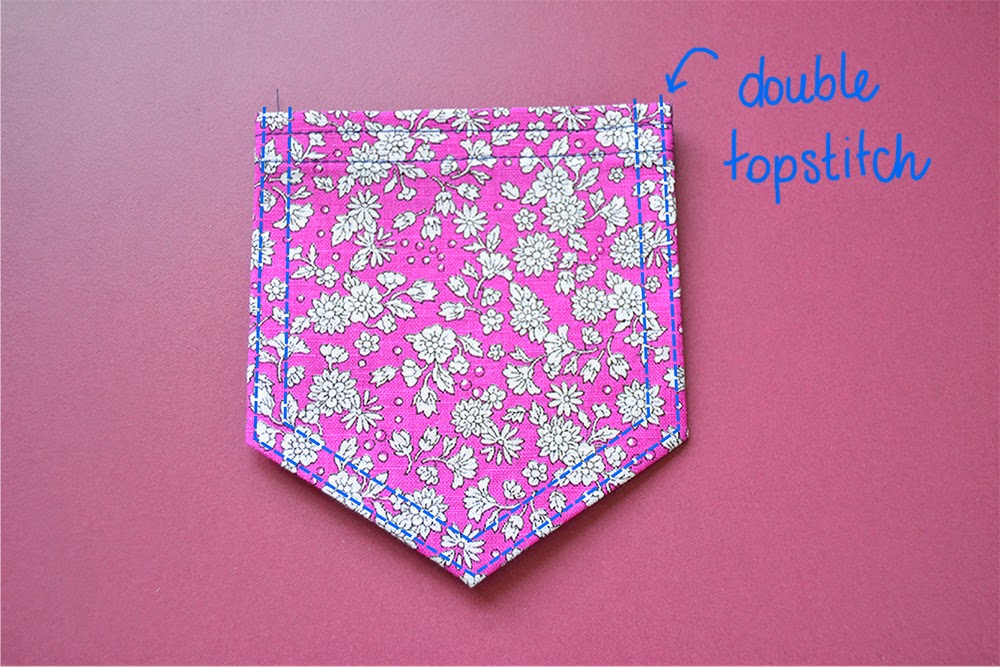
Stitch two rows of topstitching along the curved edge. Here is how I like to sew my topstitching so that the distance between the rows is always the same:
I like to stitch the first row about 3 mm (1/8″) from the edge. Then I like to place the edge of the needle plate against the first stitching line and follow it (that’s roughly 8 mm or 5/16″).
Fold the sides and bottom seam allowances along the staystitch. Make sure the staystitching line is on the inside of the seam allowances.
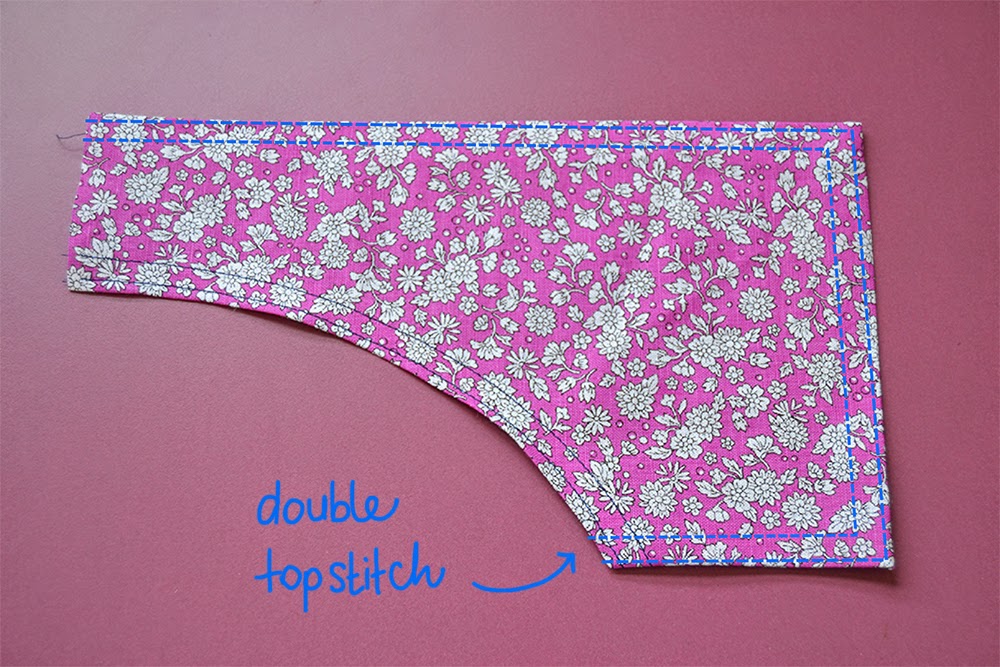
Place the pocket on the dungarees front piece, matching the marks and pin it in place. The top edges of the pocket and the front piece should match. Then stitch two rows of topstitching along the sides and bottom, leaving the curved and top edges open.
Staystitch all around the front pocket just inside the seam allowance (about 1,2 cm from the edge or 1/2″).
Turn the top edge along the staystitch, press. Fold again and stitch two rows of topstitching.
Fold the sides and bottom seam allowances along the staystitch. Make sure the staystitching line is on the inside of the seam allowances. Press.
To help you fold the seam allowances in, staystitch all around the front pocket just inside the seam allowance (about 1,2 cm from the edge or 1/2″). You don’t need to staystitch the top edge of the front pocket.
Clip the seam allowance of pocket opening: that’s the curved edge. Be careful not to cut the stitches!
Fold the seam allowance to the inside and press.
Stitch two rows of topstitching along the curved edge. Here is how I like to sew my topstitching so that the distance between the rows is always the same:
I like to stitch the first row about 3 mm (1/8″) from the edge. Then I like to place the edge of the needle plate against the first stitching line and follow it (that’s roughly 8 mm or 5/16″).
Fold the sides and bottom seam allowances along the staystitch. Make sure the staystitching line is on the inside of the seam allowances.
Place the pocket on the dungarees front piece, matching the marks and pin it in place. The top edges of the pocket and the front piece should match. Then stitch two rows of topstitching along the sides and bottom, leaving the curved and top edges open.
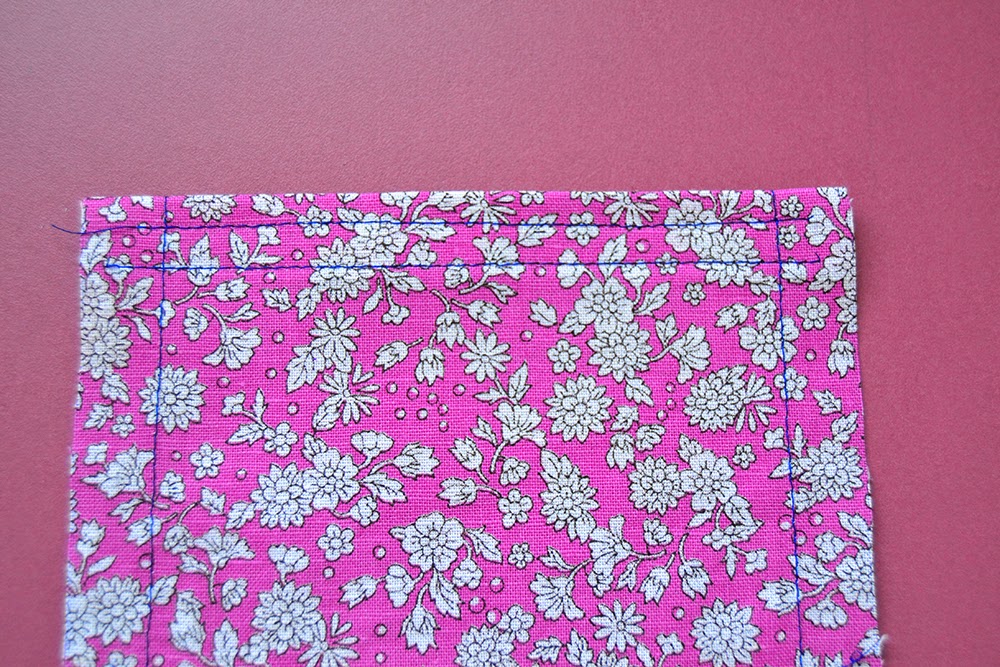
Staystitch all around the front pocket just inside the seam allowance (about 1,2 cm from the edge or 1/2″).
Turn the top edge along the staystitch, press. Fold again and stitch two rows of topstitching.
Fold the sides and bottom seam allowances along the staystitch. Make sure the staystitching line is on the inside of the seam allowances. Press.
 Place the pocket on the dungarees back piece, matching the marks and pin it in place. Then stitch two rows of topstitching along the sides and bottom, leaving the top edge open.

I’m not going to make a full Sew-Along for the Turia dungarees pattern but rather a series of small tutorials on the most important features of the pattern construction. The pattern construction in itself is quite simple, apart from the pockets and the straps, there are only 3 main pieces: the bodice, the font and the back. The most complicated step is certainly how to make a flat-fell seam, as it may well be a new technique for you. Don’t worry, it’s easy and we’ll cover it on Friday!
But let’s start today with the patch pockets! Because dungarees are a casual and most importantly, a practical garment (yes, yes, even for going to the ladies room, it just takes practice!), pockets are an essential element.
I’m going to show you how to sew easily the front and back patch pockets:
FRONT POCKETS
 To help you fold the seam allowances in, staystitch all around the front pocket just inside the seam allowance (about 1,2 cm from the edge or 1/2″). You don’t need to staystitch the top edge of the front pocket.
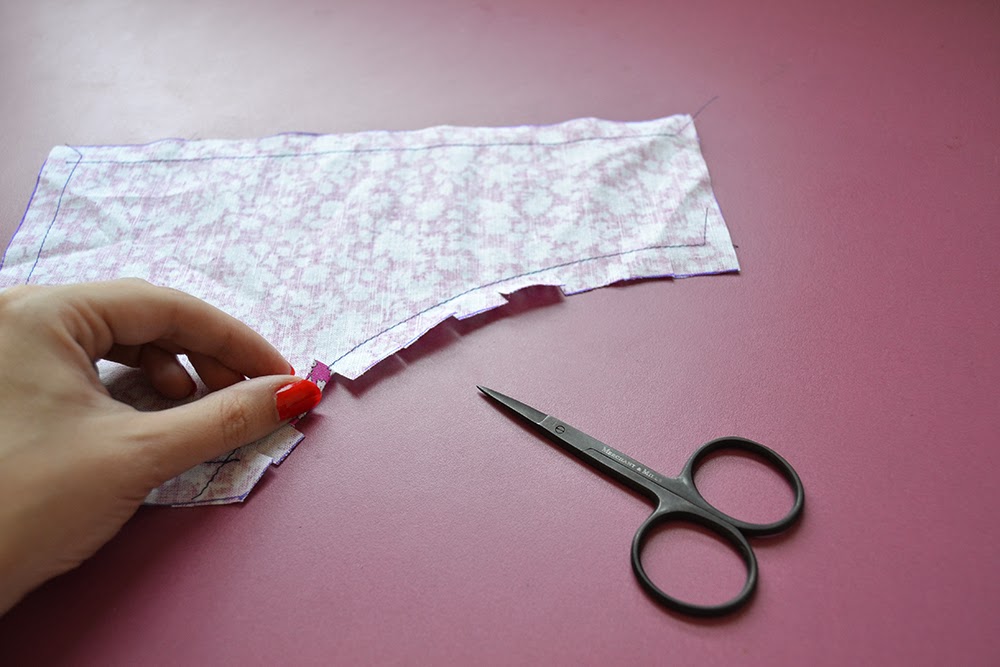 Clip the seam allowance of pocket opening: that’s the curved edge. Be careful not to cut the stitches!
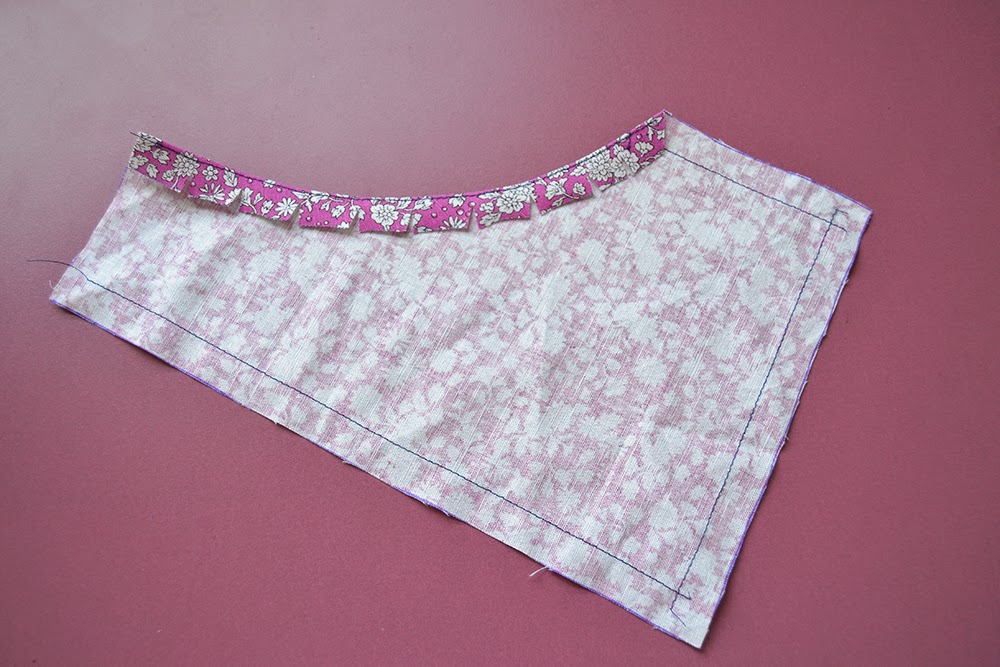 Fold the seam allowance to the inside and press.
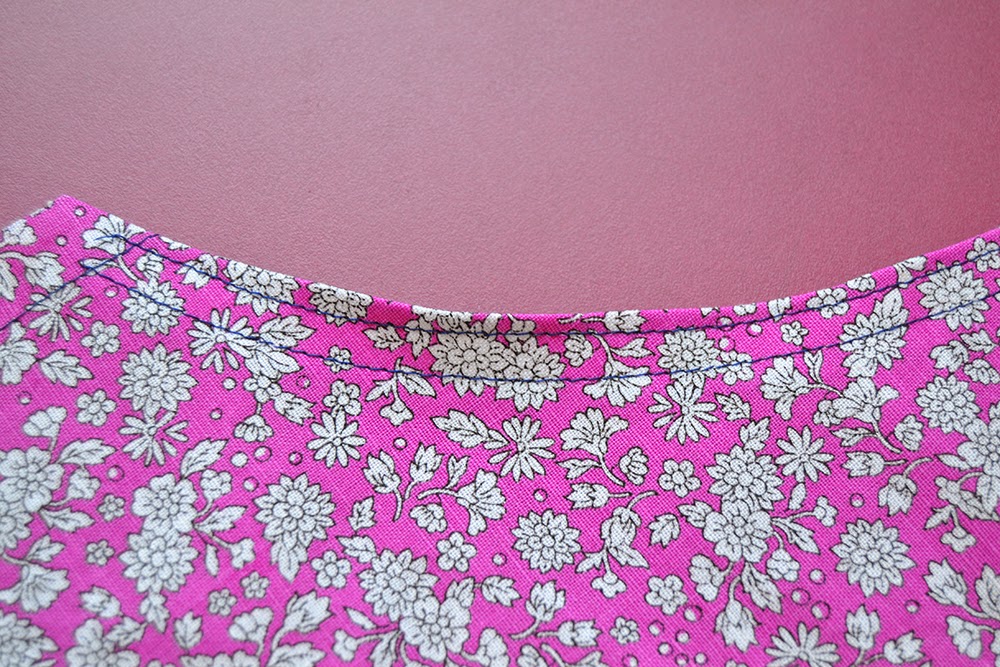 Stitch two rows of topstitching along the curved edge. Here is how I like to sew my topstitching so that the distance between the rows is always the same:
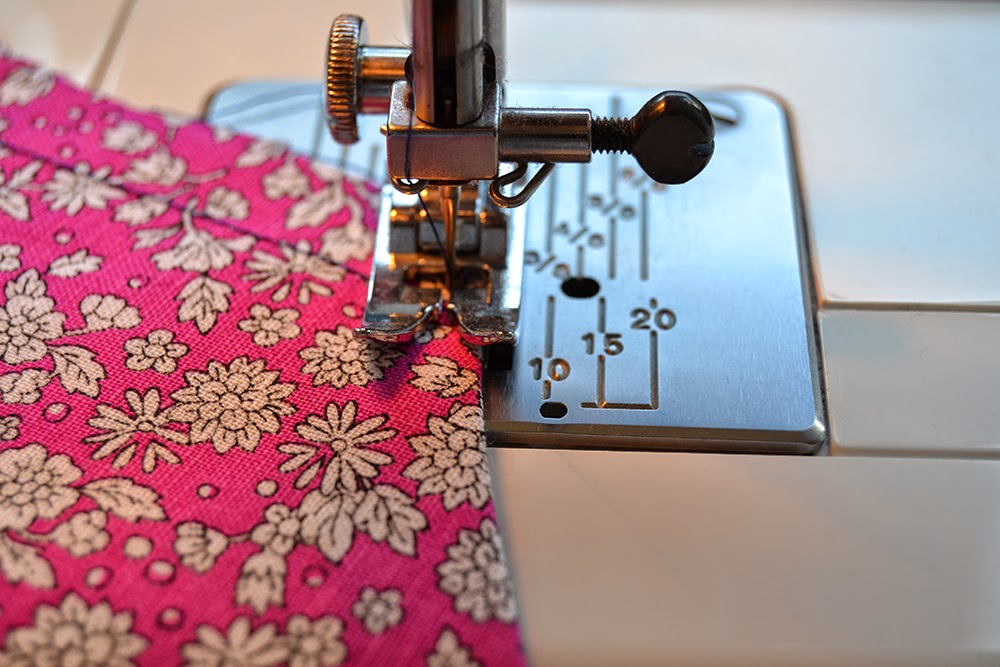
 I like to stitch the first row about 3 mm (1/8″) from the edge. Then I like to place the edge of the needle plate against the first stitching line and follow it (that’s roughly 8 mm or 5/16″).
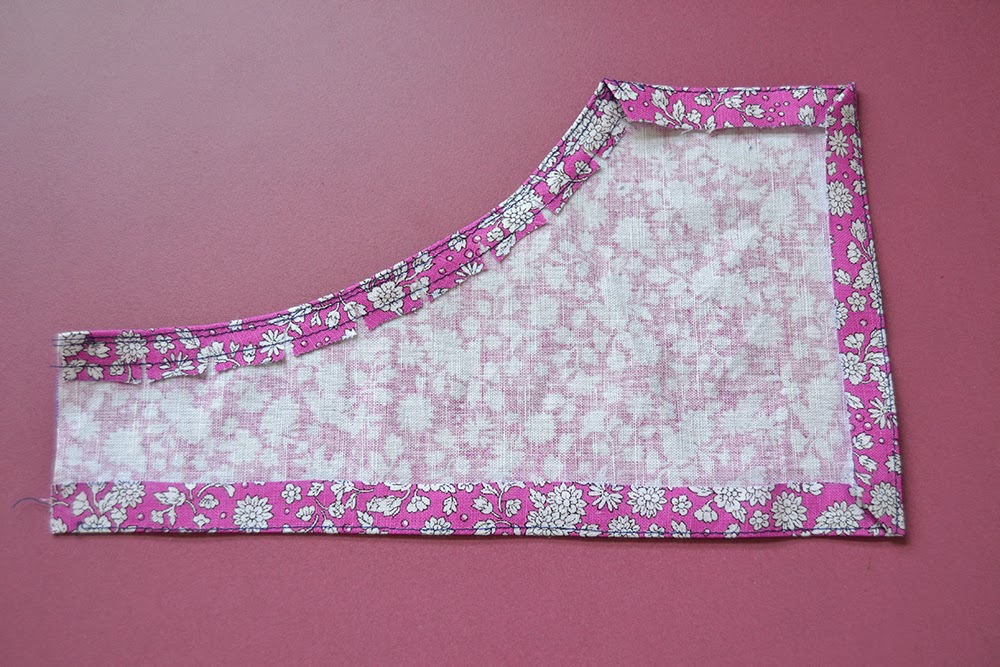 Fold the sides and bottom seam allowances along the staystitch. Make sure the staystitching line is on the inside of the seam allowances.
Press.
 Place the pocket on the dungarees front piece, matching the marks and pin it in place. The top edges of the pocket and the front piece should match. Then stitch two rows of topstitching along the sides and bottom, leaving the curved and top edges open.
BACK POCKETS
 Staystitch all around the front pocket just inside the seam allowance (about 1,2 cm from the edge or 1/2″).
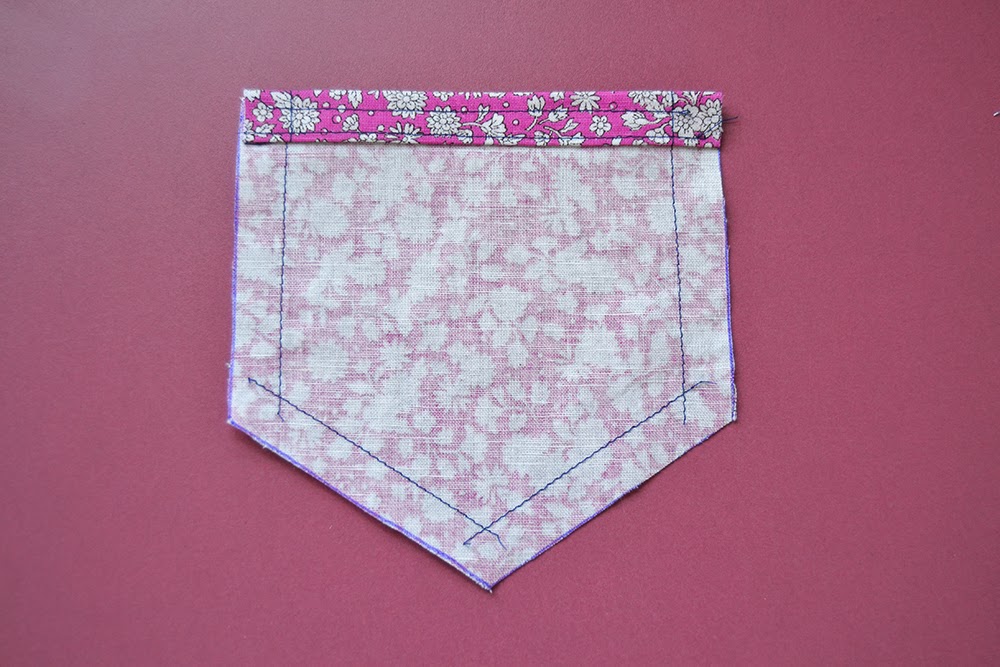
 Turn the top edge along the staystitch, press. Fold again and stitch two rows of topstitching.
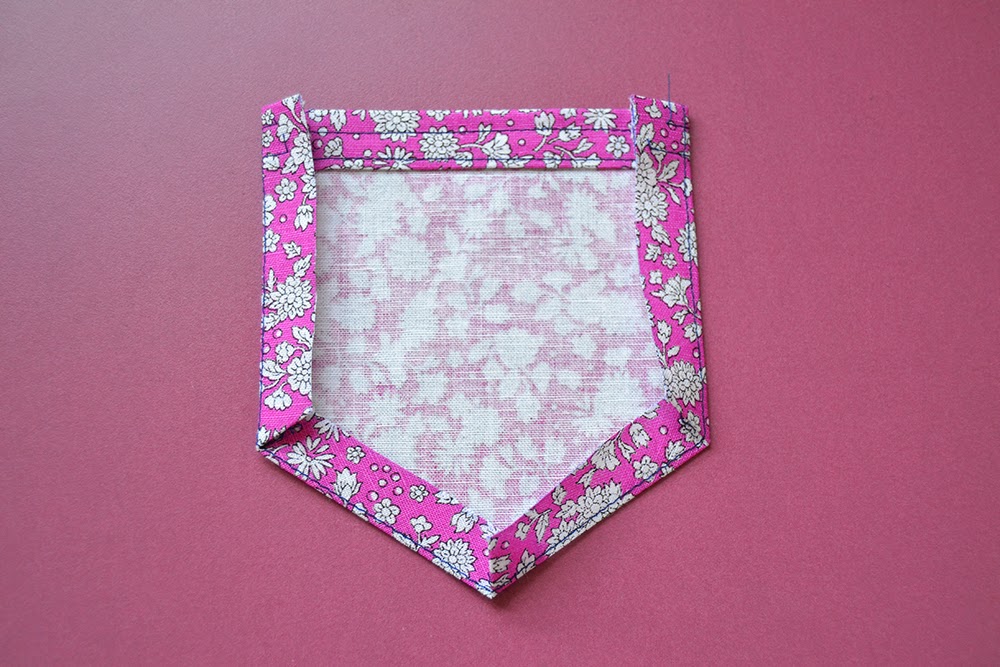 Fold the sides and bottom seam allowances along the staystitch. Make sure the staystitching line is on the inside of the seam allowances. Press.Place the pocket on the dungarees back piece, matching the marks and pin it in place. Then stitch two rows of topstitching along the sides and bottom, leaving the top edge open.
On Friday, we’ll see how to make the flat-fell seam and next week, I’ll explain how to change the pattern into a pinafore dress very easily as quite a lot were interested in this variation. Have a great week!

10 comments
Hi Pauline, I've almost finished my dungarees (just need to hem them and some finishing), but wanted to let you know that I love them! I'll finish them up this weekend and I can't wait to wear them out. The pinafore variation sounds great, I'll definitely be making that next! A pinafore in corduroy would be so cute over tights in winter.
I'm looking forward to see them! Yes, corduroy would be so great for a fall/winter pinafore dress. Just be careful that it's not too heavy for the flat-fell seam!
So excited to make a pinafore!!! Thanks so much for the printed patterns. So super sweet of you.
You're welcome Kirsty! So you're going to make the pinafore version as well? Great!!!
Bonjour Pauline, Je terminerai je pense ma Turia dungarees version robe, mais je ne connaissais pas cette couture rabattue. Merci pour ce tuto, j'ai fais la couture anglaise à la place.
Merci pour tes super patrons
Adeline
La couture anglaise est une bonne alternative si ton tissu est assez fin. Il existe aussi une fausse couture rabattue mais les marges sont visibles sur l'intérieur du vêtement. Avec un tissu épais comme du velours côtelé, un biais est aussi une bonne idée. Hâte de voir ta version Adeline!
Muy bien explicado. Un tuto sencillo y breve, pero que deja clarísimo como se hace.
¡Gracias María José!
http://www.threadandneedles.fr/projets-couture/41971-turia-dungarees-cote-jupe
Bonjour Pauline, et voilà ma version : modifications : marges avec biais rapporté pour la partie dos jusqu'au début des bretelles, puis pour celles des poches et sur la partie devant, ainsi que l'ourlet.
Superbe version Adeline!!! Bravo pour cette variation jupe, elle est géniale et pleine de peps dans ce joli tissu vitaminé. Merci pour le lien 😉