19.8K
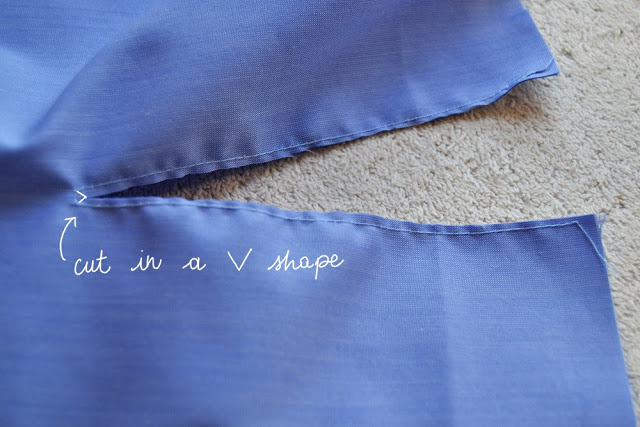
 3. Cut the opening line and finish with a V shape very close to the stitching line.
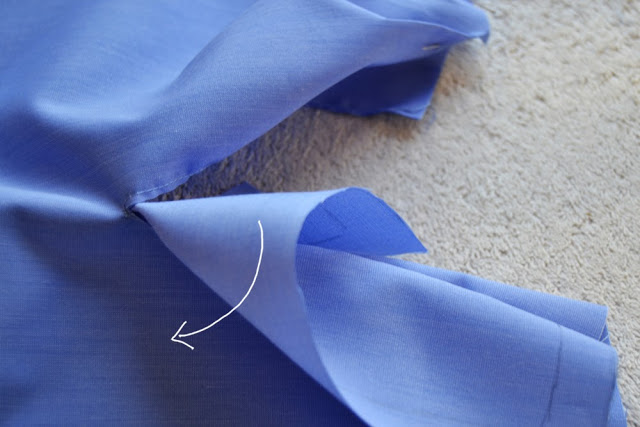
4. Turn the sleeve over and with right side up, flip the placket through the opening. Press open.
9. Now we have folded and pressed the fisrt line, we are going to fold the other one and press it.
10. Place the pointed part over the small one. We are now going to stitch the red line, enclosing the raw edges under the placket.

11. Edgestitch the placket following the red line. Go approx. 2 cm down the cuff opening to enclose the raw edge.
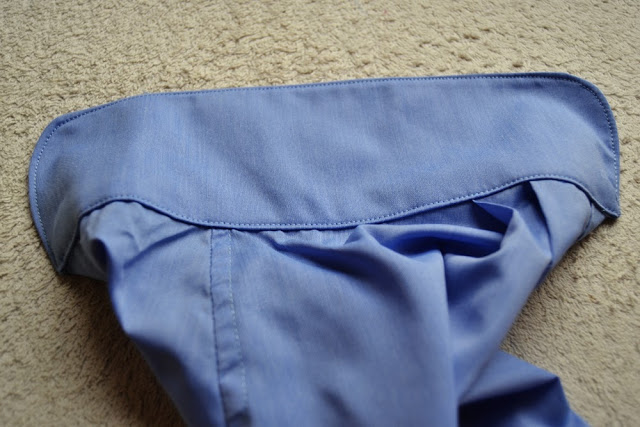
12. The result: nice and tidy! You can now baste your sleeve bottom folds (usually 2).
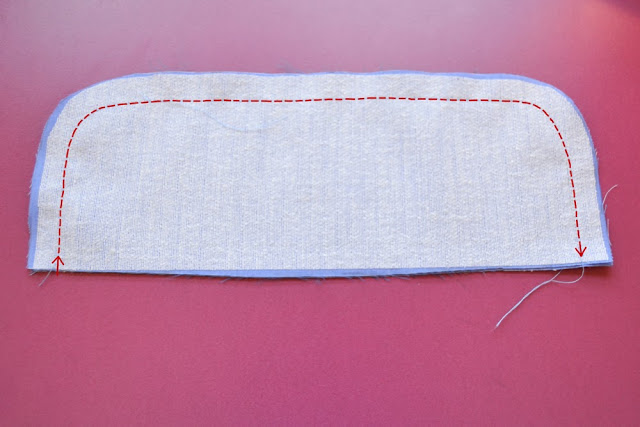
13. Interface your cuff pieces and with right sides together, stitch following the red line. Trim the seam allowances very close to the stitching line. Clip the curve.
16. Fold the seam allowance of the cuff inside, press it and edgestitch all around the cuff. You’re done! The only missing step is sewing the button and buttonhole.

Hello! How would you like to continue the shirt tutorial?
Another step I found difficult when sewing my first shirt was the sleeve placket and the cuff. I wanted it to look nice and tidy like the ones I had from the store but I couldn’t figure out how to make it. And the pattern from Burda I was using didn’t have easy explanations, hem hem 🙂
So after many hours searching the internet, I figured it out. I hope this step-by-step will help you:
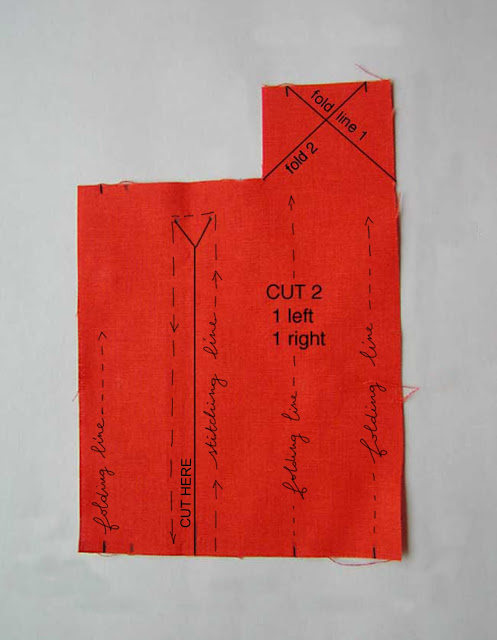 1. Here is what your placket pattern piece should look like more or less. It should come with your shirt pattern but if not, you can find printable templates quite easily.
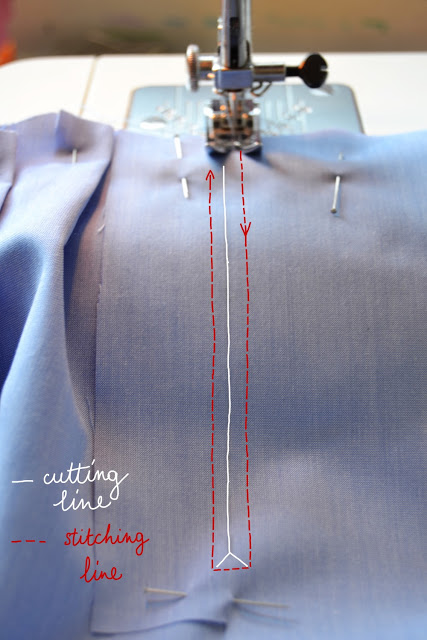
2. Place your placket piece over the sleeve, matching the cutting line marking. Important: both pieces should be with the wrong side facing up toward you!
Stitch the box around the cutting line (follow the red line), pivoting at the angles. It’s better to set your machine on a small stitch length.
 3. Cut the opening line and finish with a V shape very close to the stitching line.
4. Turn the sleeve over and with right side up, flip the placket through the opening. Press open.
 5. Take the small side and fold under along the folding line. Press.
 6. Stitch very close to the folding line.
 7. On the other side, fold the end forming a point. Press.

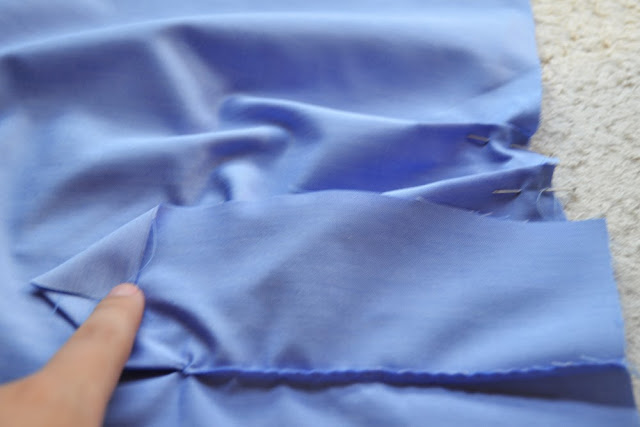
8. Fold along the two folding lines and press.
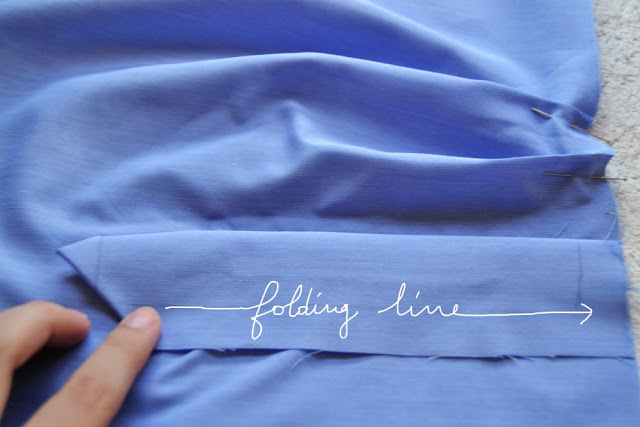 9. Now we have folded and pressed the fisrt line, we are going to fold the other one and press it.
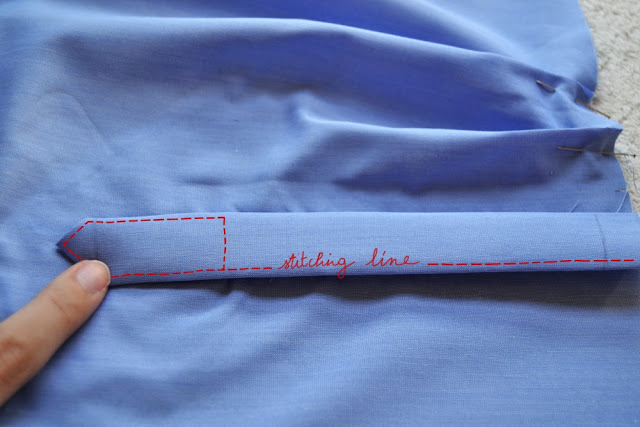 10. Place the pointed part over the small one. We are now going to stitch the red line, enclosing the raw edges under the placket.
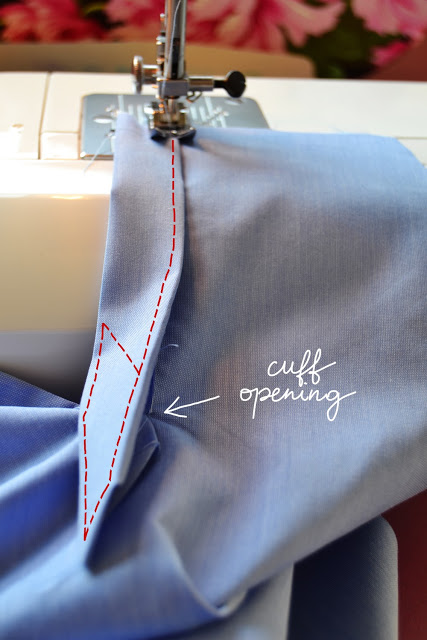
11. Edgestitch the placket following the red line. Go approx. 2 cm down the cuff opening to enclose the raw edge.
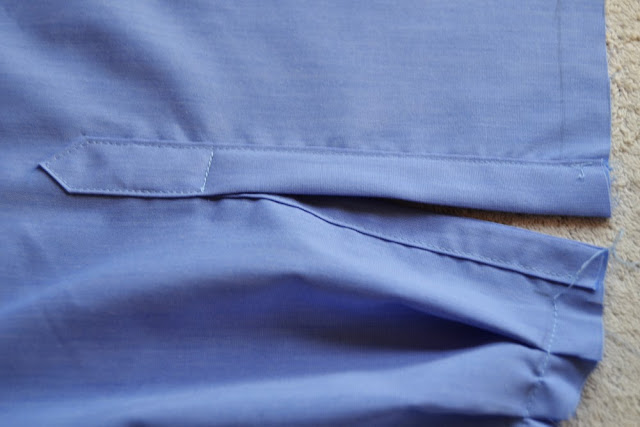
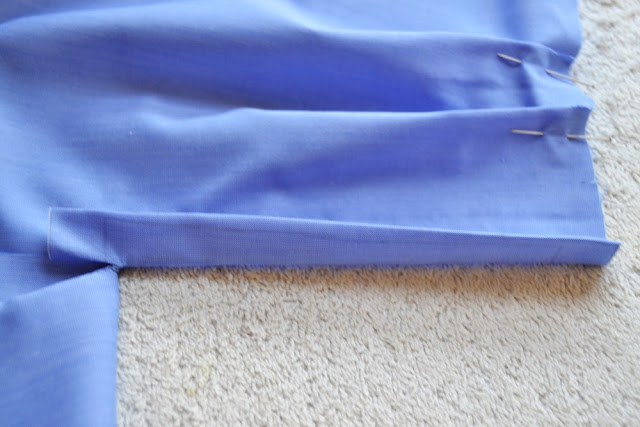
12. The result: nice and tidy! You can now baste your sleeve bottom folds (usually 2).
13. Interface your cuff pieces and with right sides together, stitch following the red line. Trim the seam allowances very close to the stitching line. Clip the curve.

14. Turn inside out and press.
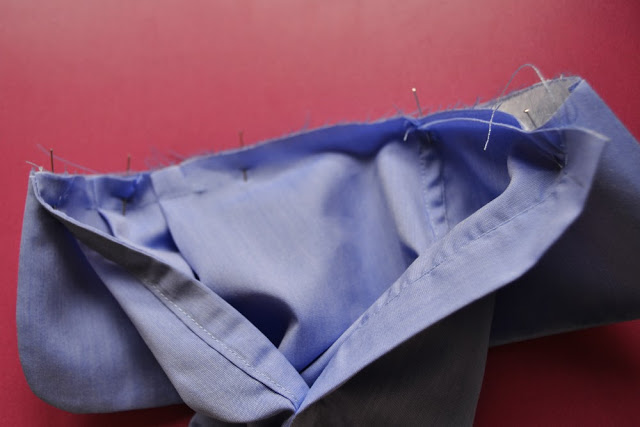
15. Now do what I say, not what I do: instead of pinning the cuff layer to the outside of the sleeve, pin it to the inside. This should look almost like the picture but with the cuff inside.
Stitch. Trim the seam allowances and press them toward the cuff.
 16. Fold the seam allowance of the cuff inside, press it and edgestitch all around the cuff. You’re done! The only missing step is sewing the button and buttonhole.
I hope that was useful! Have a nice week end!
I will come back very soon with great news!

19 comments
Mil gracias por este gran gran gran tutorial!!!.
Ya sabes que lo necesitaba!!!.
De verdad, muchas gracias guapisima!!
Besitos
¡Me alegro Sonia! Un besito.
Estupendo Pauline! Y muy bien explicado…ya me hubiera gustado tener estas explicaciones cuando me enfrente a las instrucciones del Burda! Besitos!
¡Gracias Merche! Sabes que ahora ni leo las instrucciones del Burda porque sé que no me van a ayudar, jaja. ¡Que pena porque tienen modelos complicados que no me atrevo a hacer!
Hi Pauline! This is a cool tutorials. Thank you so much for sharing:)
You're welcome Hana!
Thank you, this is so helpful!
Thanks, I'm glad you lied it!
I'm definitely putting this tutorial in my bookmarks, thank you! *^v^*
Thanks!
Gracias por el tutorial, creo que yo lo tendre que leer varias veces jejejeje, porque le tengo que entder bien 😛
Es normal, es algo bastante delicado… mi primera tapita la monté al reves, jeje… Así que mejor leerlo varias veces e incluso practicar con trozitos de tela. Un besito.
Gracias por el tutorial! Esta super bien explicado! Hace poco hice una tunica de Patrones que llevaba esta tecnica y como no lo entendi le puse un puño cualquiera. Para la proxima usare tu tutorial!
¡Gracias Florencia! ¡Me alegro que te haya sido útil!
Thank you for this nice tutorial!
Pauline me ha gustado mucho el tutorial, lo comparto en la pagina de confeccion. https://www.facebook.com/grupodecorteyconfeccion
Besos
Merci pour ce tuto !! A quand le blog en français ? Les tutos en anglais sont toujours difficiles pour moi 🙂
Fantástico tutorial!!! Precisamente me estoy adentrando en la confección de camisas y me viene estupendamente!.un besito
A very good tutorial .to the point,clear instructions. Thank you very much for sharing! !
Comments are closed.