
Have you already strated sewing your Onil blouse, our new free sewing pattern? If you need some ideas on how to personalize Onil, this is the first post of a 4 parts series.
Note: if you are going to made some modifications to your pattern, it’s easier to do without seam allowances. The A4 and A0 pattern files have a specific “cutting line” layer for each size, with no seam allowances. Then add your 1,5 cm or 5/8″ seam allowances to the finished and modified pattern pieces.
ONIL HACK #1: ADD SOME BUTTONS ON THE SIDE
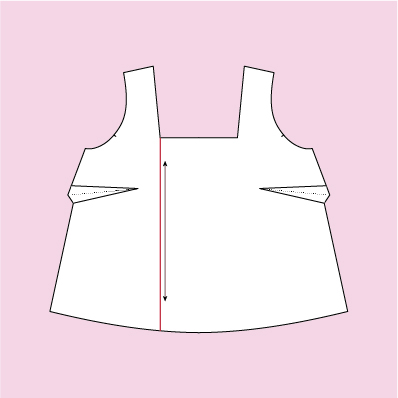
1. Draw the whole front piece (pattern is on the fold). Draw the line where you want the button closure to be (here in red) and cut the front piece along the line. You now have a left front (the smaller piece) and a right front (the bigger one).
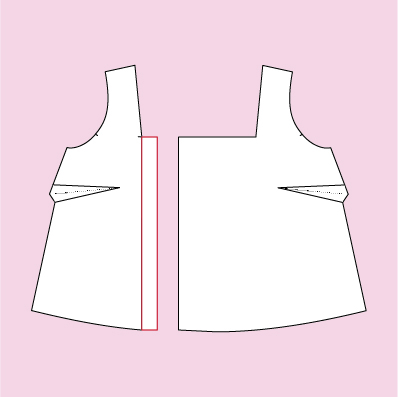
2. Add a button placket on the left front, about 2,5 or 3 cm wide (1″ or 1 1/4″).
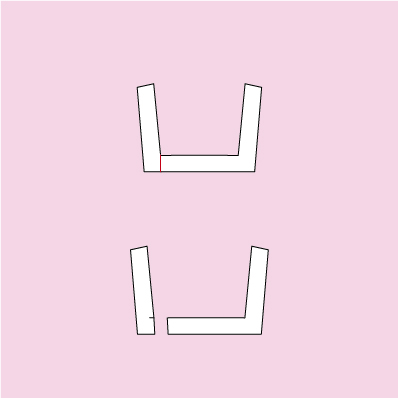 3. Draw the whole front facing (pattern is on the fold). Cut the front facing just as you did the front piece.
4. Place the facing pieces over the new front pieces and draw the new facings, adding a rectangle along the center line. Keep the width the same as the facing: 4 cm or 1 1/2″ without seam allowances (when you do add them, no need to add seam allowances to the outer edge, final width is 5,5 cm or 2 1/4″).
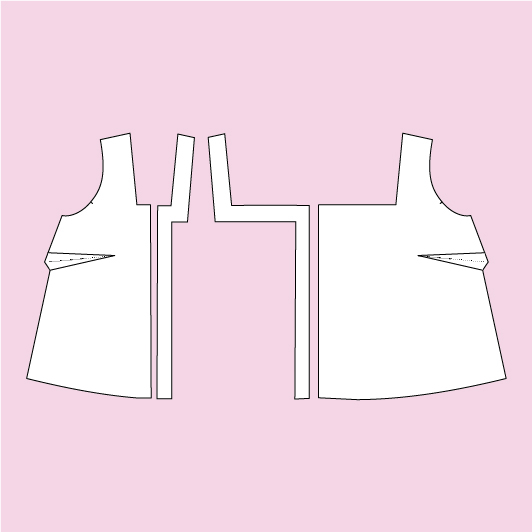
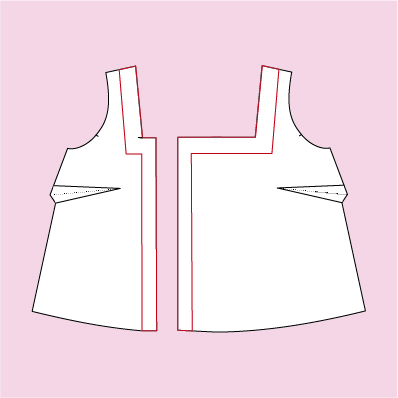
5. Here are your new pattern pieces. Remember to flip the facing pieces so they lay mirroring the front pieces on the fabric. At the end of construction, make buttonholes on the right side of your blouse and sew the buttons on the left side.
1 comment
Good job!👏👏👏