
I think that amongst all my patterns, my favourite is the Lliria dress pattern. I feel pretty every time I wear one, I believe it’s the romantic look of the dress with its crossed neckline and soft gathers. I wanted to make a new version for the summer and this time, to make it a classic wrap dress. The Lliria pattern is already a wrap dress but with buttons instead of the classic ties. It was quite easy to modify the original pattern to accommodate ties. Let’s see how to do it:
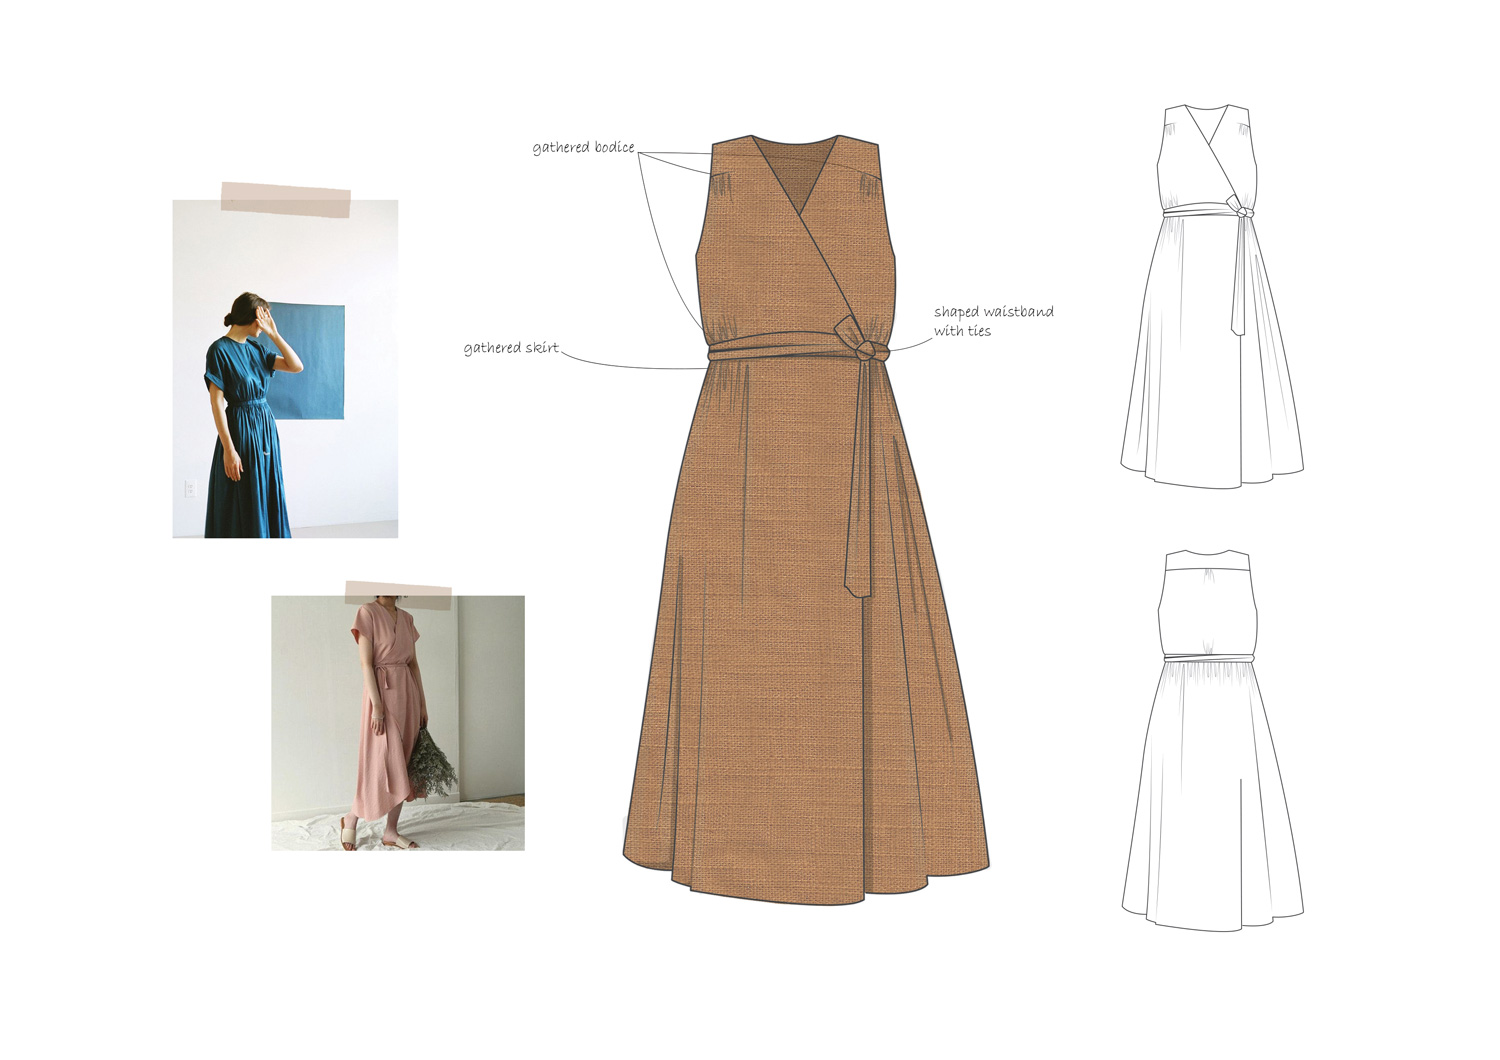
inspiration for Lliria. source : Black Crane / pinterest
—
VARIATION
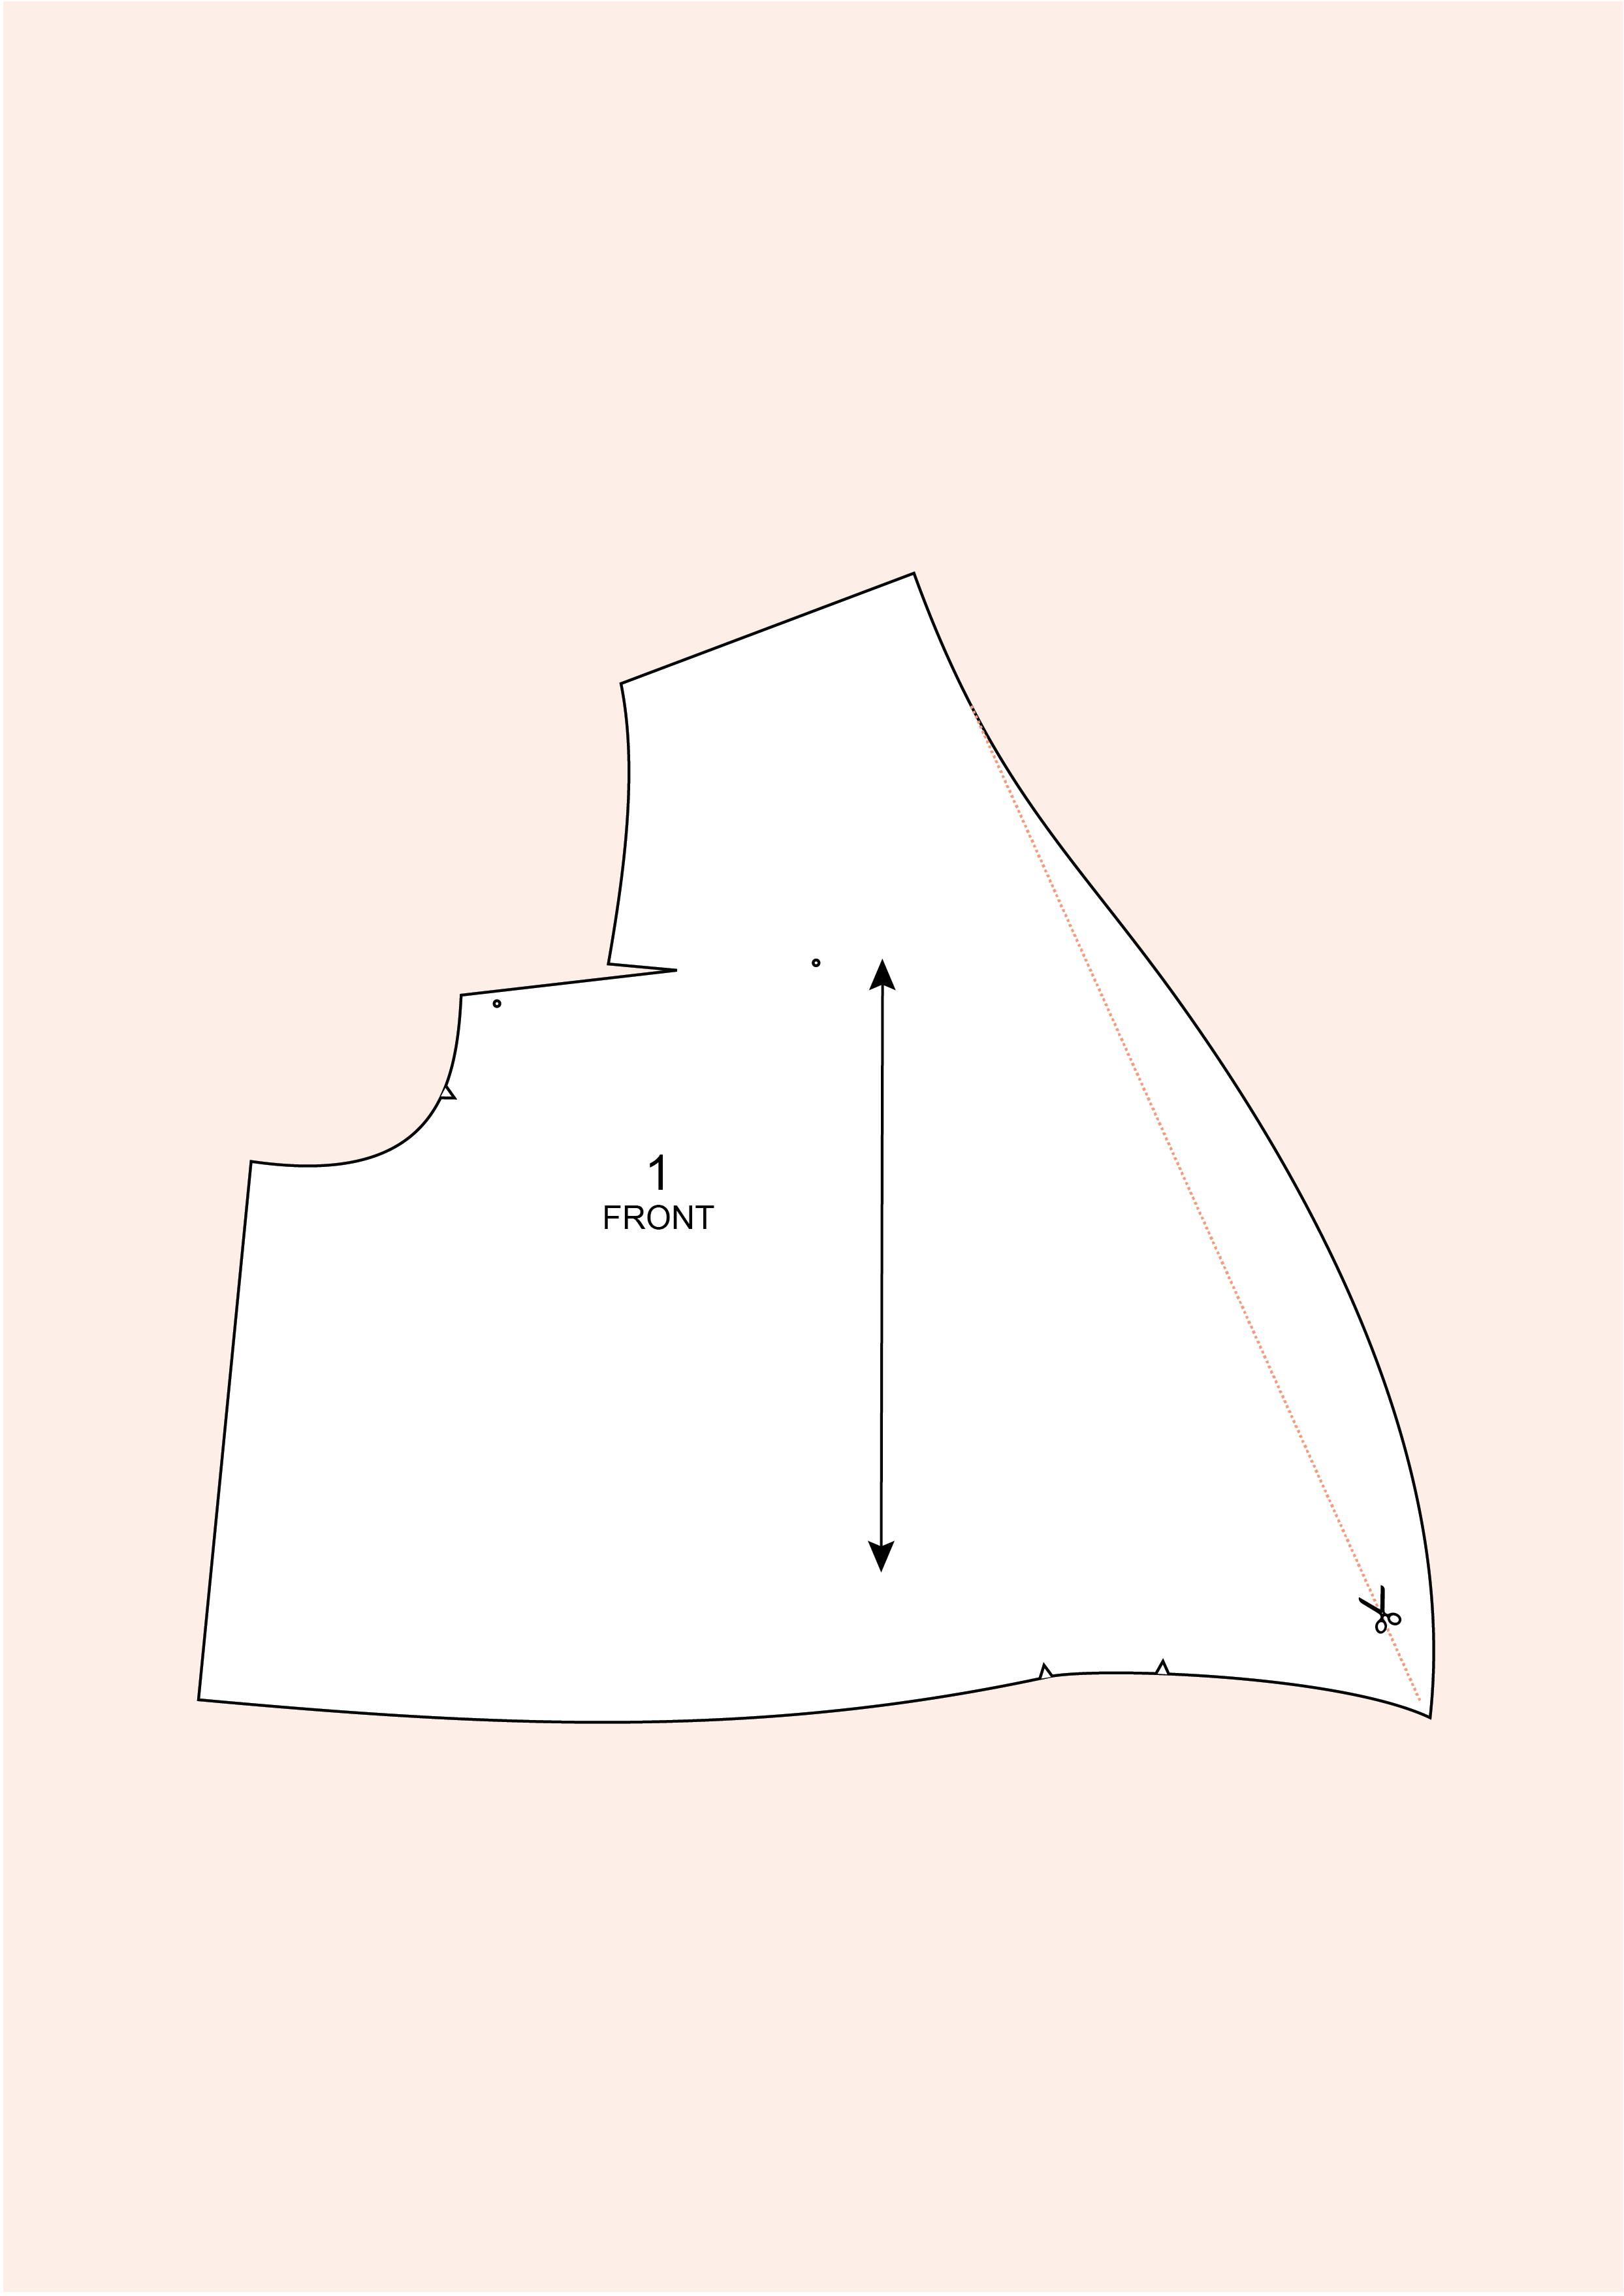
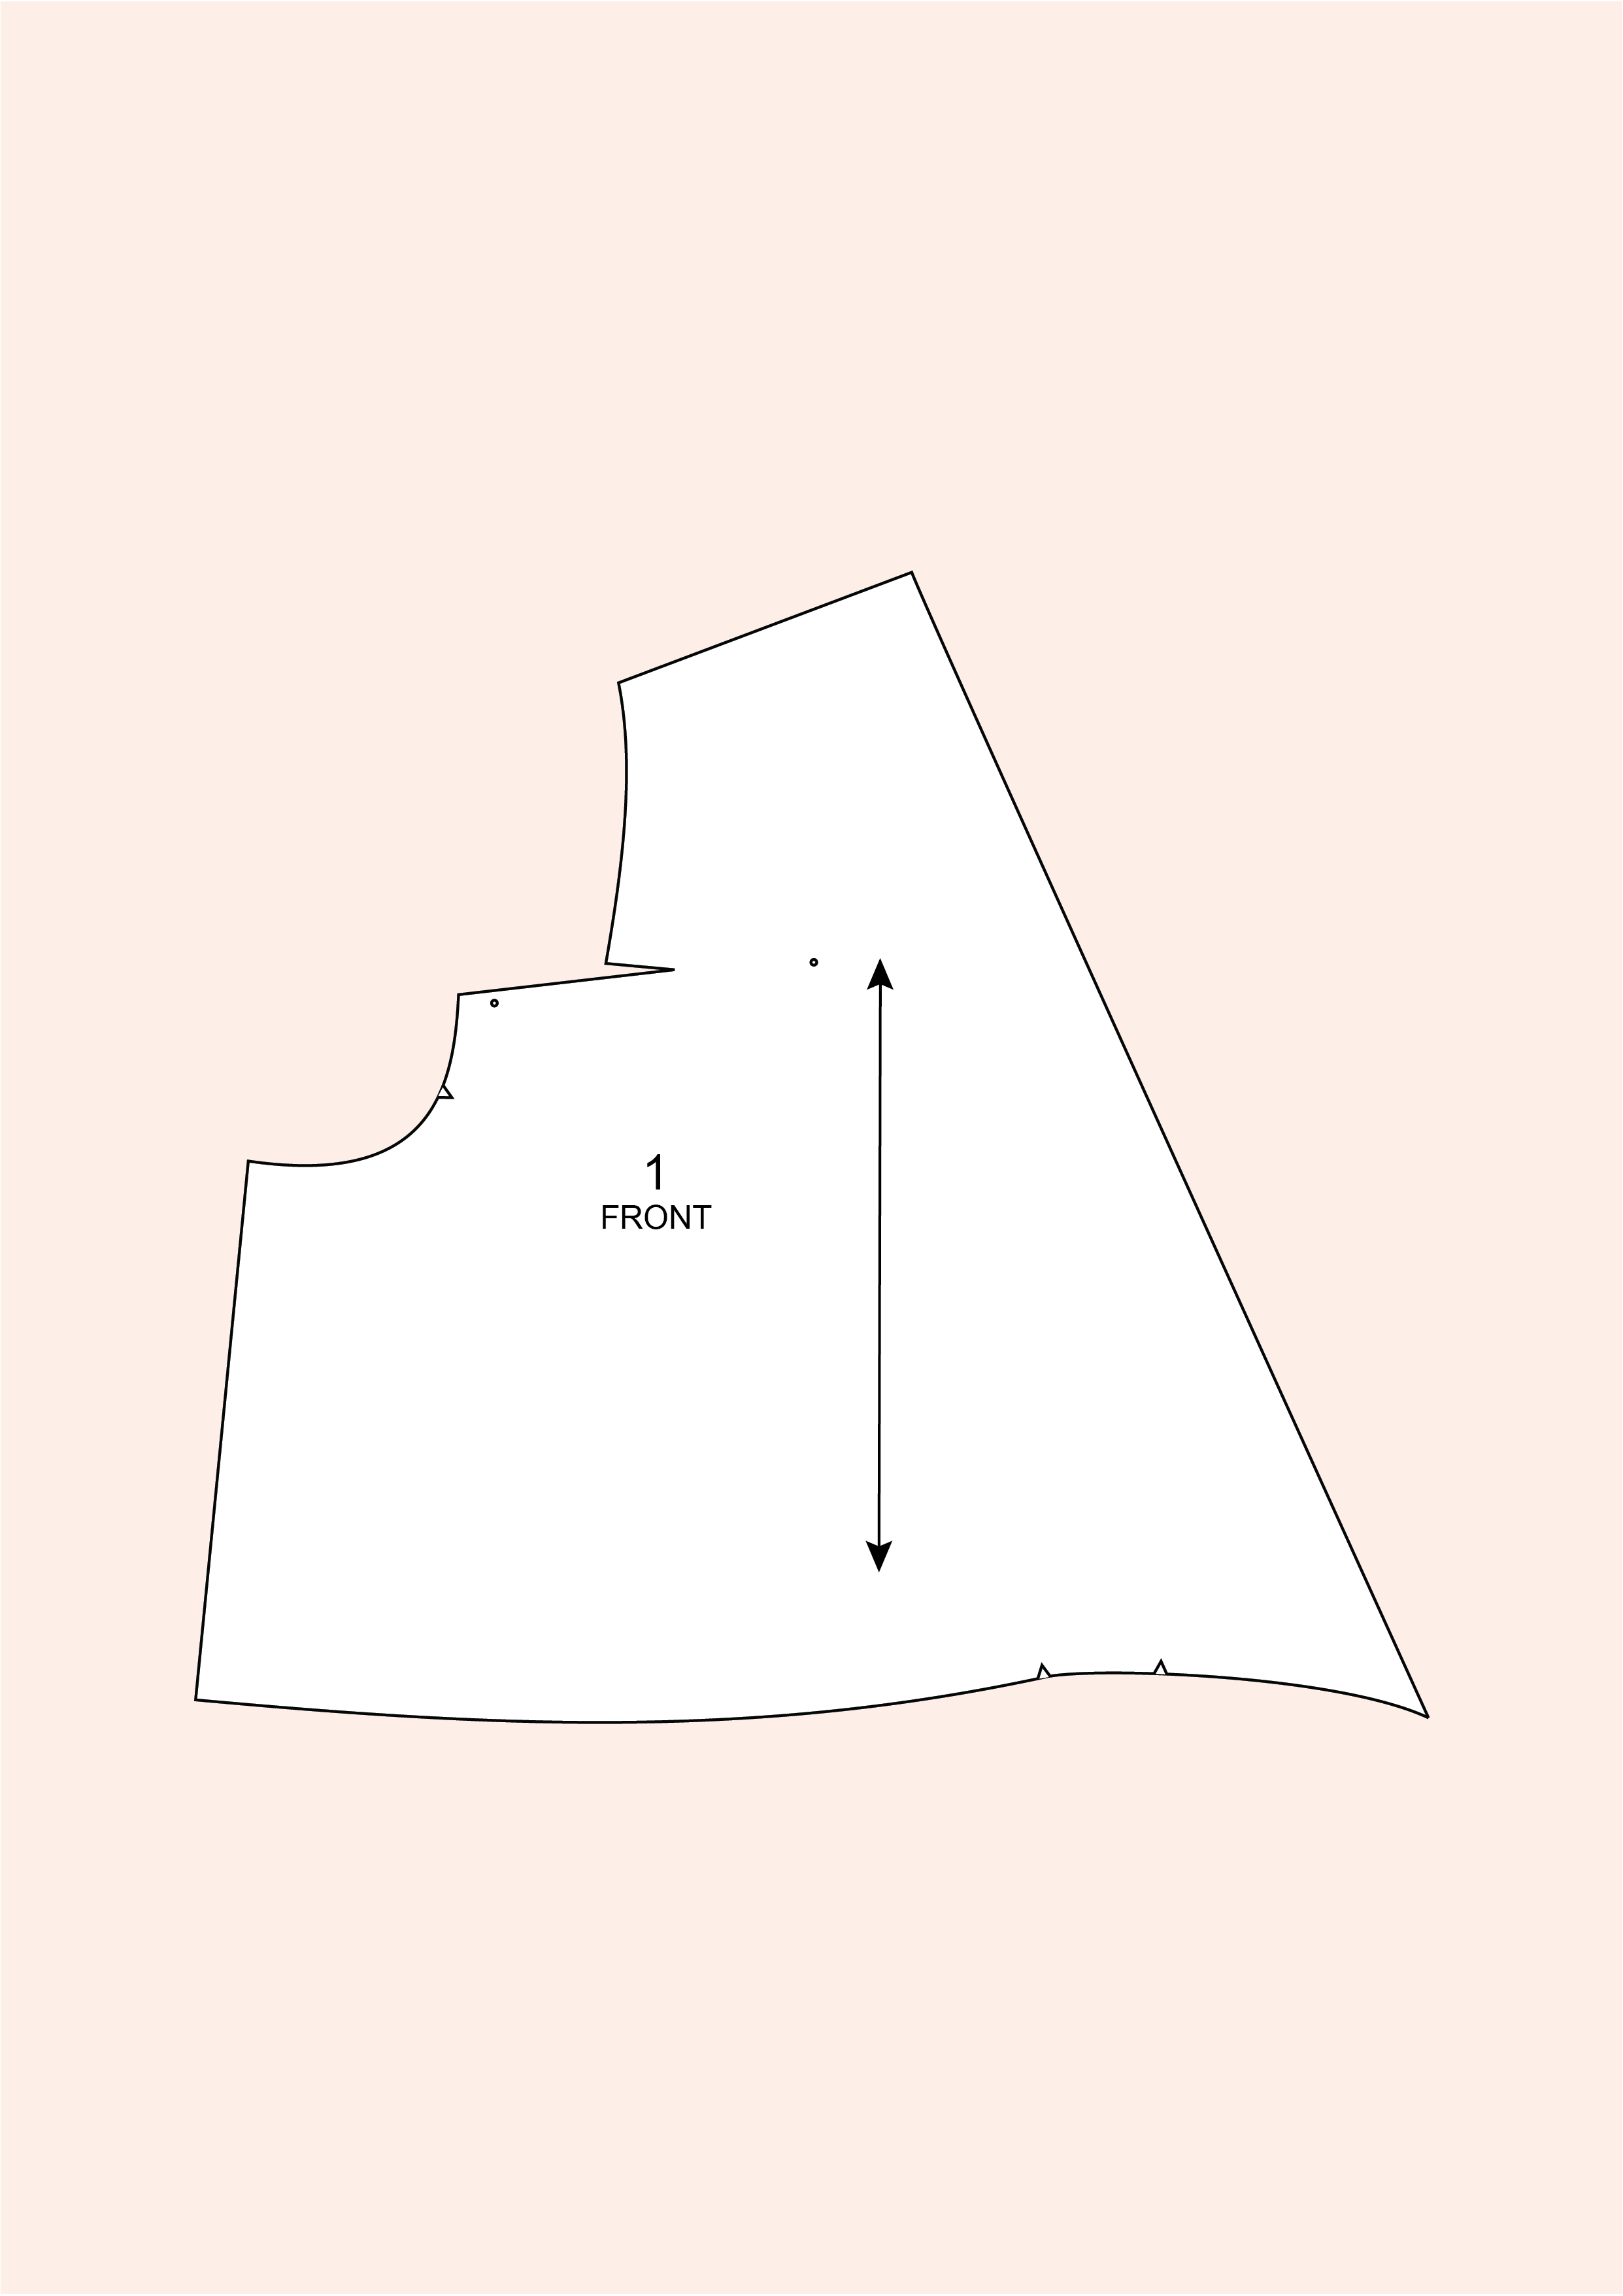
1/ As the new neckline isn’t buttoned, I decided to make it straight instead of curved to make sure it stays close to the body. I traced a straight line from the top of the neckline to the waist (remember to do the same for the front facing pieces).
—
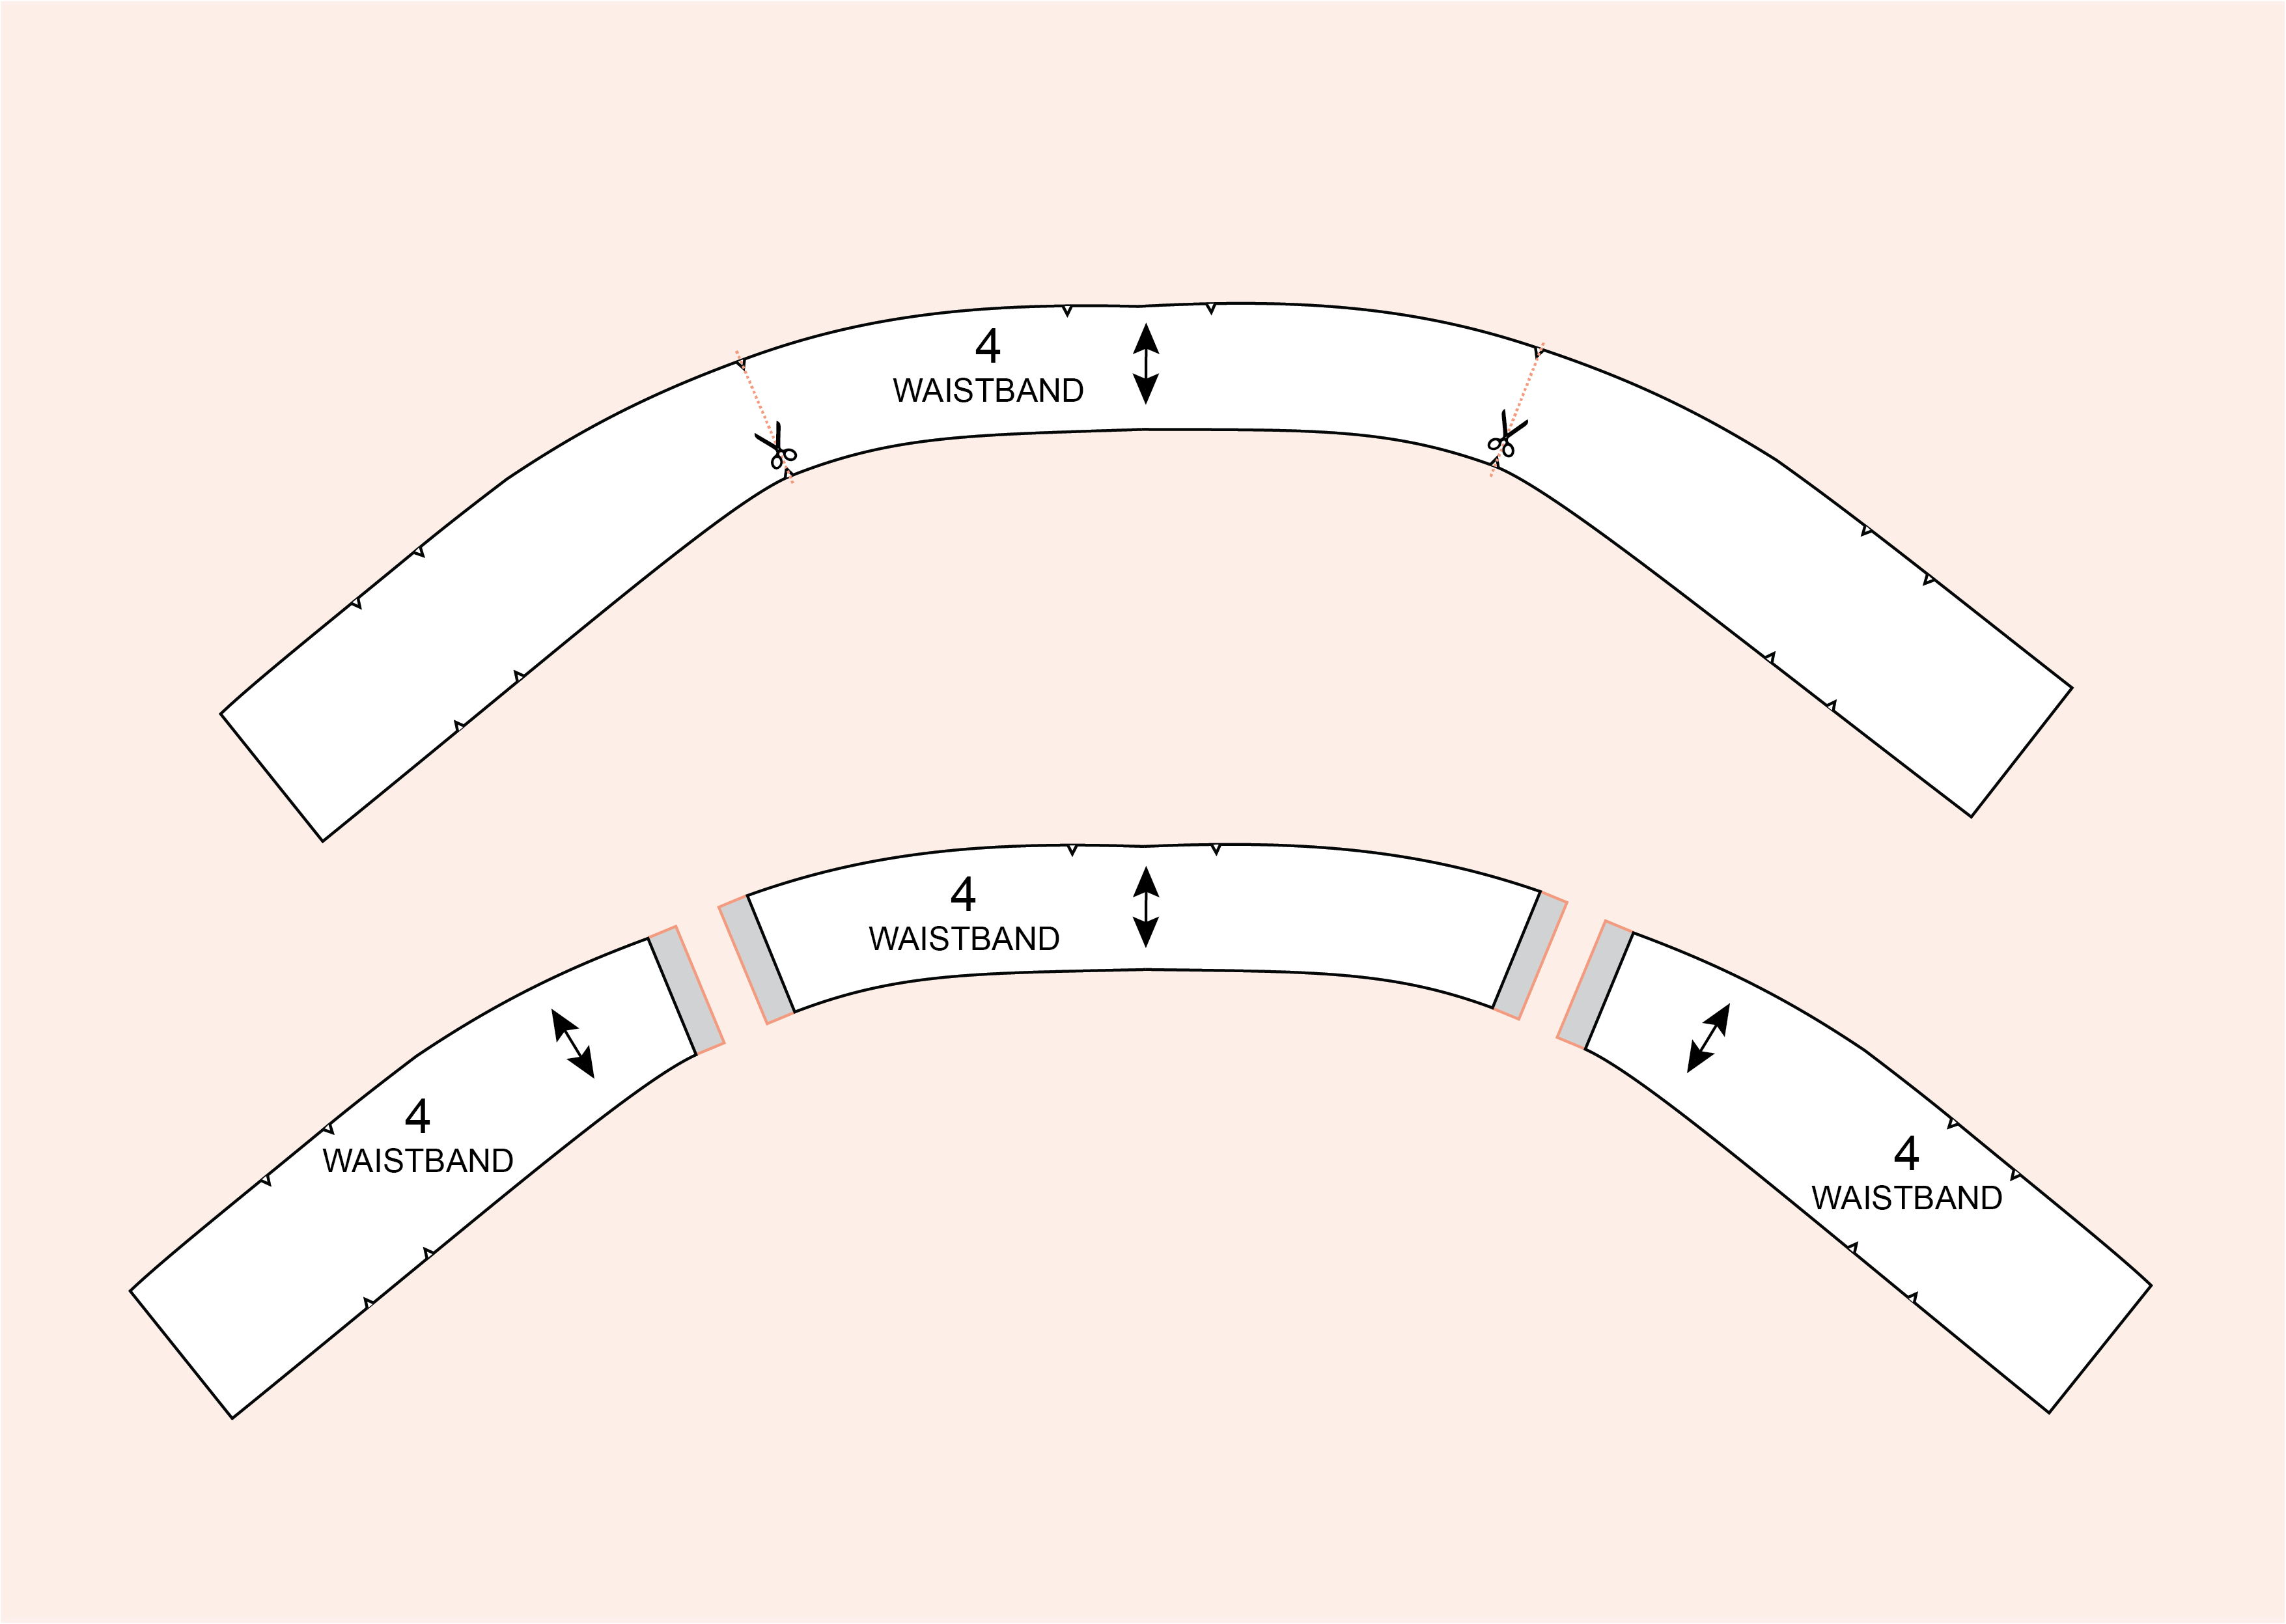
2/ We’ll need to cut the waistband in 3 pieces in order to create an opening for the ties. On the waistband piece, you will find notches indicating where the side seams should match. Trace a line between the top and bottom notches. You now have one left side front waistband, one right side front waistband and one back waistband. Add seam allowances to the new side edges (1,5 cm or 5/8” like the rest of the pattern). Remember to cut these new pieces twice (one for the exterior waistband and one for the interior one).
—

3/ Cut 2 rectangles of 1m x 11 cm (1 yd x 4 ½ “) (with 1 yd, I’m able to wrap and tie the dress on the back and at the front). If you want longer or shorter ties, you just need to adapt the length of the rectangles.
—
CONSTRUCTION AND SEWING INSTRUCTIONS
WAISTBAND
- Choose if you want to wrap your dress on the left or right side. If like me, you want to wrap the right side over the left, you’ll need to make an opening for the ties on the right side of the waistband.
- Stitch the back piece and the right front piece together, leaving a 4 cm (1 ½ ») opening at the center. Press the seam allowances open. Stitch the back and left pieces together all the way. Do the same for the interior waistband but leaving the opening on the left side instead.
TIES
- With right sides together, fold the ties in two lengthwise and stitch together (seam allowances are included and are 1,5 cm – 5/8 ») leaving one small side open. You can sew a straight edge at the end or a diagonal one if you prefer. Trim the seam allowances and turn right side out. Press and baste the ties to the right side of the front waistband, matching raw edges.
- When you’ll stitch the facing to the dress, the ties will be sandwiched between the exterior and interior waistbands.
- For the rest of the construction, you just need to follow the instructions.
FINISHINGS
- You can handstitch the edges of the tie opening together.
- I didn’t have enough fabric for the sleeves so instead, I used self-fabric bias binding to finish the armholes. I love this sleeveless version for summer.

I’m very happy about this Lliria dress variation! It’s easy to make, elegant and easy to wear as well. I chose an ochre linen from Activa textil, which makes it a light dress perfect for summer. If you want to make a Lliria dress and don’t know which fabric to use, we made a post for fabric inspiration, check it here.
While waiting for September and the new patterns release (maximum excitement!), I wish you a great end of summer!
2 comments
If we have the dress pattern, can we get the variation for free?
Hi Susan, the variation is explained in the post, you’ll have to modify the pattern yourself (there’s no new pattern pieces).