Home Tags Posts tagged with "pauline alice patterns"
Tag:

pauline alice patterns

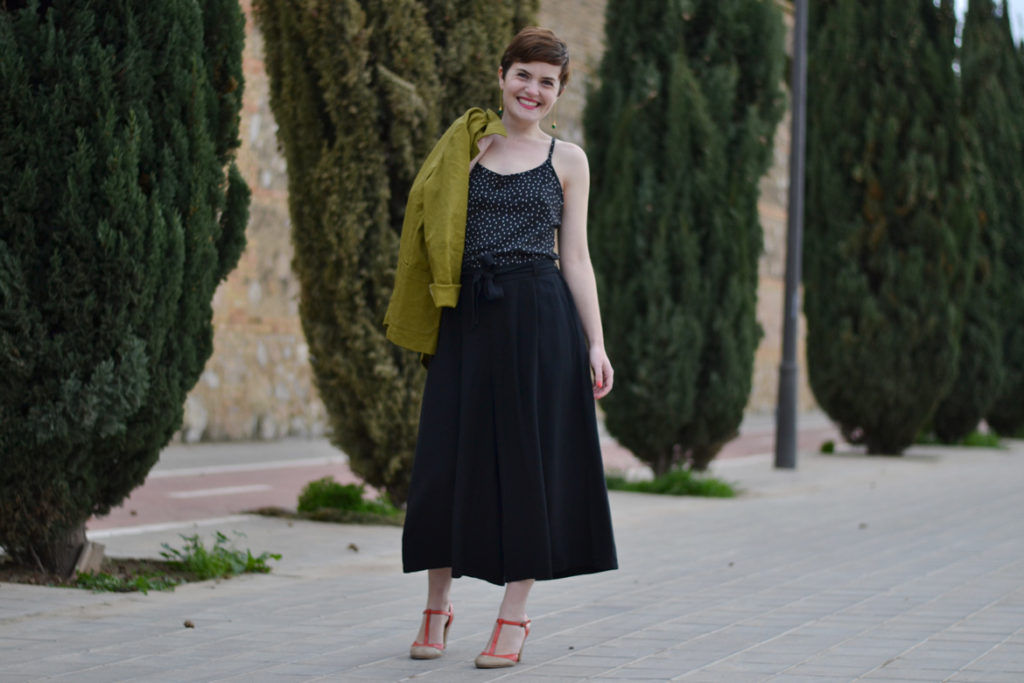
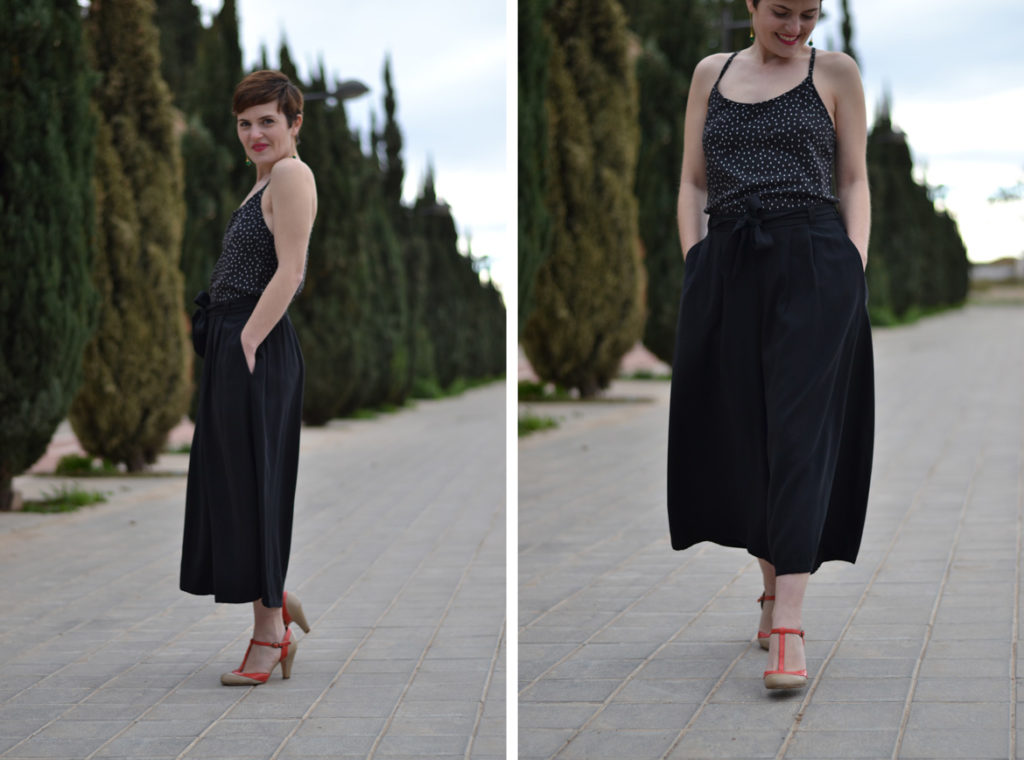
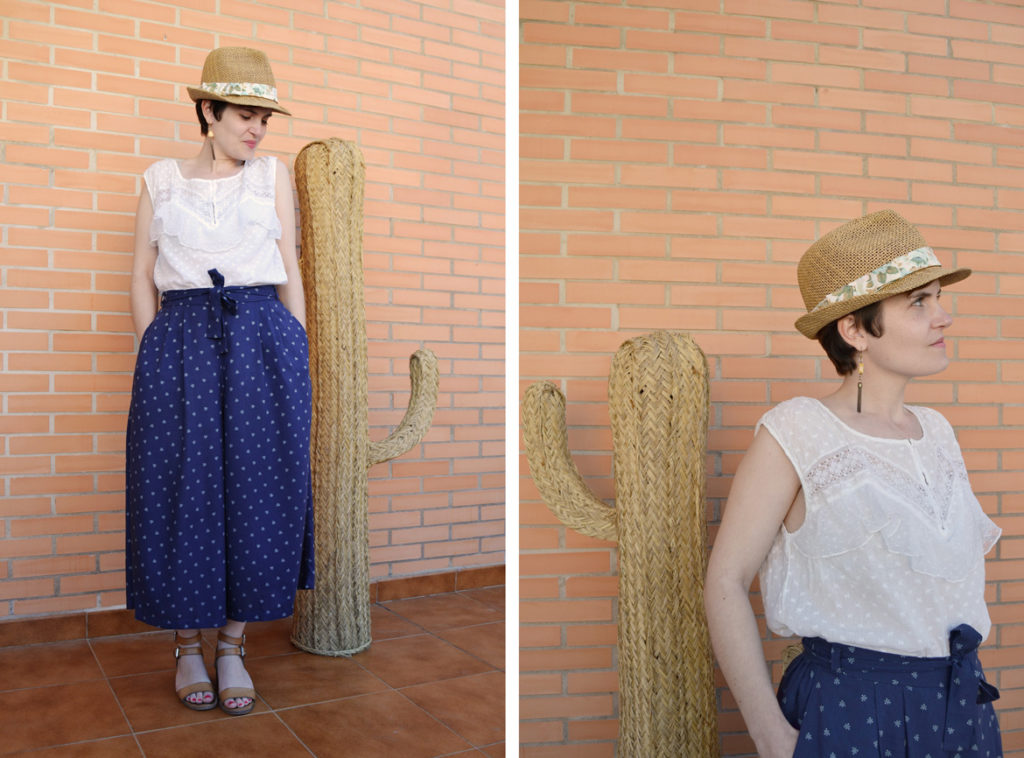
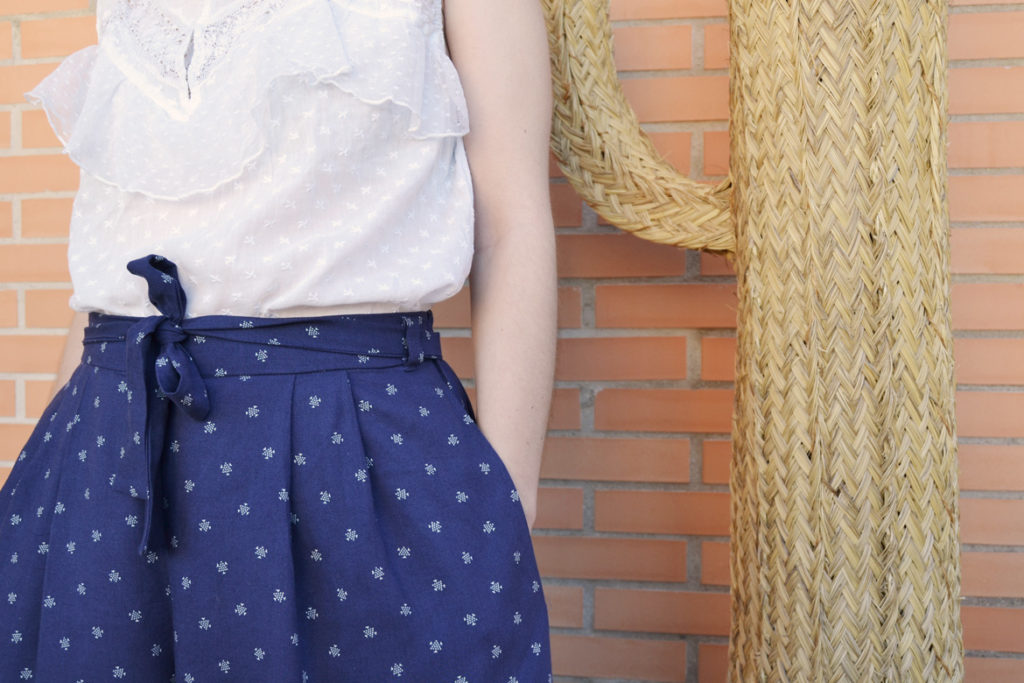
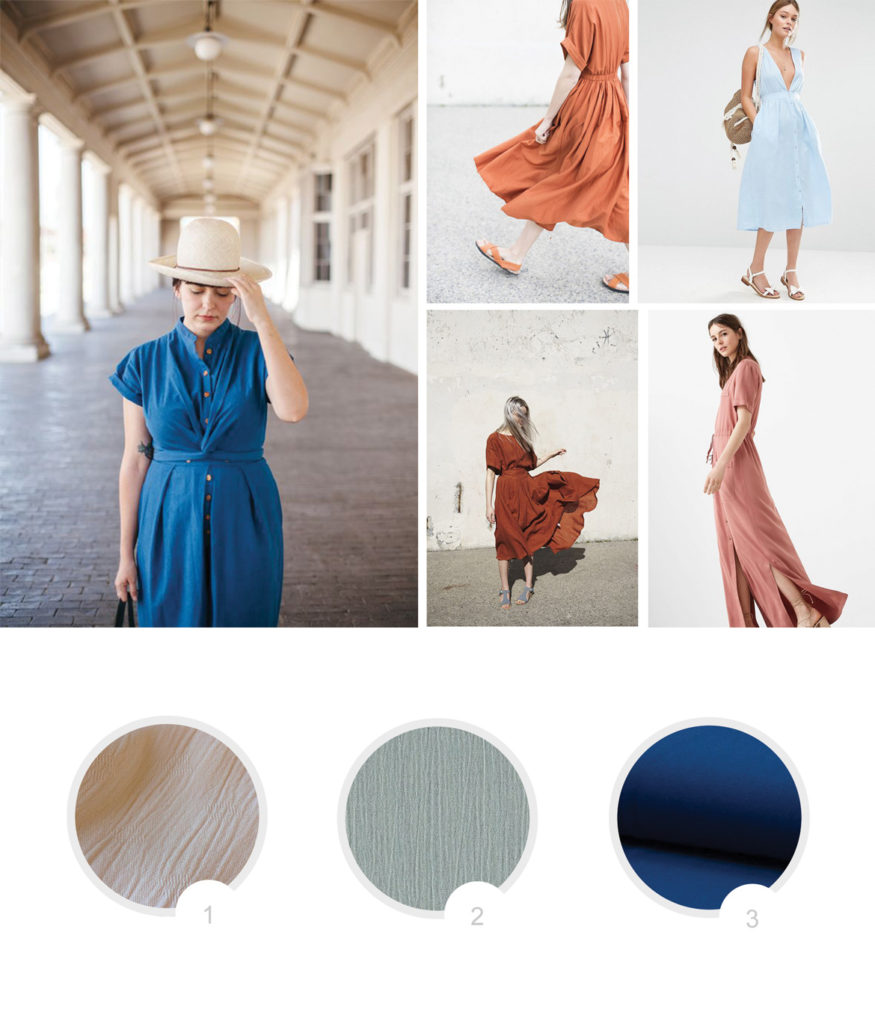
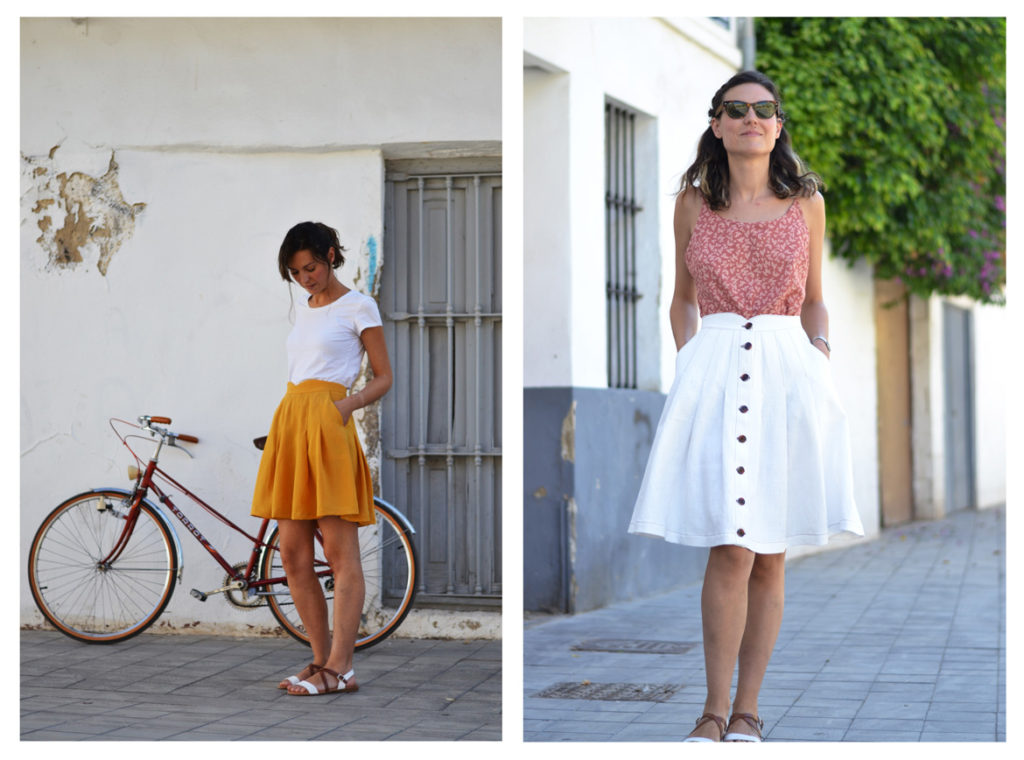
In the same way as the post about fabrics inspiration for Lliria, I introduce you some fabrics inspiration for your Mirambell skirt. The Mirambell skirt is a high waisted pleated skirt with shaped pockets. The recommended fabrics are lightweight woven fabric such as cotton, linen, rayon, silk, crepe, light gabardine or wool, chambray, …

CLASSIC

1/ Unbleached linen from Cousette.

2/ Deep blue chambray from Amandine Cha.

3/ Grey herringbone cotton from Tissustory.
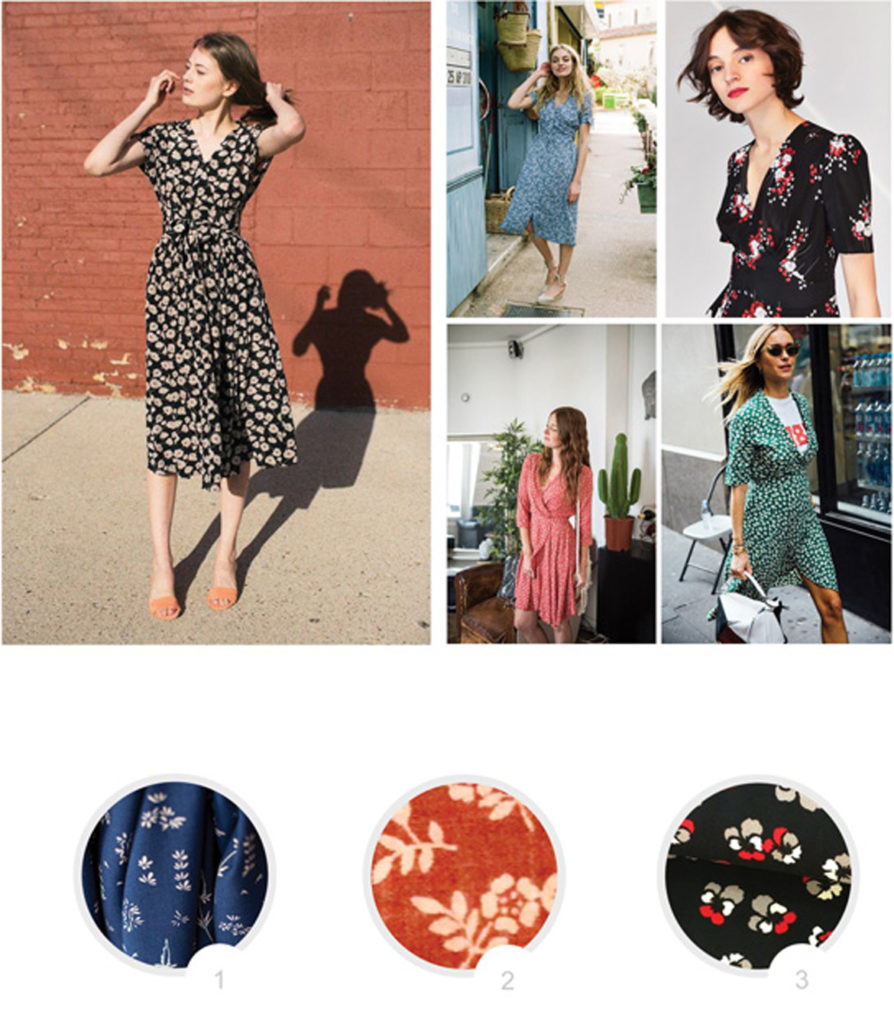
GRAPHIC

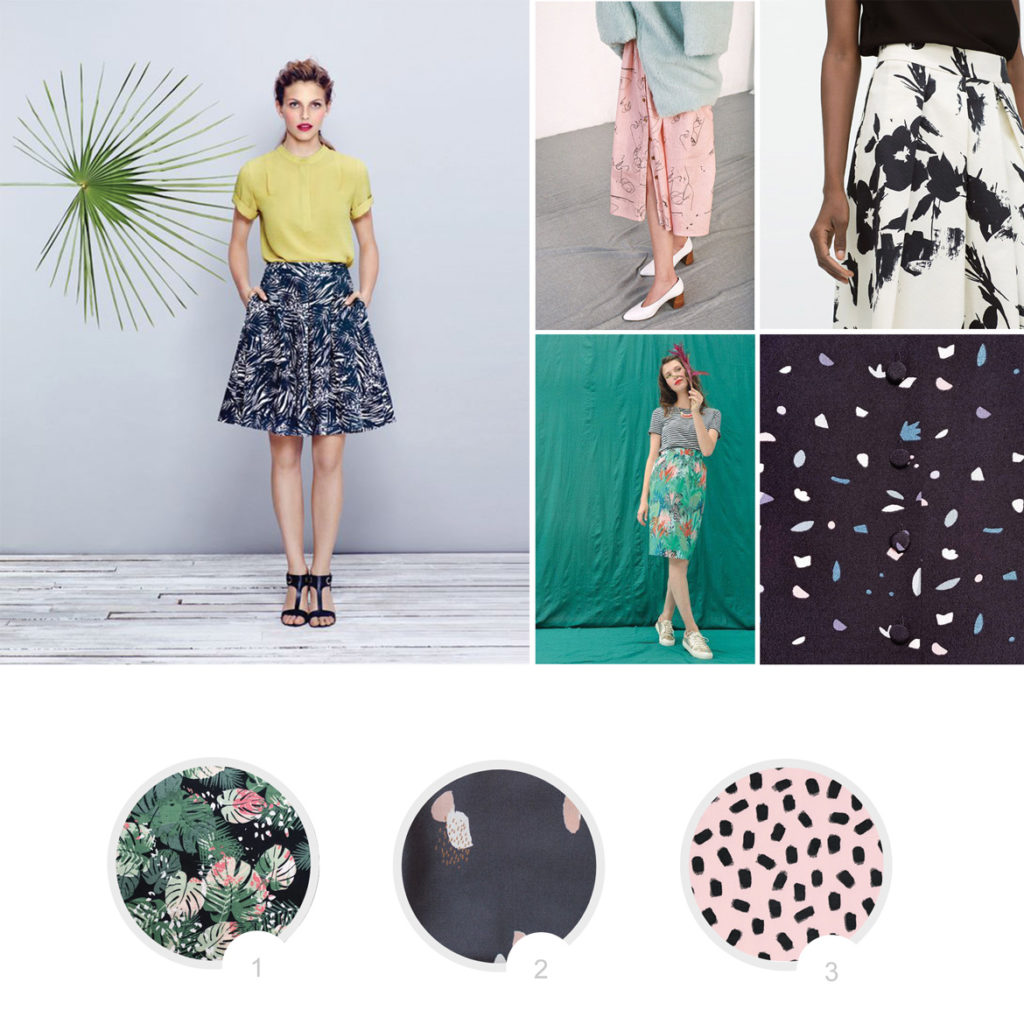
1/ Exotic printed viscose from Henry Henriette.

2/ Viscose Moonstone from Atelier Brunette.

3/ Poplin pink panther from Anna Ka bazaar.
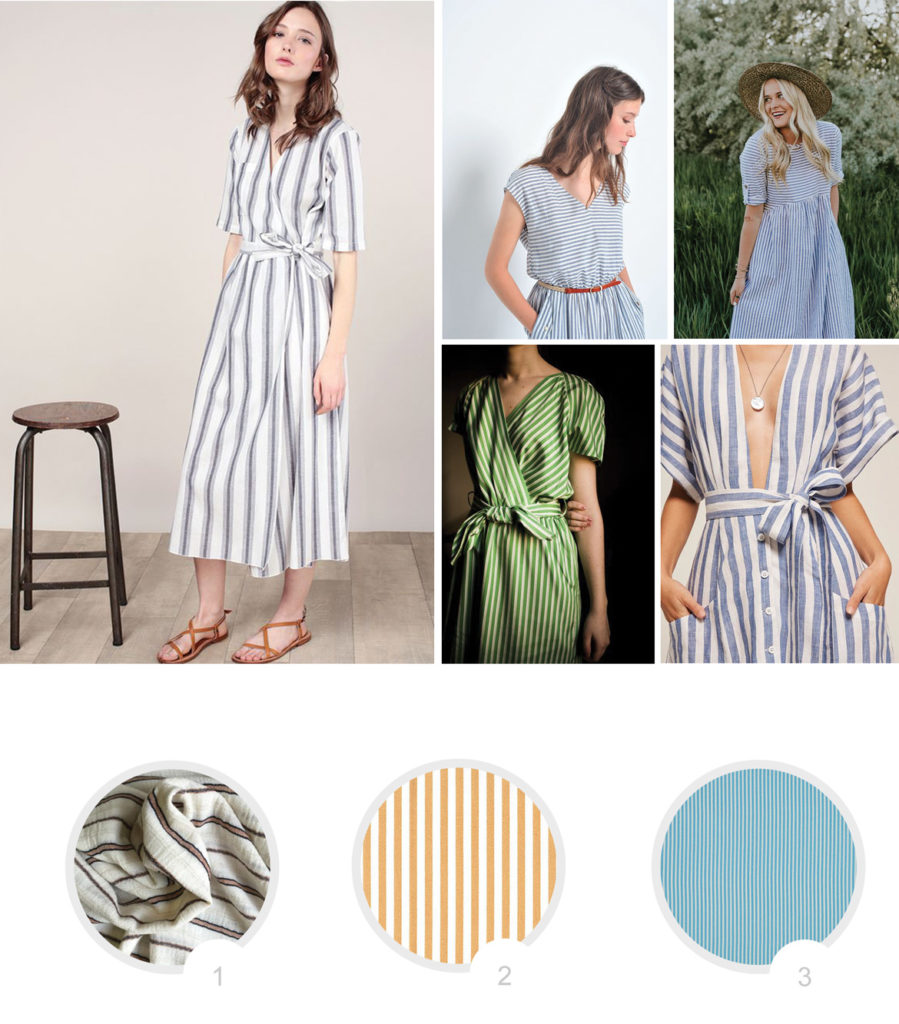
DENIM

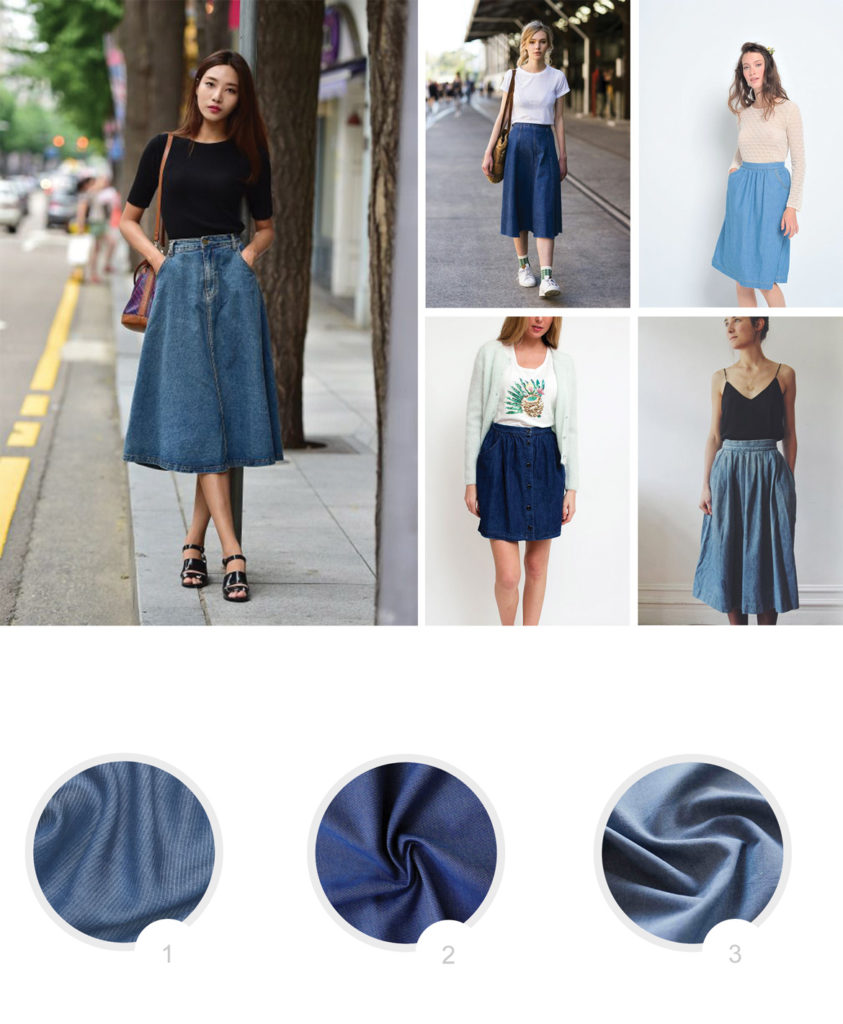
1/ Striped Tencel Madison from Cousette.

2/ Denim Etendard from Amandine Cha.

3/ Denim chambray from Amandine Cha.

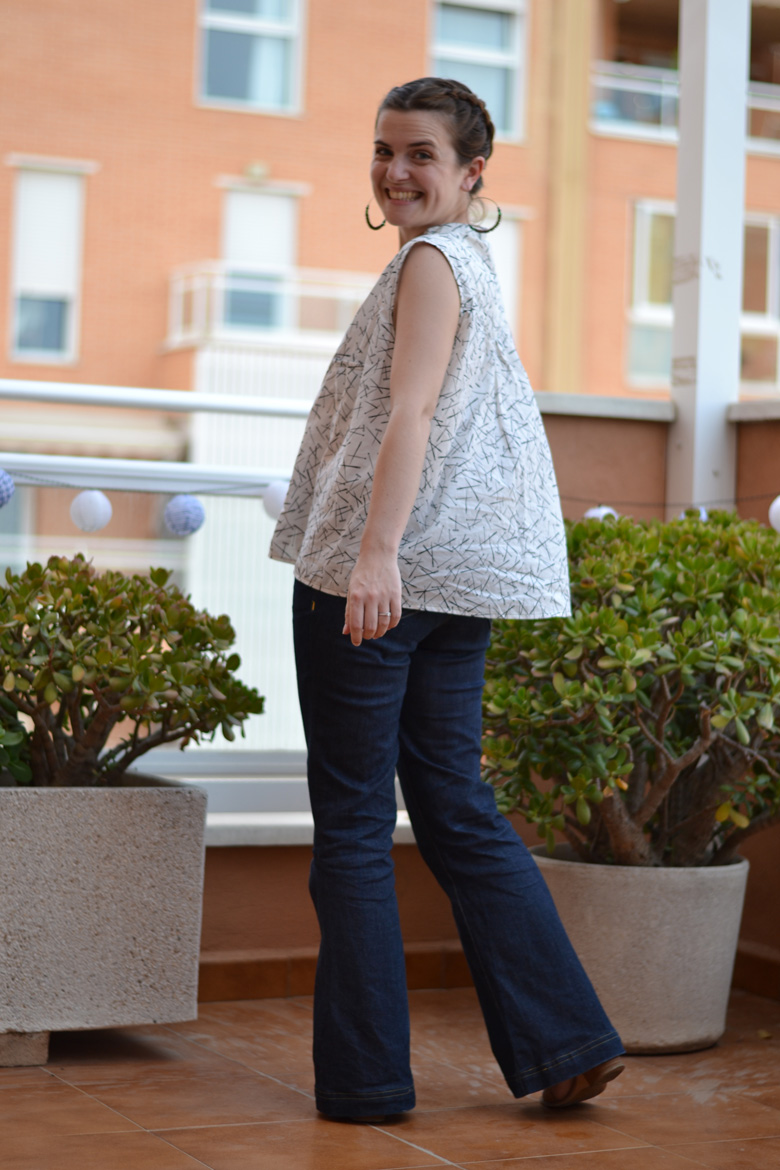
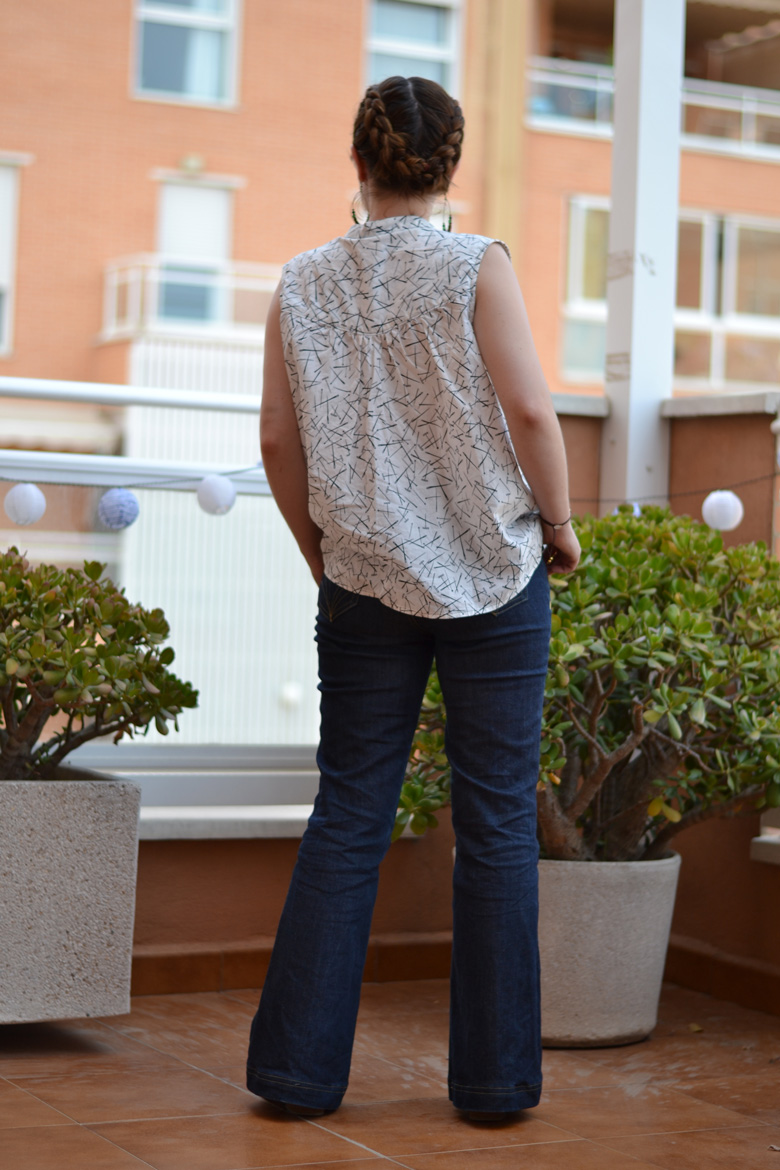
So, I hope these inspirations give you some ideas for your Mirambell skirt. I will show you my fall version very soon!


0 comment
7 FacebookTwitterPinterestEmail

Summer is almost finished but I felt like making it longer just a little bit more. Here are some fabrics inspiration for your Lliria dress: clean, graphic or floral. Lliria is a semi-fitted wrap dress. It has bust darts and soft gathers around the waistband and close with an asymmetrical button closure. This is such an elegant yet easy-going dress. The recommended fabrics are lightweigh such as cotton lawn, rayon, crepe, linen or silk.

MONOCHROMATIC

1/ Opaline jacquard rayon from cousette.

2/ Cotton grey from cousette.

3/  Royal blue rayon from Rascol

FLORAL

1/  See You at Six rayon – Herbs – from Rascol.

2/ Red viscose with flowers from Tissu Story.

3/ Black rayon with flowers from Atelier de la Création.

STRIPED

1/ Striped linen from Atelier de la Création.

2/ Yellow/white stripes from Cousette.

3/ Cotton with with and blue stripes  from Rascol.

I hope these inspirations will give you plenty of ideas to sew your Lliria dress. Which one is your favourite? I think mine is going to be with stripes! 🙂

0 comment
7 FacebookTwitterPinterestEmail

For this new pattern collection, I wanted to go back to the beginning. The style of the Pauline Alice patterns has been changing since they first came out, the main reason being that I design patterns according to what I feel like wearing at the moment, but I’d like to think that they have the same references. And for this summer, feminity is back, with the same care about details and designs inspired by the past but still completely actual.


I’m very happy to present you the Mirambell Skirt and the Lliria Dress!

The Mirambell Skirt

You´ll find the Mirambell skirt pattern here in both printed and PDF versions.

______

The Lliria Dress

You’ll find the Lliria Dress pattern here in both printed and PDF versions.

I will come back to you with more details on both patterns in a short while…


0 comment
2 FacebookTwitterPinterestEmail

Hello everyone,

Lauren, the owner of Birmingham-based haberdashery Guthrie & Ghani and finalist of the first “Great British sewing bee”, has made an amazing video with useful tips for the Rosari skirt pattern. I thought it would be a great idea to share it here as it can definitely be really useful.

Here are the main tips:

  • how to adjust the skirt length
  • how to topstitch and adjust the thread tension
  • tips on placement of the buttons and buttonholes
  • some styling tips to wear your Rosari skirt all year round

And if you’re looking for a nice sewing kirt with everything you’ll need to sew your Rosari skirt (pattern, denim fabric, thread, buttons…), check Lauren’s own kit!


2 comments
2 FacebookTwitterPinterestEmail

Today I’m writing a special post: how to adapt your Pauline Alice patterns when you’re expecting!

You may have noticed (or not) that I’m expecting a baby for Fall (thanks to everyone who congratulated me!). My closet is quite limited right now as most of my clothes are fitted and high waisted, so I need new outfits more adapted to my growing belly. I thought it would be nice to show you how to adapt non-maternity patterns quite easily with pretty illustrations and diagrams:


CAMI DRESS

This is a very easy modification: you just have to shorten the front and back bodice pieces of the Cami dress pattern.

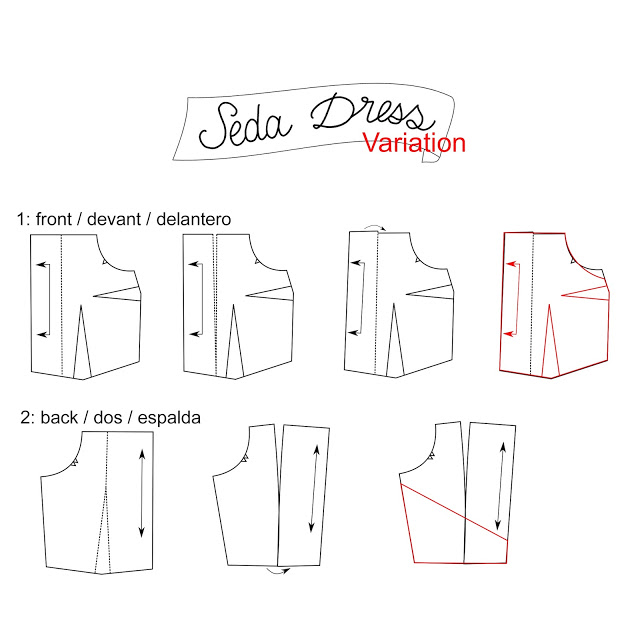
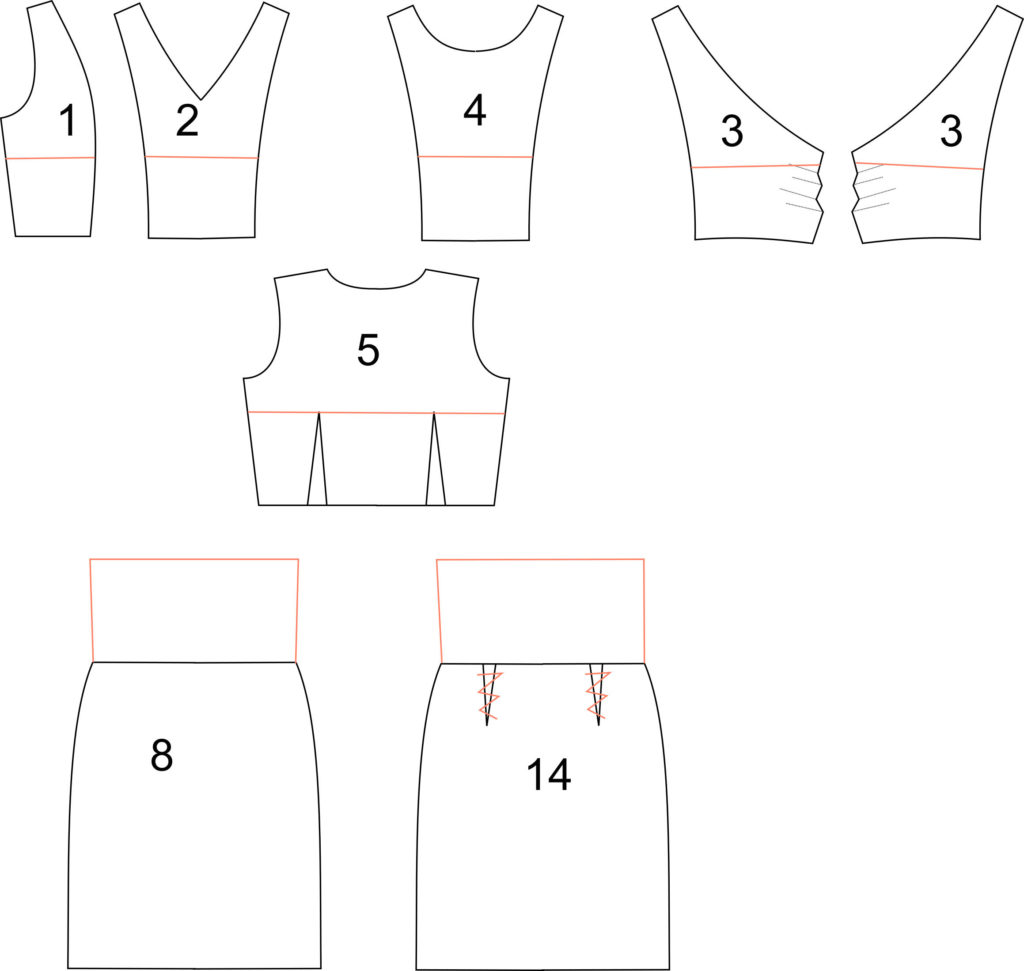
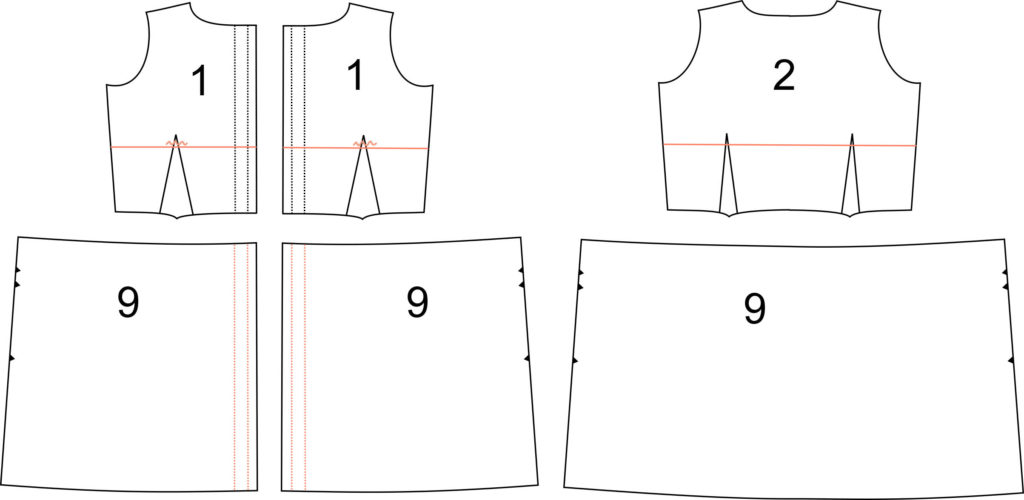
I would then remove the back darts and replace the front ones by gathers. To make the dress easier to put on, I would remove the side zipper and cut the front skirt piece in half and continue the bodice buttonband on the skirt. As the waistline is now under the bust, I would remove the pockets but they can also be lowered if you wish to keep them.


CARME BLOUSE & PORT SHORT

In the Carme blouse Sew-along (see it here on youtube), I had already shown how to make a maternity version.

You just need to add fabric on the bodice centre front that will later be gathered and stitched to the front yoke as the original version.


The Port short is a model that will ask for a more complex modification.

You’ll need to add a jersey waistband to the short. You need to redraw the front pieces (front and pockets). Draw a curve from the side to the center front (the seat is shortened by about 15 cm – this measure will vary depending on your belly, make sure to make a toile before). You won’t need the zipper fly pieces as the shorts will be pulled on, fly will only be decorative. Place the pockets (view A or B) over the new front piece and draw the curve on the pockets as well.

For the jersey waistband, we’ll cut two front and two back waistbands (size is to be adapted to your belly). The bottom edge should measure the same as the short’s new waistline with the cruve. Stitch the front and back waistbands at the sides and then both waistbands together at the top edge. Turn with the right sides out and stitch a line about 2 cm below the top edge to created a channel and insert an elastic. Stitch the waistband to the short. You can now pull the short on and the jersey waistband will be very confortable all the way through pregnancy.


MALVAROSA DRESS

No need to change anything on the Malvarosa dress as it’s loose shape makes it perfect for maternity.


ELIANA DRESS

That’s the first dress I thought of hacking : if you move the elastic waistband up, you’ll have the perfect maternity dress, from the first to the third trimester.

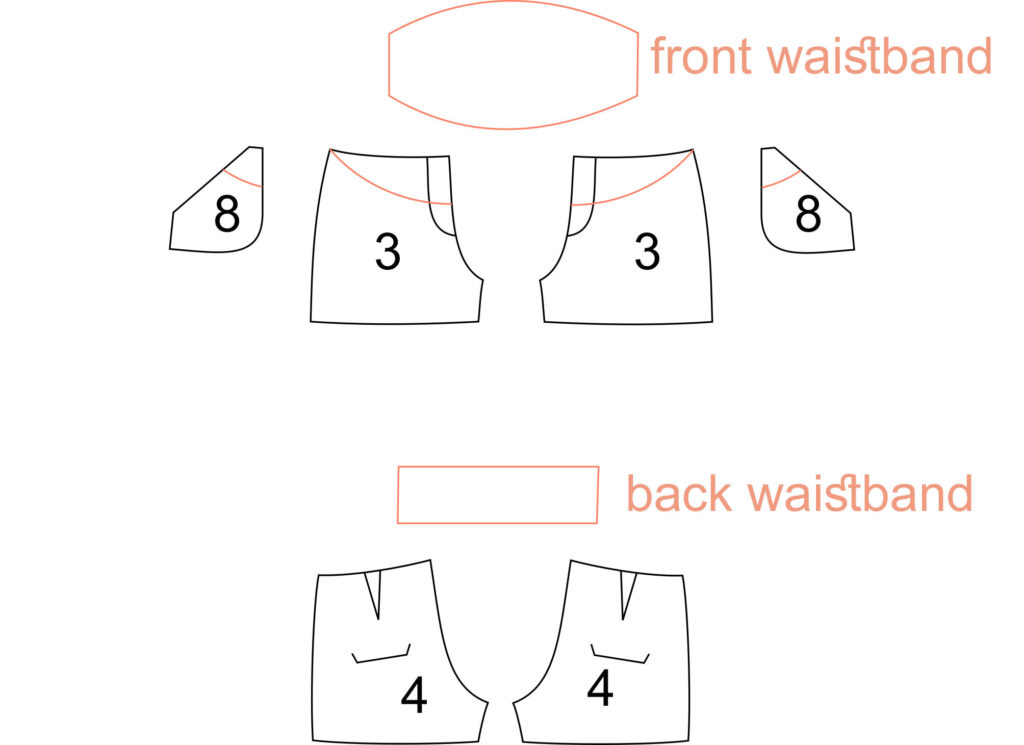
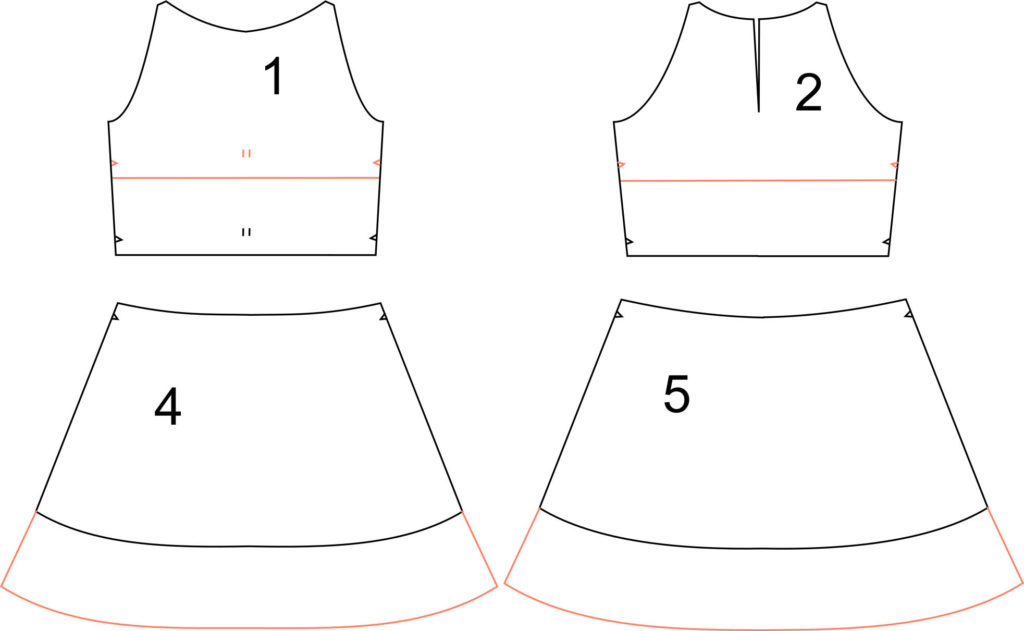
You need to shorten the Eliana dress bodice front and back pieces, without removing the 3 cm seam allowances at the waist. For the skirt, no need to change the waist but you might want to lengthen it a little bit. As the waistline is now under the bust, I would remove the pockets but they can also be lowered if you wish to keep them.


REINA SHIRT / DRESS

No modification needed for the Reina shirt thanks to the loose shape and gathers around the bust. But I want to lengthen it and try to make a dress out of it.


XEREA DRESS

By replacing the fold on view B of the Xerea dress by soft gathers, you’ll get a pretty maternity dress that you’ll also be able to wear after baby’s arrival.


DENIA BLOUSE & ROSARI SKIRT

The Denia blouse pattern doesn’t need any change. It will be perfect for summer temperatures.

Just as the Port short, the Rosari skirt will need a jersey waistband to be worn as a maternity skirt.

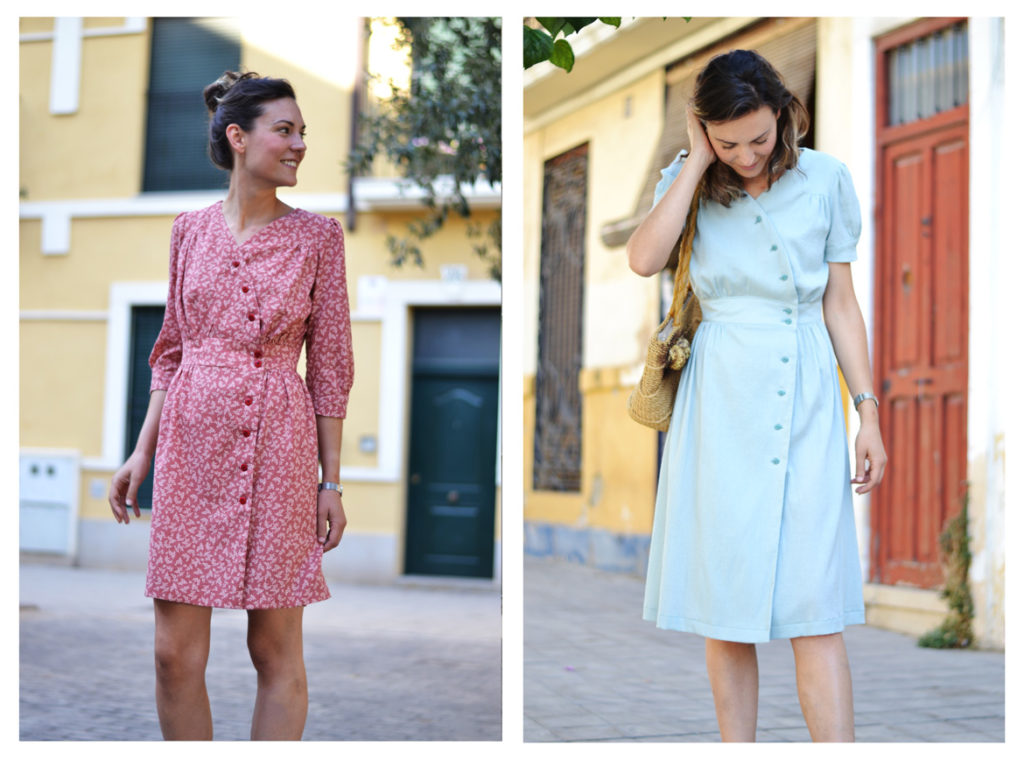
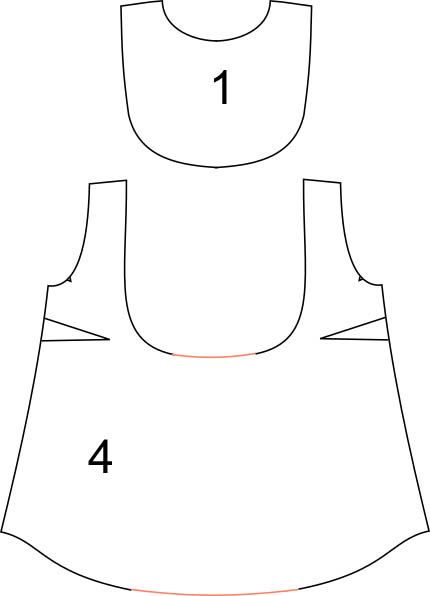
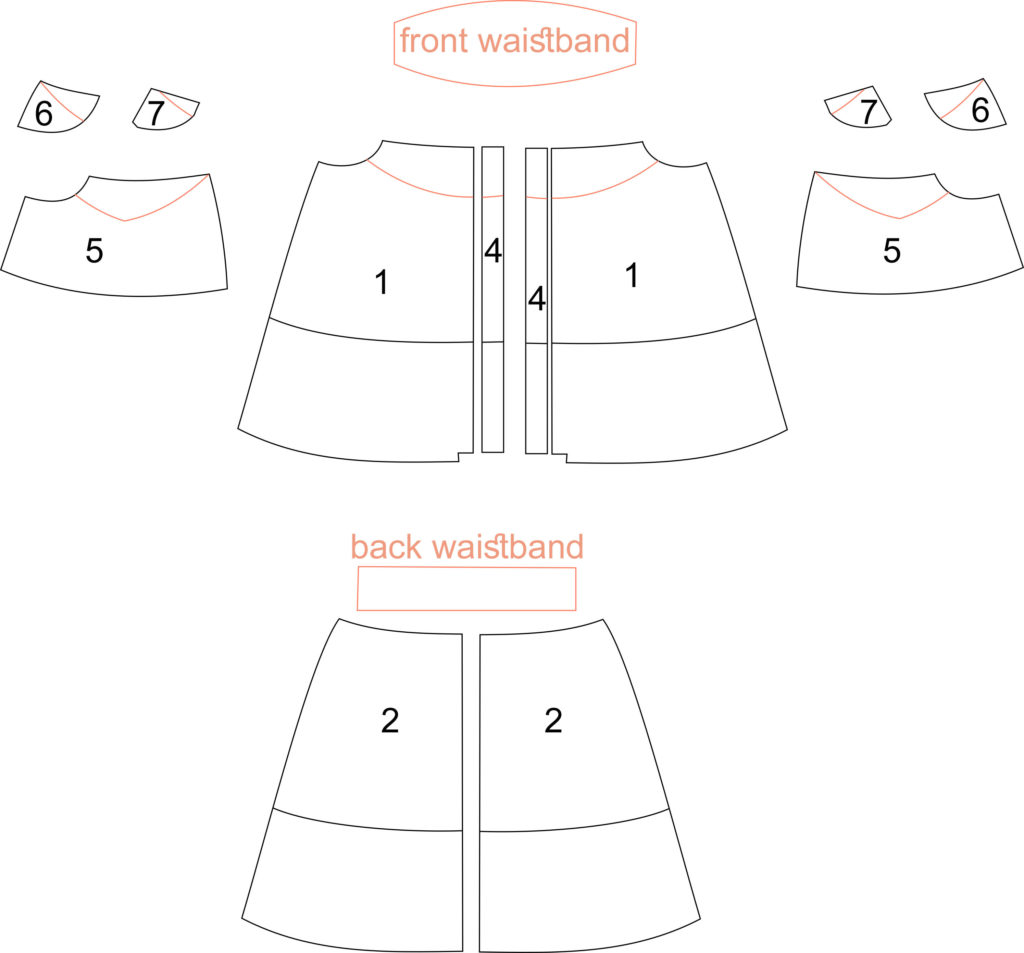
Check out the Port modifications above. You don’t need to make the buttonholes, as the skirt won’t be opened, you can stitch the buttons directly over the buttonbands. Pockets will nedd to be lowered slightly.


ALDAIA DRESS

The Aldaia dress is designed for jersey fabrics, perfect when your belly is getting rounder every day.

I would shorten the bodice pieces (all three views are compatibles) under the bust and remove the back darts. For the skirt, I recommand using view B, without seams, and lengthen the skirt at the waist. Make sure you choose a fabric with enough stretch ad why not add some soft gathers on the front around the waist?


This is my Pauline Alice maternity wardrobe! I don’t know if I’ll have the time to test all the variations but this is definitely my summer sewing plan. I’m about to start the Cami dress in white cotton, I’ll let you know how that works out.

What about you? What’s your favourite maternity pattern? Which of these do you like the most?

8 comments
6 FacebookTwitterPinterestEmail

And last but not least, I’m really excited to introduce the lovely Denia blouse!

Denia is the easiest of the new patterns: this would be an excellent project for a beginner seamstress. It features a round collar, short cuffed sleeves and buttons in the back. The wide panels can be tied in a knot or left loose. It’s available as a PDF pattern in English, French and Spanish.

For fabric, we recommend light to medium weight such as cotton poplin, batiste, linen, viscose, chambray… Use stripes or color block to highlight the original seams.

Depending on the fabric you choose, Denia can be either casual (think cotton or linen) or more dressed-up (viscose, silk).

I was also inspired by my Japan trip for the Denia blouse: I wanted something stylish but with a very classic line at the same time. The volume is key for this pattern: loose-fitted, the ties help shape the blouse the way you want to.

Stripes were obvious to me as soon as I started working on the pattern: it would be so great to play with horizontal and vertical stripes for the many pieces. I used a cotton fabric with lurex stripes from Un chat sur un fil for the presentation pictures.

I also made a very light viscose Denia (fabric from Henry et Henriette) with contrasting bias piping and a small chest pocket. And I can’t stop thinking about a color block Denia for summer…

This will be the perfect top for summer as it’s loose-fitted and will look stylish with everything. How about you pair it with the Botanic trousers, the Rosari skirt or the Port shorts?

Find the Denia blouse PDF pattern here!

1 comment
2 FacebookTwitterPinterestEmail

A new trousers pattern for Spring, hooray! Meet the Botanic trousers, your perfect companion for the warmer months. This pair of wide-legged, high-waisted trousers are so comfortable you’ll want to live in them every day (I know I do!).

When I started designing the Botanic pattern at the end of 2016, culottes were seen in editorials or high-fashion magazines but not so much on the street. But this season, they’ve started to pop up everywhere! I certainly don’t mind as I love this style.

Botanic trousers are very flattering and create an elongated silhouette thanks to the cropped-length. They are designed for an average height of 5 ft 5 (1m65) and the hem should hit between mid-calf and just above the ankle.

The waistband sits at the natural waist and the front waistband is flat with two folds on each side for a smooth and clean line.  Pockets are hidden in the side seams. But the best feature is the elastic back waistband: not only is it comfortable but it allows for a fitted waist without the need of any closure. The belt loops allow you to add the self-fabric removable belt or a belt of your choice.

Choosing the right fabric for the Botanic trousers is very important: drape is the key word! I recommend going for a light to medium weight fabric with a lot of drape such as crepe, viscose, linen, light wool, silk… You also need a piece of interfacing for the waistband.

For the presentation version, I’ve used a beautiful viscose fabric in black. It is really soft, comfortable, light and with a great drape.


A few days ago, I showed you several Tello jackets on my instagram story. It was a great way to show the possibilities of this model in other fabrics and colours. In the same way, I was thinking of sharing with you the Botanic’s versions I made while testing the pattern.

Mid saison Botanic – 

This is a test version I have worn all winter. The fabric I’ve chosen is a  checked wool blend purchased in a beautiful haberdashery situated in Valencia, Bye Bye Manoni. This fabric is a perfect fit for these trousers. It looks great with sneakers for a casual week end outfit or like this, with boots and a shirt for work.

Spring Botanic –

I was thinking that a light printed cotton fabric with ethnic influence would be a nice idea for a Botanic spring version.  This viscose is from Henry Henriette but does not exist anymore… However,  you can find more printed viscose in their online shop.

I think I’ll be wearing this one during all summer, it’s so light and breezy!


So, which one is your favourite version?

0 comment
6 FacebookTwitterPinterestEmail

Let me introduce you the Tello jacket today.

Tello is a classic utility jacket, unlined and with many pockets (by now, you should know I’m a pocket addict!). It features topstitching, a Balmacaan collar, and one-piece sleeves shaped with an elbow dart. The front closure can be made of buttons or snaps.

As for the various pockets, I bet you’ll find what you need: large hip U-line pockets, a small chest pocket and a vertical zipped chest pocket with lined interior. So practical!

I had a similar jacket when I was younger and I love how it was so versatile. That’s why I wanted to design a jacket that goes with almost everything in your wardrobe: a cute dress, a pair of jeans, shorts… Typically, it’s the jacket you grab before going out on a summer evening without thinking!

The Tello jacket construction is quite easy, I would recommend it as an intermediary level pattern and it would be great as a first jacket with interesting details. It’s unlined (you can either serge the seam allowances or bound them with a pretty bias binding tape matching the lined pocket), the one-piece sleeve is easy to insert and the collar is only one piece. Use snaps instead of buttons to make even simpler.

You can use a great variety of fabrics to make the Tello jacket: gabardine, twill, denim, lightweight wool or linen like the presentation version. You also need some lining for the pocket (cotton would be perfect) and bias binding if you choose to finish your seams this way. No interfacing is required, this is a rather informal jacket, but if you think your fabric would need it, feel free to interface the collar and facings.

Easy to make and easy to wear, what more can you ask the Tello jacket?

You can find the Tello jacket pattern in the shop in both PRINTED and PDF versions.

3 comments
1 FacebookTwitterPinterestEmail

Spring is finally here and it’s the perfect excuse to introduce three new patterns available in paper and/or PDF format. I’ve also prepared some surprises for all of you so stay tuned! But first, let’s see the new patterns:

  • The Tello jacket is a classic utility jacket, unlined and with many pockets. It features a topstitched collar, one piece sleeves with dart, one vertical zipped chest pocket with lined inferior and one patch pocket, large hip pockets and six button closures at front placket. This model is available in paper and PDF format.

  • The Botanic trousers are wide-legged with a high waist and cropped length. They feature a double-pleated front, pockets and a removable belt you can tie according to your own taste. The waistband sits at the natural waist and has a flat front and elastic back for comfort, no closure needed. This model is available in paper and PDF format.

  • The Denia blouse is loose-fitted, with a round neckline and short cuffed sleeves. It ties in the front and closes in the back with buttons. This model is available only in PDF format.

There you go, a complete outfit perfect for Spring! I hope you’ll like it! You can find all 3 patterns at the Pauline Alice patterns shop. This week, we’ll go into more details on each pattern…


8 comments
6 FacebookTwitterPinterestEmail

The new shop is live!

by Pauline Alice

One week after releasing the new blog, it’s with great pleasure (and a hint of nervousness) that I introduce you to the new shop!

I’ve been working on this new page for a couple of months, to propose a new design that represents Pauline Alice more accurately, a site more user-friendly and with more options.

Here are some important details to know:

  • New categories. When I opened my first online shop, I had only 6 patterns available so it was really easy to see them all at once. But Pauline Alice is growing and there now 18 patterns in the catalogue! It was time to order everything and file them under separate categories. You can now look for patterns according to style (Outerwear, dresses, tops and bottoms) or format (printed pattern or PDF print-at-home). Which leads to the following point.

  • The biggest difference the new shop offers is the format category. Before, you were able to choose the format you wanted to order from the product page, now you have to choose before. Thus, there are two options for each pattern on the main page. And why did we have to change that? Well, it’s for a very unglamorous reason: VAT legislation… On January 1st 2015, a new legislation was signed concerning VAT for digital products in the European Union – and PDF patterns are considered digital products. I won’t bore you too much with the law but the main point is that VAT is calculated according to the buyer’s country. A new rate is going to be applied from now on: depending on where you live (UK, Germany, Belgium for example), you’ll see that the final price for PDF patterns is different, as each country does have a specific VAT rate. For each PDF patterns now, the price will be offered as ex. VAT (without taxes) and VAT will be applied automatically at the end of the order process (this explains why it’s very important for you to fill in all your address details, even for PDF patterns). And if you leave outside the European Union, no need to worry. You won’t see any changes.

  • Your personal accounts have been migrated to the new shop, you’ll be able to access them with the same email address. But you’ll need to generate for a new password by clicking on “forgot your password”. Your address will also need to be added on your first order. Your PDF pattern library is going to be empty for a couple of weeks while we migrate your previously bought PDF patterns. Once it’s done, you’ll be able to access them and download or print them as before. If you need one of your patterns urgently, send me an email and I’ll mail it to you. Thanks for your understanding!


Here are the main changes you’ll find on the new shop. I hope you’ll like the page and that you’ll enjoy using it. And please, don’t hesitate to send me an email at info@paulinealicepatterns.com if you have any question, as I would be surprised if the new shop launch went smoothly ?

See you on Monday for the new patterns release! And while waiting, the Aldaia, Rosari and Xerea printed patterns are back in stock!

signature1_editado-1

0 comment
1 FacebookTwitterPinterestEmail
back view of Seda dress criss-cross variation

It all begins with this amazing fabric: I saw it 3 months ago at my local shop when I went for interfacing (and the plan was to leave with only interfacing). I remember thinking ” wow, what a great print!” and then touching it and thinking “wow, and it’s super soft as well”. So I grabbed 1,5 m and went home with it!

It reminded me of last seasons Dolce & Gabbana printed dresses with large florals and fruits, and I love Dolce & Gabbana retro classic italian (and a little over-the-top) style.

Seda dress pattern design

Back of the seda dress pattern


Steps to change the dress

I knew I was going to use it for a double wedding* I had in June (*2 weddings on the same day! That was crazy but so much fun!) and I wanted a simple retro shape for the dress. I thought about the Seda dress pattern and decided to hack it. Here are the changes I made with a diagram:

  1. First I made a muslin of the bodice without sleeve, adding some straps. As the bodice top is supposed to be attached to sleeves, I had to remove some ease at the neckline to bring it closer to the chest. I just cut a line parallel to the grainline/foldline and overlapped by 2 cm (removing 4 cm in total).
  2. I redrew slightly the front armhole and lowered it.
  3. I cut open the back bodice dart and taped the two pieces together (no need for dart with this low back). I redrew the back tracing a diagonal from the armhole (making it match the new front one), ending about 10 cm above the waistline.
  4. I made fabric loops, long ones! The loops go from the back and cross each other passing through a smaller loop in the front.
  5. I used the same skirt pattern but had to remove some width as my fabric only had a 45″ width. It’s not as full as the original Seda dress pattern.
  6. I lined the bodice only.

back view of Seda dress criss-cross variation

Verdict: Love it! The simple shape of the dress allows the fabric to shine and that was the idea. It was really comfortable to wear all day (the fabric is cotton twill with a bit of stretch!). I love the straps detail, it’s my favorite part of the dress, even if I could have added 2 cm to each strap to make the waistline sit a little bit lower.

And the best thing is that I’ve been wearing many times since!

I hope you’ll like it and that you’ll give a try to this summer variation!


11 comments
5 FacebookTwitterPinterestEmail
sleeveless varisation reina shirt
We are having a nice summer in Valencia and temperatures are already quite high (for the last 2 months I’ve been wearing summer dresses and sandals). And for me, the Reina shirt is perfect to wear on such warm days: it’s flowy, loose-fitting but put together as well. I’ve made this sleeveless version two months ago and I’m wearing it constantly. I’ll have to make a new one and maybe a dress variation as welsleeveless varisation reina shirt
sleeveless reina shirt 1sleeveless reina shirt back
I’ve used a cotton voile from Cosercosas, a spanish online shop. It’s very soft and light and I couldn’t resist the cute sewing needles print!
Instead of sewing the sleeves, I just finished the armhole seamallowances with self-fabric bias binding. Easy! I didn’t change anything else (except not using any interfacing to keep the drape and lightness of the fabric).
sleeveless reina shirt side
Hope you like it! What’s your favorite summer garment?
8 comments
1 FacebookTwitterPinterestEmail