
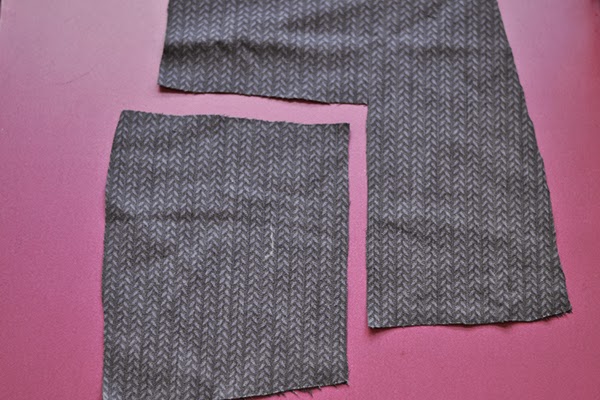
Holiday season has started and it means Party!!! Have you thought about your party dress for the holidays? Mine is going to be a velvet and polka dot tulle Seda Dress. And while sewing it, I took pictures of the minor changes I made in order to show you some variations you might want to try on your own version of the Seda dress.
So today, we’ll see how to add boning to the Off-the-shoulder version, View A.
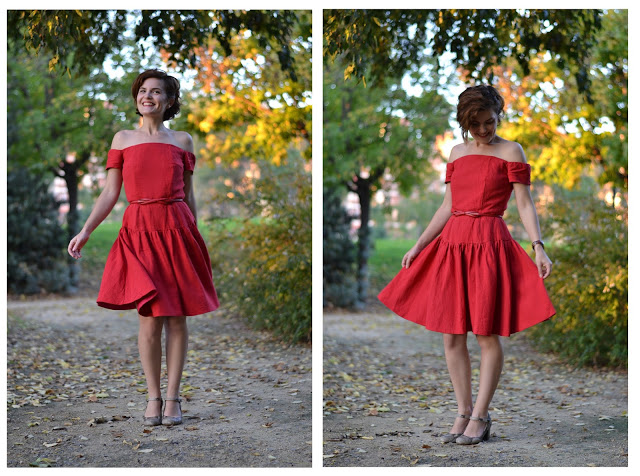
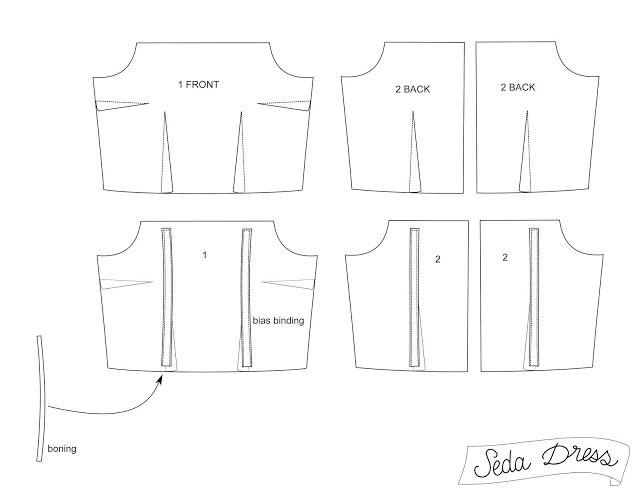
View A of the Seda dress emphasizes the shoulders and neckline, I think it’s very sensual and quite sexy if you ask me. The dress is designed to work without added structure but depending on your fabric and your bust size, you may feel more comfortable adding boning to the bodice of the Seda dress View A.If your fabric is light and doesn’t have enough body, I would recommend adding an underlining. To underline the bodice, you can use muslin fabric, cotton batiste or silk organza (choosing the right underlining will depend on your fashion fabric, underlining should always be lighter in weight). Cut the bodice pieces out the underlining and transfer all the markings (you don’t need to mark the main fabric). Baste the fashion fabric and the underlining together, you can then use them as one piece.
Underlining will help structure the bodice of the dress, it will also prevent darts to be seen from the right side if your fabric is very light and will minimize wrinkles. And for our purpose, it will prevent to boning to show throught this double layers of fabric.So now on to the boning!
There are different types of boning, here the ones you’re most likely to find at your notion store:
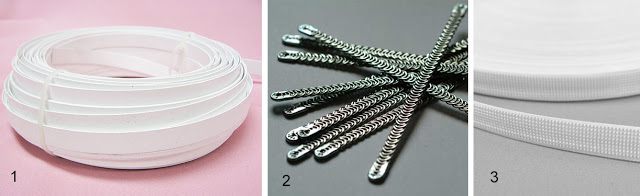
- Plastic boning. Sold by the meter/yard.
- Steel boning. Either flat or spiral like in the above picture. Usually sold in precut length.
- Rigilene boning. Can be stitch directly on fabric. Sold by the meter/yard.You’ll need approximatively two 28 cm (11″) boning for the front bodice and two 26 (10 1/2″) for the back, both about 1 cm wide (3/8″).
-Stitch along the edge of the bias binding, going up and down, stitching very very close to the edges.
-Insert boning into the channel you created with the bias binding. Make sure your boning stops about 2 cm (3/4″) above the waistline edge. Stitch the bottom edge of the bias binding to prevent boning from moving.Rigilene boning insertionWith Rigilene boning, you’re going to pin the boning directly on the wrong side of the lining over the darts, as explained for the bias binding previously. You can melt both ends of the Rigilene so it won’t punch through the fabric (or stitch a piece of fabric over the ends). Make sure the boning stop about 2 cm (3/4″) from the neckline and waistline edges.
Stitch over the boning, on each side.Now you are ready to follow the Seda dress instructions just as they come.


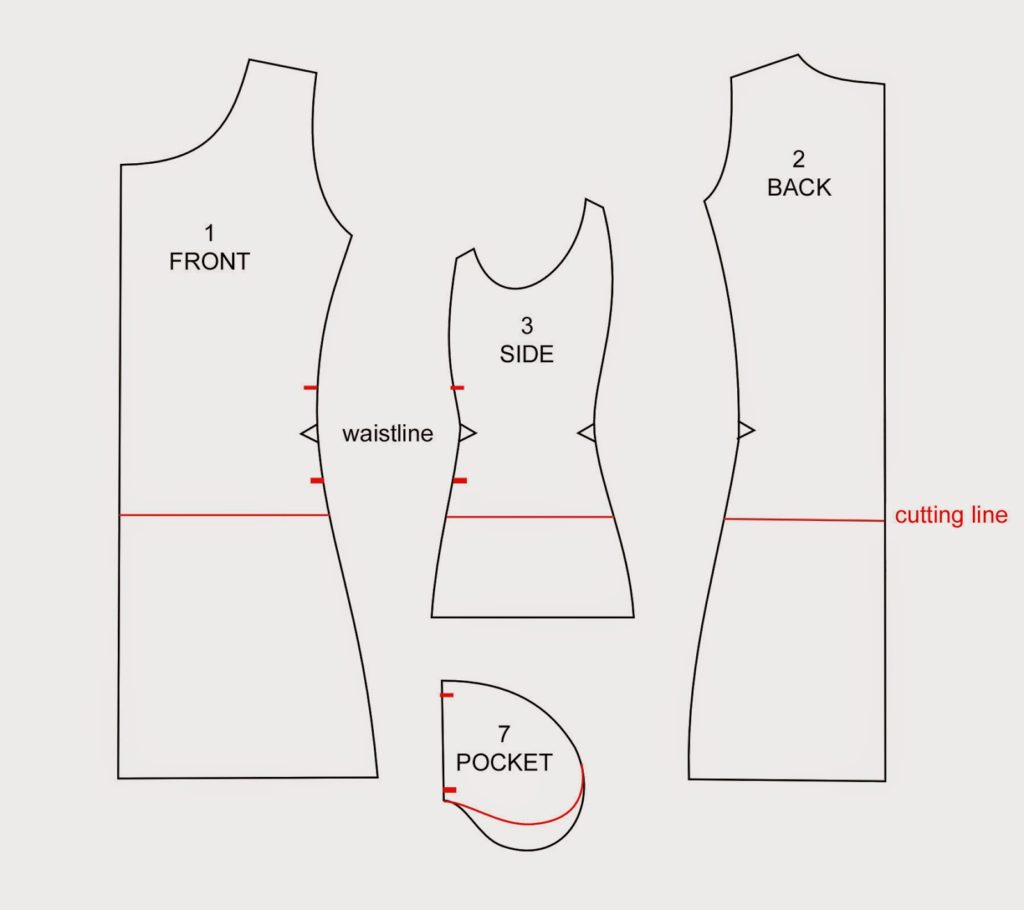
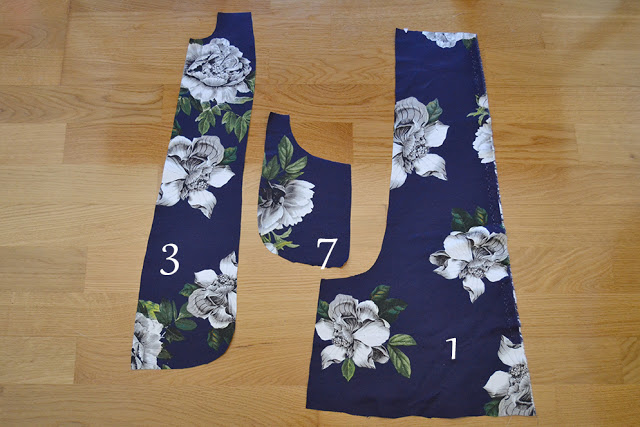 Here are the pieces involded in the pocket construction:
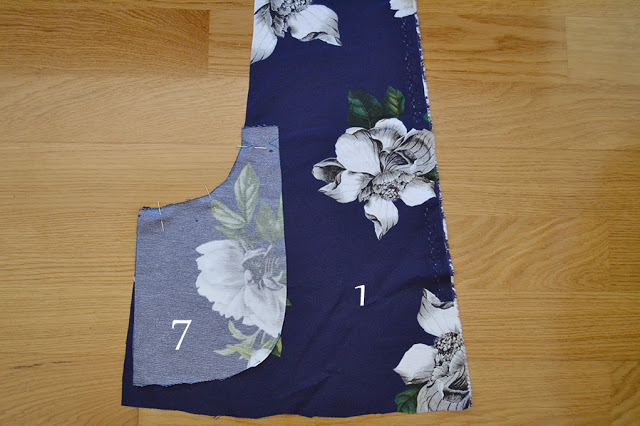 1. With right sides together, pin the pocket (7) to the front (1), matching the marks.
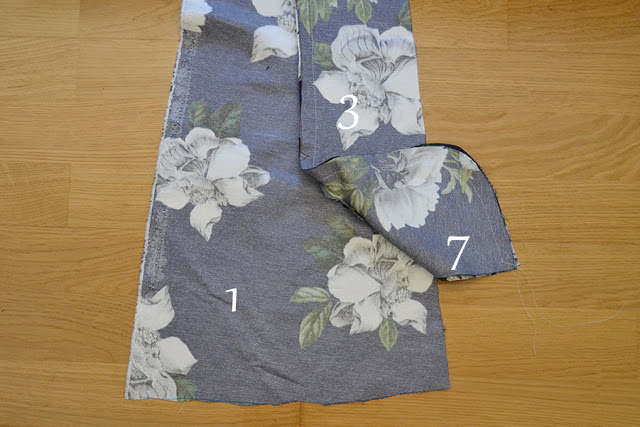
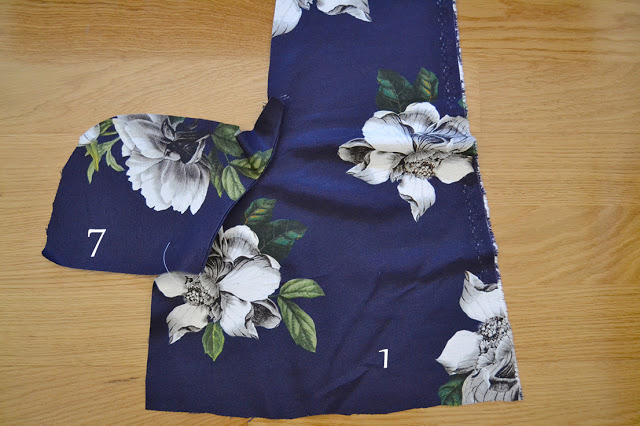 3. Press the pocket seam flat (you can understitch the seam allowance if you want). Open the pocket like on the picture.
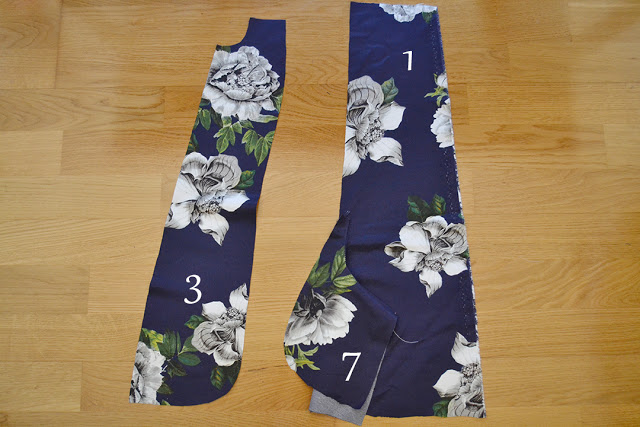
 4. We are going to stitch the side front (3) to the front/pocket piece. With right sides together, pin the side front (3) to the front/pocket. Start pinning from the top, side front to front and when you reach the pocket, continue to pin to the pocket curve as if it was one unique piece, matching the marks. Stitch.
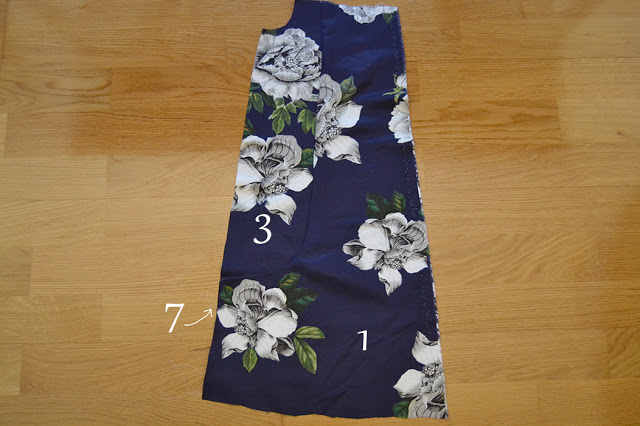
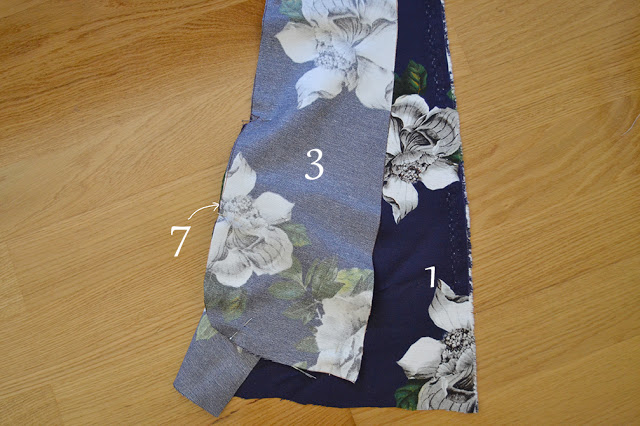
 5. Place the pocket inside and press the pocket opening flat and the seam allowances toward the front. Trim and finish them.I hope this will help you. It’s a difficult step to photograph but if you make a pratice pocket before sewing your Xerea, I’m sure it will be easier to understand.

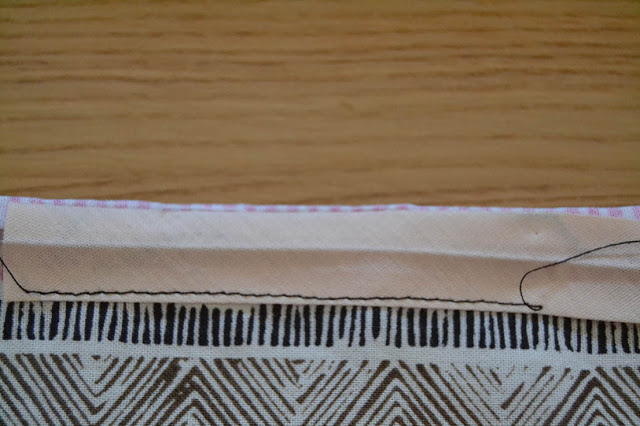
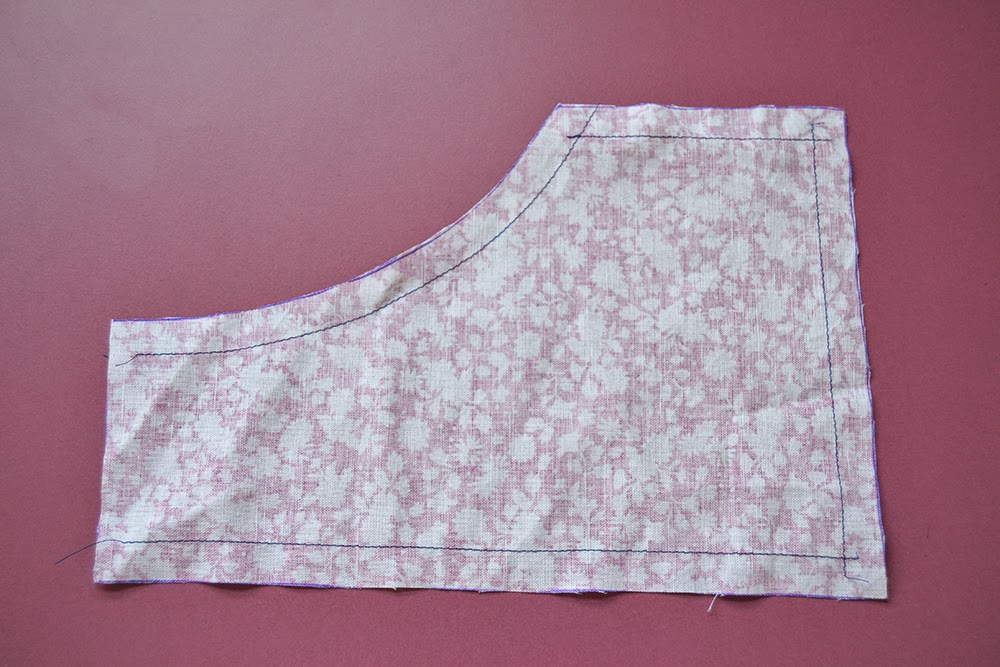
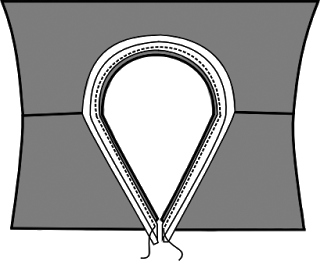 Here is the illustration for this step in the instructions booklet. The instructions tell you to “finish the neckline with bias binding: with right sides together, pin the bias binding to the neckline matching the edges. Stitch on the first fold line. Fold the bias binding to the inside twice and edgestitch.”In pictures, this would look like that:
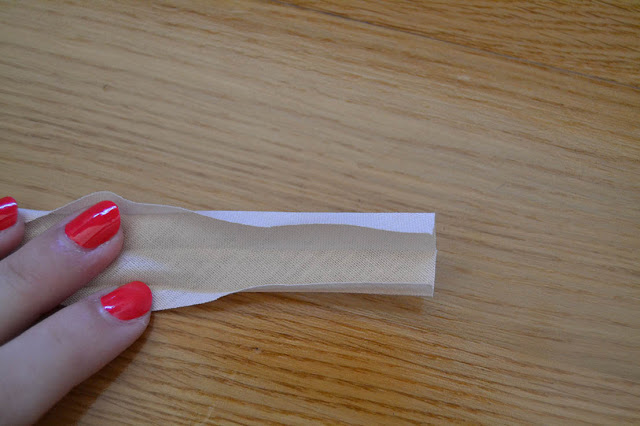 Here is your bias binding: double fold and a pretty normal width, here approx. 2,5 cm (1″) when completely open.
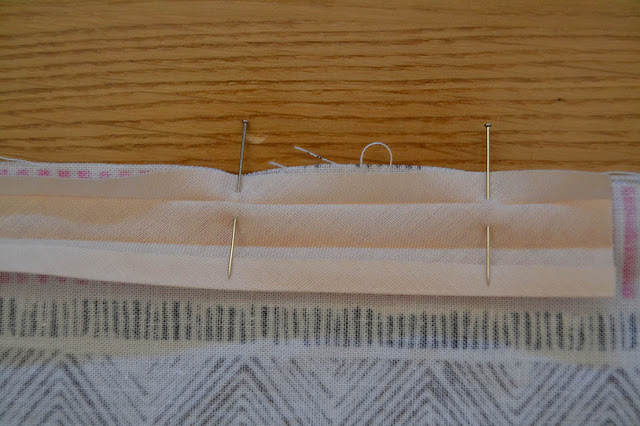 First, pin the bias binding on the neckline, with right sides together (oups, my fabric is upside down, make sure yours is with right sides together!). The bias binding raw edge should match the fabric raw edge.
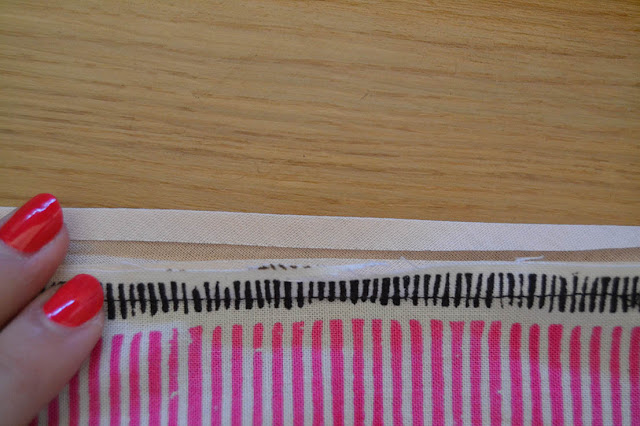
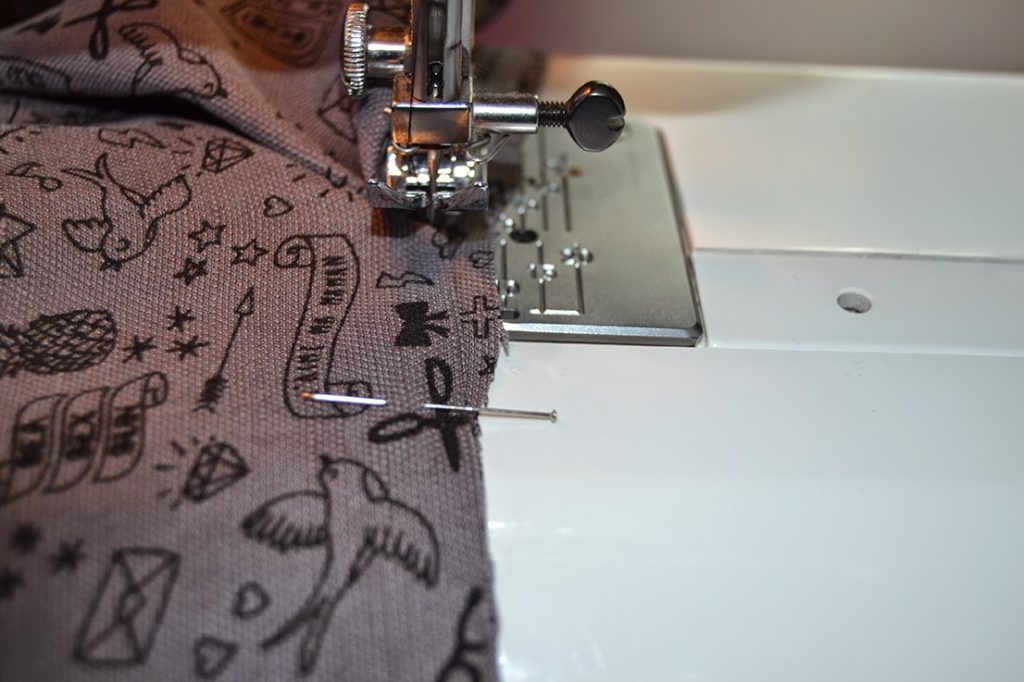
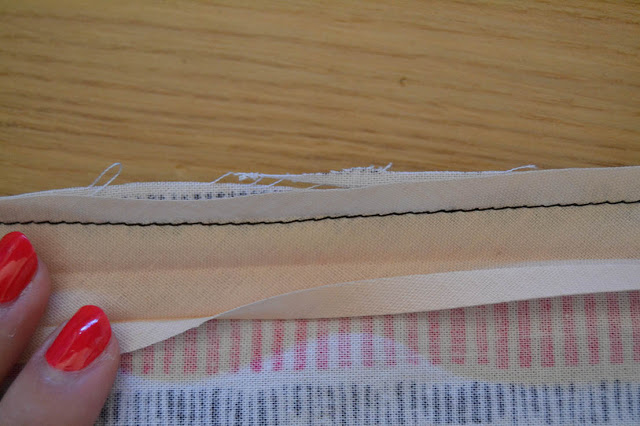 Then stitch inside the first fold line crease. This should be between 0,3 and 0,5 cm (1/8″ and 3/16″) from the edge.
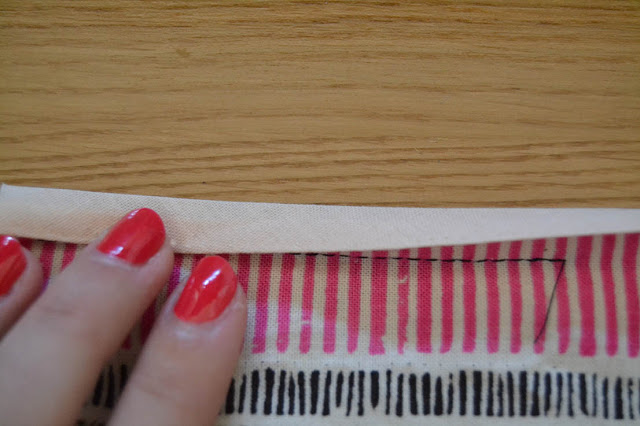
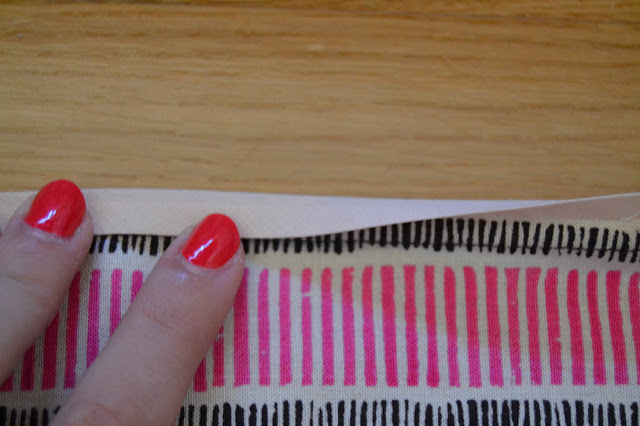
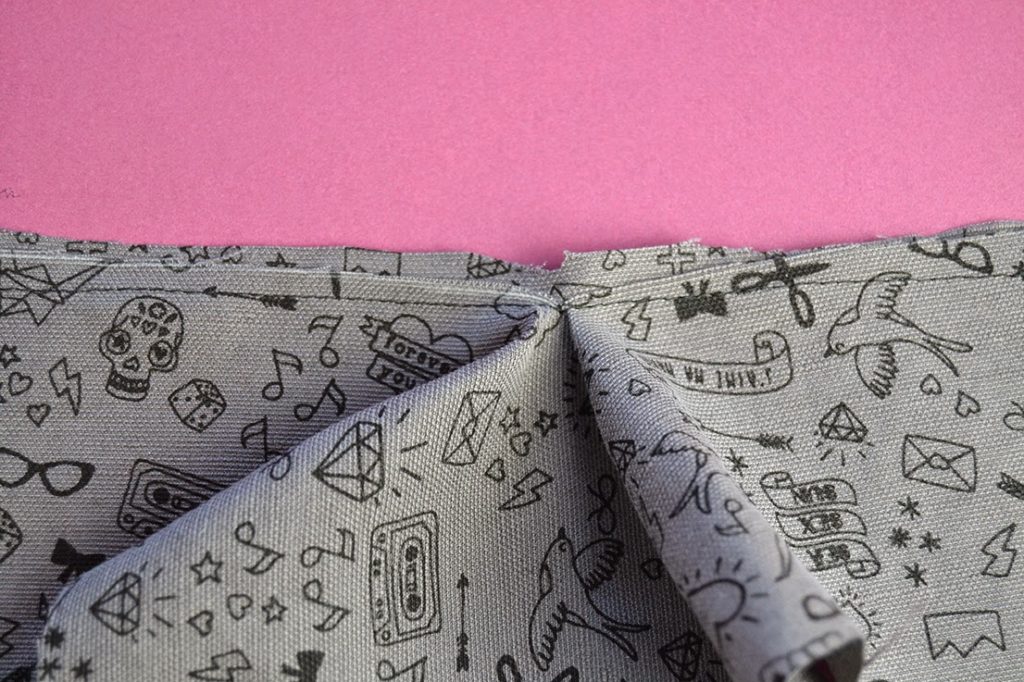
 Fold the bias over the seam allowances along the center fold and then fold it again to the inside. Press. Edgestitch.
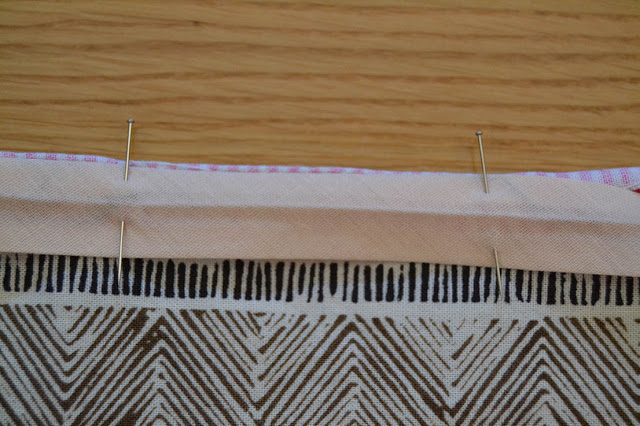
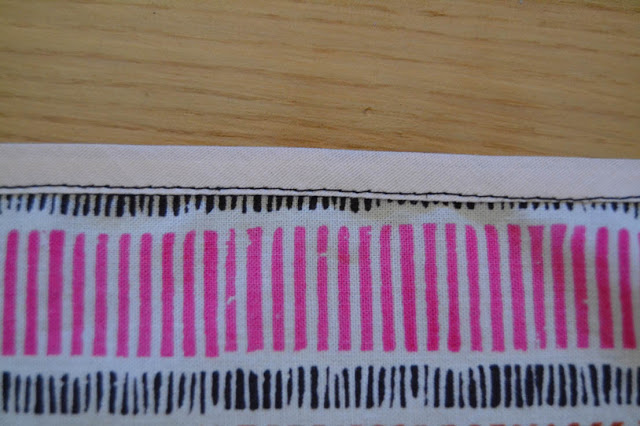
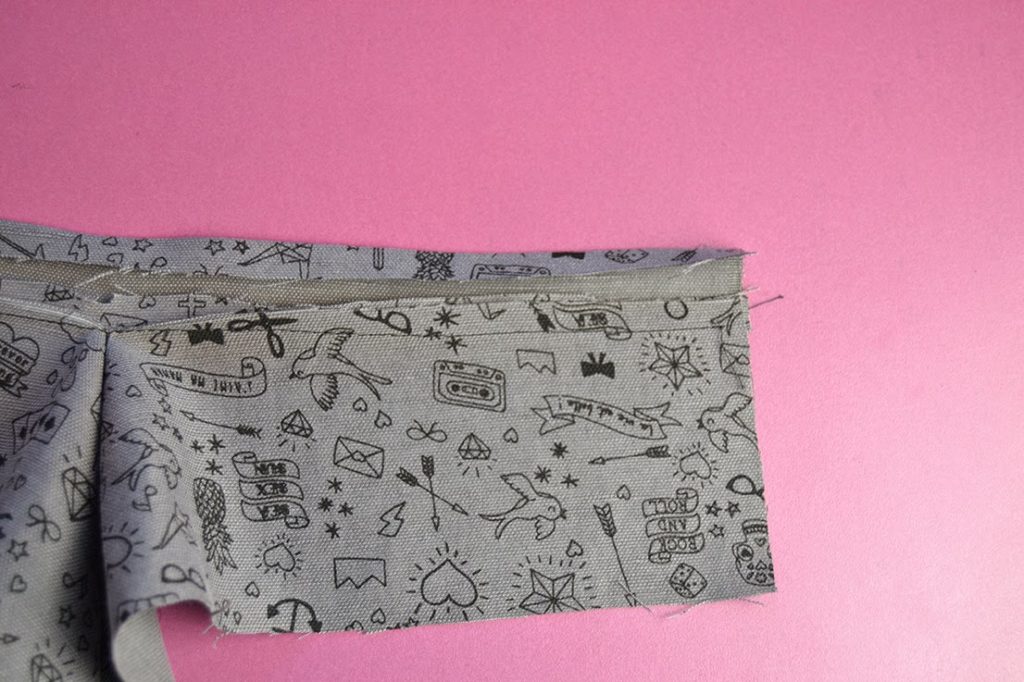
 You can also fold the bias binding only once to the inside. This will give you more structure to the hem, but I would recommend this only for the sleeve and dress hem, not the neckline.
 Pin the bias binding to the neckline, matching the raw edges. I like to pin it to the wrong side but this is a personal preference, you can also pin it right sides together. Stitch inside the first fold line crease. Fold the bias binding over the seam allowances to cover them and edgestitch (make sure your binding covers the first line of stitching you did). This would look nice with a constrating color binding.Please let me know if you have any questions.


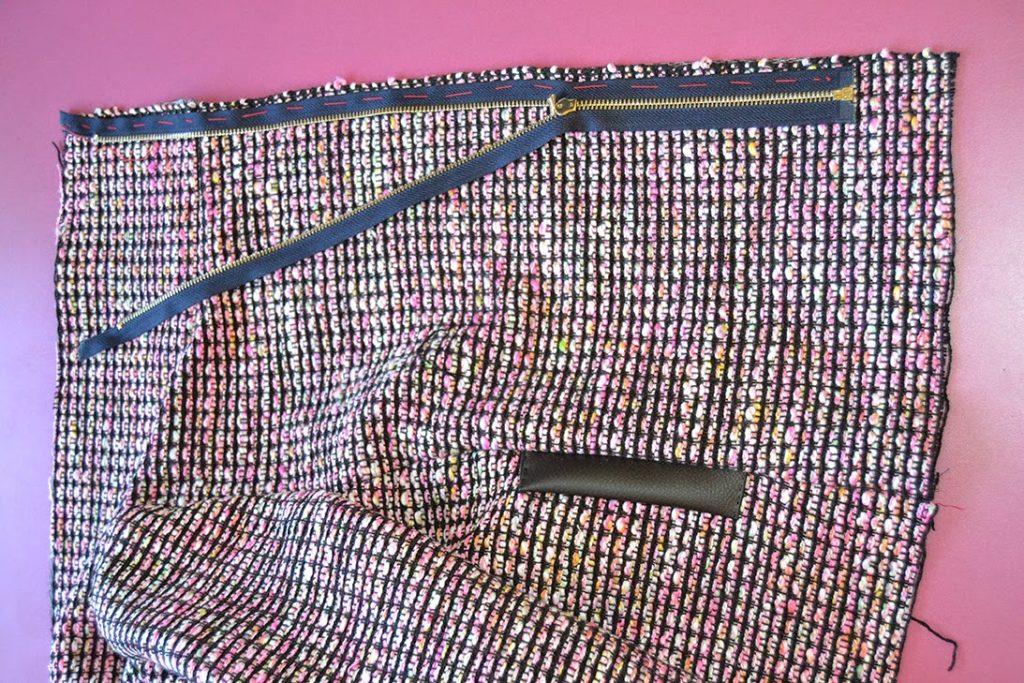
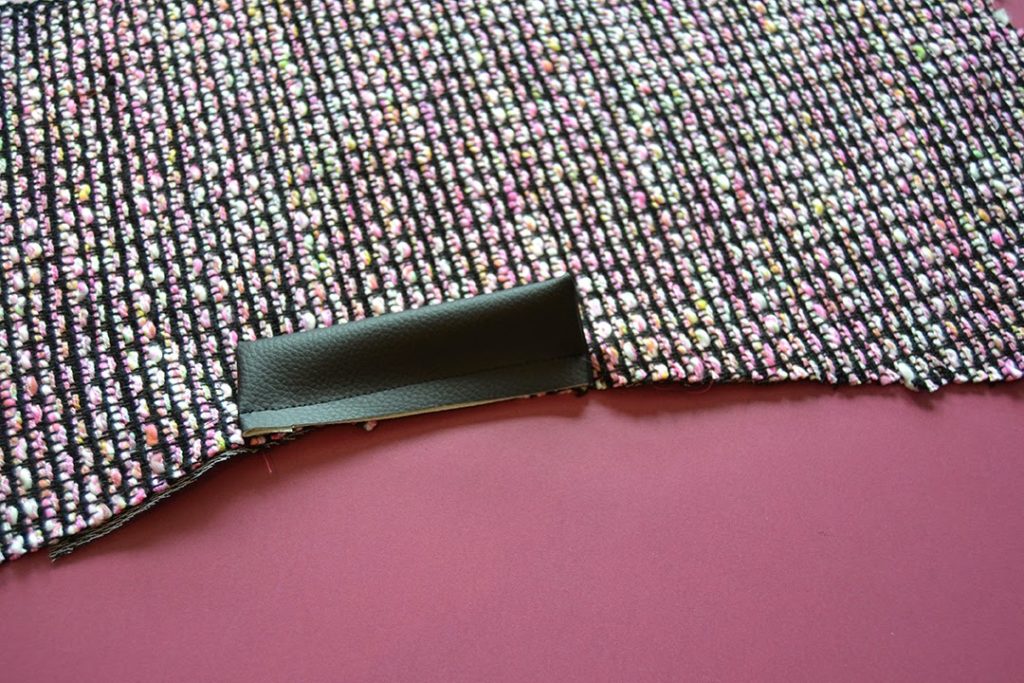
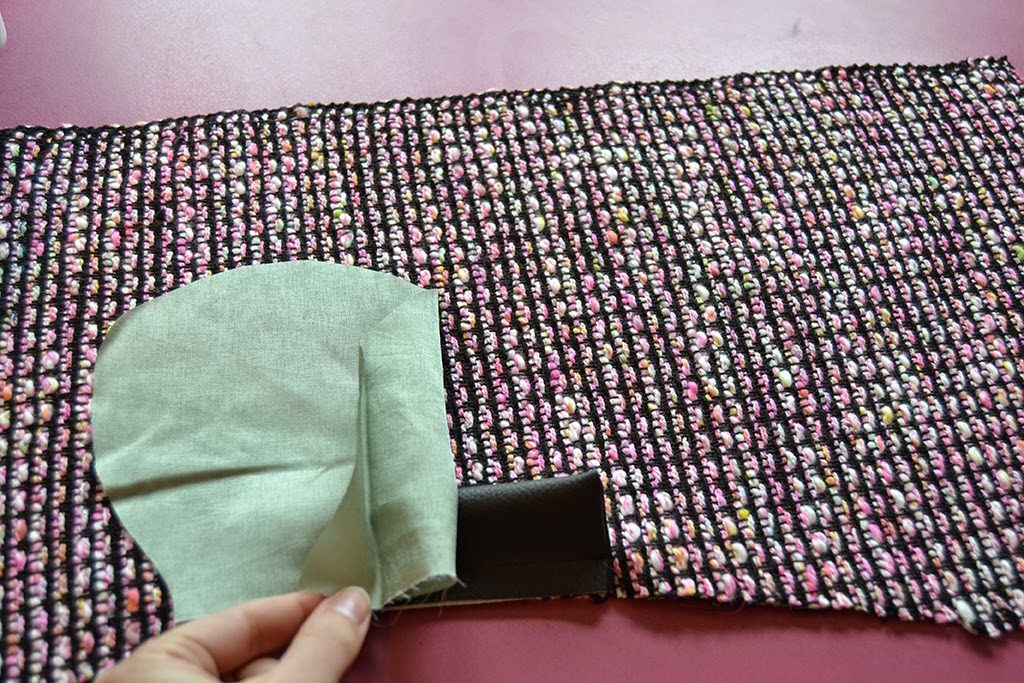
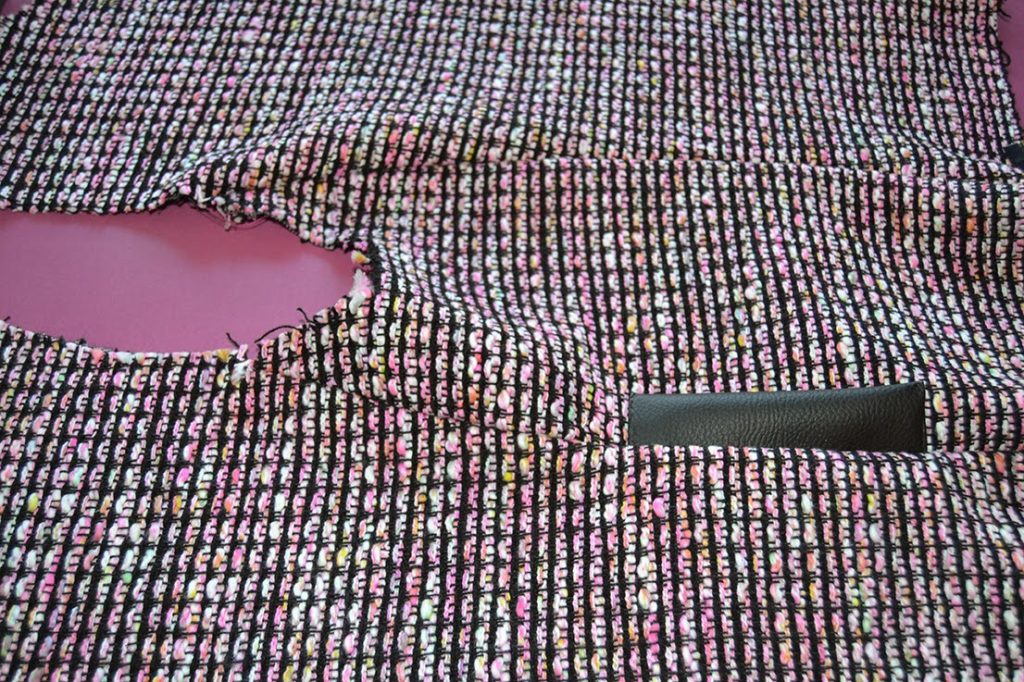
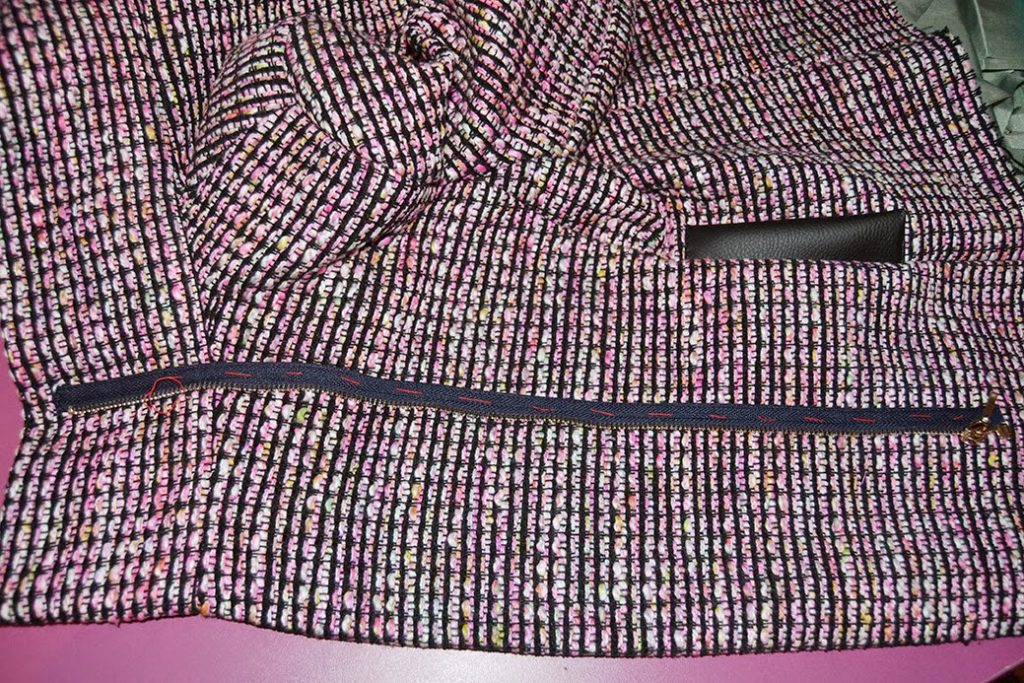 To add a leather welt to the pockets, cut 2 pieces of leather of 10 x 16 cm (4″ x 6 1/4″) and fold them vertically. Stitch the extremities together and turn inside out. Place the welt between the pocket marks on the front piece and stitch at 1 cm (3/8″) from the edge. Redraw a new pocket (see the illustration above) and place hem over the welt and the pocket marks on the side piece. Stitch the pockets according to the instructions. Stitch the welt side to the side piece.
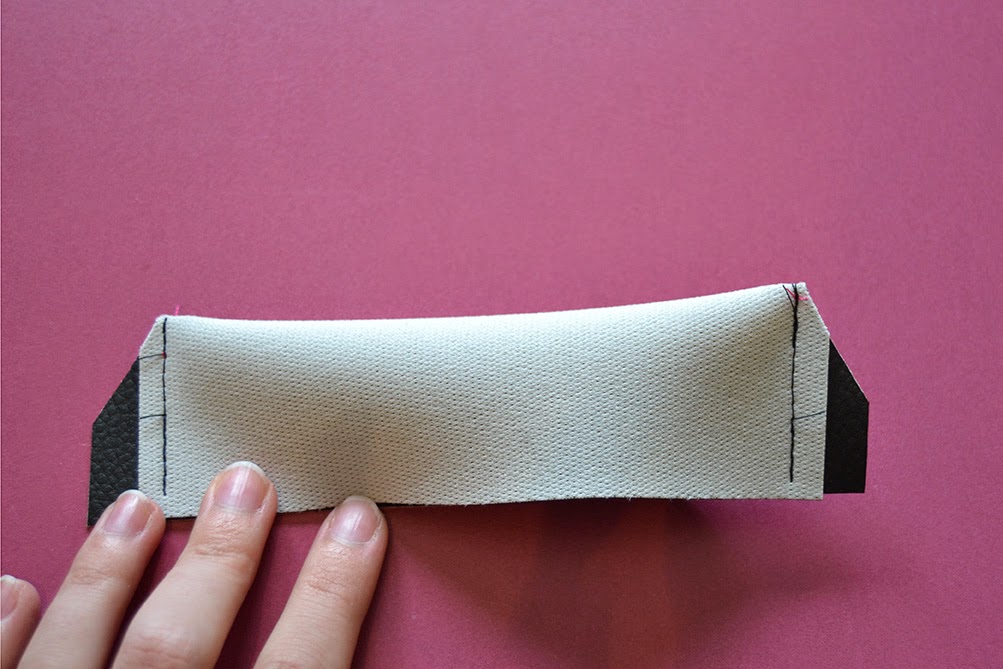

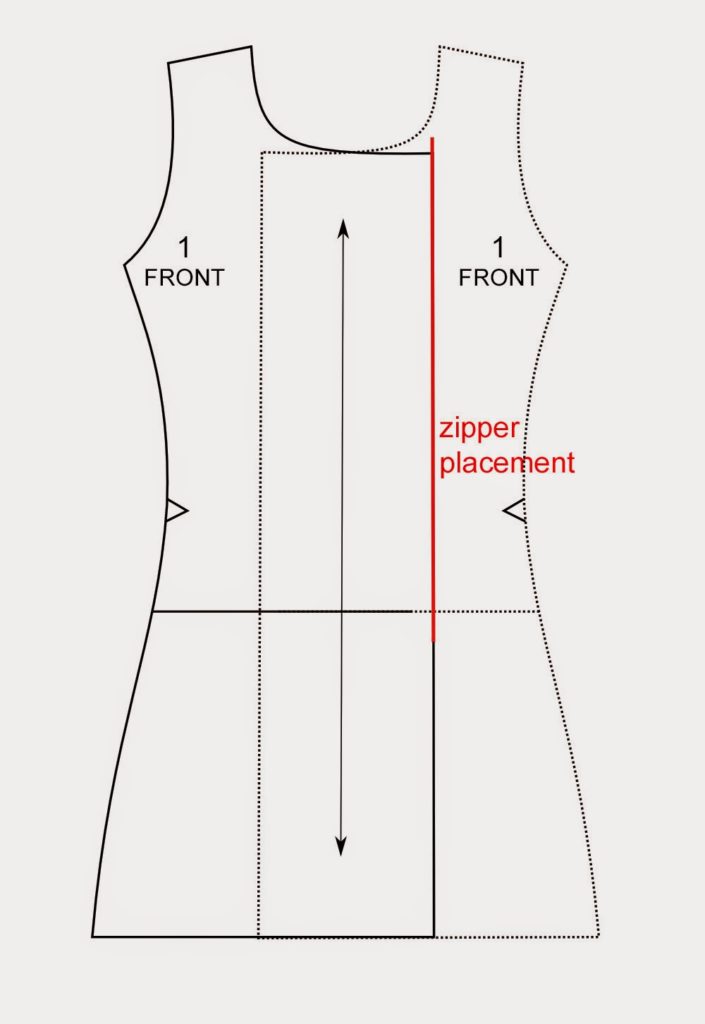
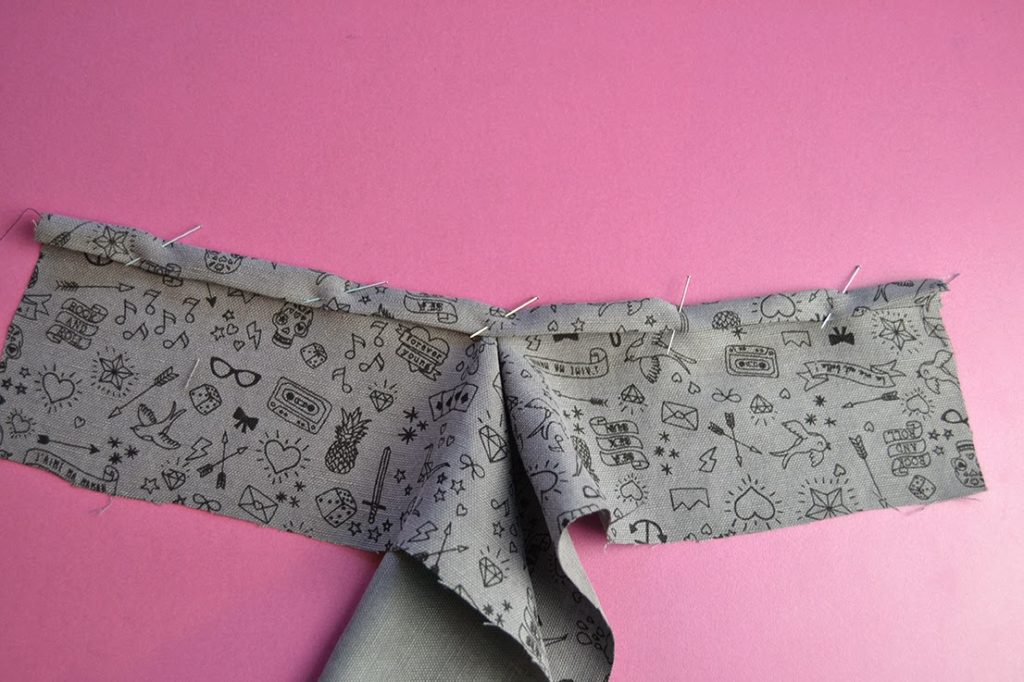
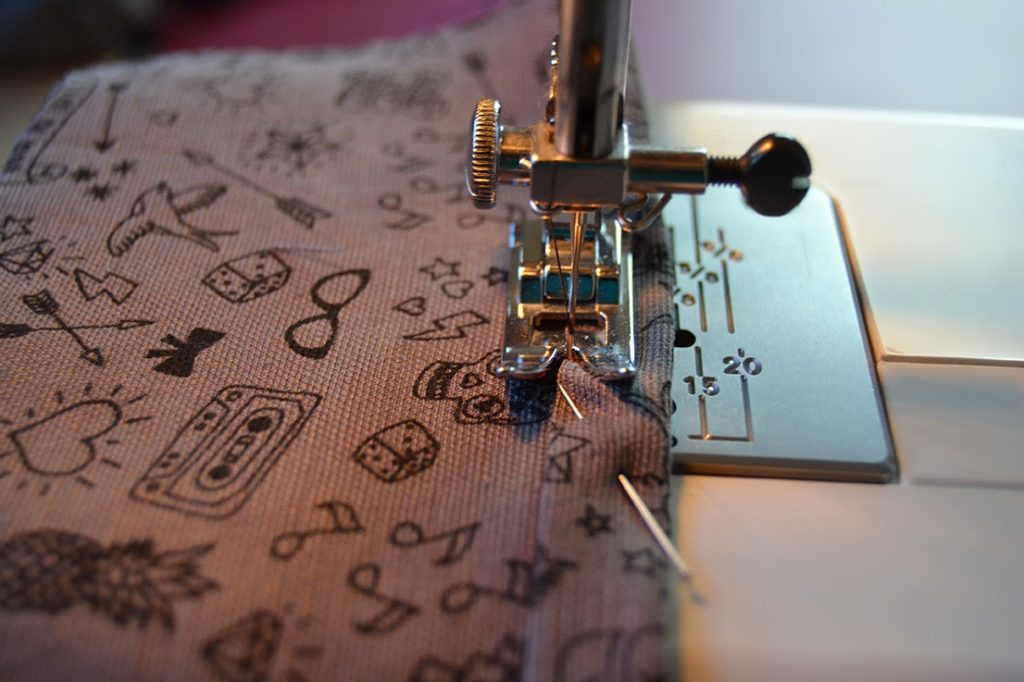
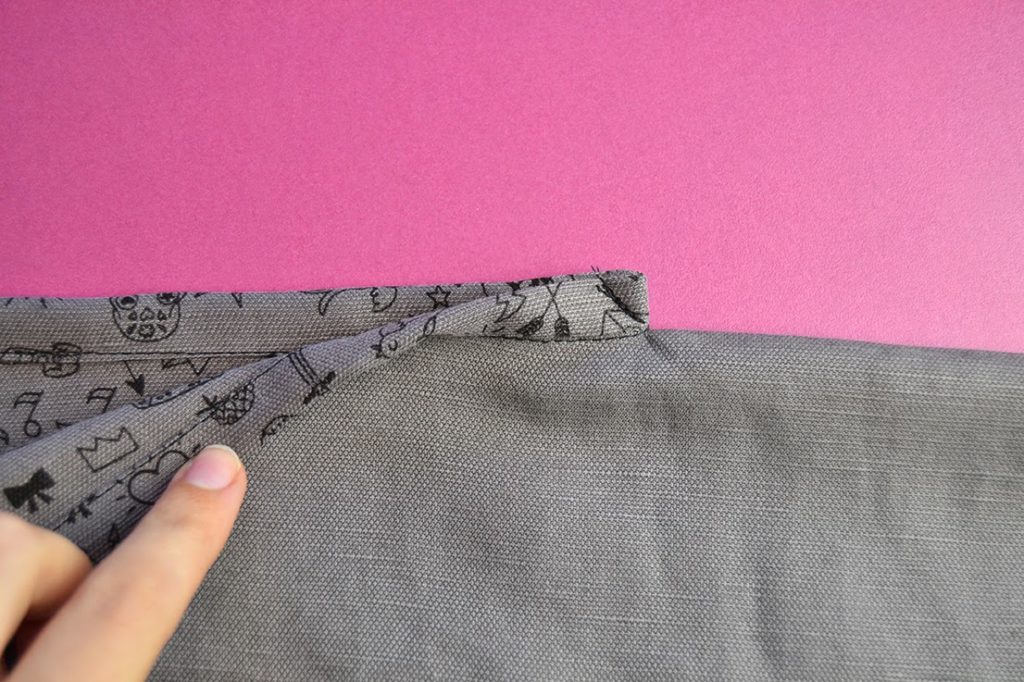
 Here’s how to sew an easy vent with binding!
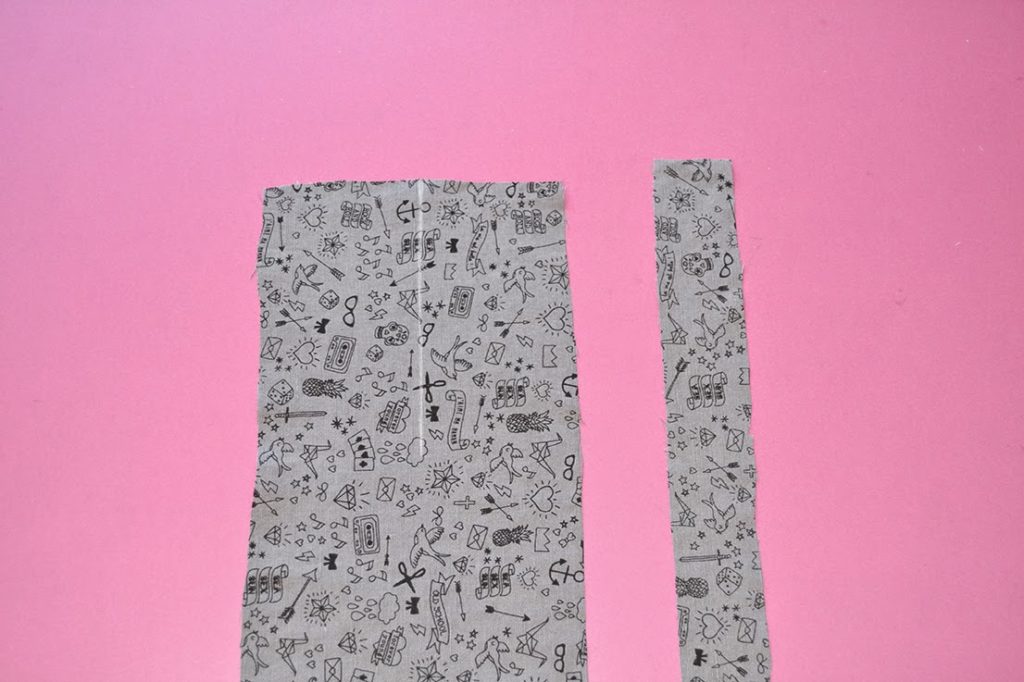 You’ll need your fabric piece (sleeve or bodice) and a strip of fabric cut on grain twice as long as your opening and about 1″ large (you can also use bias binding, just know that it may not sit as flat as on grain fabric).
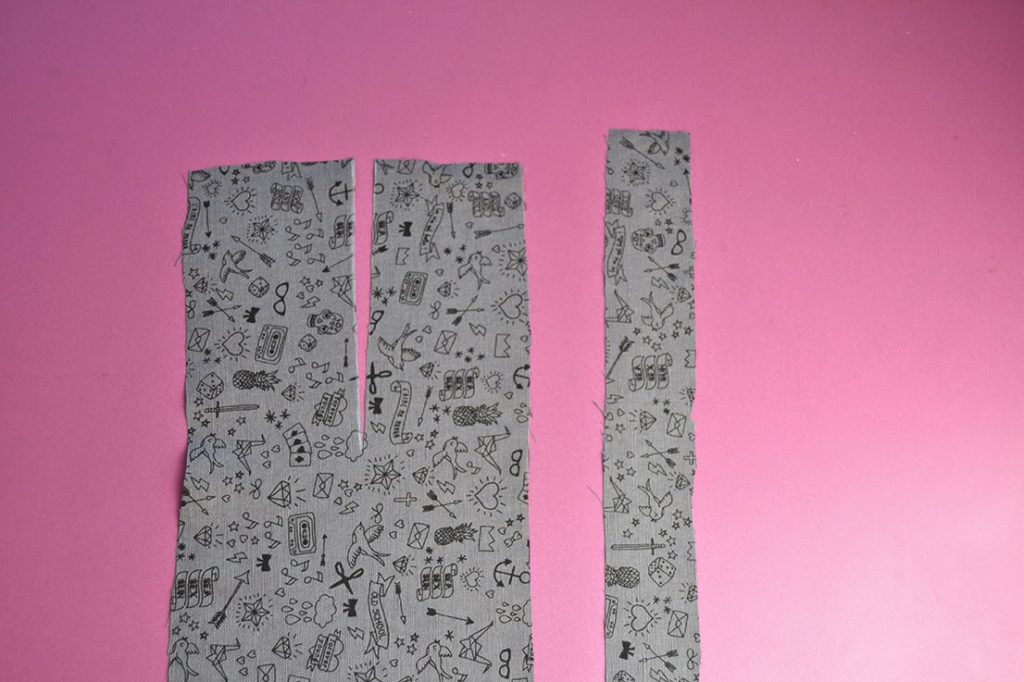 Step 2:
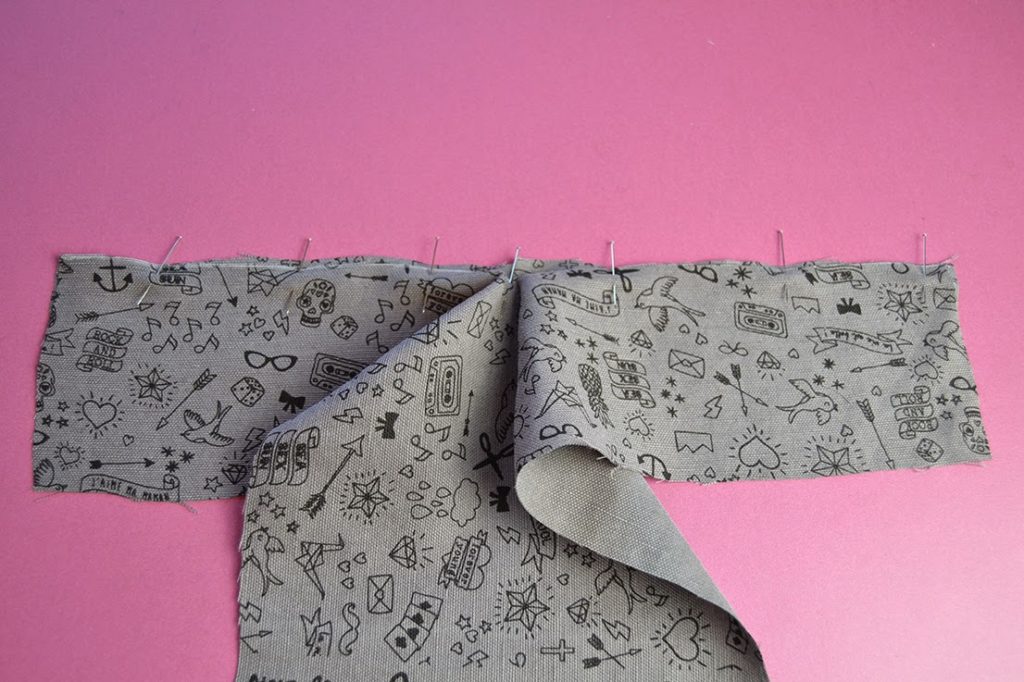
 Here is how it looks from the right side:
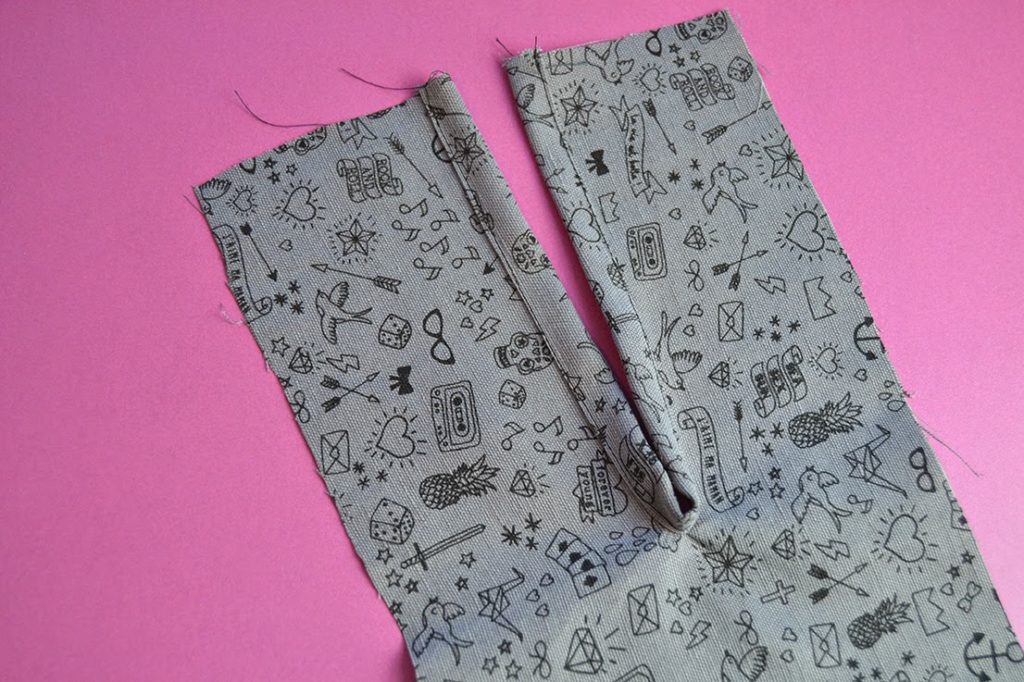 Step 6:
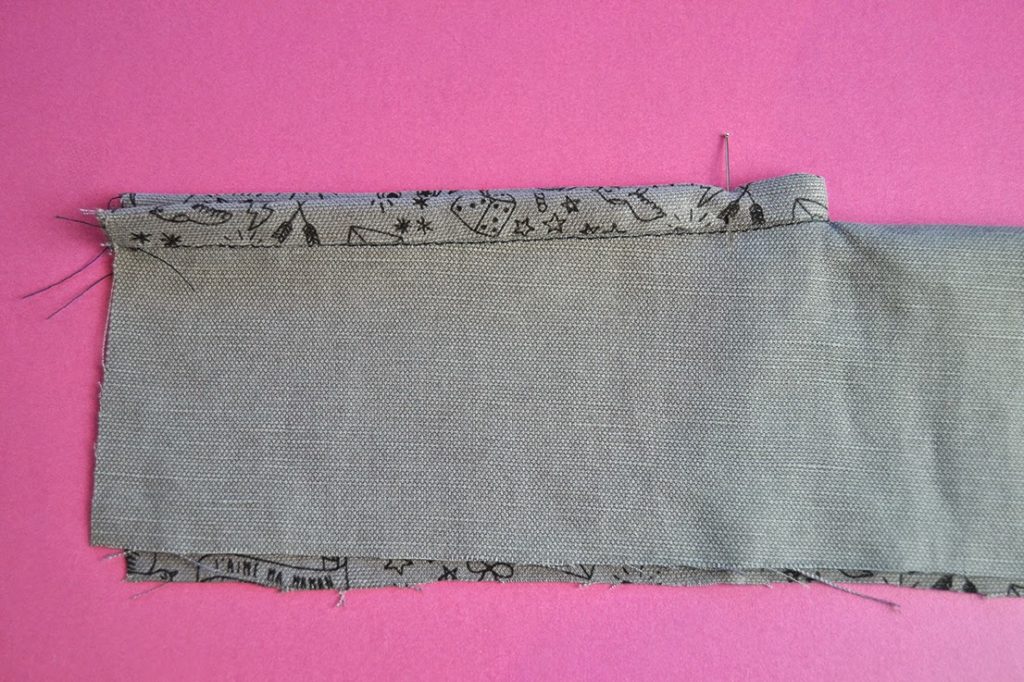
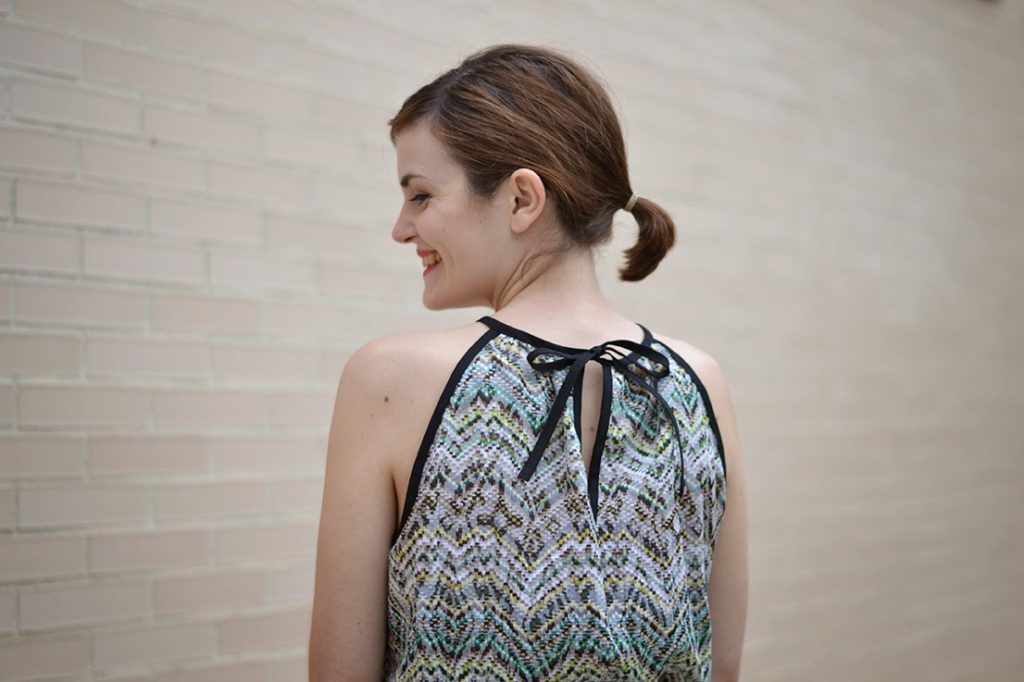
 There you go! Now you can add cuffs or hem your sleeves for the Carme and stitch the bias binding neckline on the Eliana.

 If you have any question, leave them in the comment section below.Thank you!
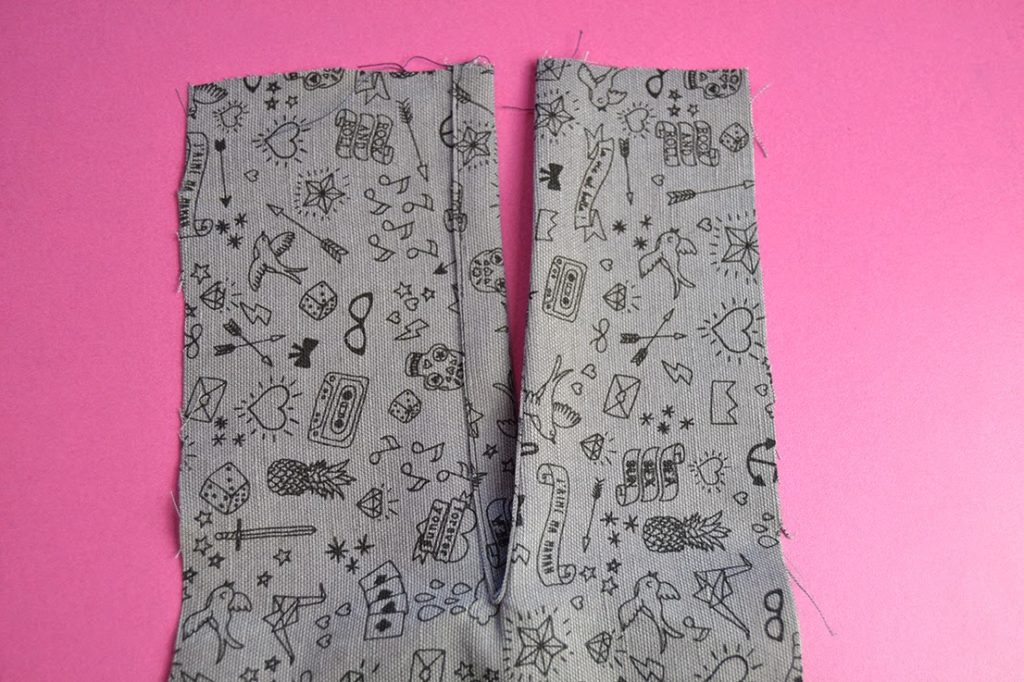
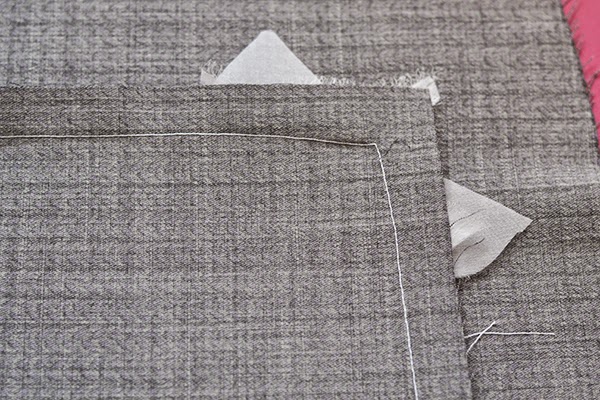
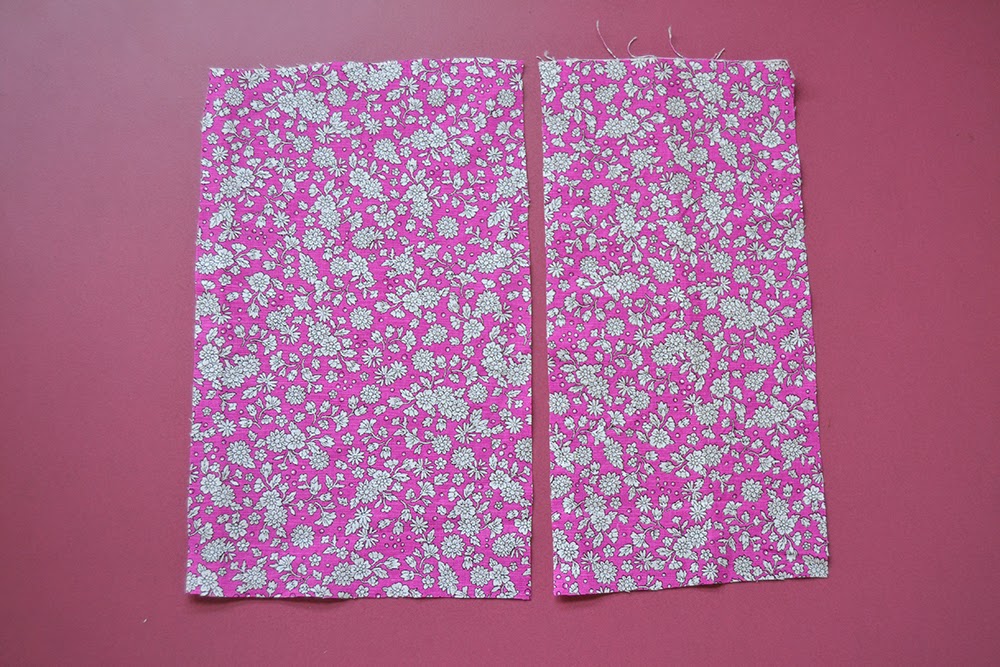
 1. Here are your 2 pieces of fabric, right sides facing up. Seam allowances will depend of your pattern (usually 5/8″).
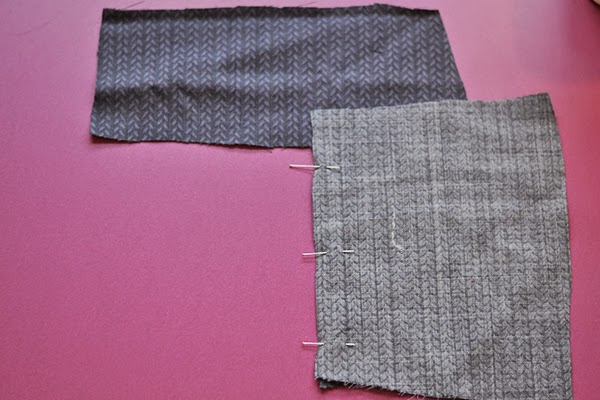 2. Pin the side together. As you can see, the top edges don’t meet: You should have about twice the seam allowance length
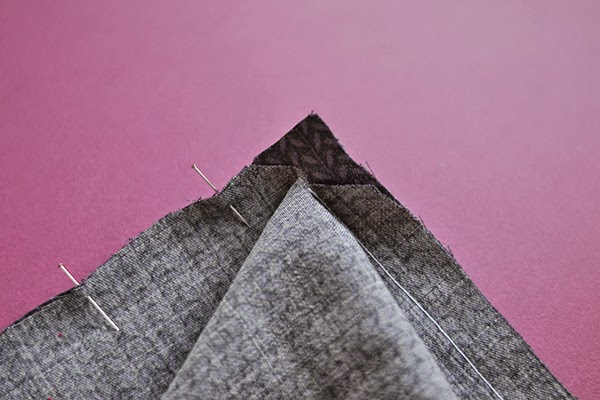
 3. Stitch until the apex point (where the seam allowances meet) using short stitches.
 4. Carefully, clip the seam allowance up to the stitching line, (snip into just the bottom layer, the one with the angle in).
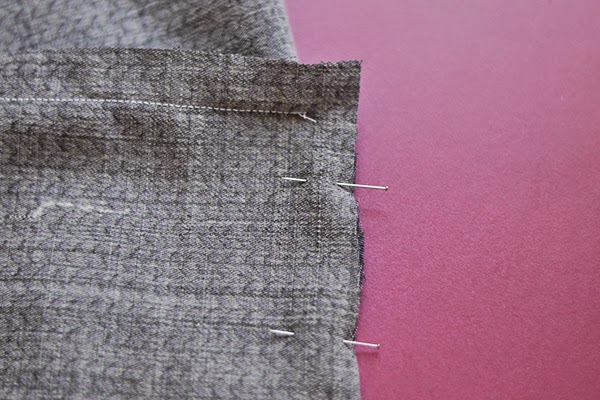
 5. Pin the other sides together. You can see how it looks from both sides. Pivot the angle at the apex point so the edges meet and pin.
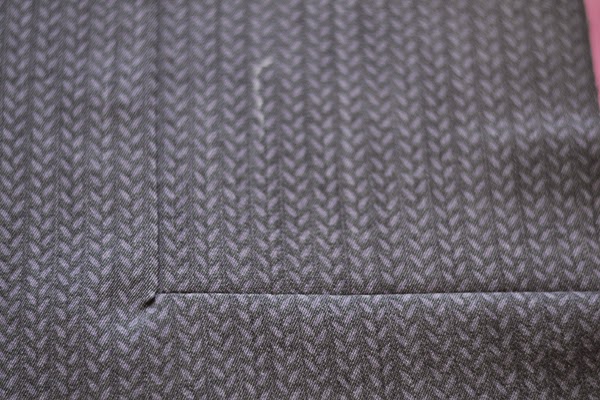 6. Press the seams to the outside. Here is the right side: if you see a little plucker like here, you can clip carefully a little bit closer to the stitches from the wrong side.
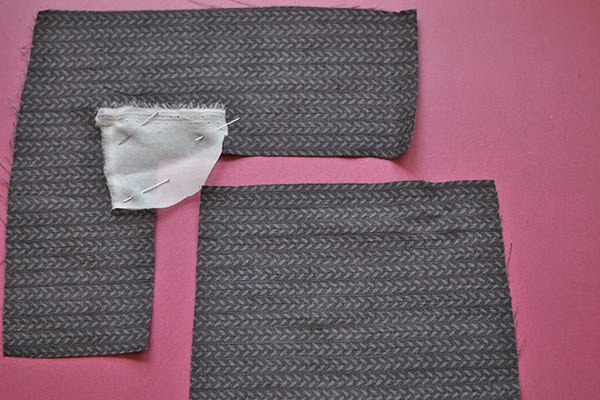 1. Pin a piece of organza over the inside angle, on the right side of the fabric. Make sure the apex point is covered (this is
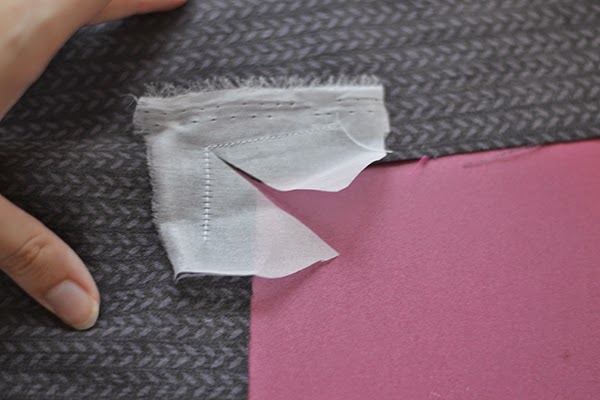 2. Stitch the organza around the angle, pivoting at the apex. Clip both layers diagonally into the corner, as close as possible
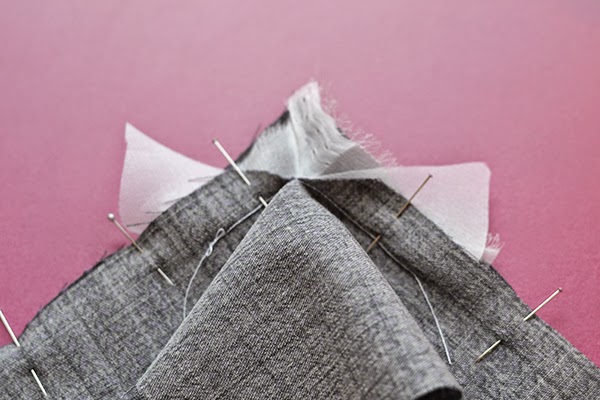 4. Pin the outer angle to the inner angle, using the piece of organza to lay both layers flat against each other. As you can
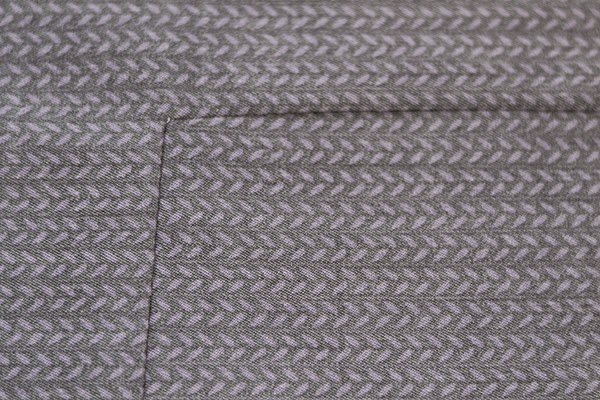
 5. Press the seam allowances to the outside. From the right side and from the wrong side of the fabric.

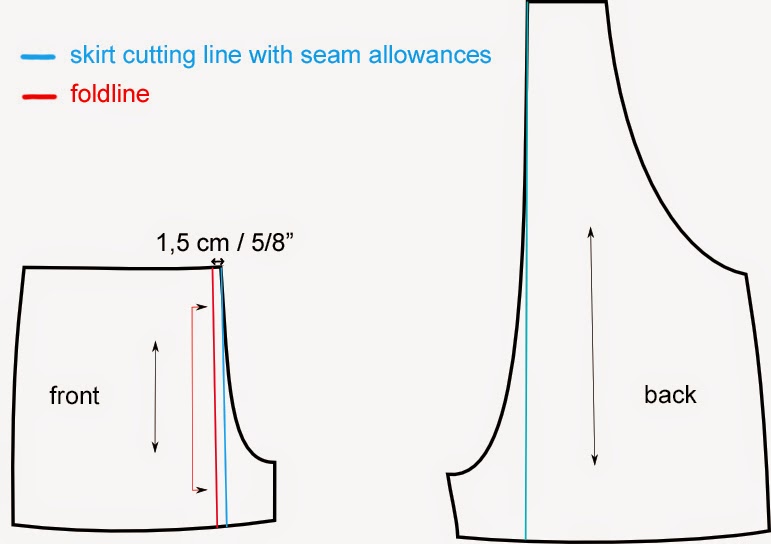

 Place your pieces WRONG SIDES together (yes, yes, wrong sides, I know it’s weird!). Pin and stitch together (note: 1,5 cm or 5/8″ seam allowances included in the pattern).
 Press the seam allowances to one side.
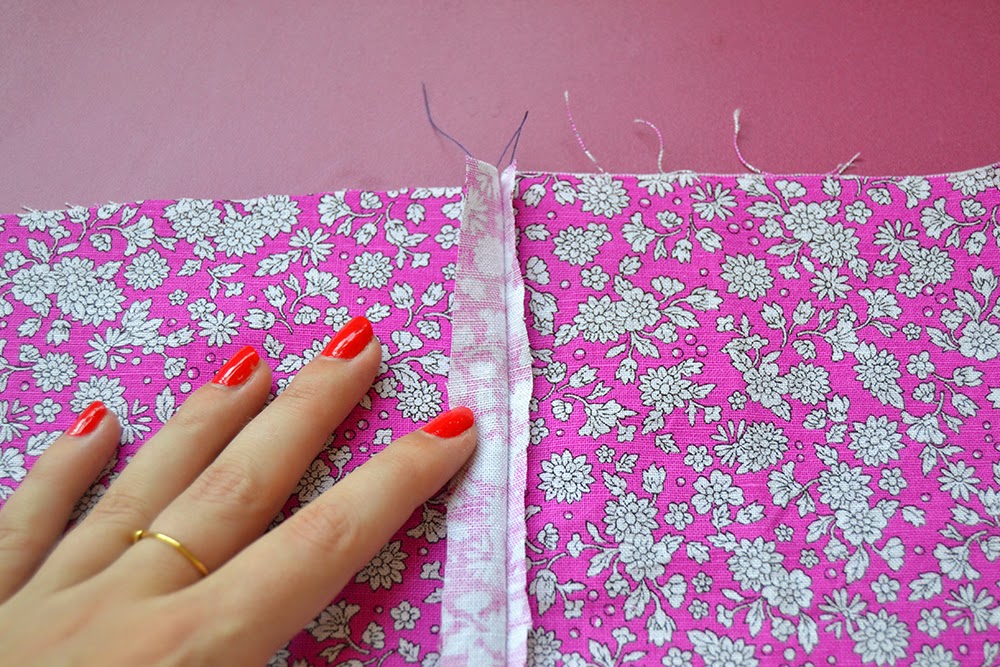 Trim the bottom seam allowance to a minimum (about 0.5 cm or 3/16″).
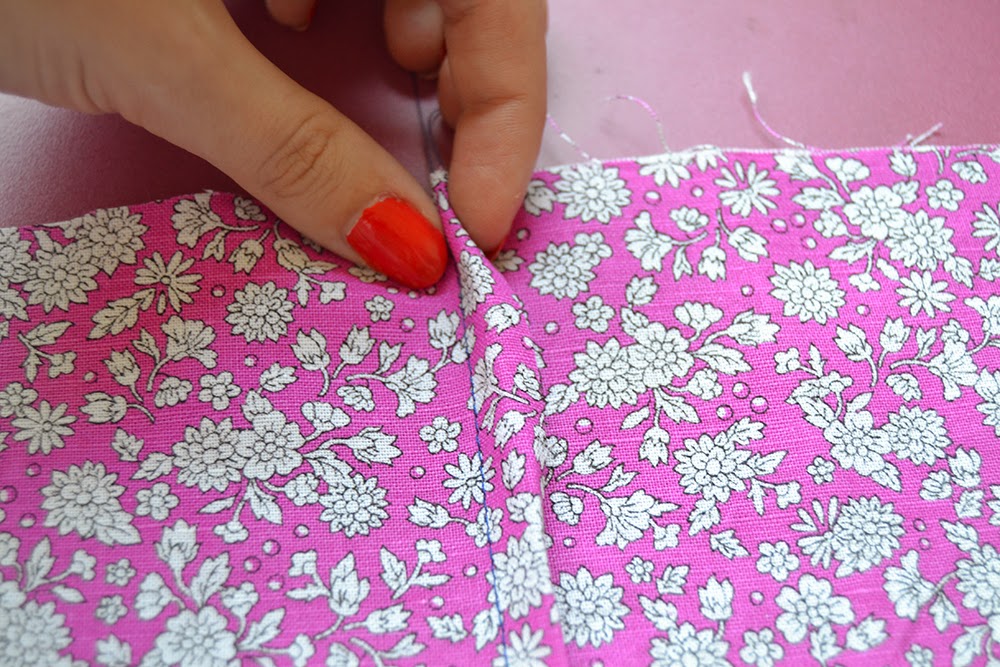
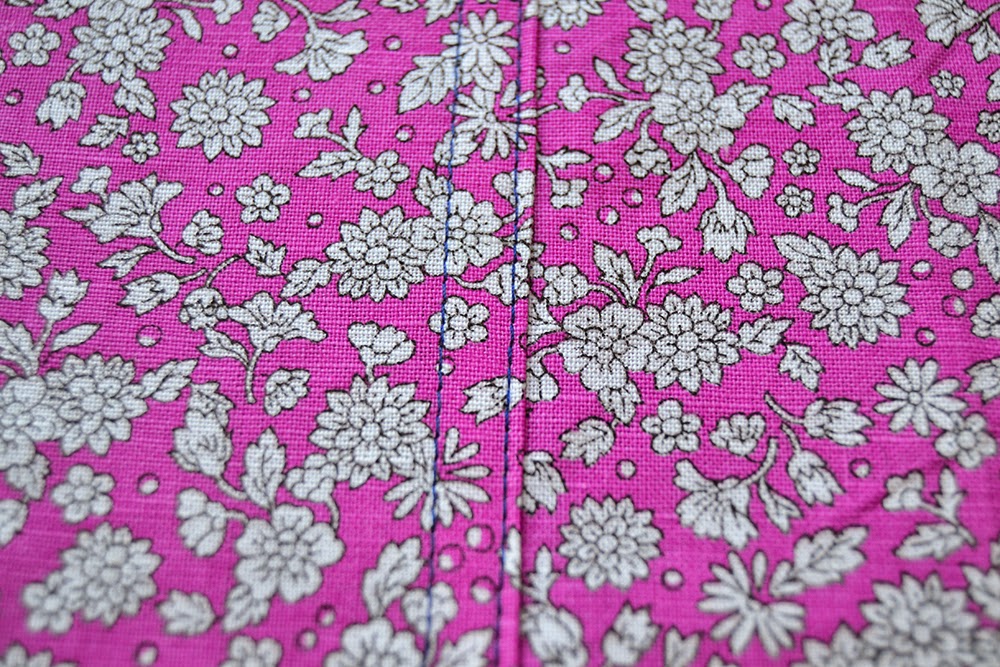
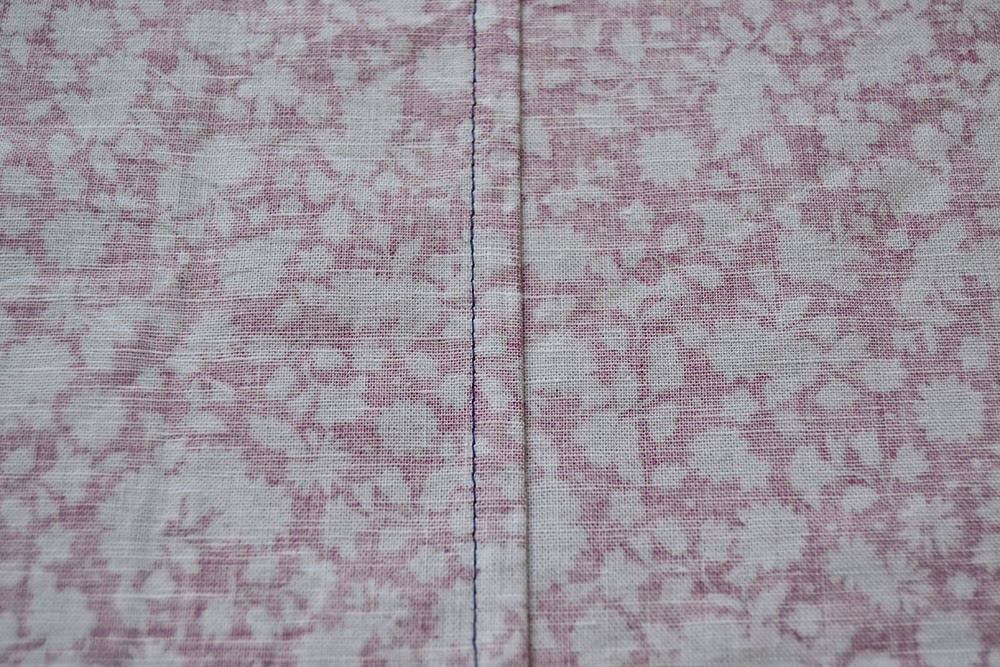 Stitch very close to the folded edge. Try to keep your stitches parallel to the first stitching line.
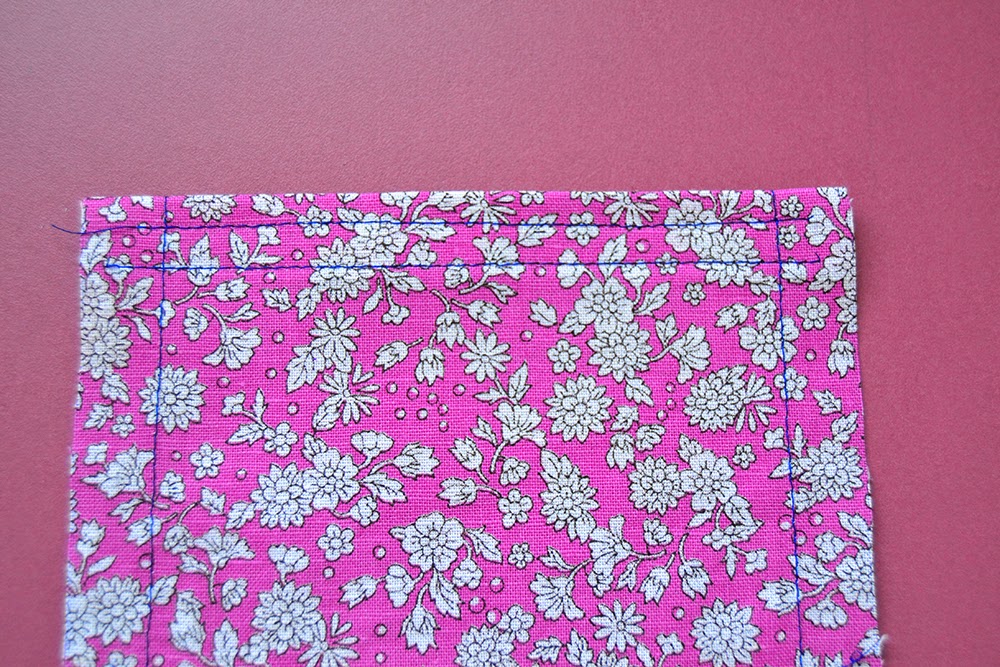
 To help you fold the seam allowances in, staystitch all around the front pocket just inside the seam allowance (about 1,2 cm from the edge or 1/2″). You don’t need to staystitch the top edge of the front pocket.
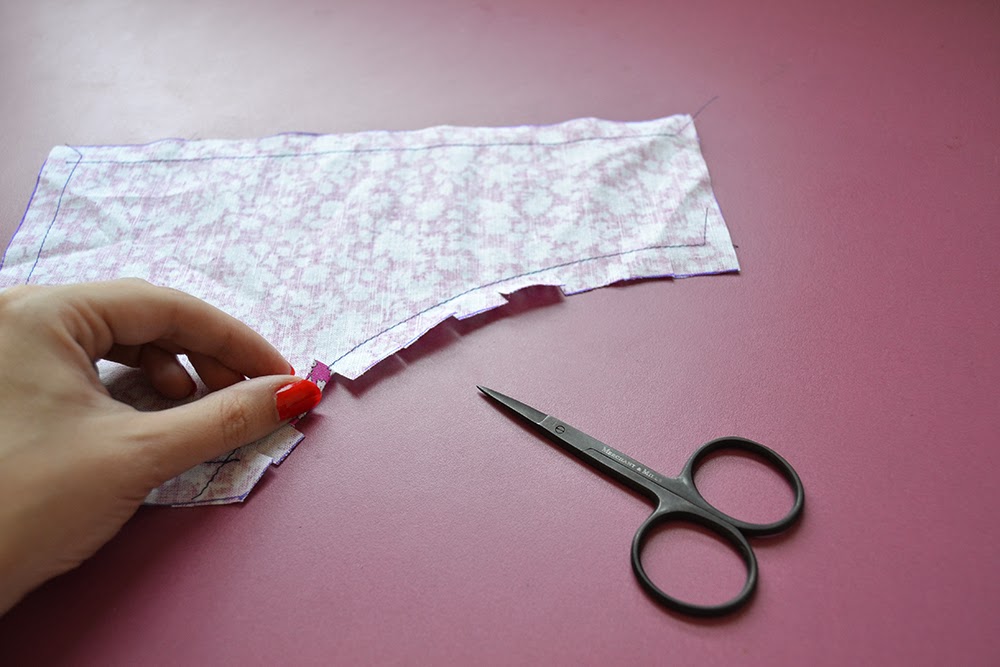 Clip the seam allowance of pocket opening: that’s the curved edge. Be careful not to cut the stitches!
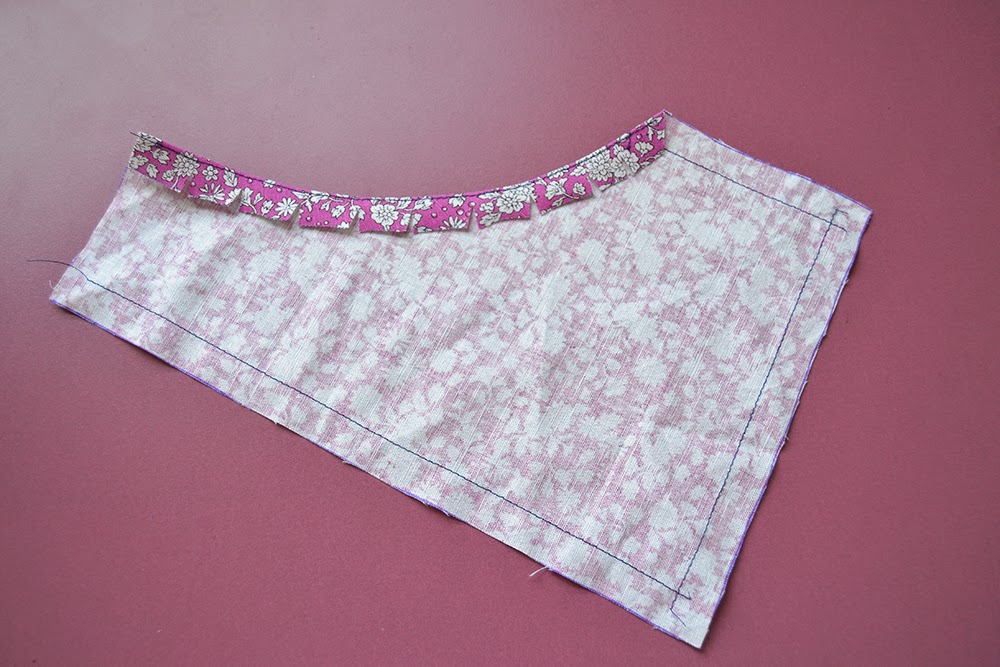 Fold the seam allowance to the inside and press.
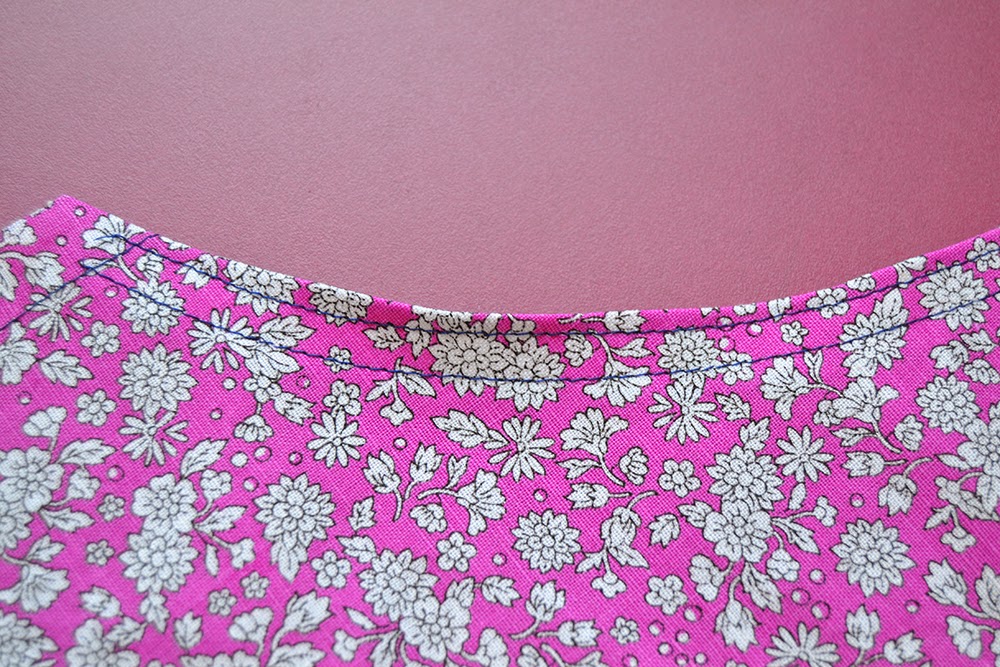 Stitch two rows of topstitching along the curved edge. Here is how I like to sew my topstitching so that the distance between the rows is always the same:
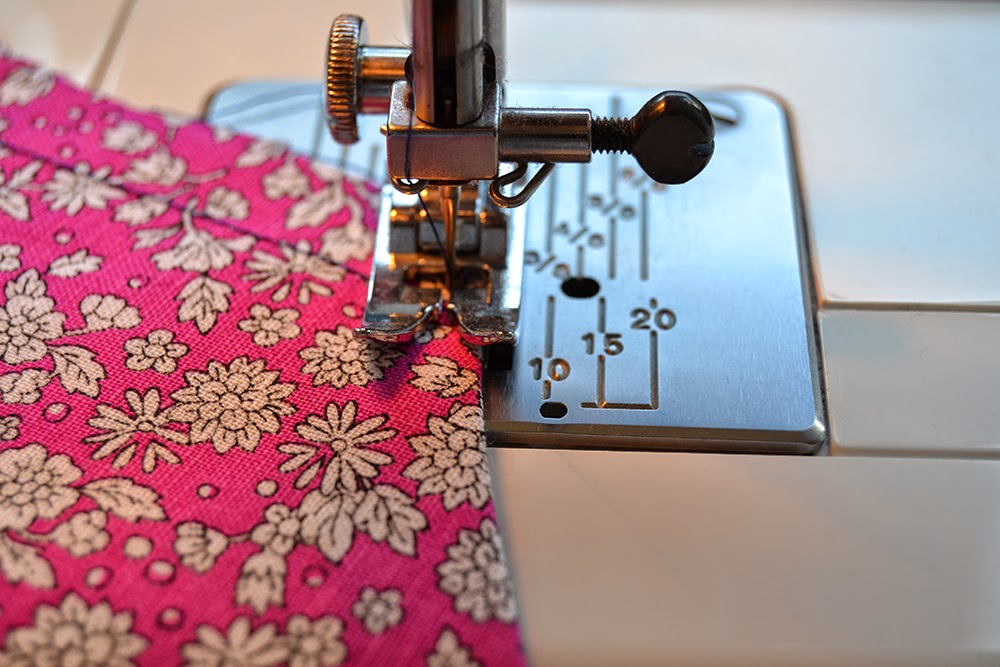
 I like to stitch the first row about 3 mm (1/8″) from the edge. Then I like to place the edge of the needle plate against the first stitching line and follow it (that’s roughly 8 mm or 5/16″).
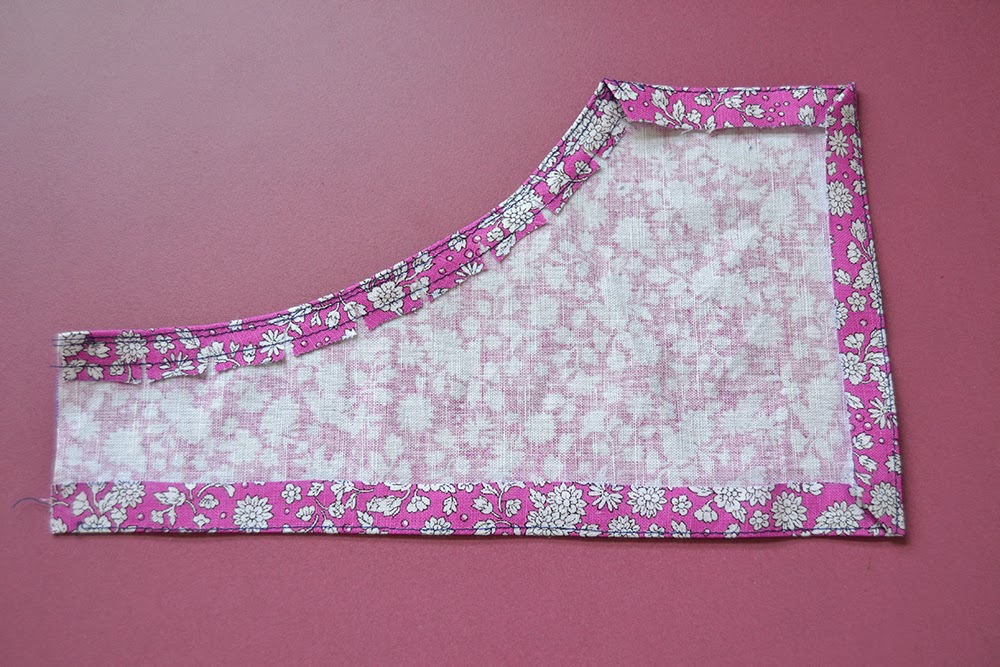 Fold the sides and bottom seam allowances along the staystitch. Make sure the staystitching line is on the inside of the seam allowances.
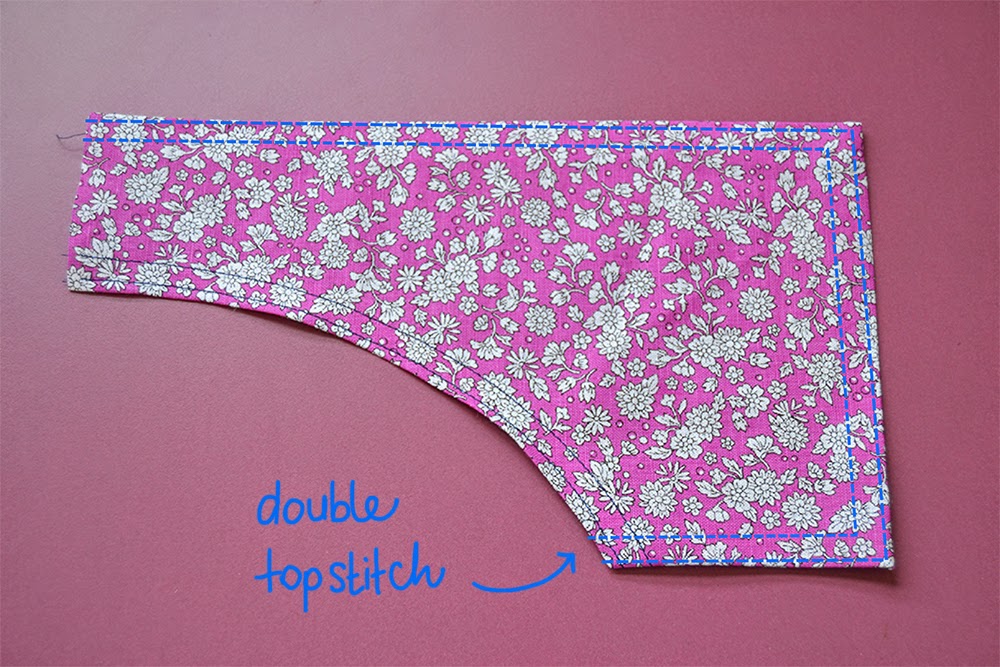 Place the pocket on the dungarees front piece, matching the marks and pin it in place. The top edges of the pocket and the front piece should match. Then stitch two rows of topstitching along the sides and bottom, leaving the curved and top edges open.
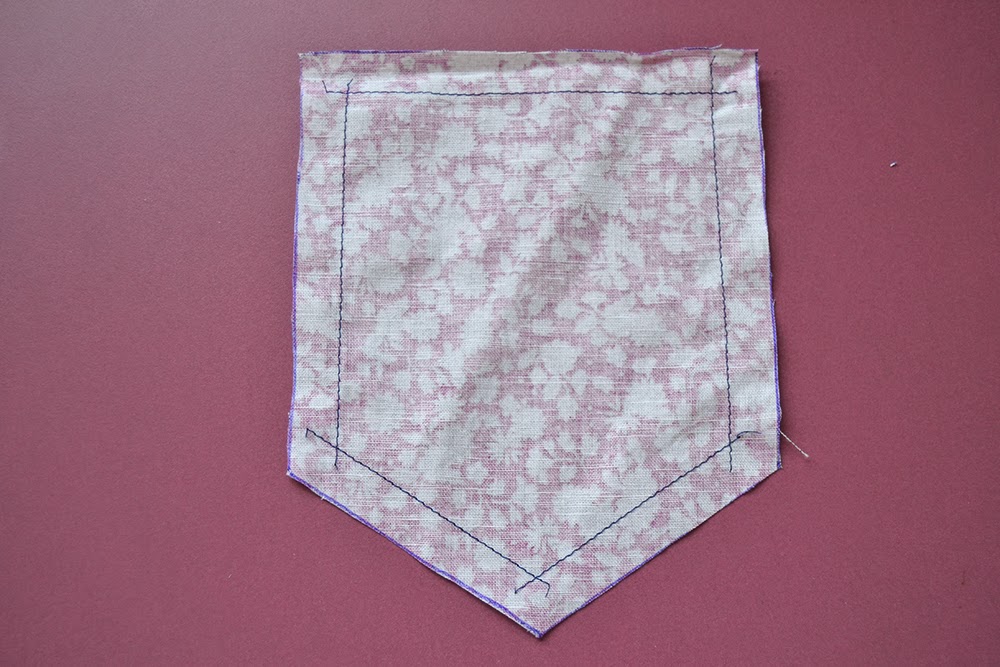 Staystitch all around the front pocket just inside the seam allowance (about 1,2 cm from the edge or 1/2″).
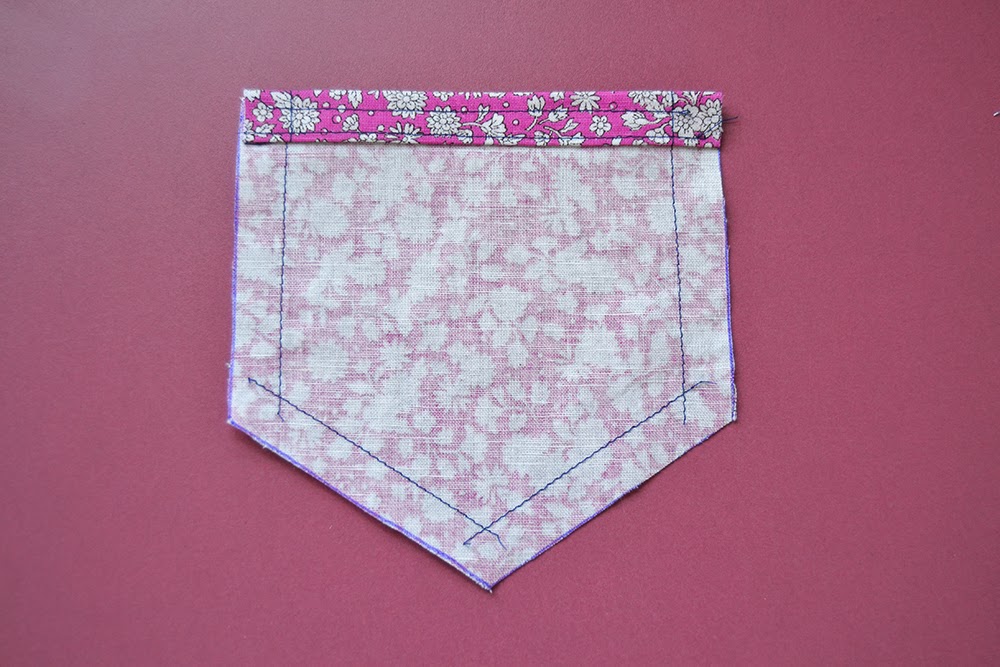
 Turn the top edge along the staystitch, press. Fold again and stitch two rows of topstitching.
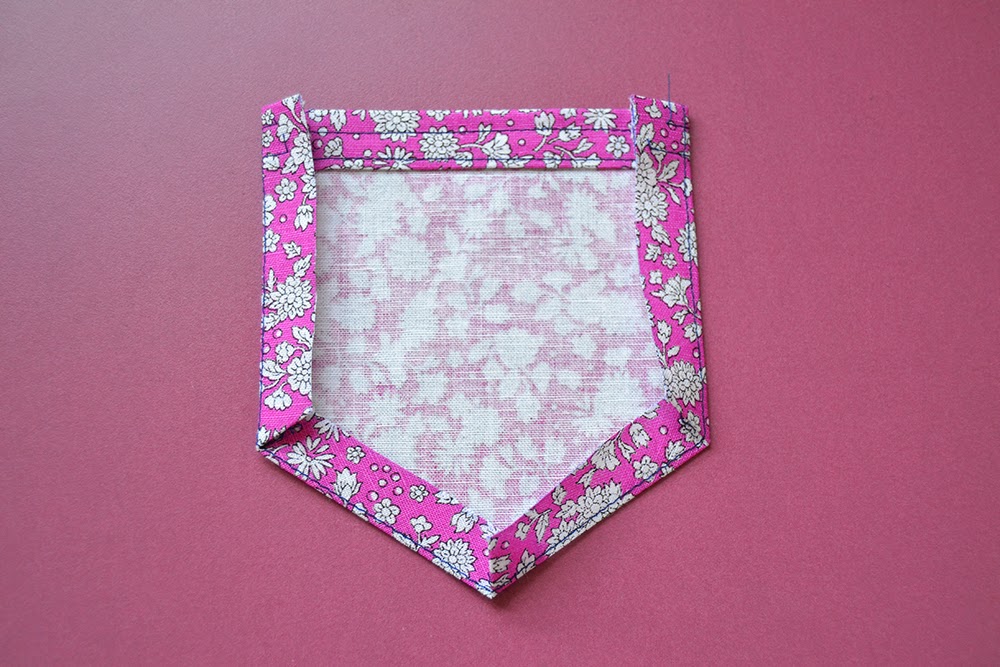 Fold the sides and bottom seam allowances along the staystitch. Make sure the staystitching line is on the inside of the seam allowances. Press.