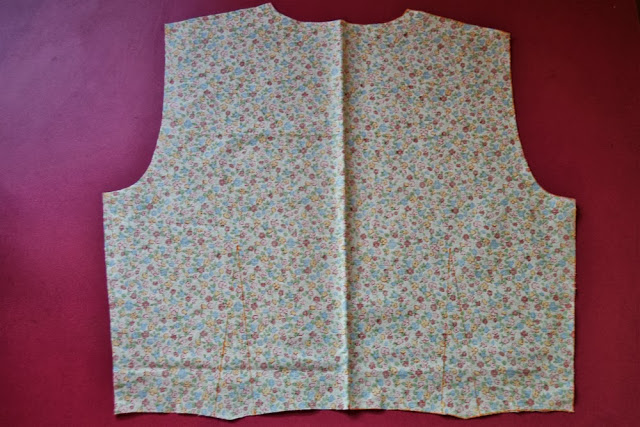
Today we’ll do some actual sewing, so grab your bodice pattern pieces and your fabric!
BODICE FRONT DARTS
 1.Take your bodice front piece and make sure you have transfered all the markings (dart, sleeve marking, zipper marking).
 2.Fold the dart in the center with right sides together, matching up the dart legs. Pin into place.
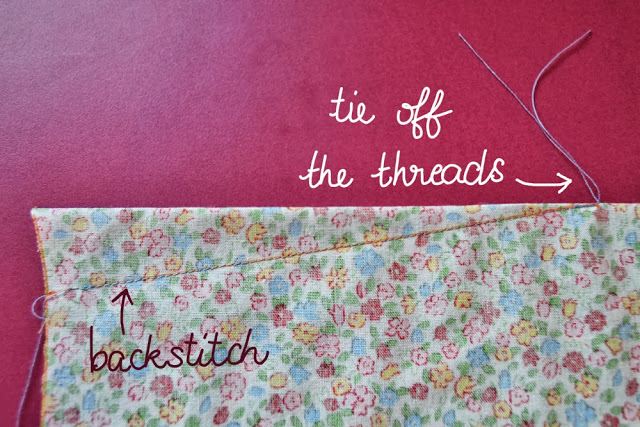 3.Stitch the dart: backstitch at the beginning but not at the end. When you arrive at the dart tip, tie off the threads.
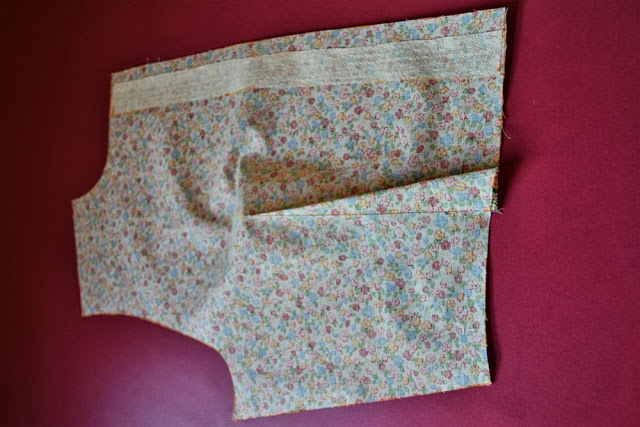 4.Press the dart toward the center.
5.Repeat steps 1 to 4 for the other bodice front piece.
BODICE BACK DARTS
 1.Take your bodice back piece and report all markings (darts, waist and collar center, sleeve and zipper markings).
 2.Stitch the darts like for the bodice front and press them toward center.
SIDE SEAMS
 1.With right sides together, pin the bodice front’s right side to the bodice back. Stitch, press the seam open and finish seam allowances as you prefer (serger, zig-zag, binding, french seams).
 2.I decided to make a turned-and-stitched finish.
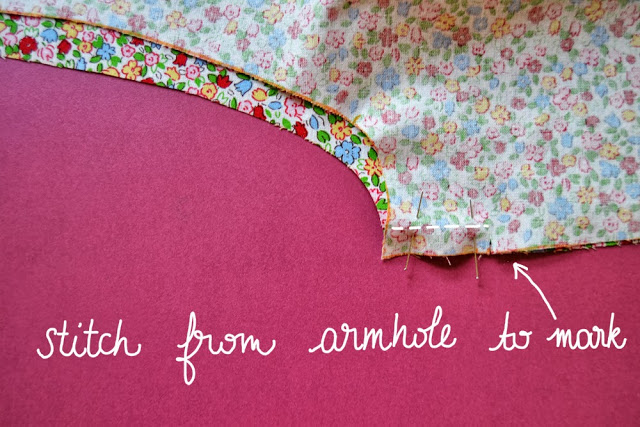 3.On the left side, stitch from the armhole to the zipper marking. Depending on how you finish you seam allowances, you might want to finish them before stitching the side seam (serger, zig-zag).
SHOULDER SEAMS
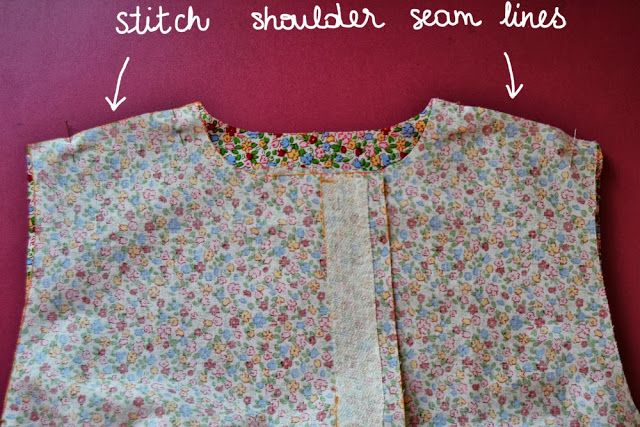 1.Pin the shoulder seams together with right sides together and stitch. Press the seams allowances open and finish them.
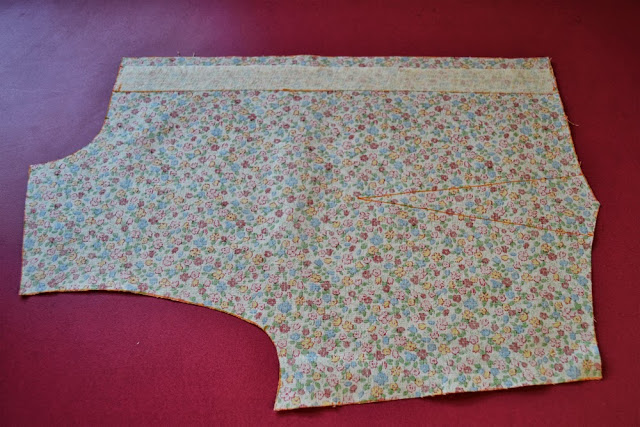
BUTTON PLACKET
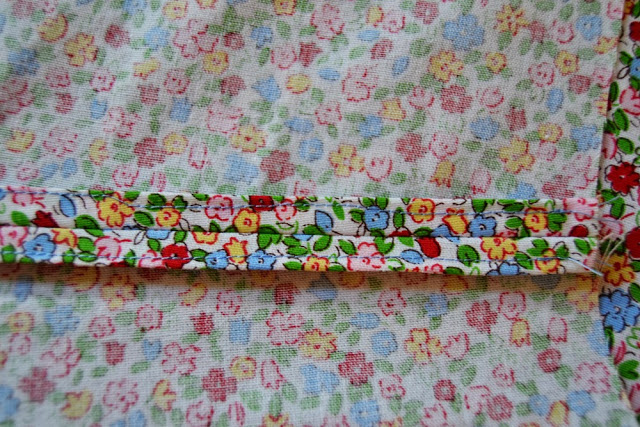
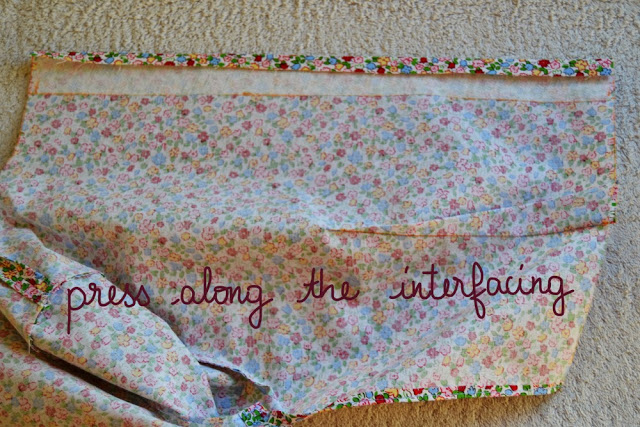 1.Take the bodice front. Fold and press the fabric margin (1 cm, 3/8″) along the interfacing, following the markings, like on the picture.
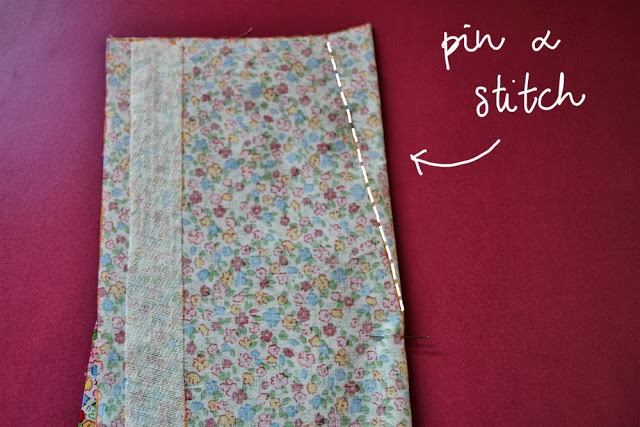
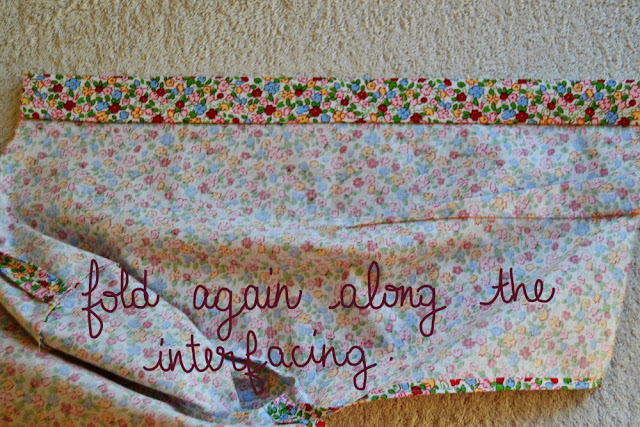 2.Fold again follwing the markings (3 cm, 1,2″) and press.
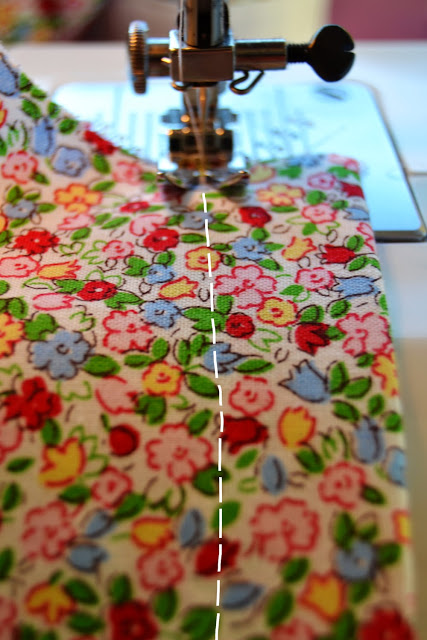 3.On the right side, stitch very close the fold. Repeat on the other bodice side.
That’s all for today! You can now try your bodice, it’s open on the front and at the bottom of the left side. Tomorrow we’ll see how to add a little breast pocket. So cute and practical!
 |
12 comments
Está fenomenal, aunque voy a tener que estudiármelo más despacio, ya que hay cosas que son nuevas para mi. Ya sabía yo, que con este Sew Along iba a aprender un montón.
Me alegro! Además creo que se puede aplicar a mucho vestidos, no solamente al Camí…
Muchas gracias por las entradas estas 🙂 Está todo perfectamente explicado. Lástima que me siga peleando con un corpiño de prueba que me hice, no me convencen las pinzas, no sé si hay que acortarlas o hacerlas más grandes… En fin, este fin de semana, pienso atacar y ponerme al día, que me da mucha rabia ir atrasada 🙁 Besos!
http://modistilladepacotilla.blogspot.com.es
Si quieres Alicia, hazte una foto con el corpiño de prueba puesto y ponla en el grupo de flicker (tienes el enlace en el post anterior) o enviamela por mail y veo lo que hay que hacer.
Un besito
Uis! Perfecto 🙂 En cuanto pueda me hago la afoto y la cuelgo el grupo a ver si entre todas sale alguna solución y si no pues te mando un mail, pero me sabe mal molestarte 😉 Besos!
http://modistilladepacotilla.blogspot.com.es
Uis! Perfecto 🙂 En cuanto pueda me hago la afoto y la cuelgo el grupo a ver si entre todas sale alguna solución y si no pues te mando un mail, pero me sabe mal molestarte 😉 Besos!
http://modistilladepacotilla.blogspot.com.es
Perfecto Pauline!!!, sabes que?, que ademas de disfrutar de tu Sew Along, voy a aprender mejor el ingles,,,ja,ja…cosa que necesito..
Besitos
¡Jaja, me parece perfecto Sonia! Y ahora incluso francés si quieres…
Hola Pauline! Recien regreso a la costura y a la compu despues de casi cuatro meses y aunque no estoy participando en tu Sew Along te queria feleicitar por el lanzamiento de tu patron y por haber empredido esta nueva etapa en tu carrera de modista – way to go girl! Once I get my sewing room organized again and get my sewing priorities straight I will definitely be giving your pattern a go. Once again, congrats!
Thanks so much Andrea! I was wondering how you were doing the other day as I didn't receive feed from you on bloglovin. I am glad you're ok and I'm looking forward to read you again 😉
Qué fácil parece todo cuando quien explica conoce bien la materia. Es un disfrute seguir cada paso, con su foto, su leyenda, su texto. ¡Me gusta mucho!. Gracias.
Gracias guapa, me alegro que te está gustando y ayudando. Un besito.
Comments are closed.