7K
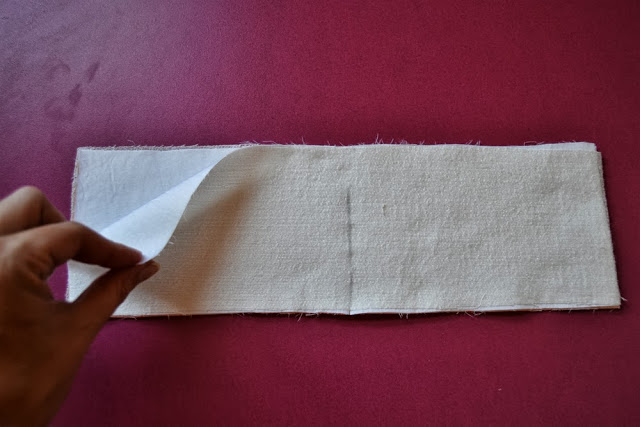
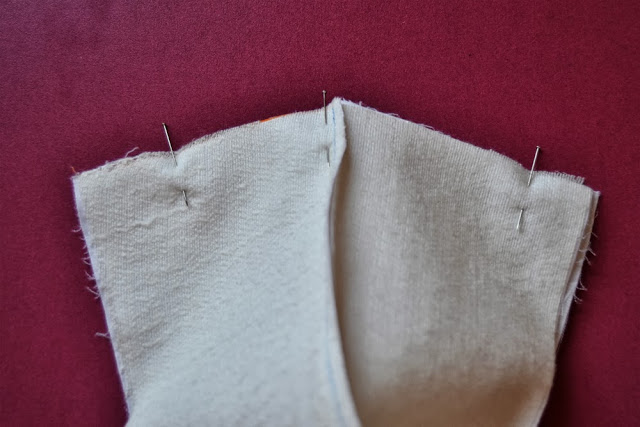
 1.Take your two cuff pieces, already interfaced and place them with right side together. Make sure the opening is marked (I drew only the slit but you can draw the whole box as in the pattern, it’s easier).
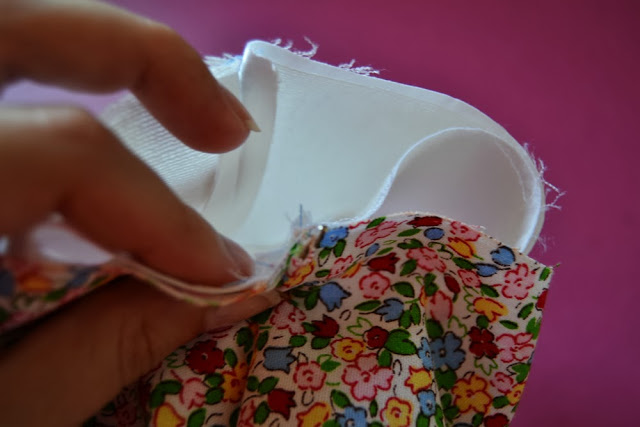
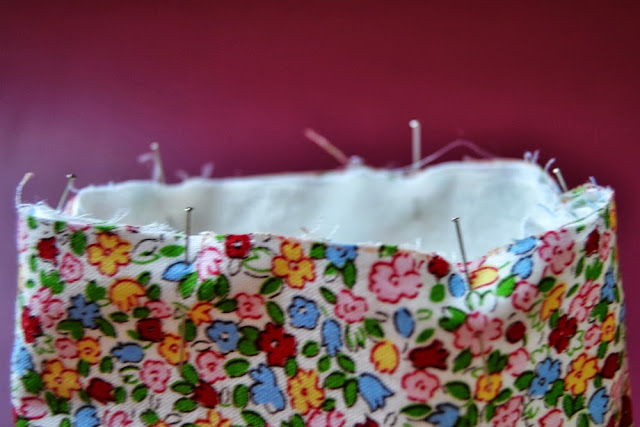
 1. Now comes the tricky step: matching the cuff seam and the sleeve seam, pin the cuff inside the sleeve hem. Look carefully at the pictures and try before sewing. We will stitch the cuff like we would stitch bias binding. So the cuff right side is against the sleeve wrong side (believe me, try it! I inserted my first cuff on the wrong side.) When you have pinned it, stitch. Trim the seam allowances and press toward the cuff.

I hope you had a nice strong cup of coffee or tea this morning as today’s post is a tough one! Let’s begin!
STITCH THE CUFF
 1.Take your two cuff pieces, already interfaced and place them with right side together. Make sure the opening is marked (I drew only the slit but you can draw the whole box as in the pattern, it’s easier).
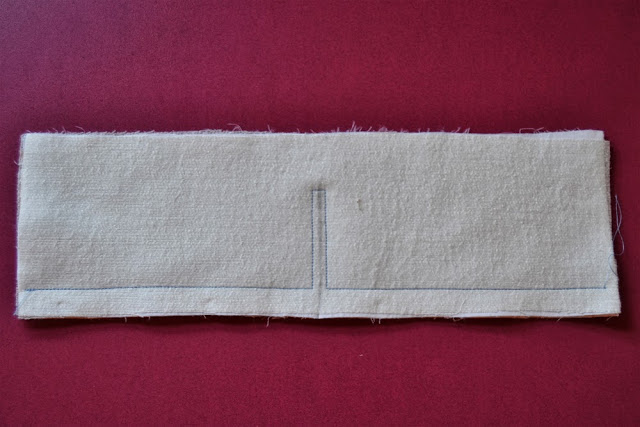
2.Pin and stitch the cuff, pivoting around the opening. It’s best to use a short length stitch (I used nº 2 for example).
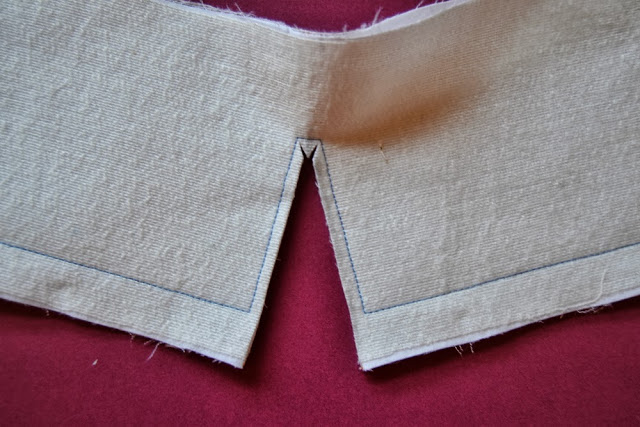
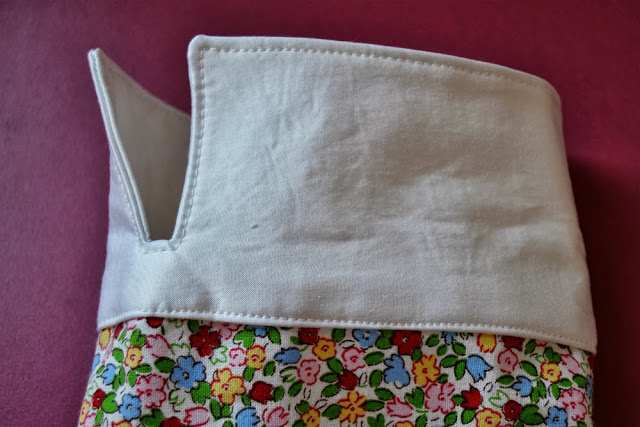
3.Cut carefully the opening between the stitches. At the end, cut a V-shape the closest possible to the stitch line to the angles like in the picture. Be careful not to cut the stitches!
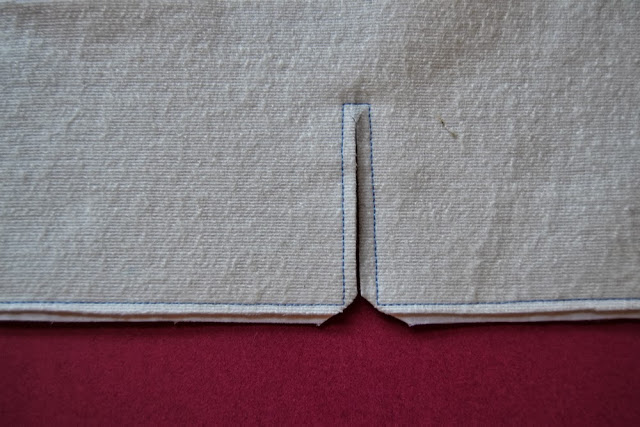
4.Trim the seam allowance and cut the corners very close to the angles.
5.Open the cuff and pin together the side seams, with right side together. No need to turn the cuff inside out. Stitch.
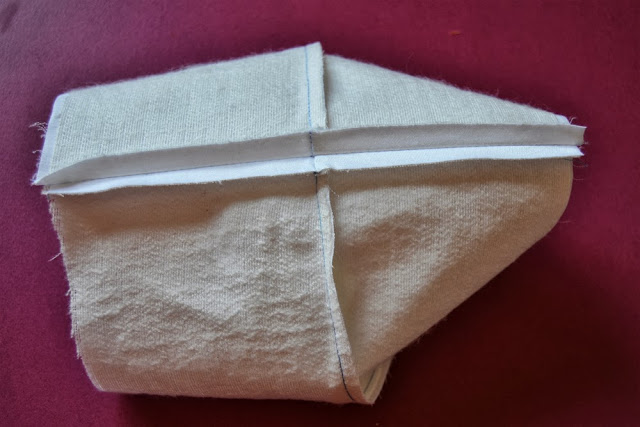 6.Press the seam open.
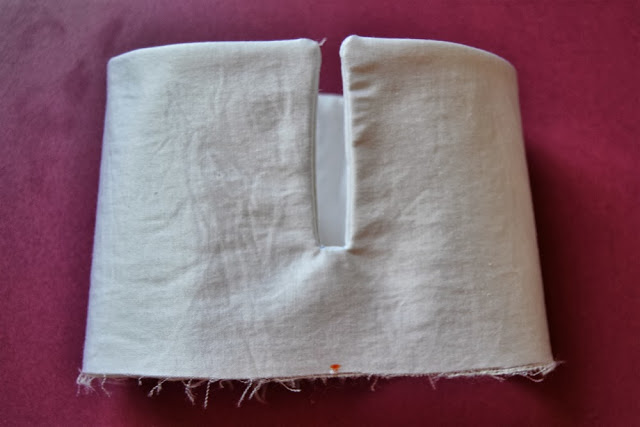 7.Turn the cuff inside out and press.
JOIN THE CUFF TO THE SLEEVE
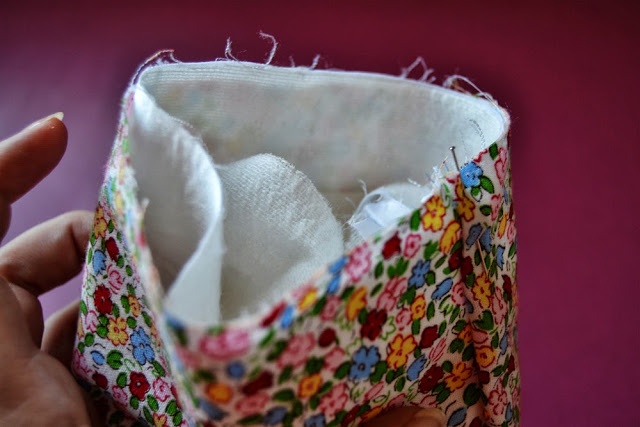
 1. Now comes the tricky step: matching the cuff seam and the sleeve seam, pin the cuff inside the sleeve hem. Look carefully at the pictures and try before sewing. We will stitch the cuff like we would stitch bias binding. So the cuff right side is against the sleeve wrong side (believe me, try it! I inserted my first cuff on the wrong side.) When you have pinned it, stitch. Trim the seam allowances and press toward the cuff.
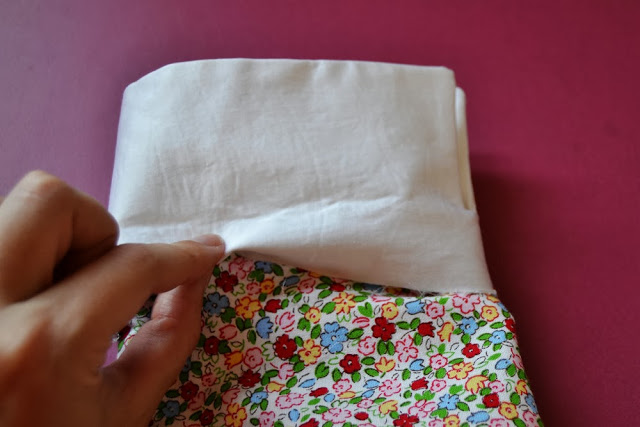
 2. Take the cuff out of the sleeve and press the seam allowance toward the cuff.
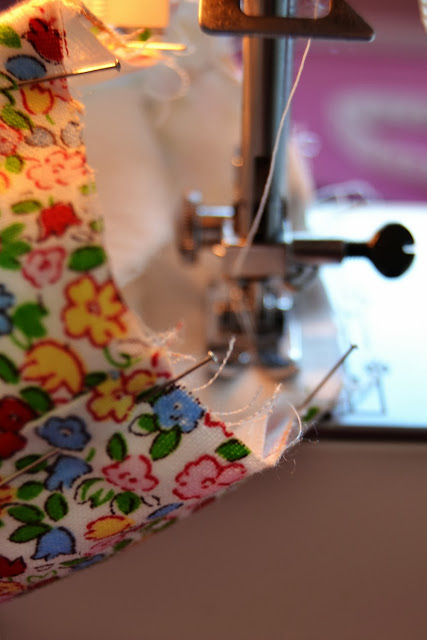
 3. Topstitch!
4. And repeat on the other side of course… What do you think? Easy or difficult?

12 comments
Lo explicas todo tan bien que de momento parece fácil 🙂 Claro que para mí lo más difícil ha sido ajustar el patrón jejeje Pero al final lo he conseguido yuju! Y ya me he puesto casi al día (falta entretelar porque no tenía suficiente entretela). Besos y gracias
http://modistilladepacotilla.blogspot.com.es
Hola Alicia, me alegro que hayas acertado la FBA. Seguro que vais a volver a día en nada de tiempo. Un besito guapa.
i just sewed the cuffs yesterday evening… i decided to sew them flat to the sleeve (meaning before sewing the underarm seam) as i thought it would be easier to topstitch. it worked well, but it means i have more raw seams at the cuff, so in hindsight, maybe it wasn't the smartest. anyways, i'm still confused about how you intended the cuff to be worn. folded up or left down?
Hi Joelle! I decided to insert the cuff that way to enclose the raw seams completely, even if I know it might seem rather complicated 🙂 But if you know how to apply bias binding, it's the same concept. The cuffs can be worn folded up or down, as you prefer. I have a version I wear folded up and the one from the Sew-Along with white contrasting cuffs I like to wear down.
Have a great week!
thanks! i saw your finished dress on the fall for cotton flick feed and i could see that the cuffs are worn down, and i quite like it. i made mine folded up and because of how i constructed them, now they cant be switched up. but thas ok! and yes, i can see why you chose to construct the cuffs that way, very clever 🙂 i really need to stop trying to outsmart pattern designers… hihi
Don't worry Joelle, the instructions are here to help but you're more than welcome to try your own techniques! This is how I constructed the cuffs but I'm sure there're plenty of other ways… Each seamstress has her little tricks!
Phew all done. It wasn't too hard although making it neat inside with the stitching perfectly aligned in there was tricky! 🙂
Yes, you have to take your time sewing this step, but the neat and clean result is totally worth it for me, don't you agree?
Yes definitely.
Je m'en suis sortie comme un chef ! Il est chouette ton SAL 🙂 reste la jupe à monter pour moi 😉 merci pour le montage des poignets 🙂 j'ai adoré faire ça, je trouve juste que du coup lorsqu'on les retourne portés comme sur certaines suggestions, on voit la surpiqûre sur l'envers et je trouve ça moins joli, mais je tatillonne à fond là 🙂
Merci Charlotte! Et oui, on voit la surpiqûre! Moi, c'est un détail que j'aime bien mais je comprend que ça puisse te gêner 😉 si tu es très patiente, tu peux aussi faire un point invisible à la main pour fermer les marges de coutures.
Merci pour ce tuto, je l'ai eployé pour arangé une robe à ma fille! l'effet et top!
Comments are closed.